
Follow these steps to add a Cash Drawer.
-
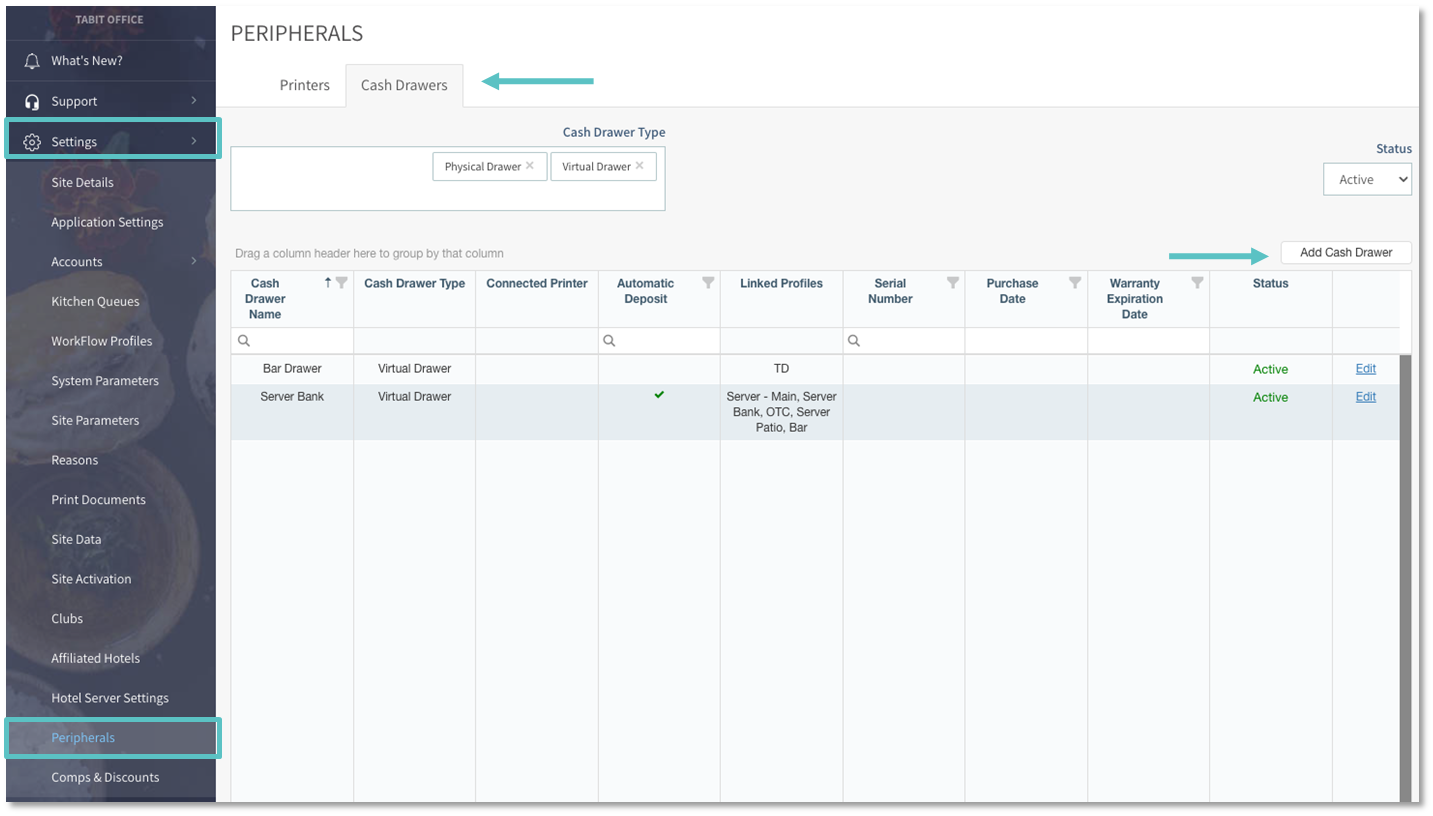
In Office, go to Settings > Peripherals > Cash Drawers > Add Cash Drawer
-
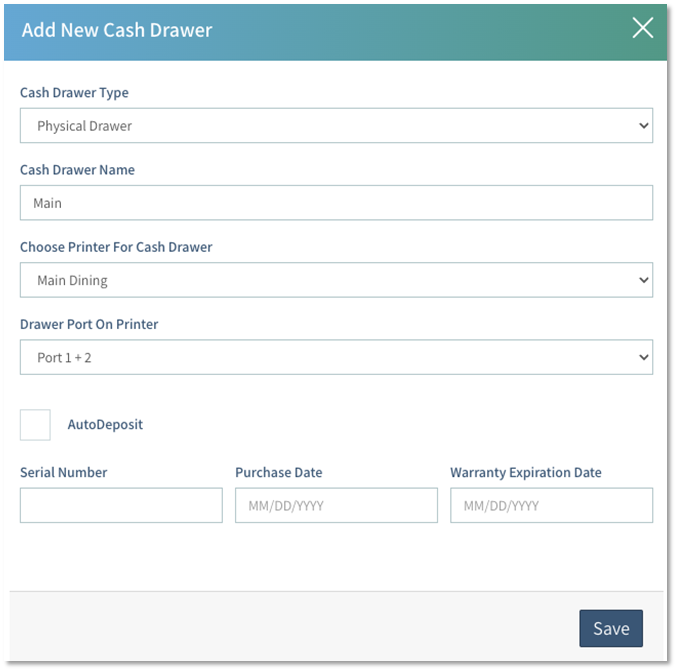
In the Add New Cash Drawer box fill out the following information:
-
Cash Drawer Type
-
Physical Drawer: Physical Drawer on site
-
Virtual Drawer: Allows for the placing of cash in a non-physical drawer like a Server Bank
-
-
Cash Drawer Name: Internal name that appears on all reporting
-
⚡Best practice is to name the drawer to match the printer it’s connected to
-
-
Choose Printer For Cash Drawer: Select the appropriate printer (only available for physical drawers)
-
Drawer Port On Printer: Allows the use of external buzzers and a cash drawer at the same time. This also allows multiple cash drawers to print to one printer
A special cable is required to enable both the buzzer and the cash drawer -
Auto Deposit: Allows for faster functionality when cash is selected as a Tender Type. The cash drawer action will NOT open the drawer and the cash will automatically be registered as a deposit in the drawer
-
Serial Number | Purchase Date | Warranty Expiration Date: Optional fields for internal use
-
-
Select Save on the bottom right of the box
A Cash Drawer has now been added.