
Overview
HQ Tax Groups let sites using Master Item share centrally managed Tax Rules and Rates within a tax jurisdiction.
Sites that belong to an HQ but do not use Master Items do not use HQ Tax Groups.
Complete the setup in the following order.
Add the Tax Rate
-
At the HQ site, open Menu > Tax Rates.
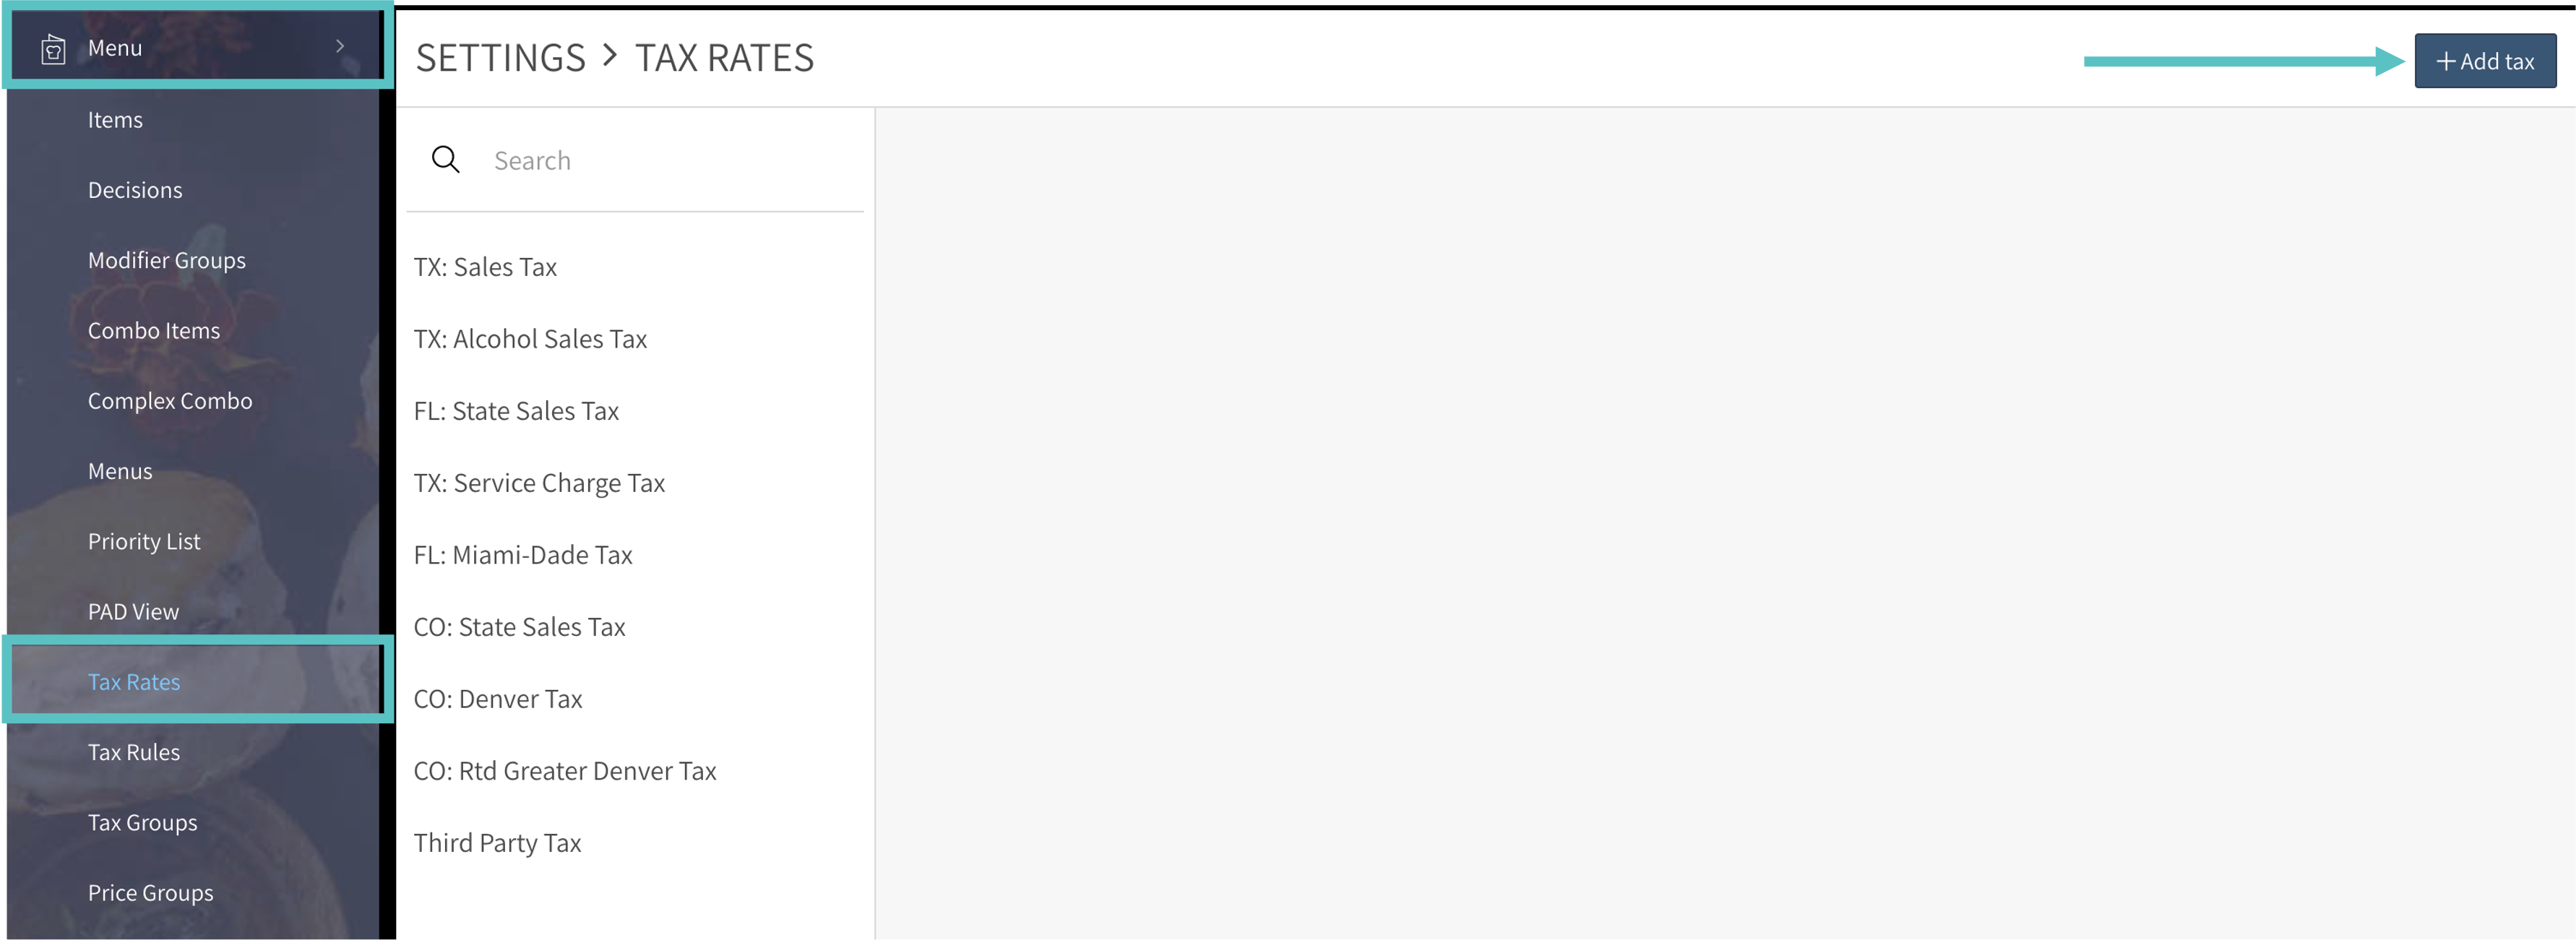
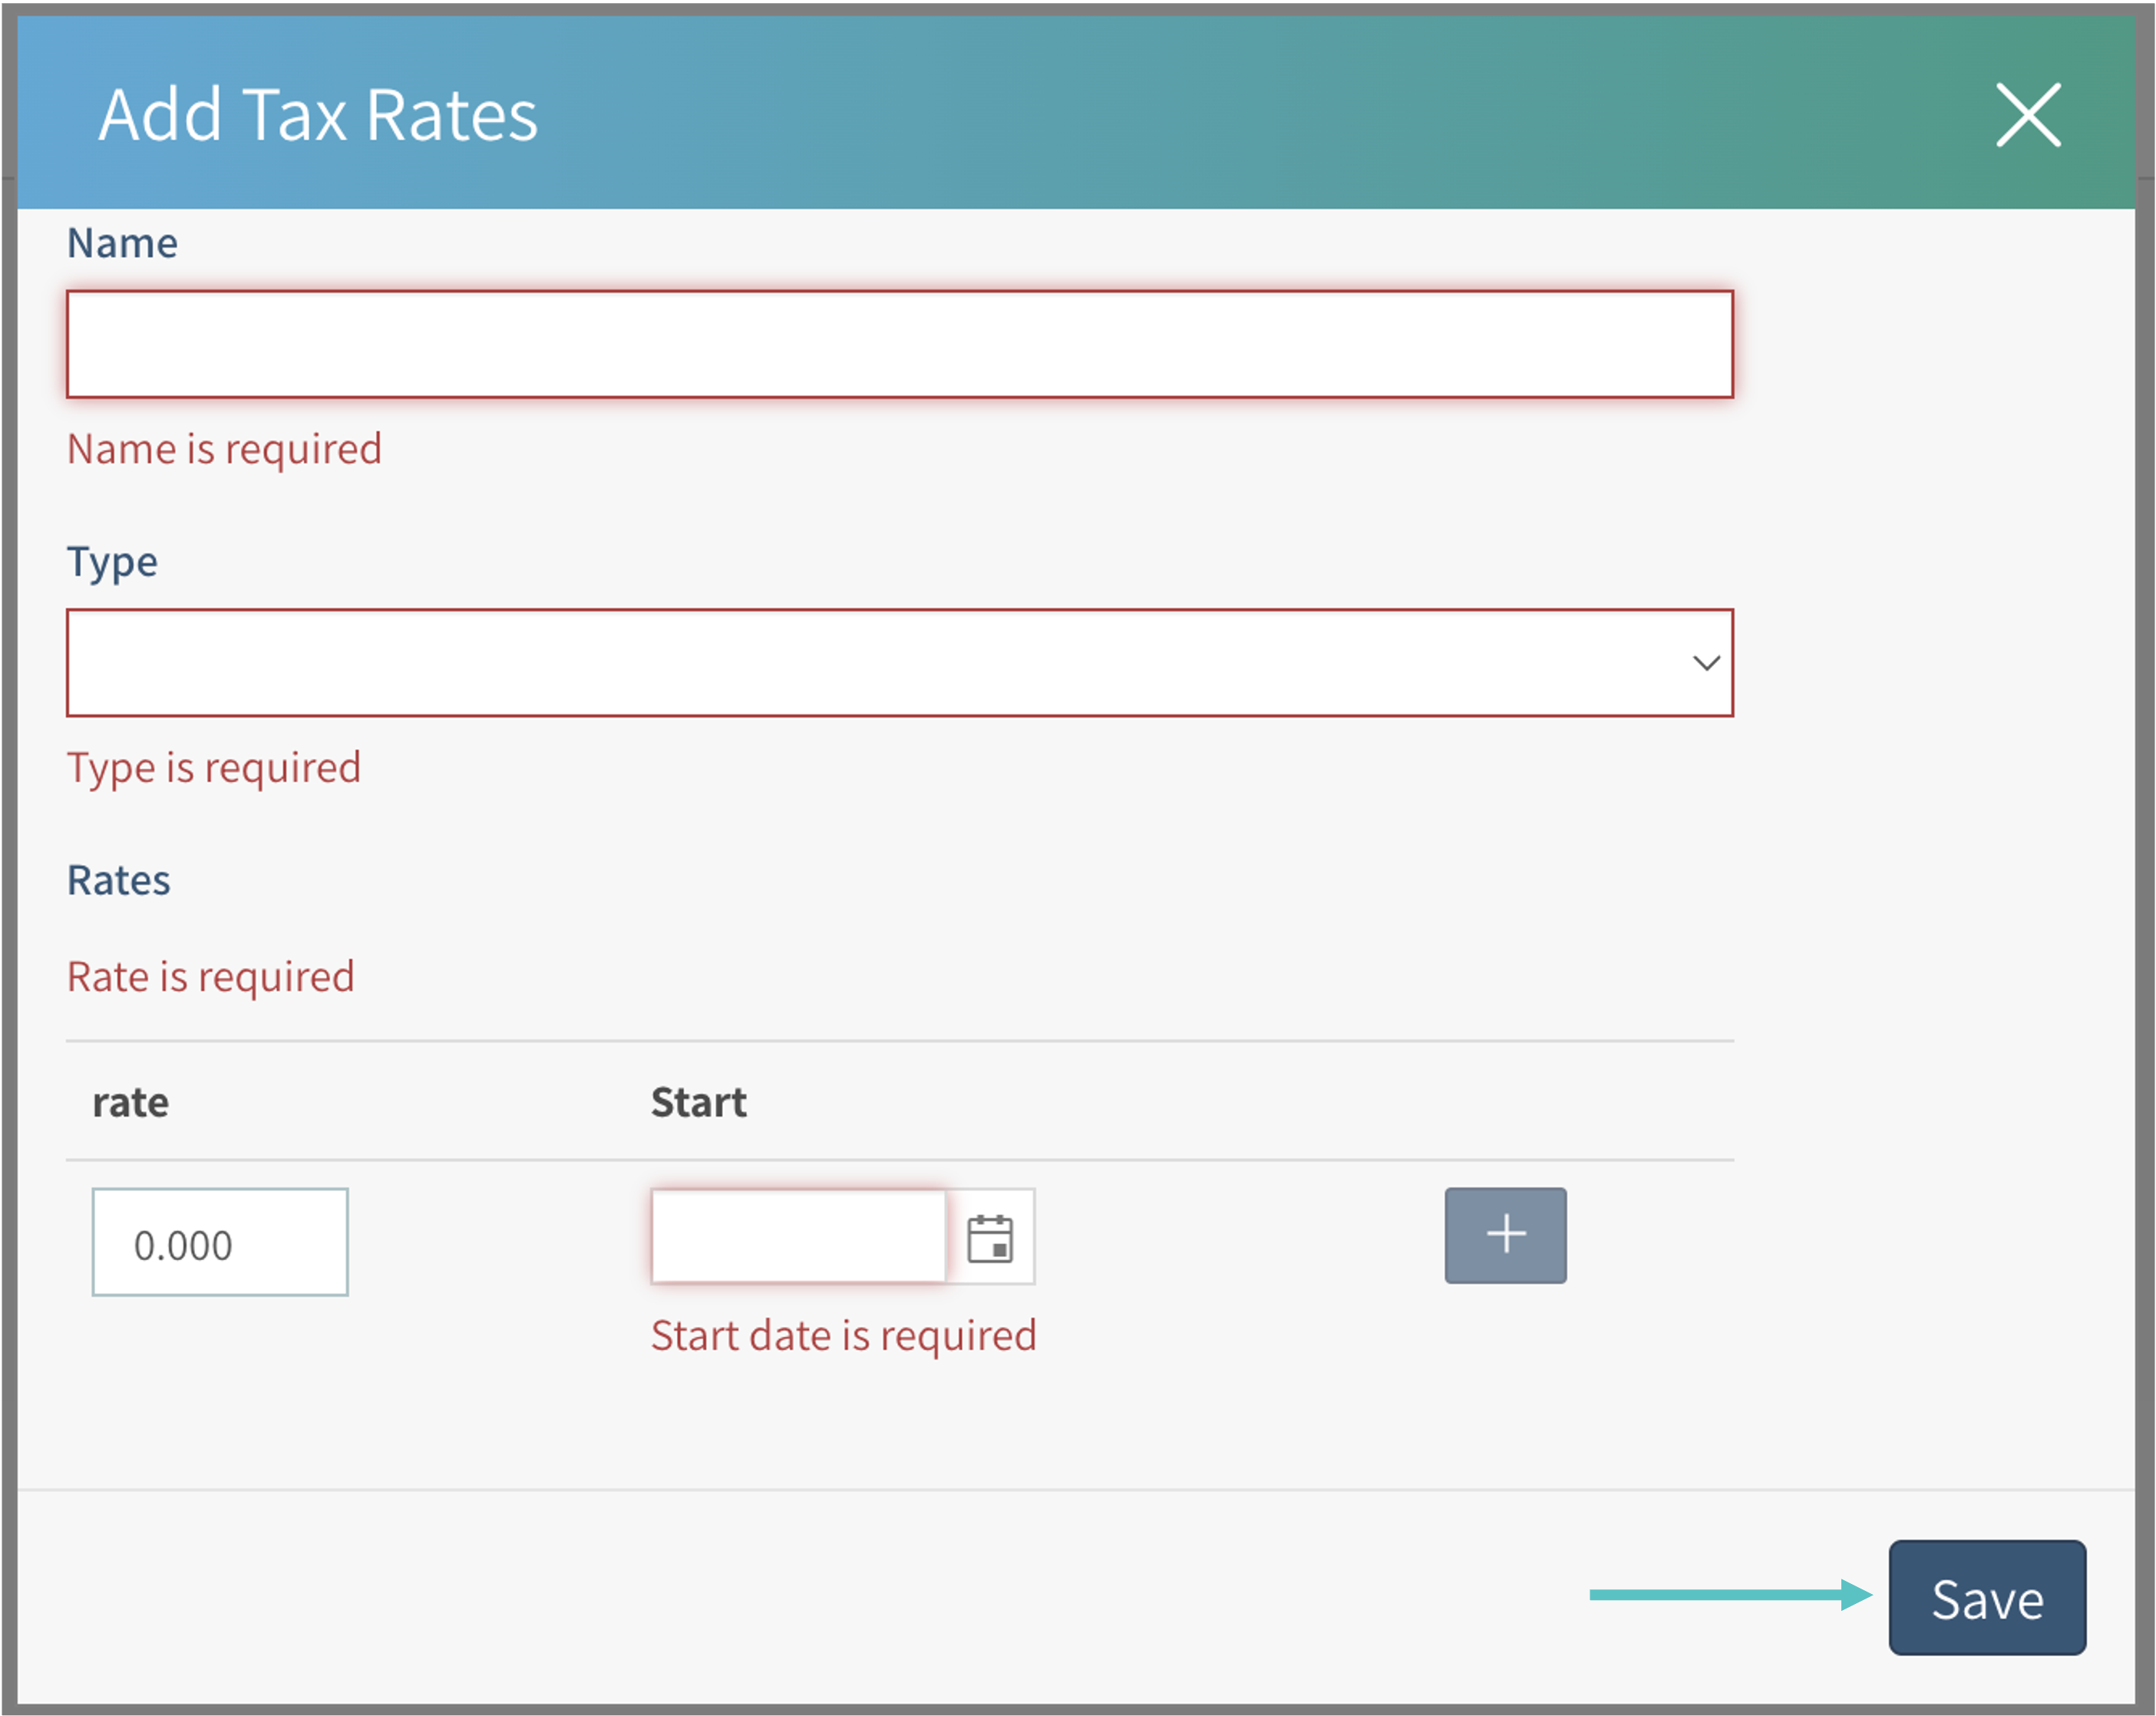
Create the required Tax Rate with its name, type, and rate, then select Save. Name rates to identify their jurisdiction, such as TX, FL, or CA.
Create a Tax Rule
-
Open Menu > Tax Rules and select Add Rule + at the top right.
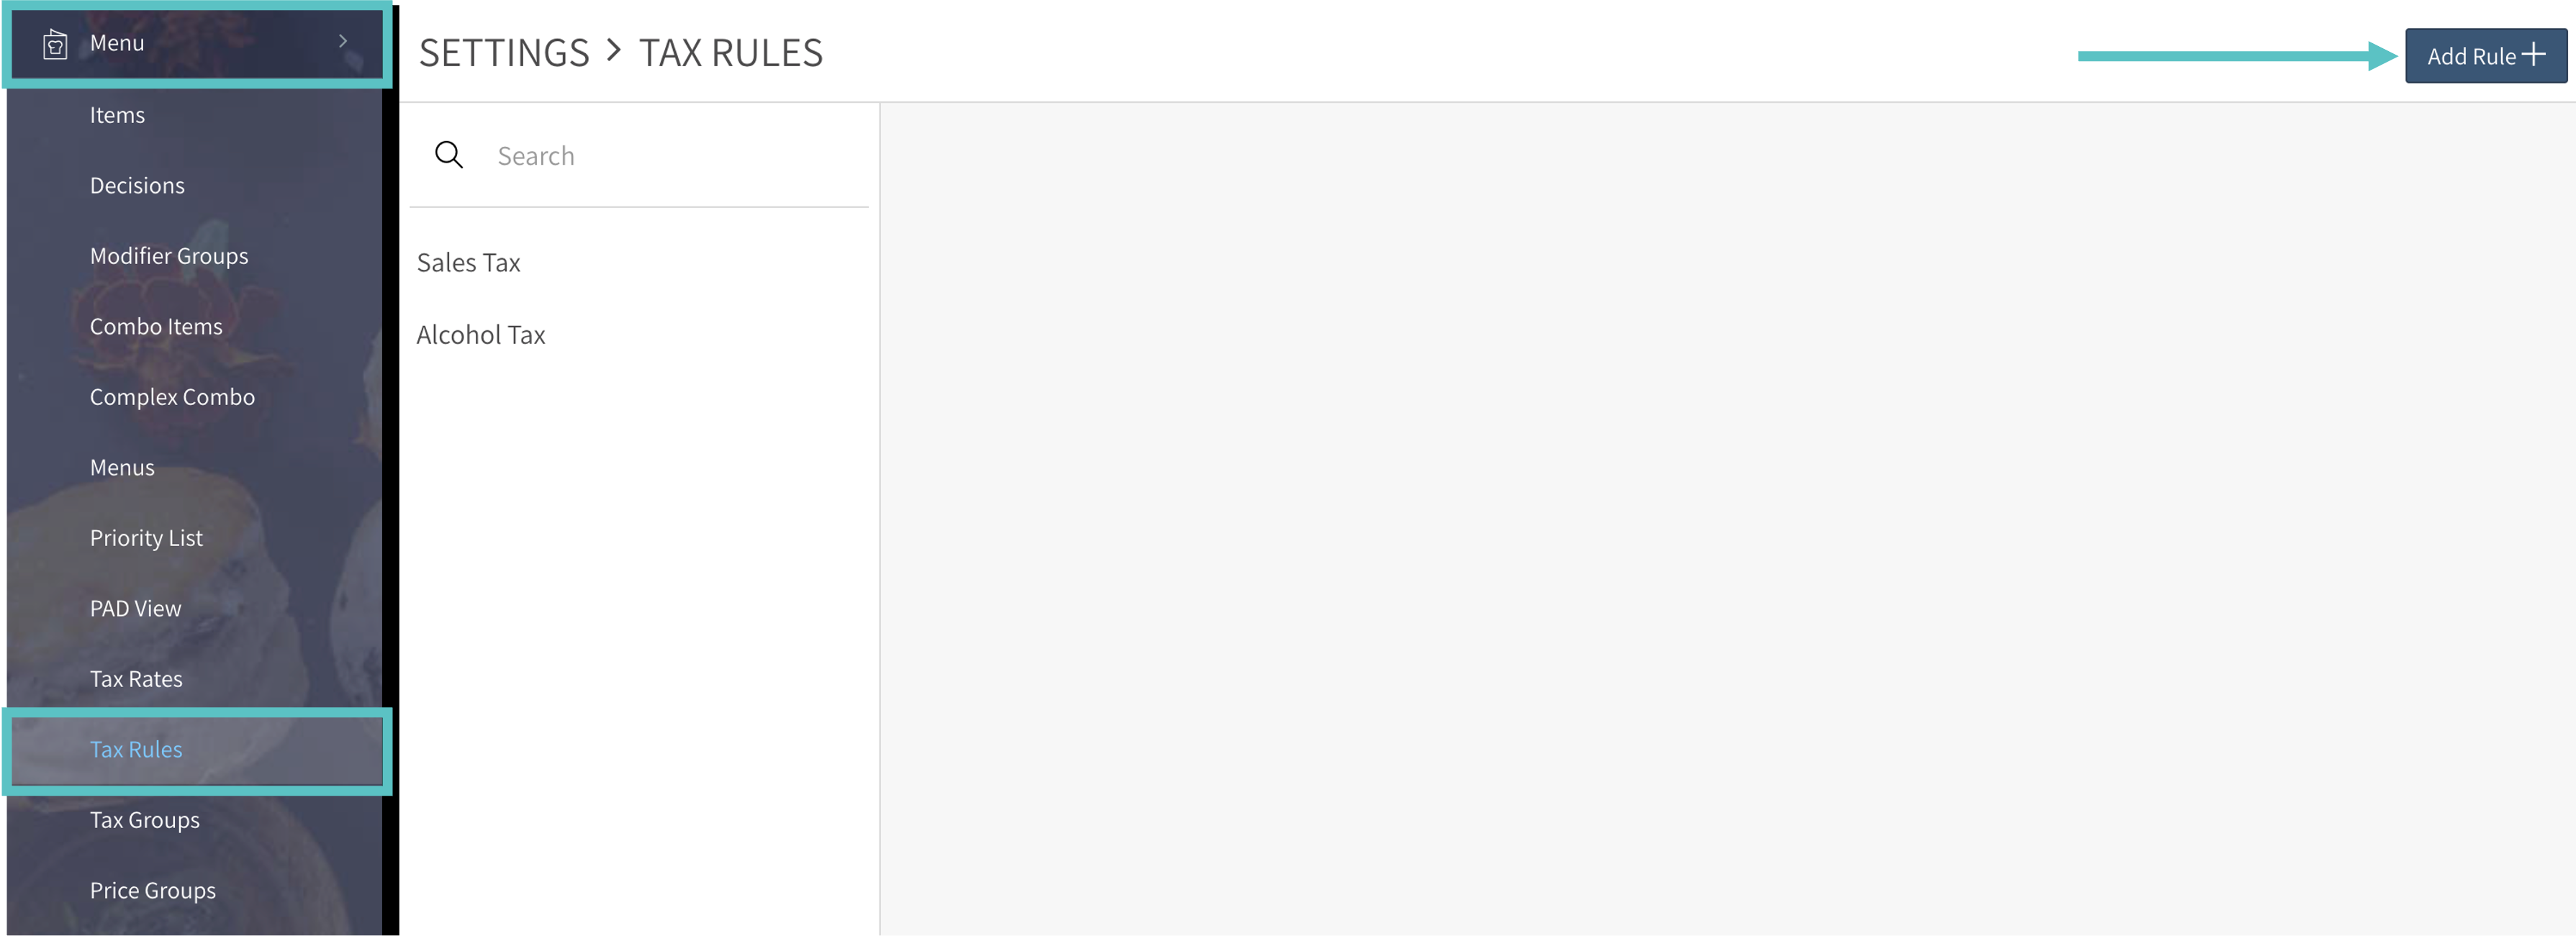
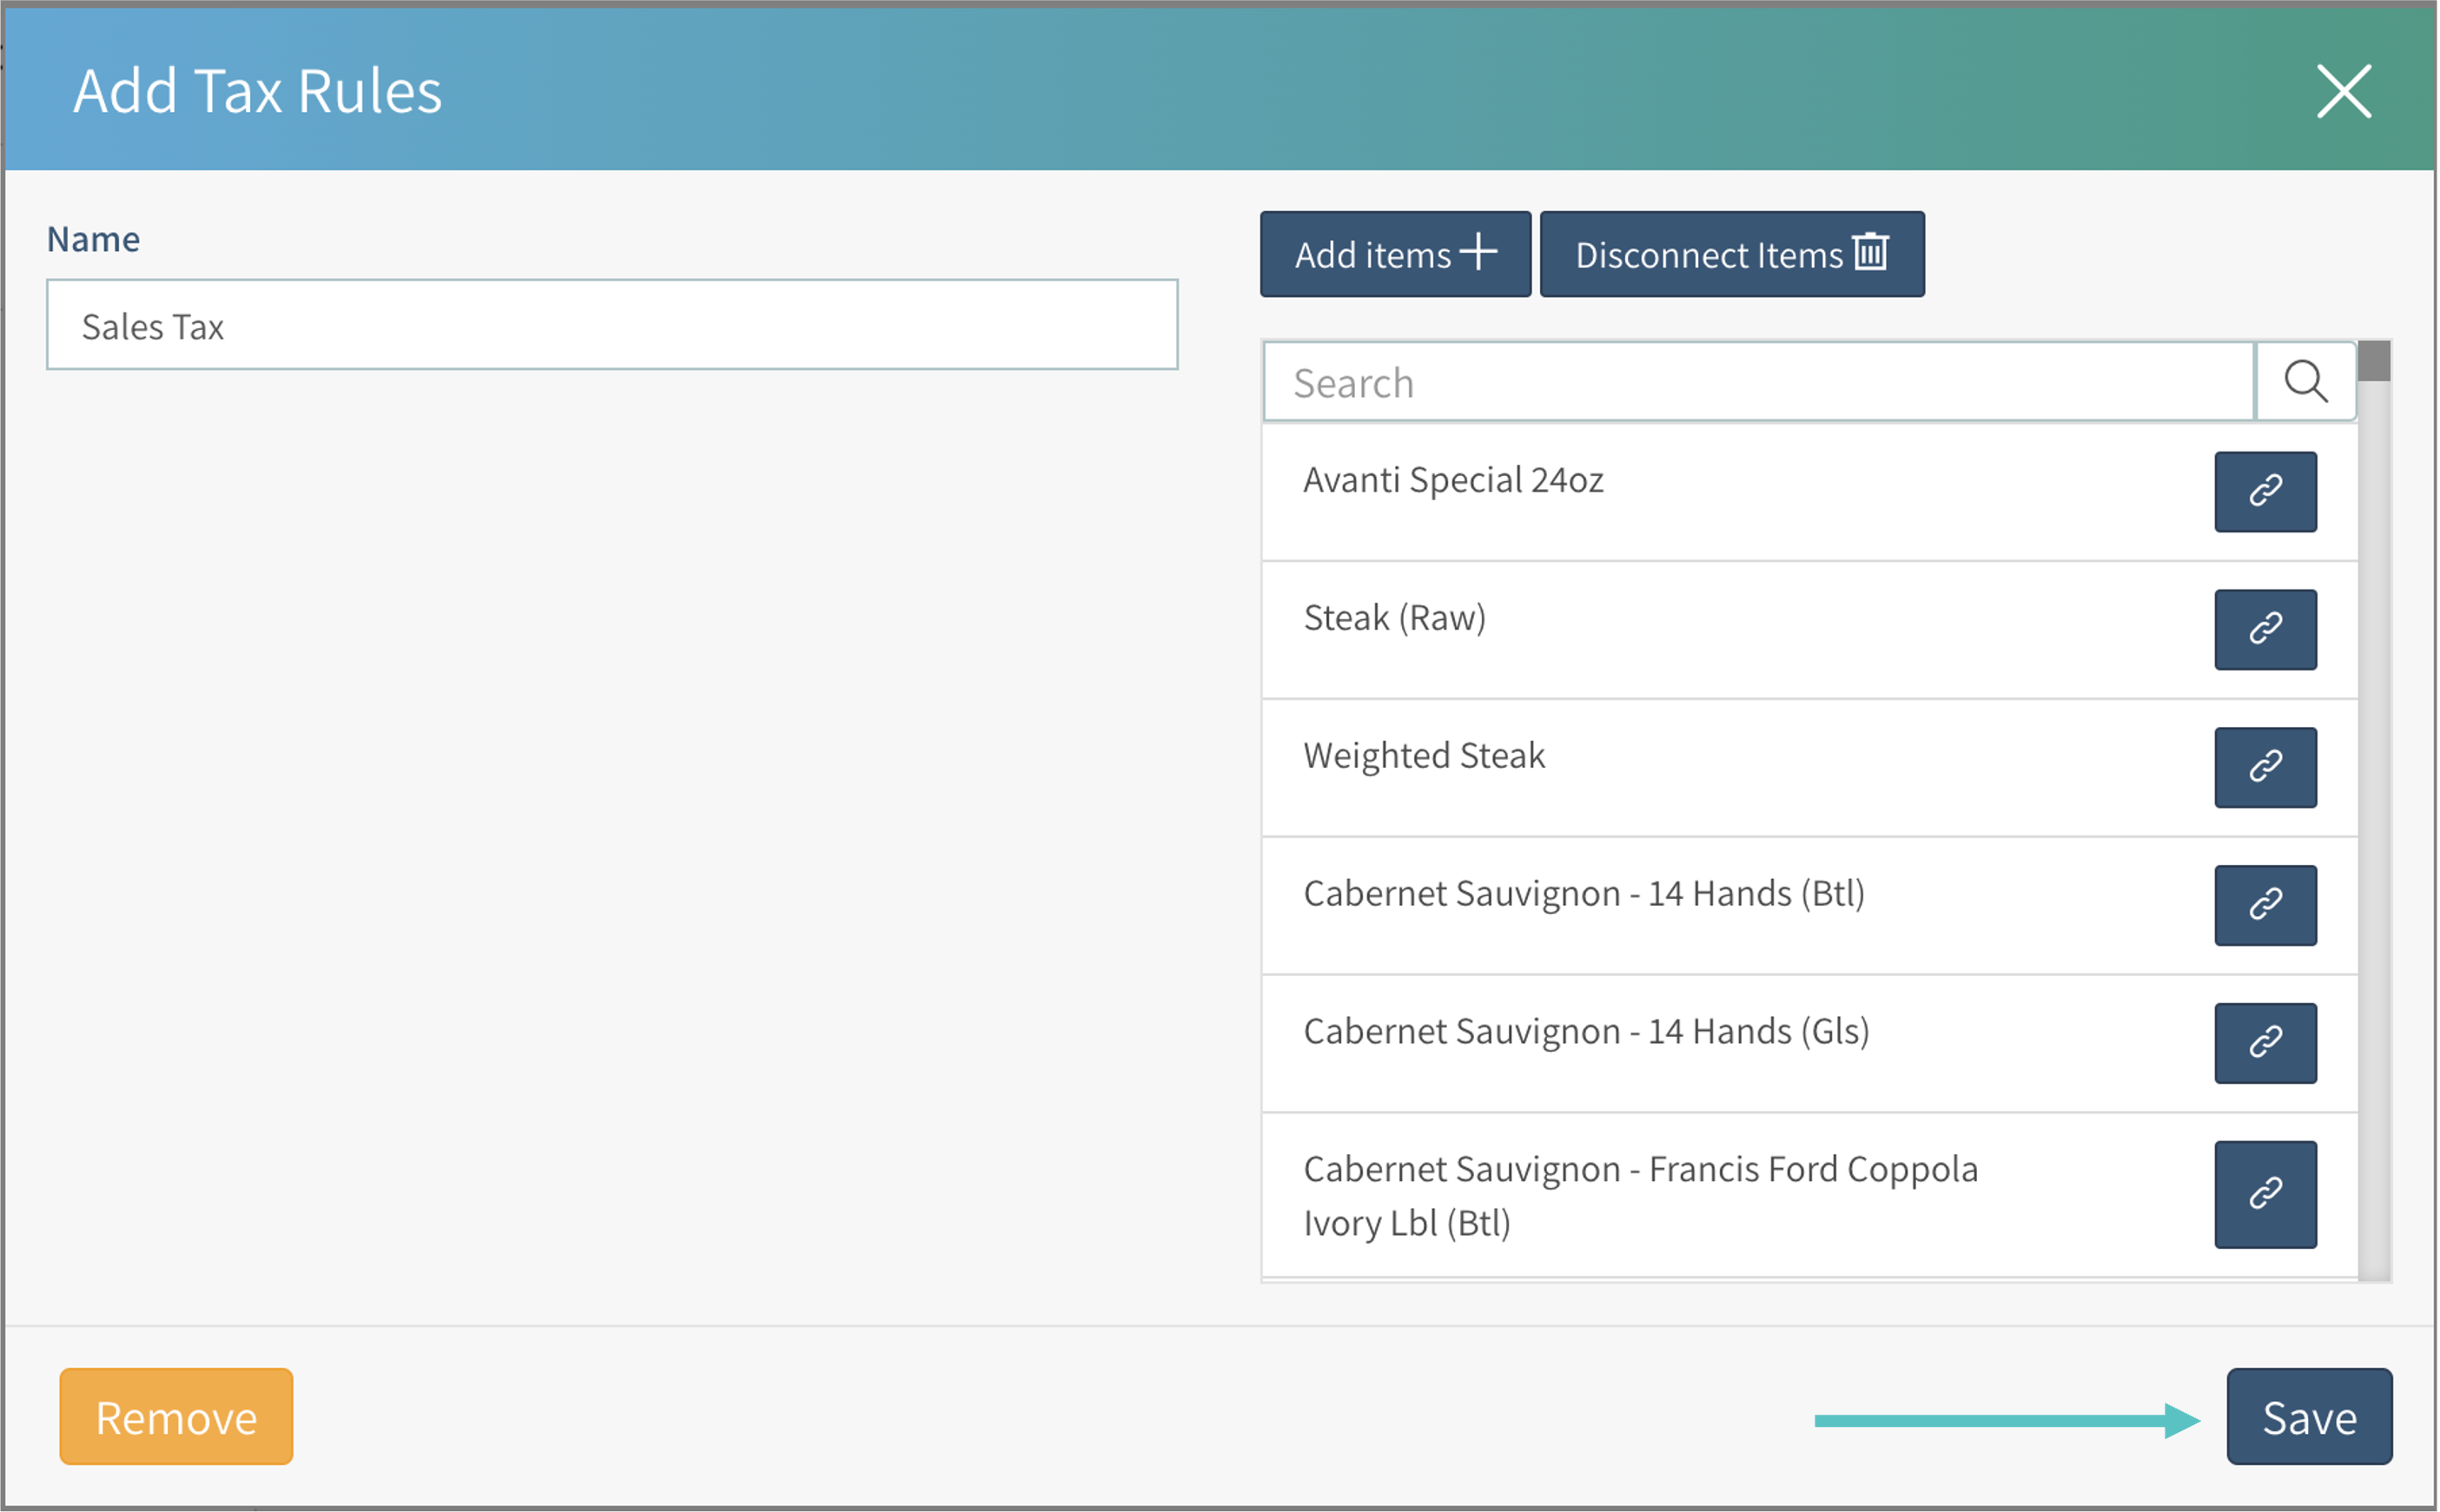
Name the rule, attach the applicable items or menus, and select Save.
Create a Tax Group
-
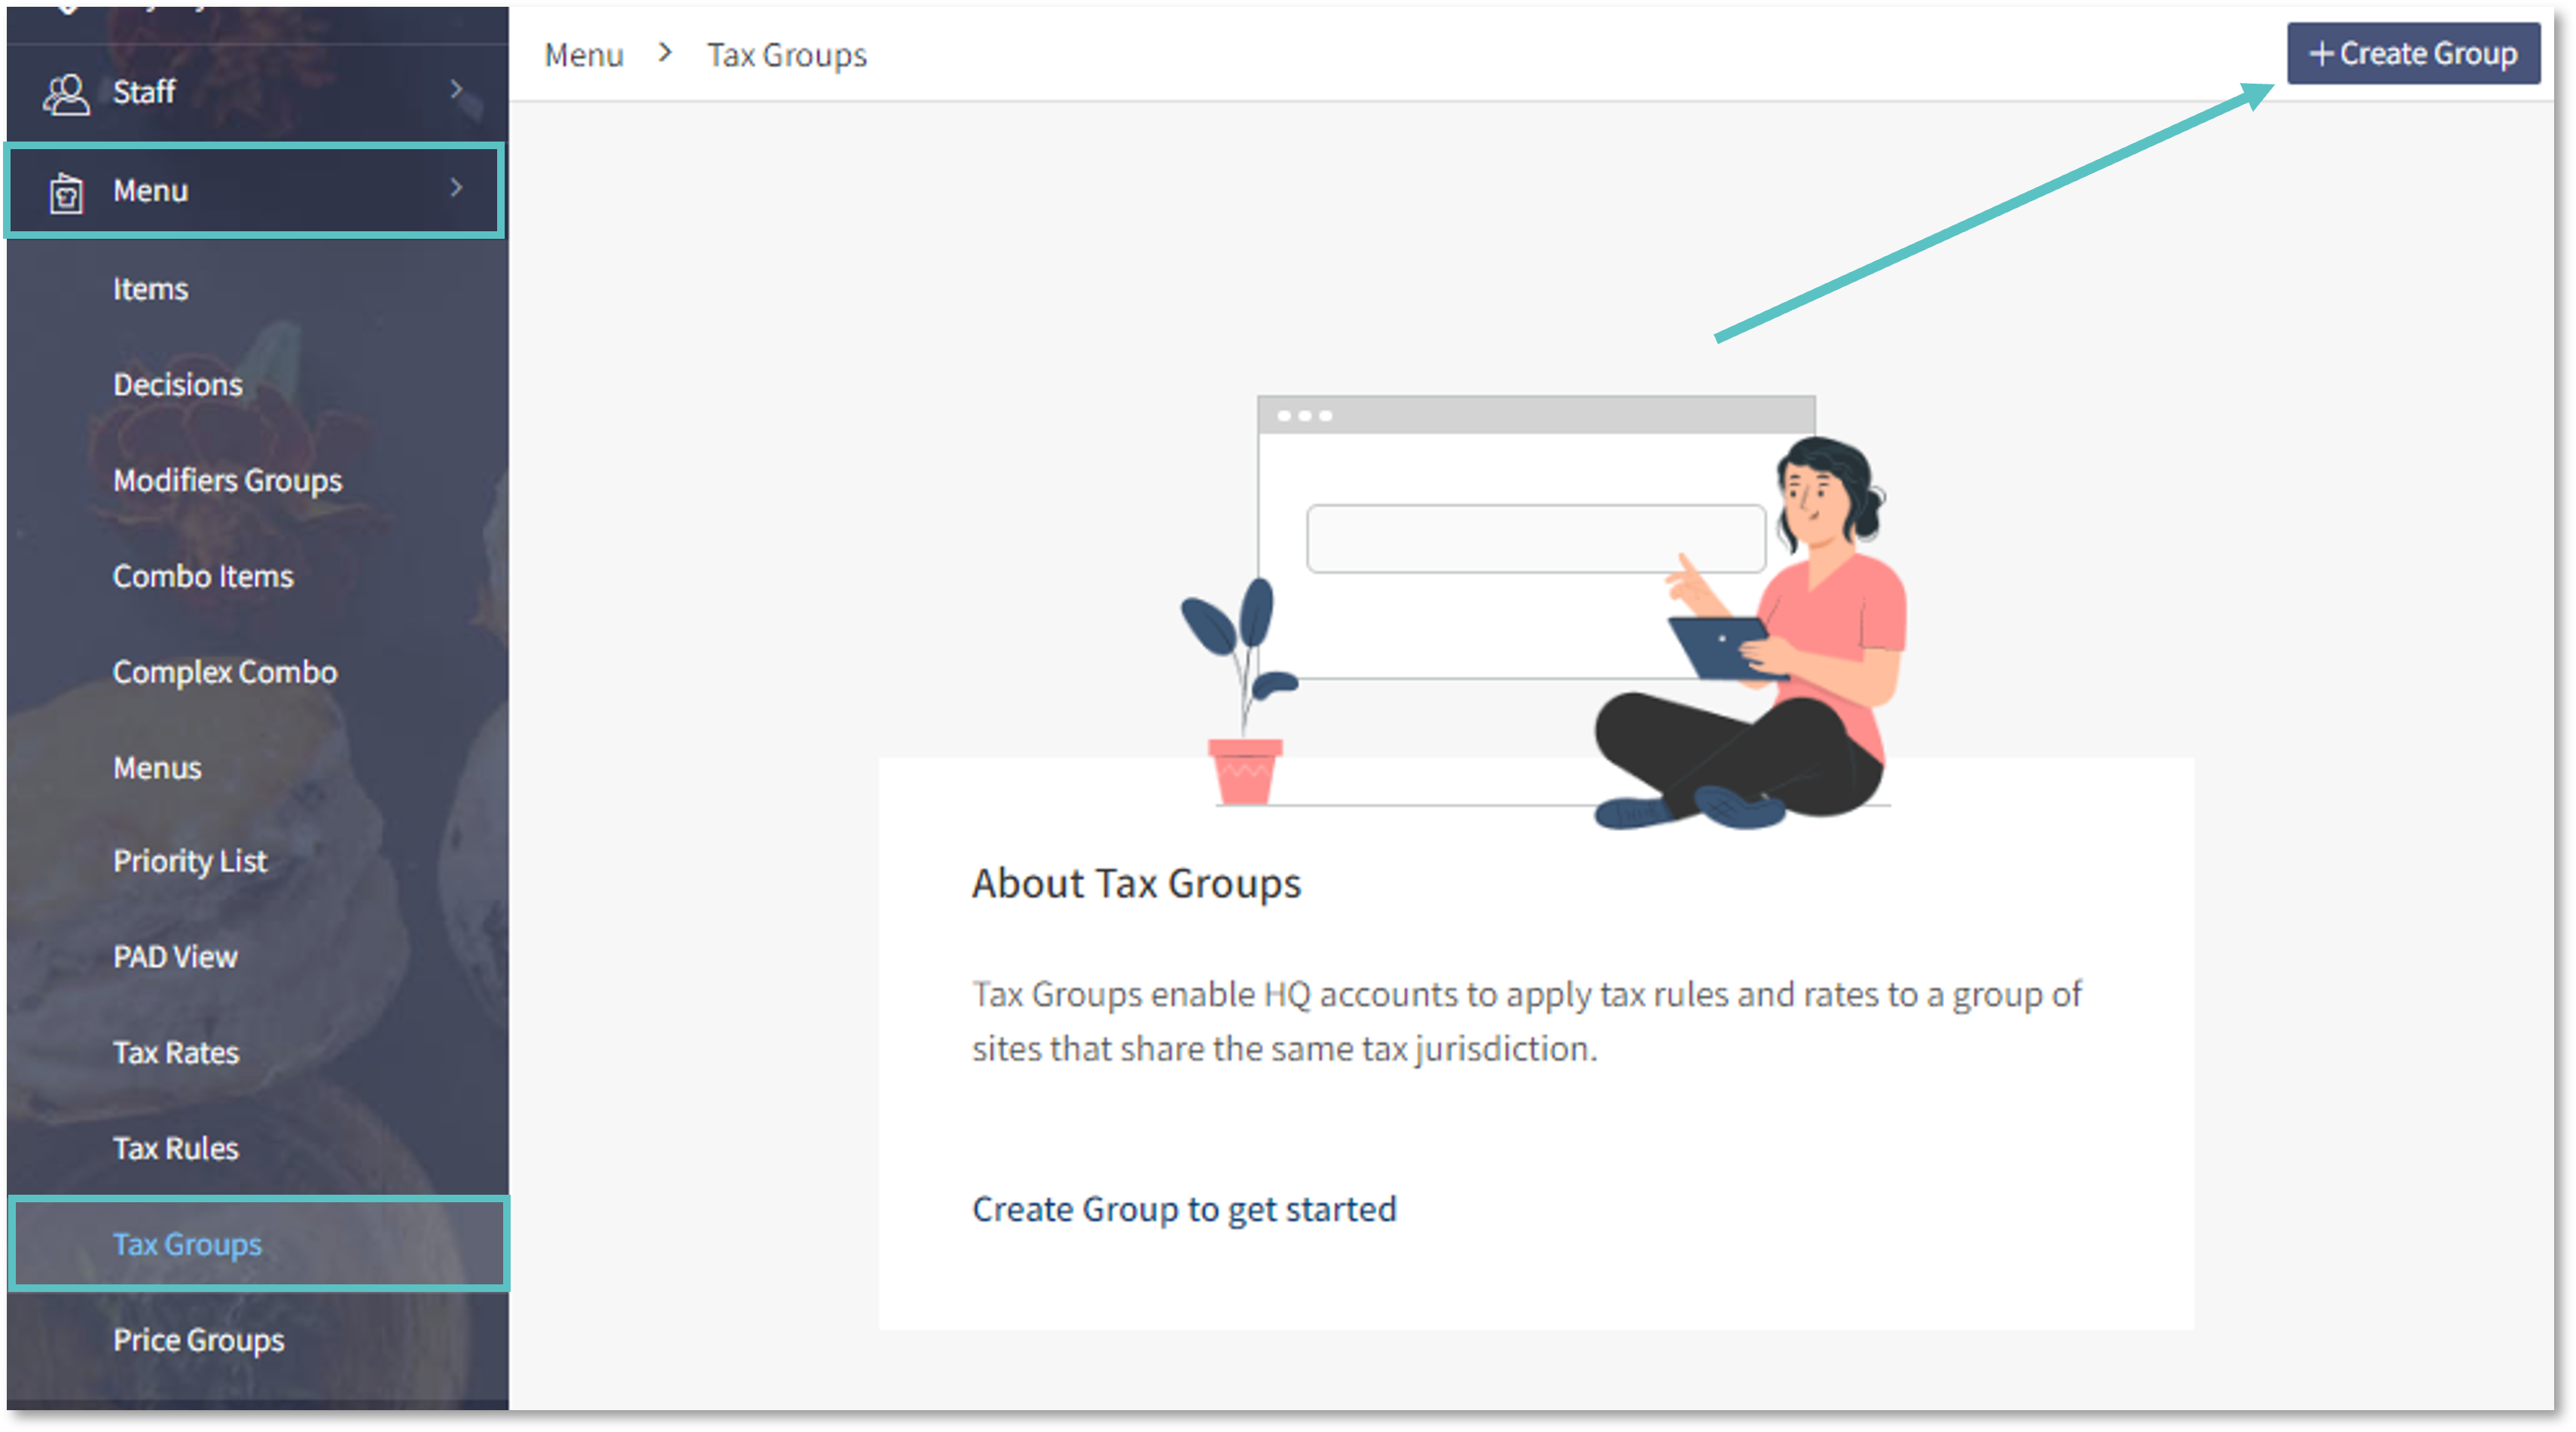
Open Menu > Tax Groups and select + Create Group at the top right.
-
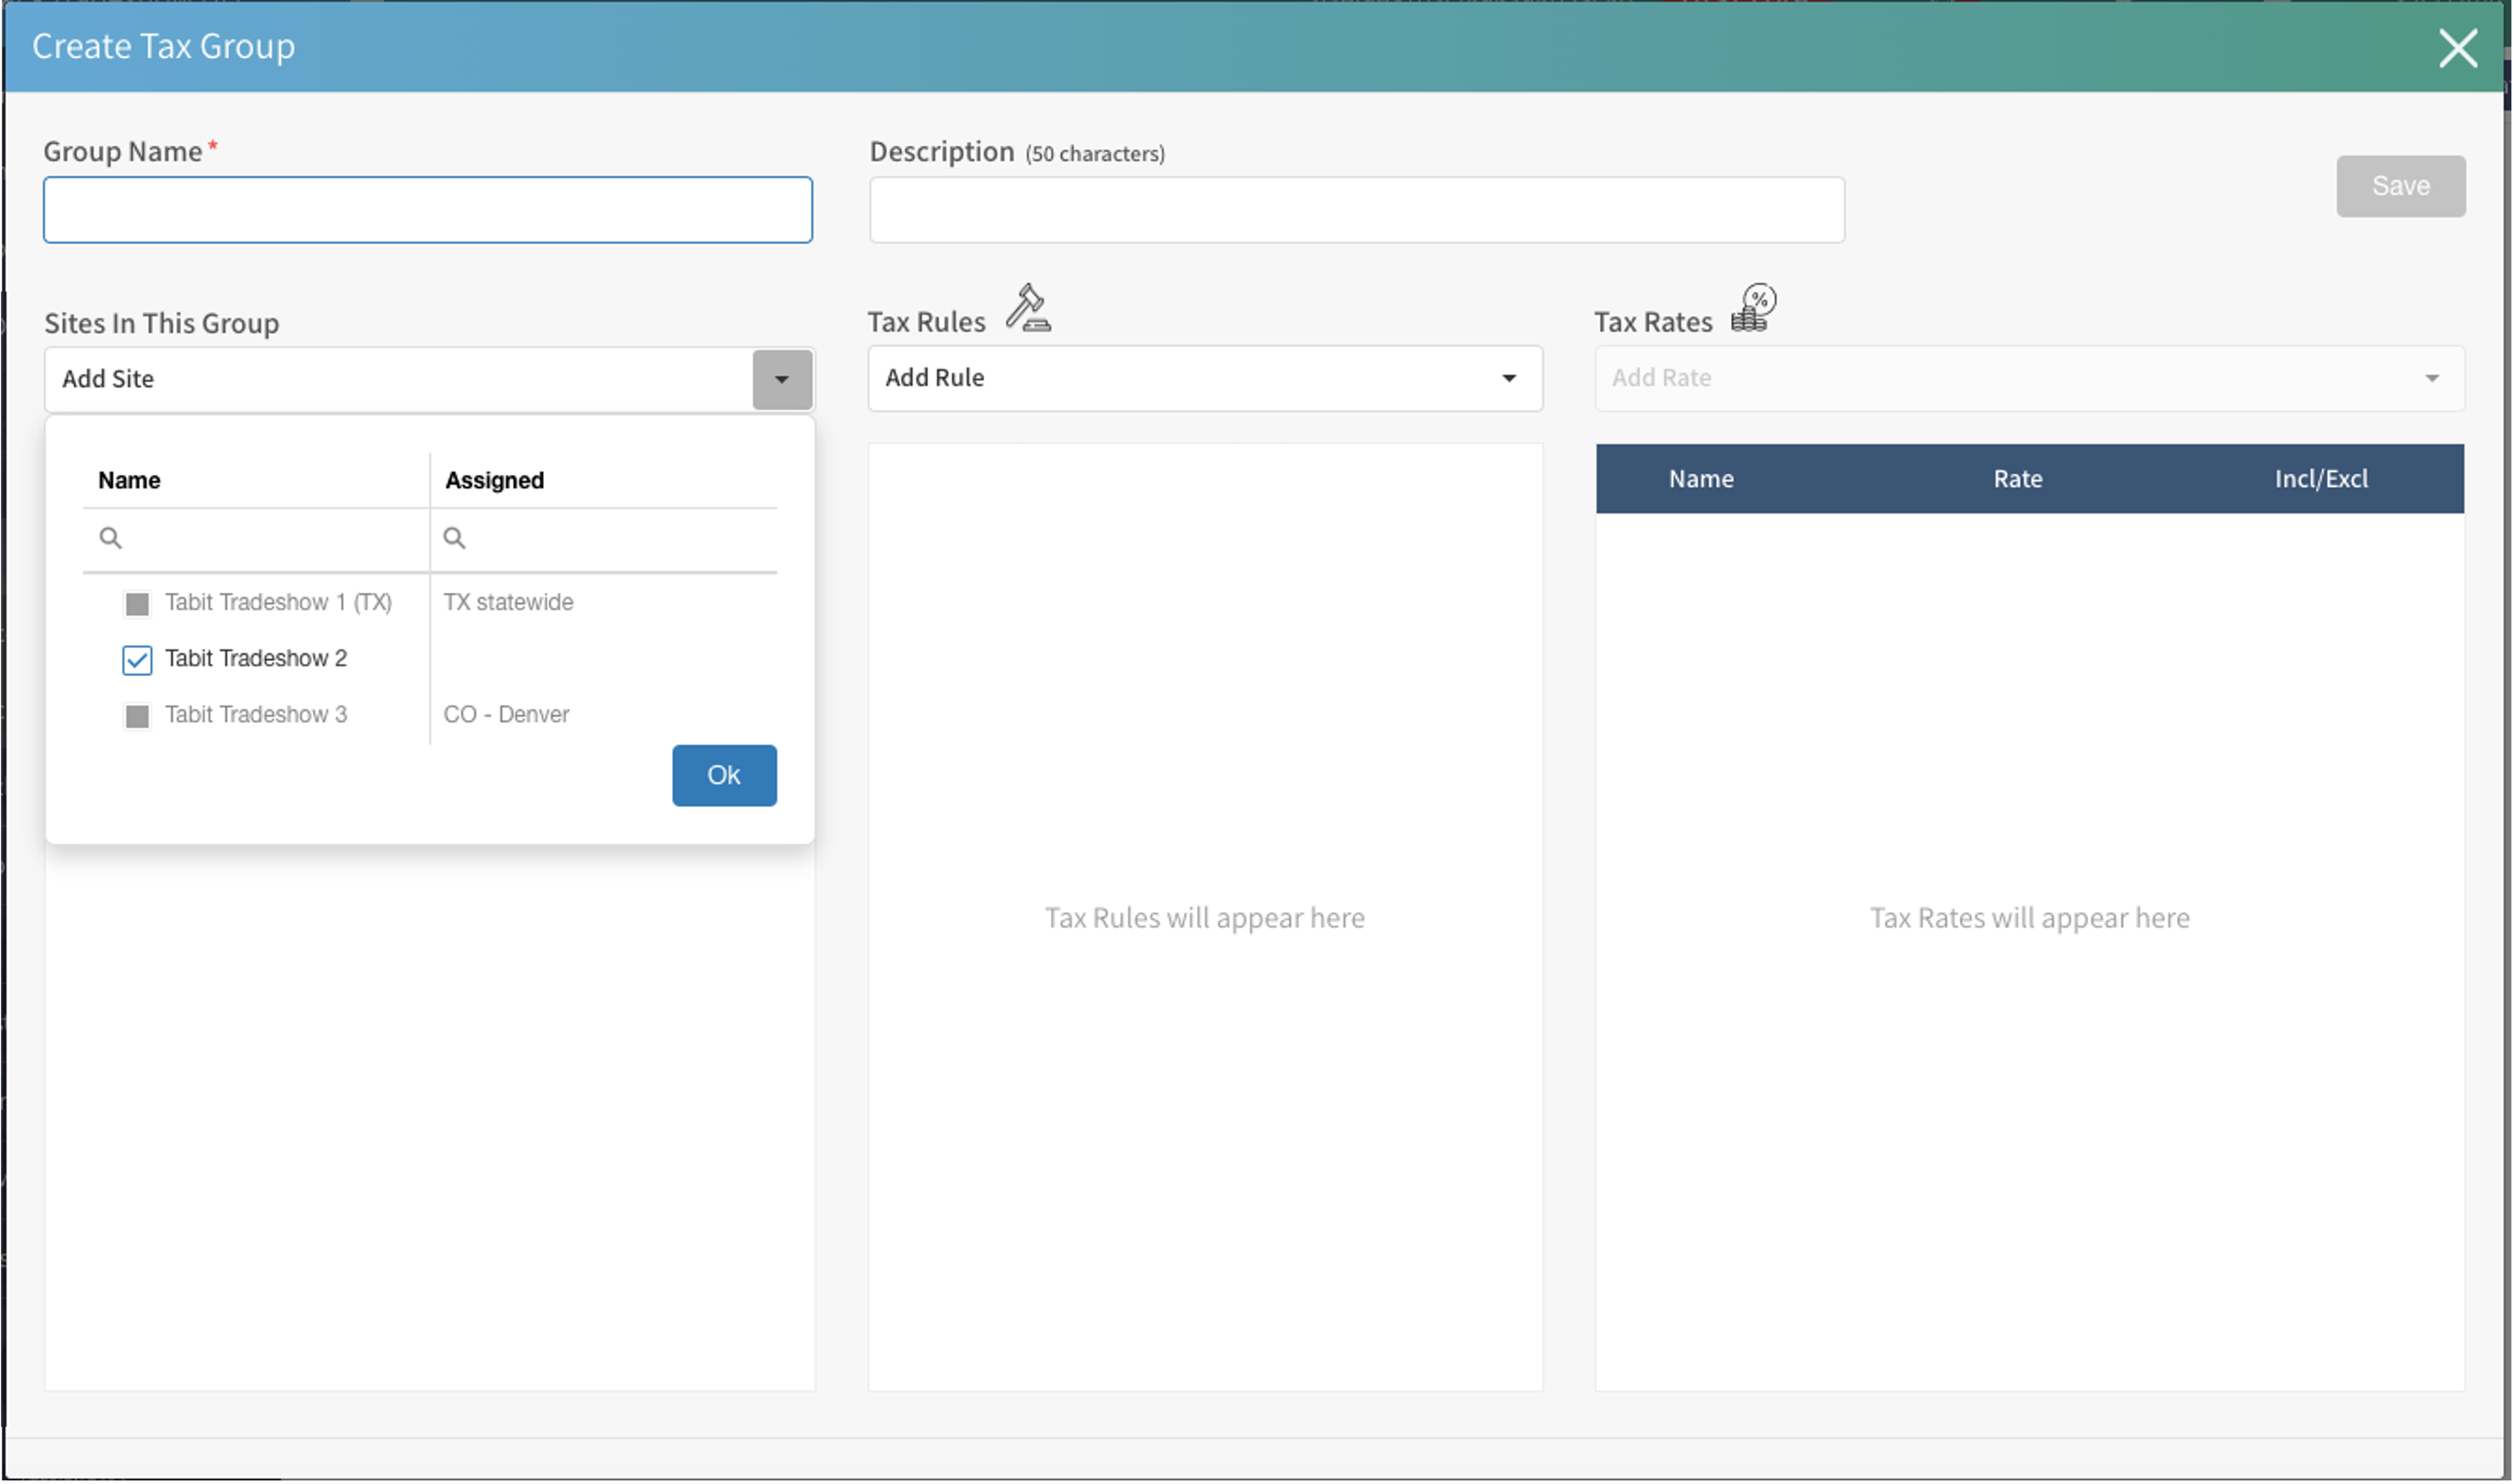
Name the Tax Group and choose its sites. Each site can belong to only one Tax Group.
-
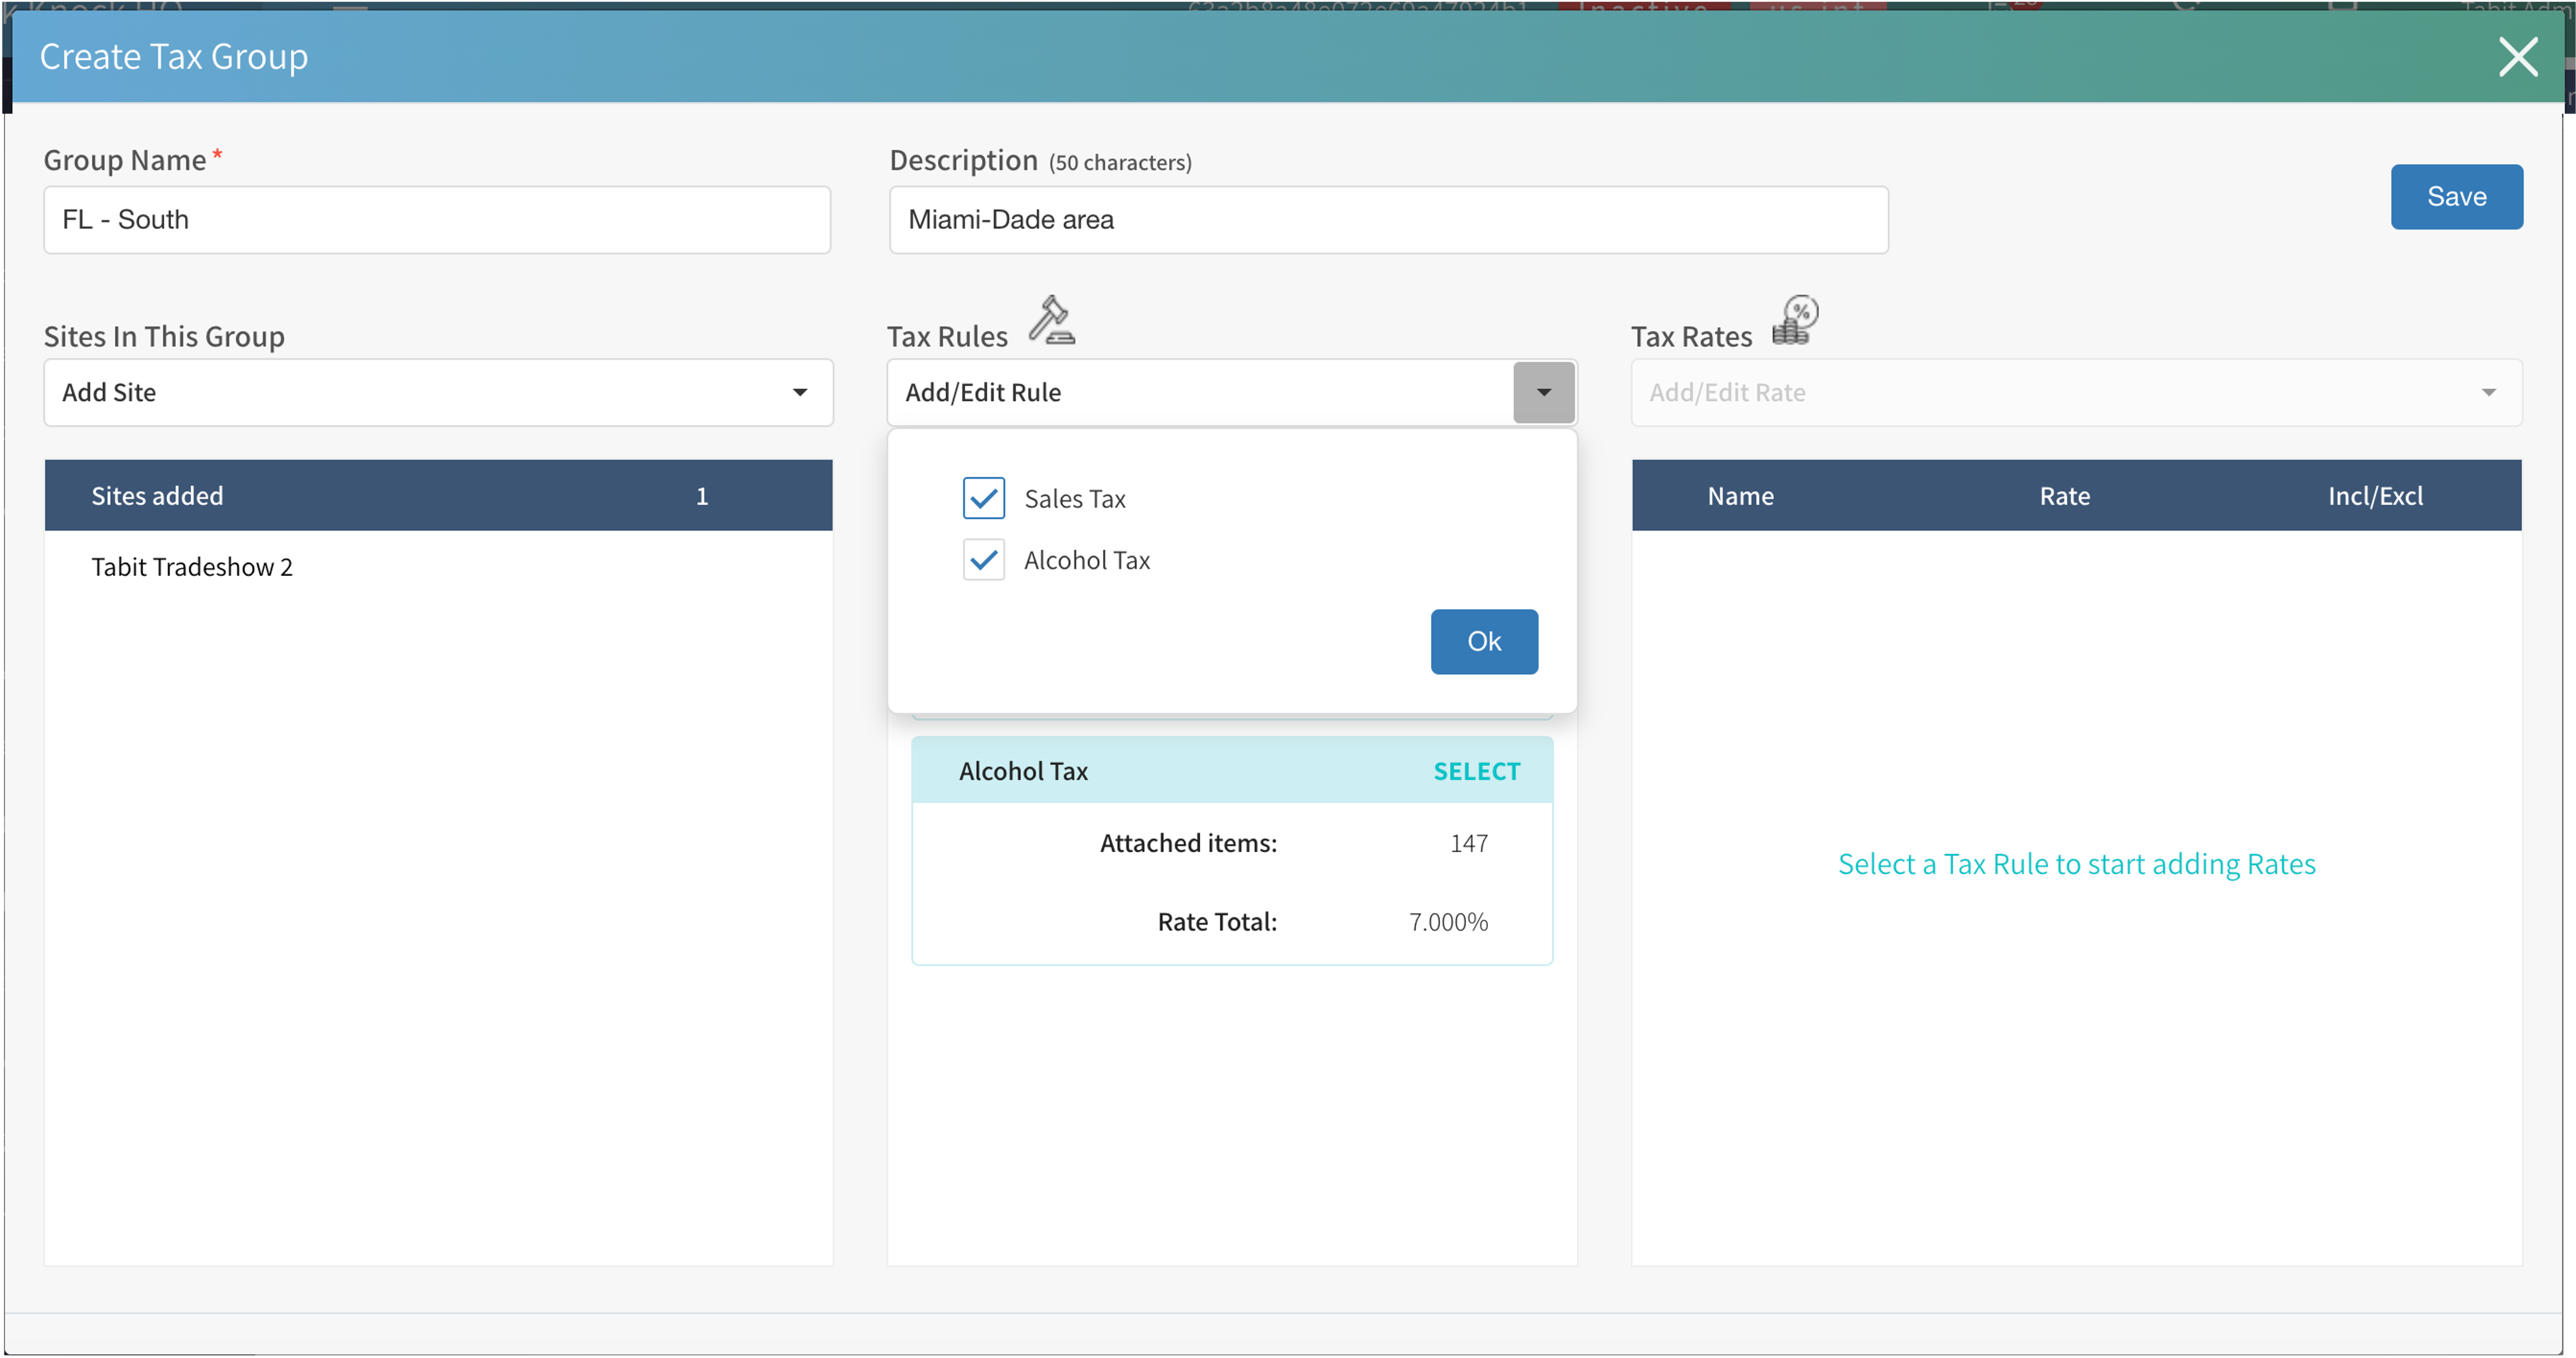
Choose the Tax Rules for the group. Typically, the group uses all Tax Rules.
-
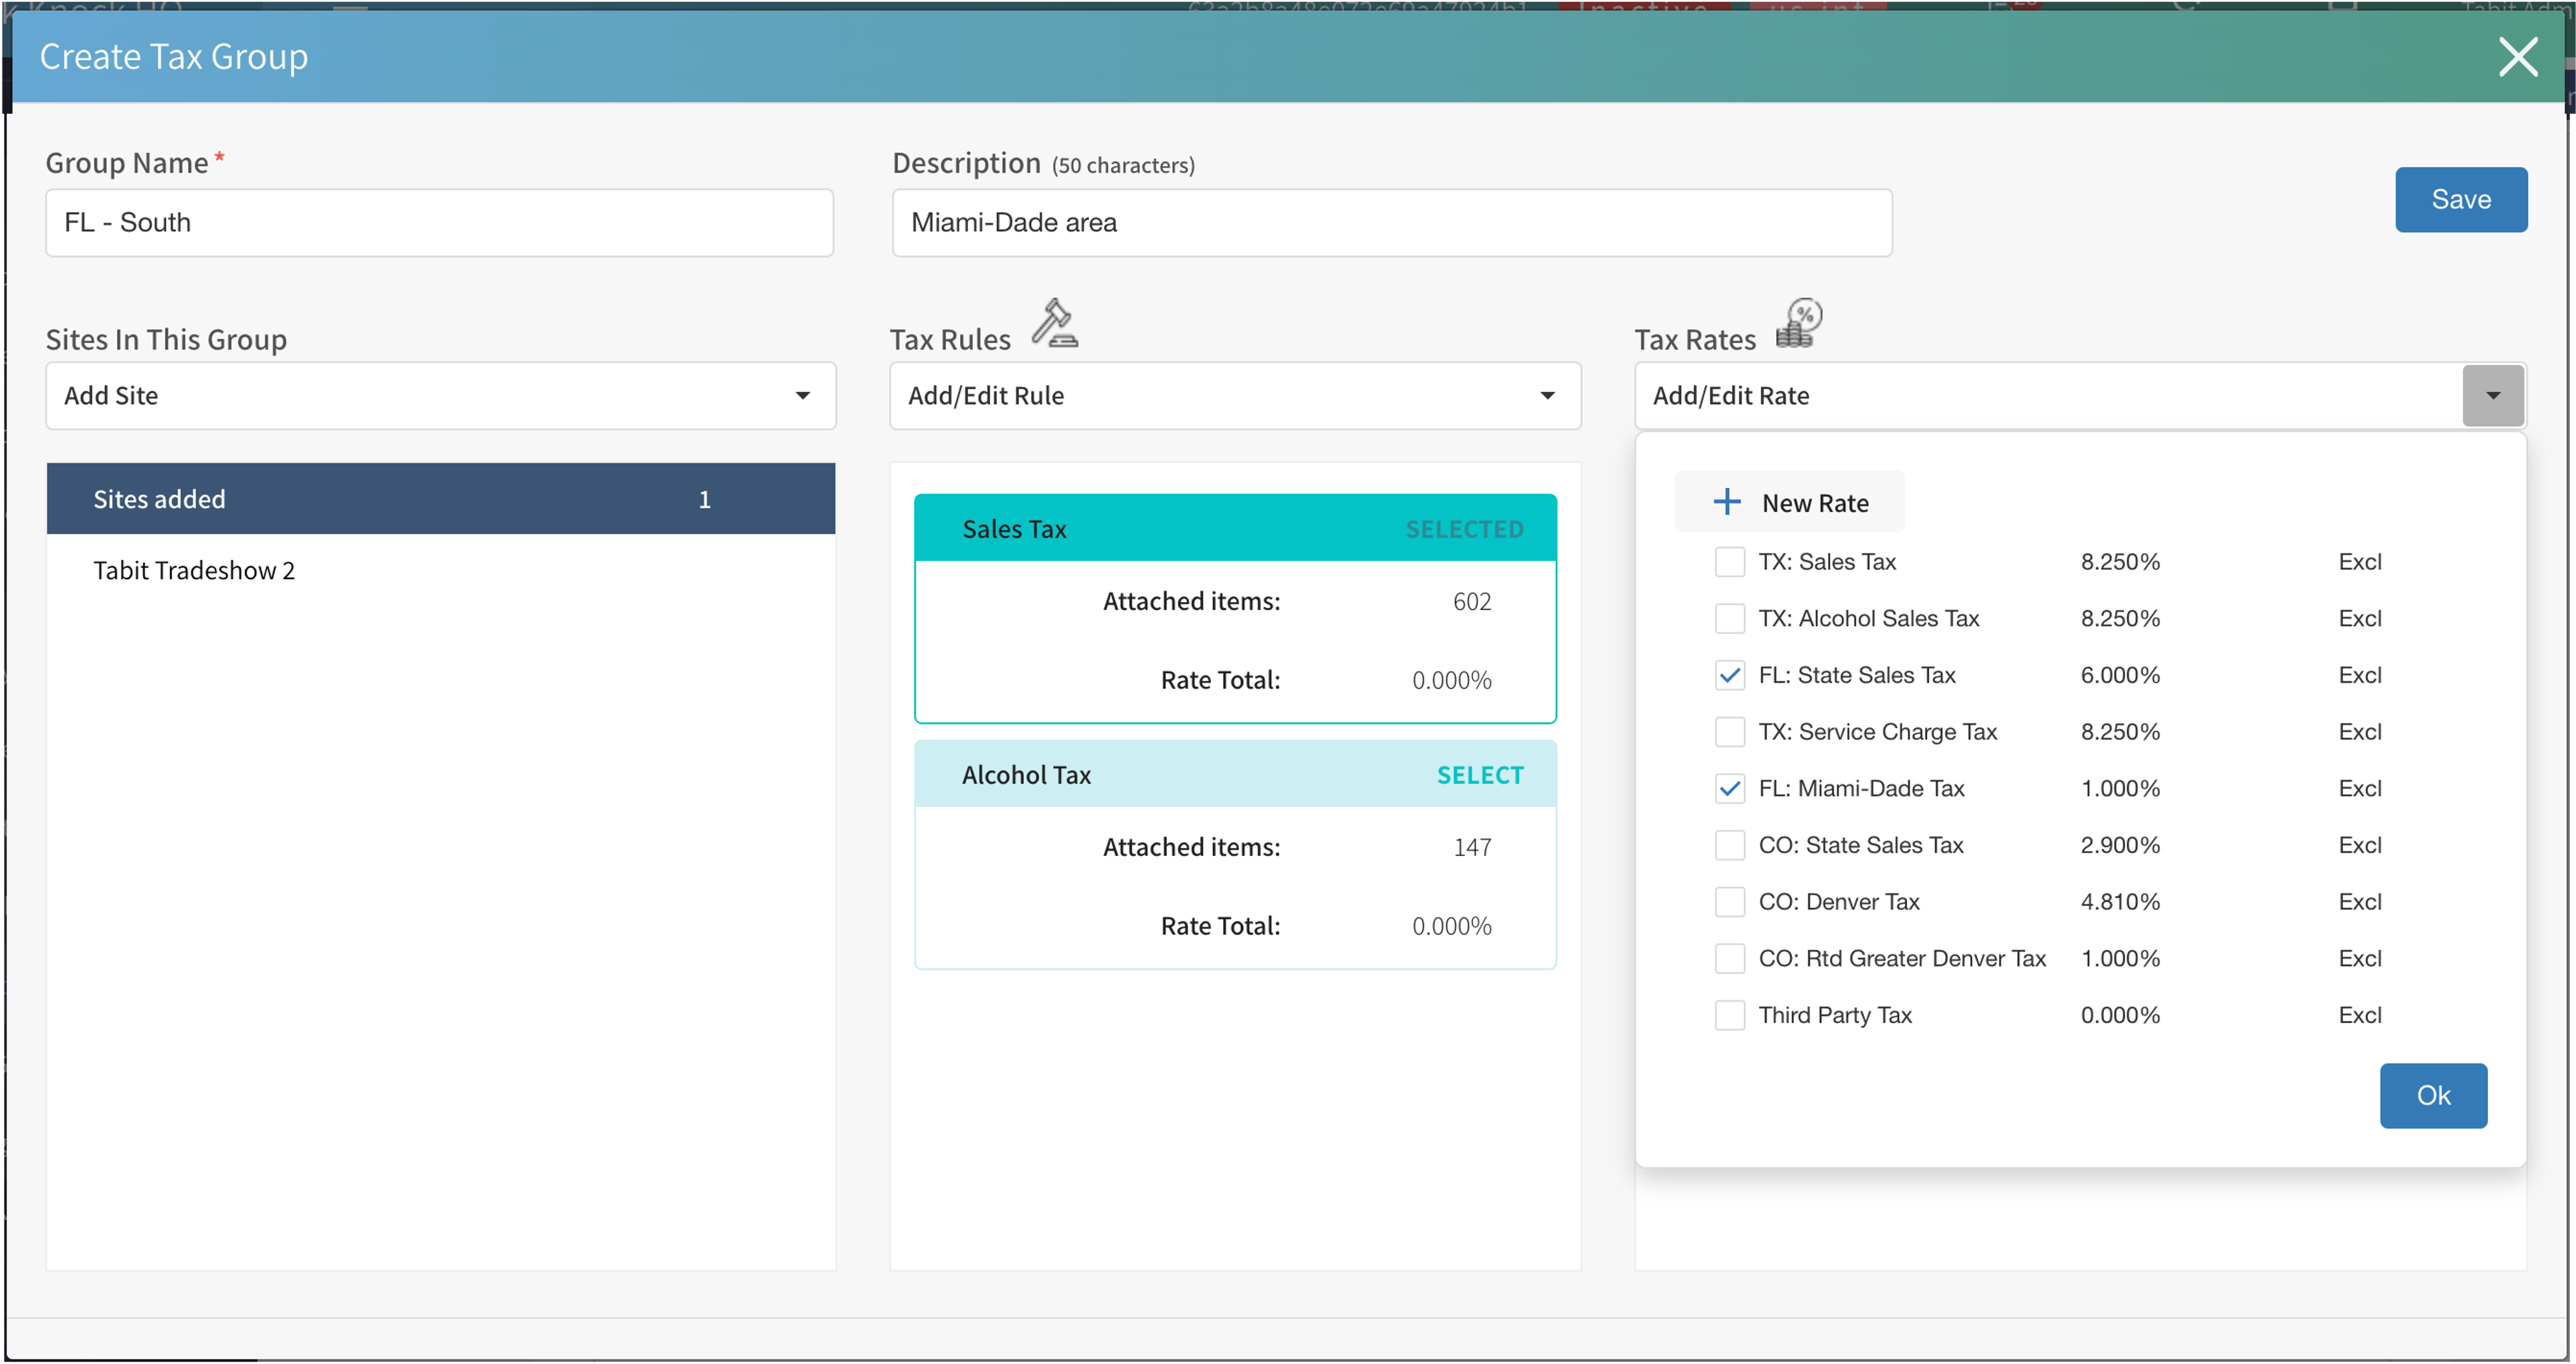
Assign the Tax Rates to each Tax Rule within the group.
-
Select Save
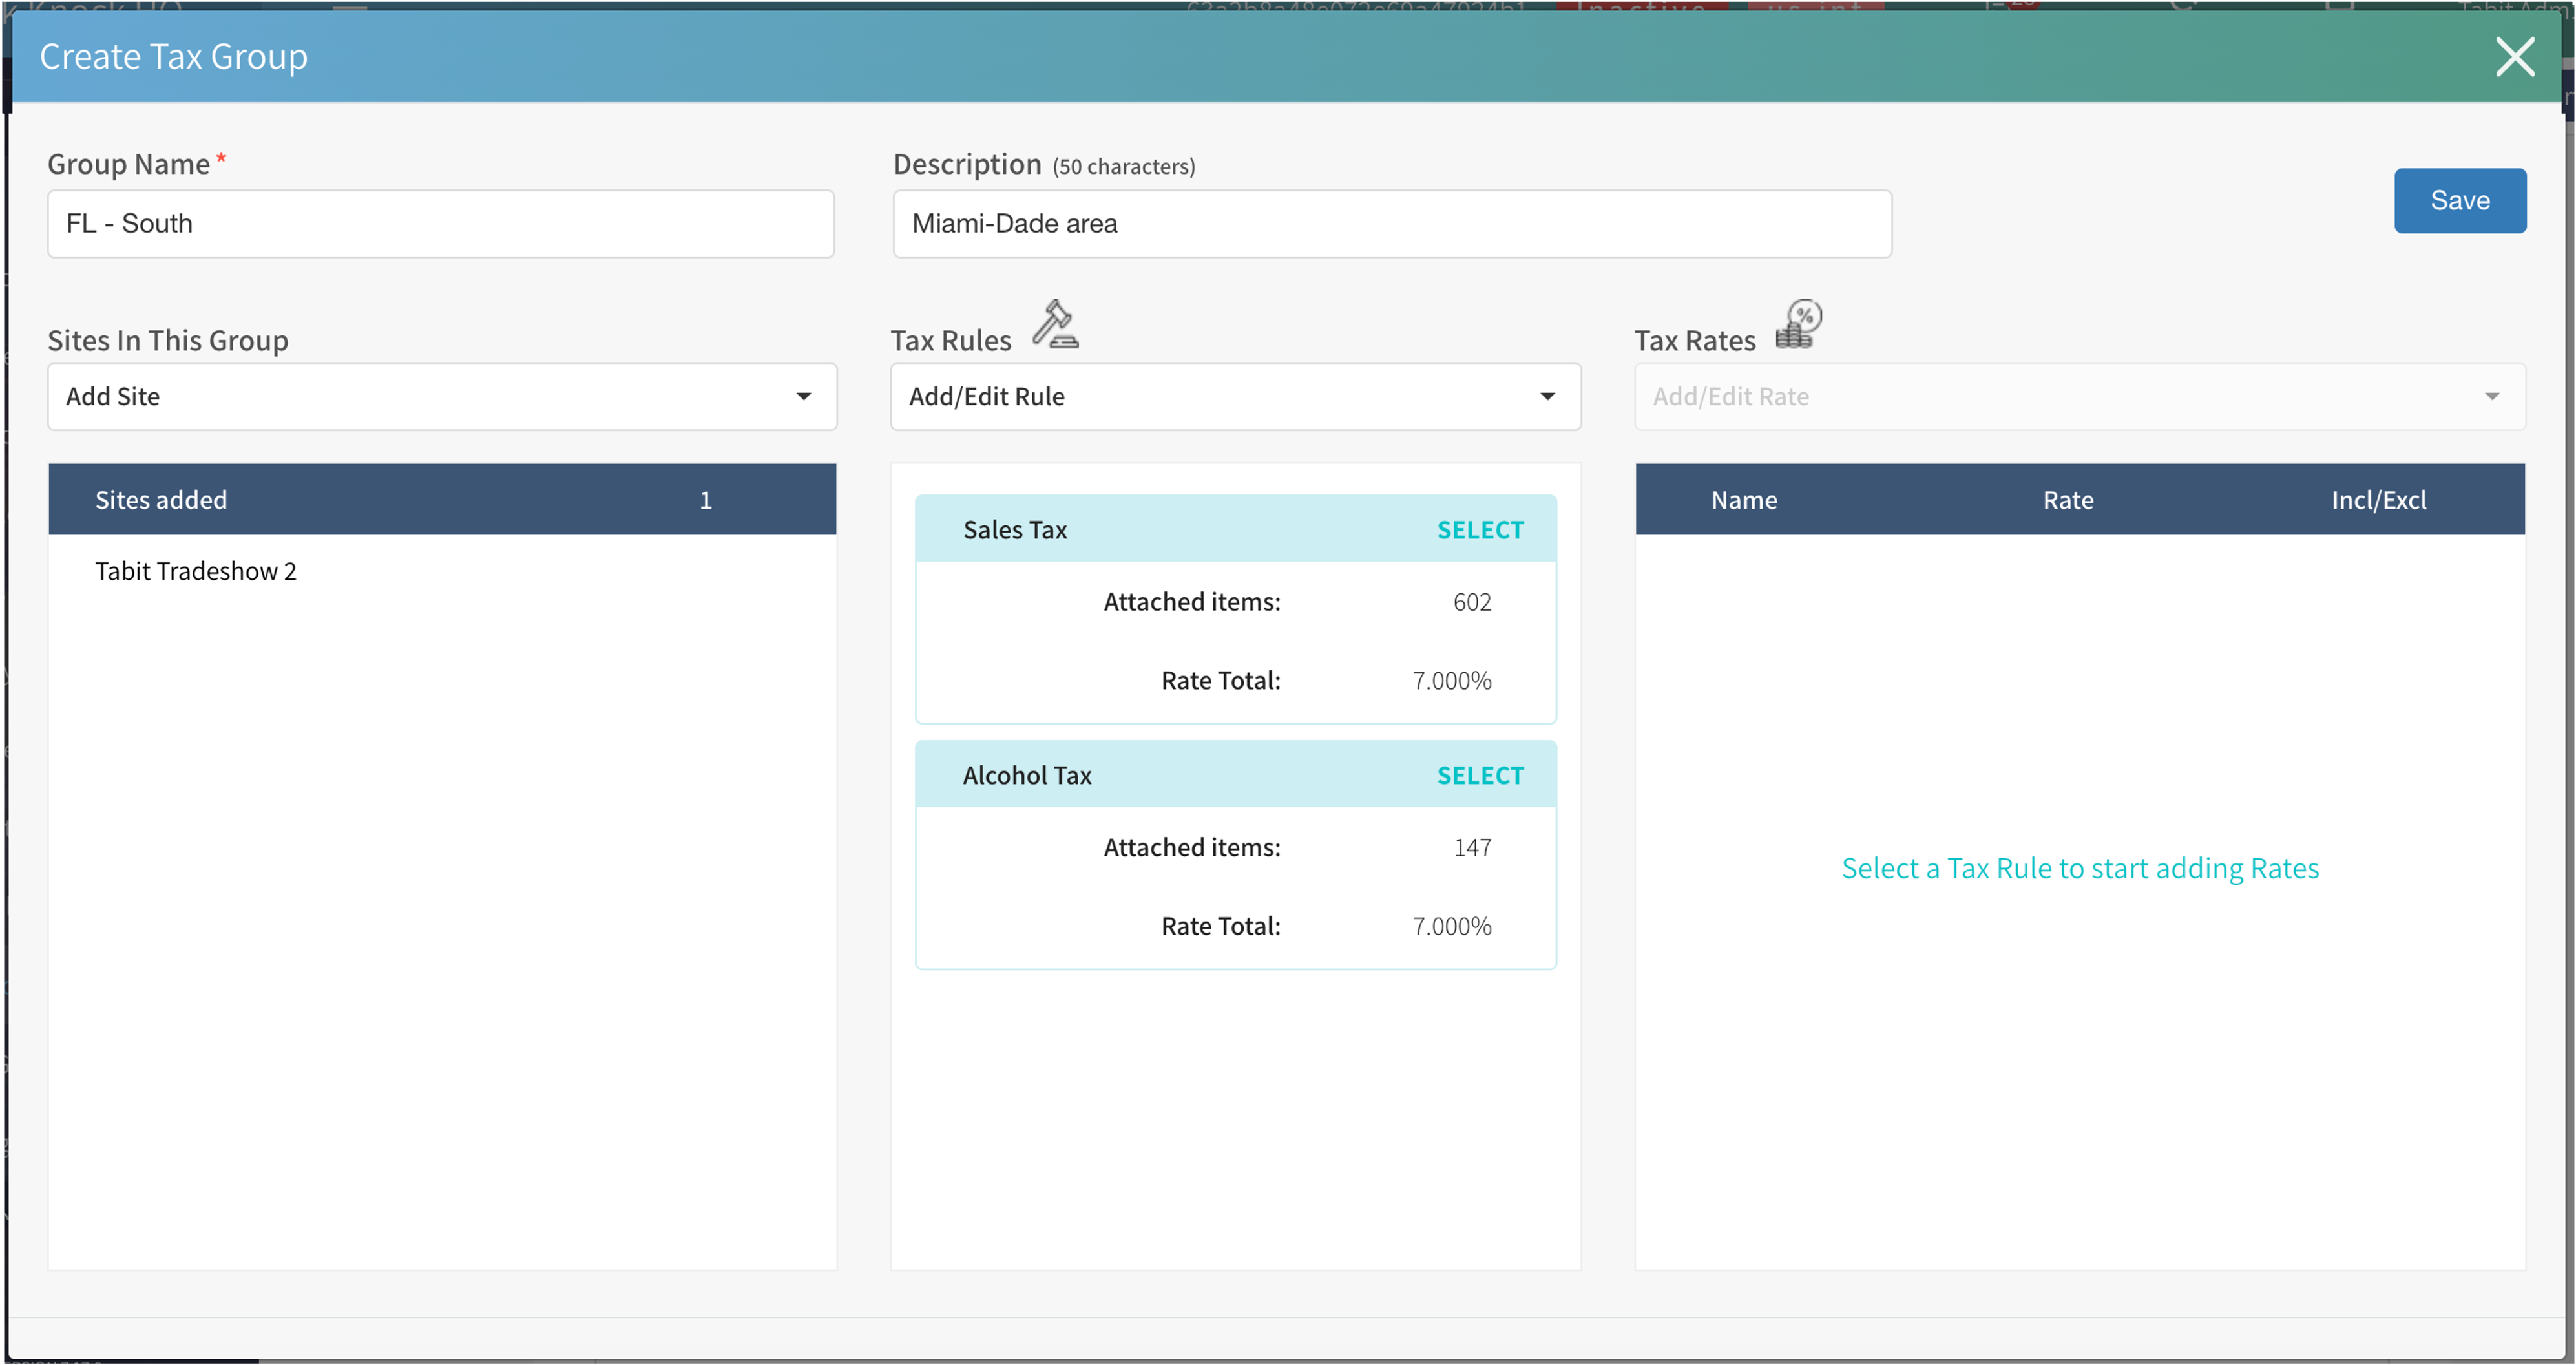
-
To activate the group, select Exit, then Publish on the Tax Groups page.
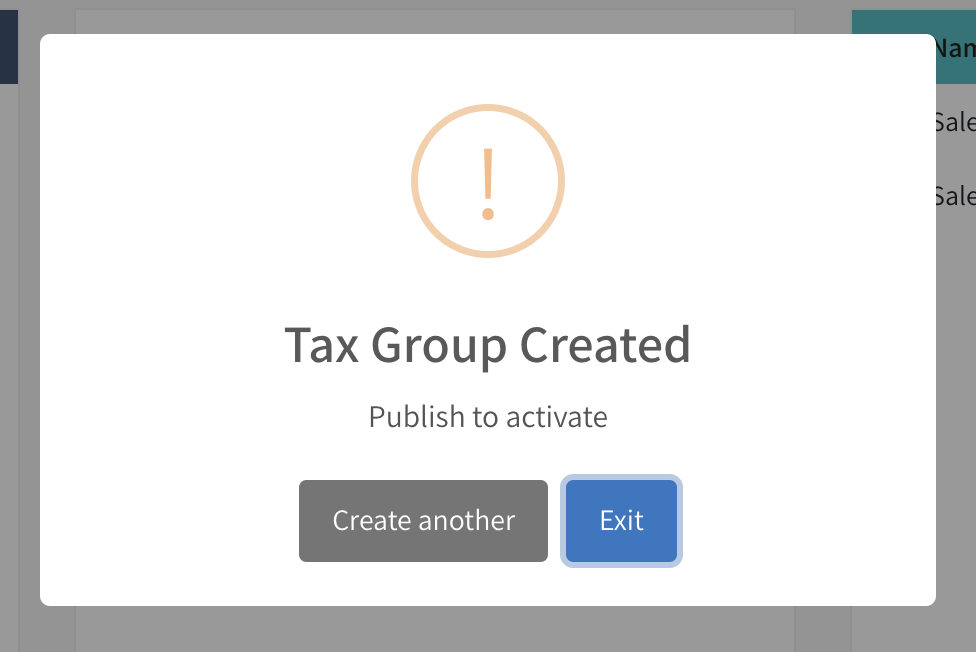
-
The Tax Group is now configured.
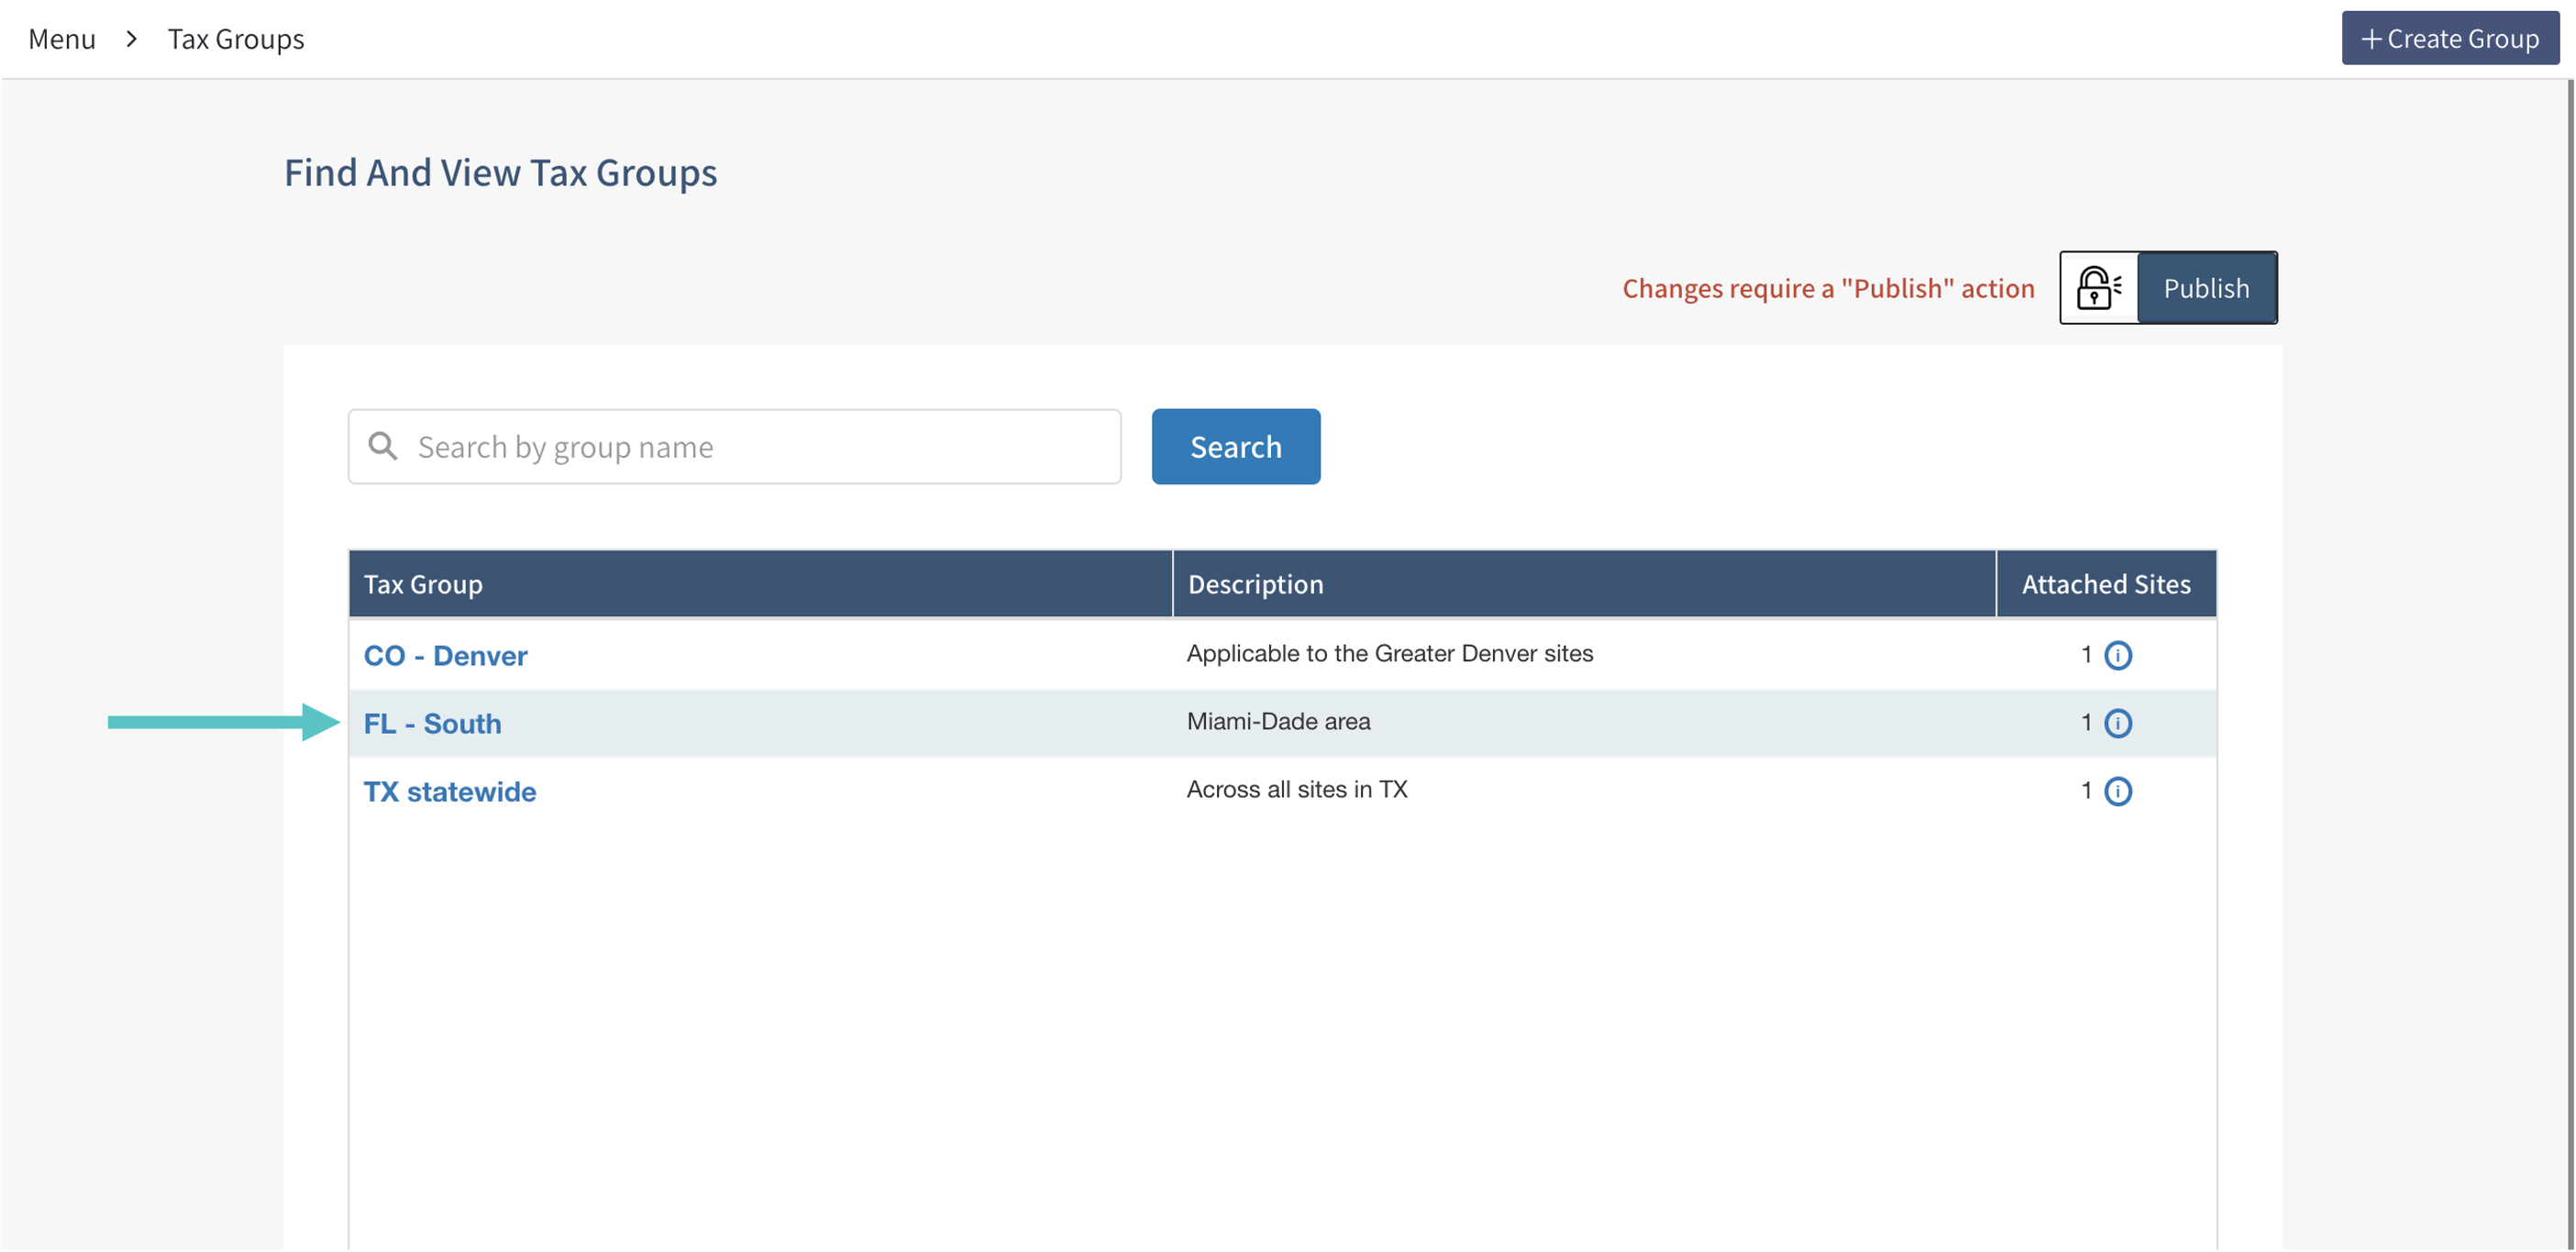
At each participating site, configure the following locally using the Tax Rates and Rules inherited from HQ:
-
Auto Gratuity: Assign an inherited HQ Tax Rule to the site's Auto Gratuity.
-
Fees: Assign an inherited HQ Tax Rule to fees that require one.
-
Third Party Platforms: Apply the inherited HQ Tax Rate in the site's third-party configuration where needed.
-
Local Items: Assign inherited HQ Tax Rules to all local items.