
This article walks through the process of adding a table to a Map in Tabit Office.
Here are the steps on how to add a table to a map:
-
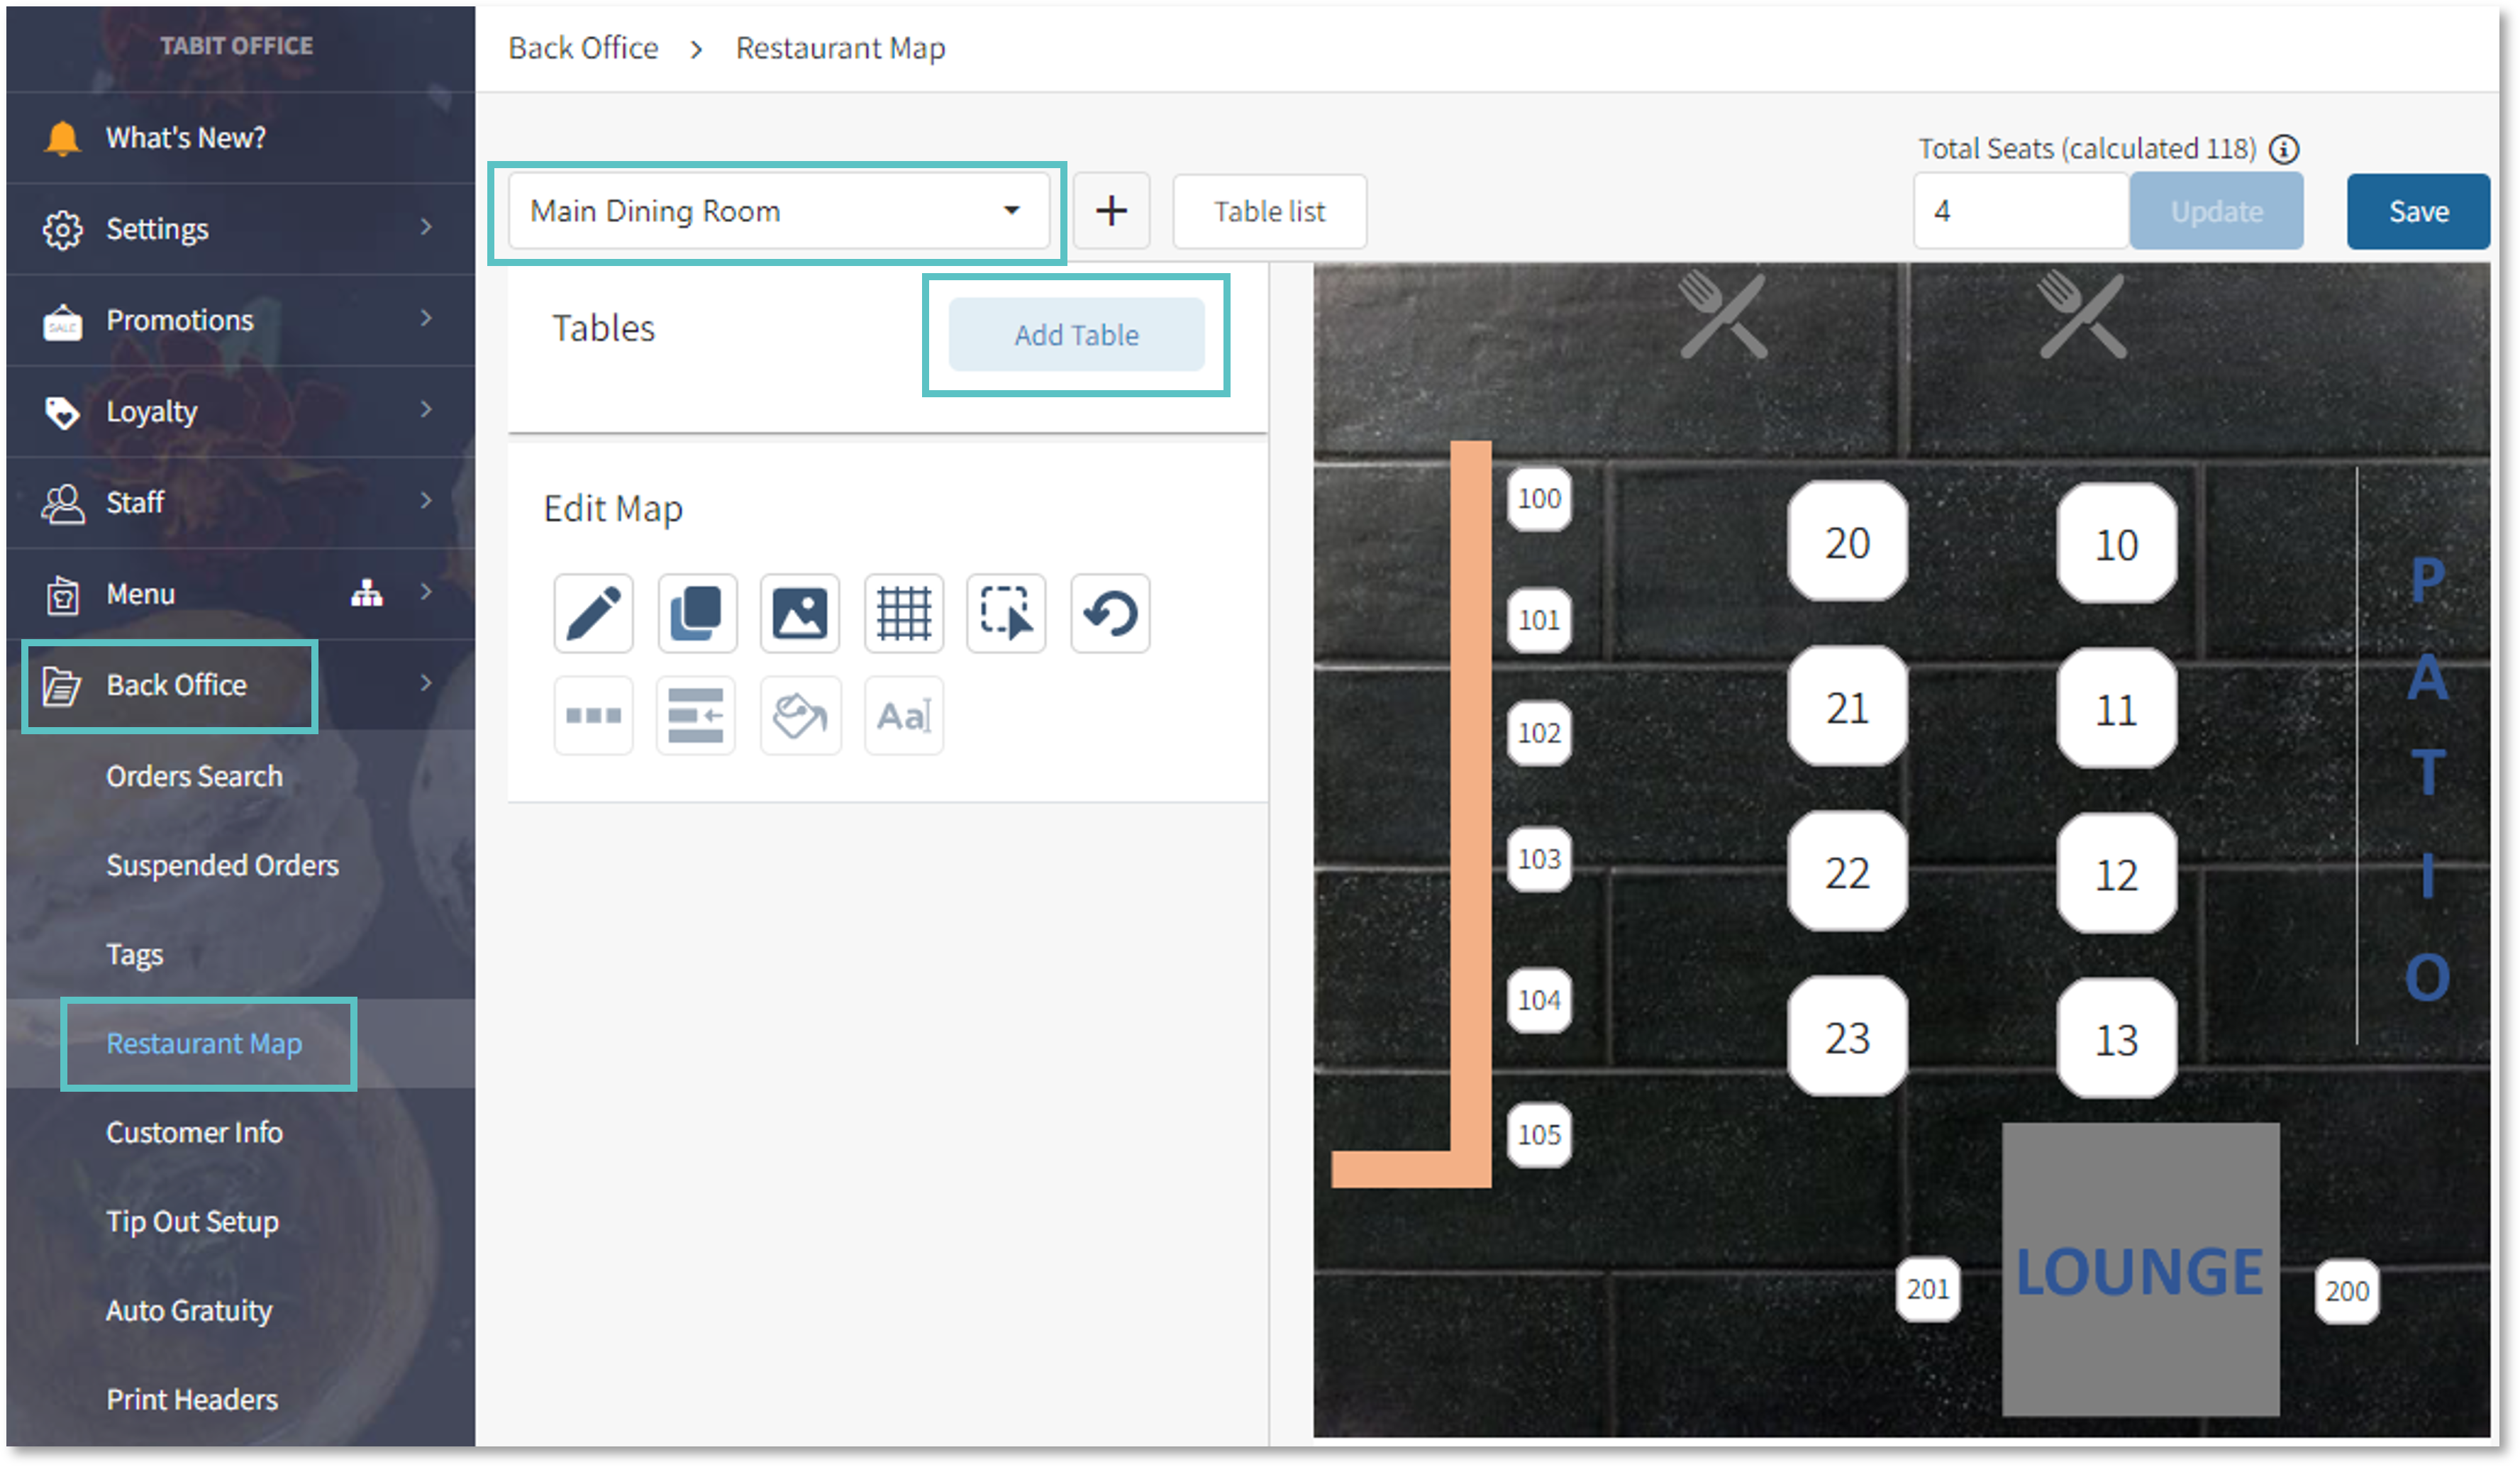
In Tabit Office, go to Back Office > Restaurant Map
-
Select the relevant Map
-
Select Add Table
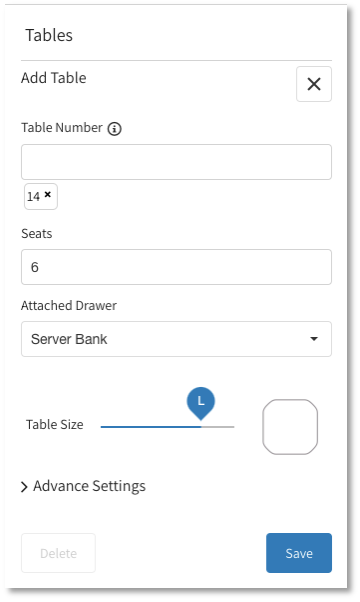
From here a new table can be configured:
-
Enter the table number. Up to 8 tables can be added at once
-
Add seats to the table
Best Practice: If a table can seat a range of guests, put the larger number
-
-
Attach the relevant Cash Drawer
-
Server Bank
-
Bar Drawer
-
-
Choose the table size. This will determine the size of the Table icon on the PAD
-
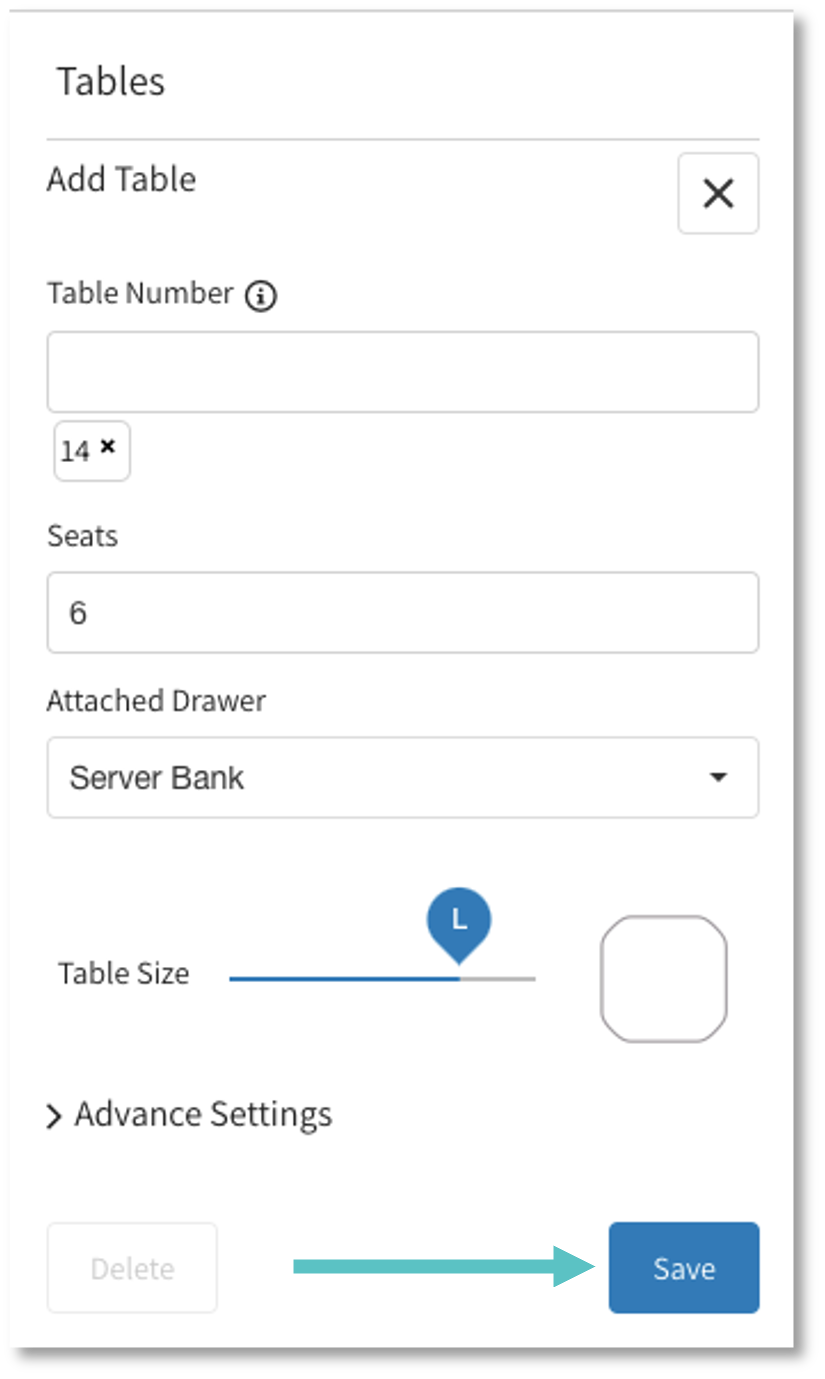
If no advanced settings are needed, select Save. You may also refer to the procedure below to learn about advanced settings.
-
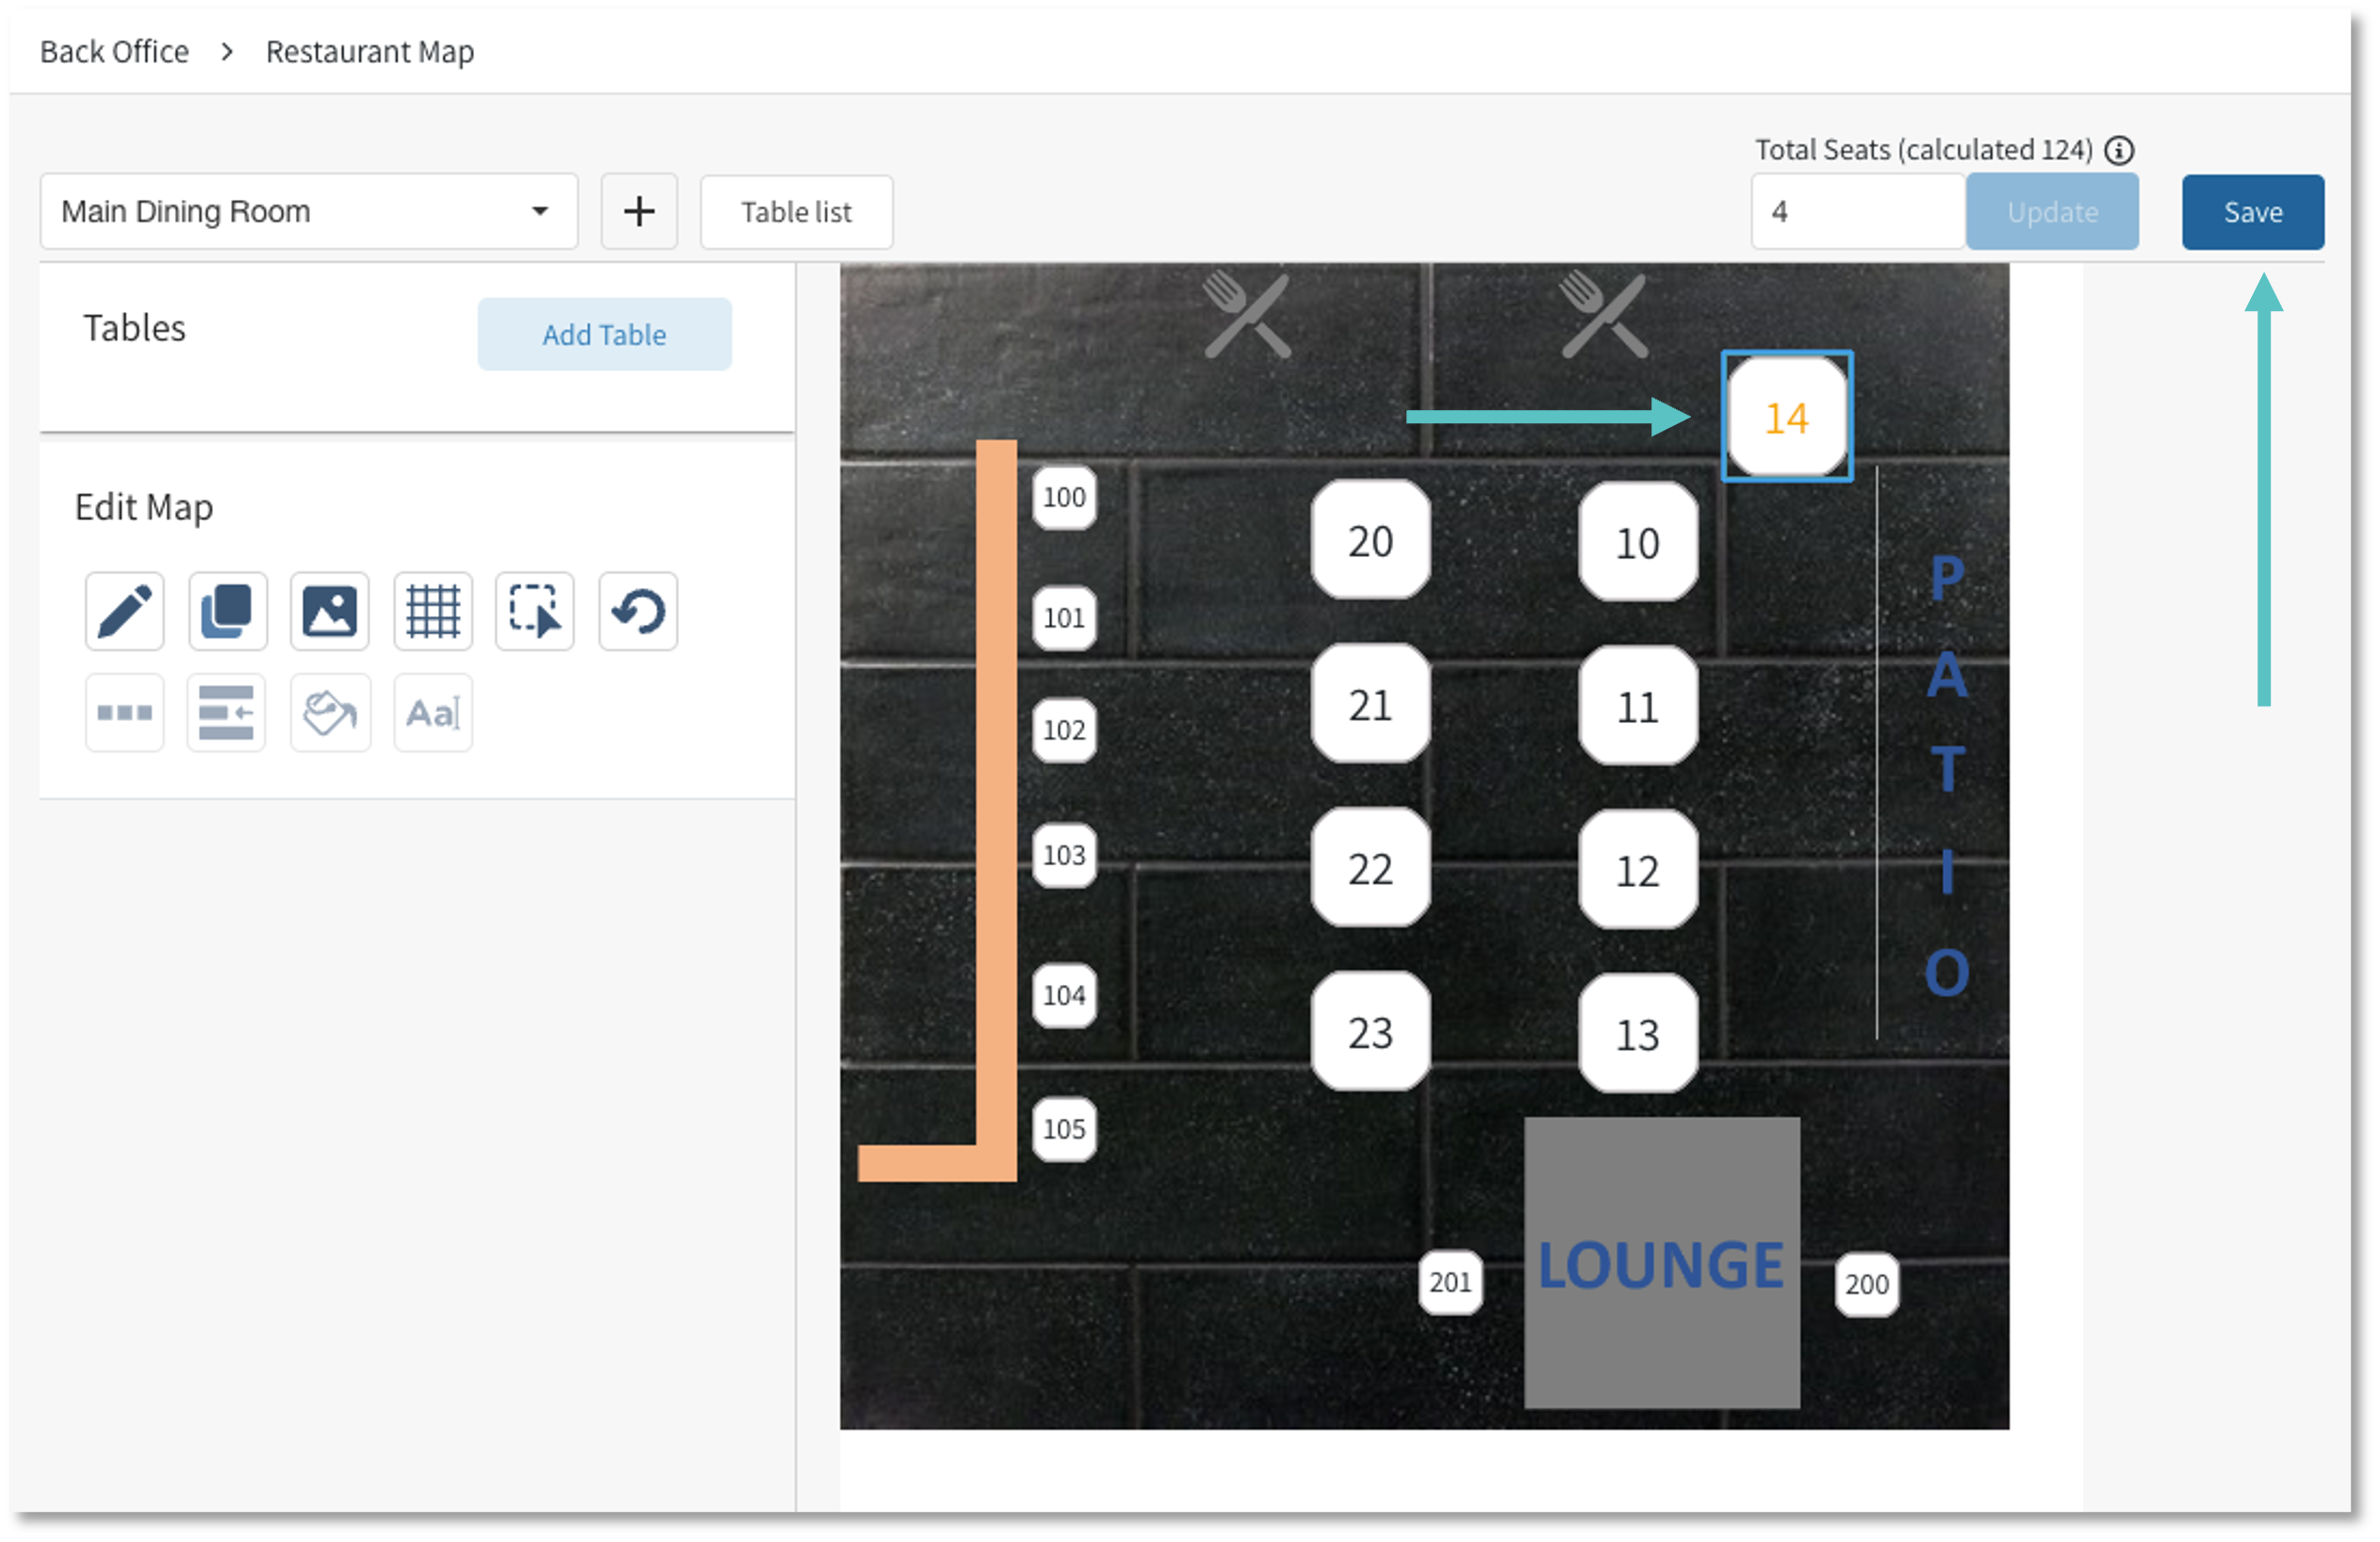
Drag the table to the desired location on the Map and then select Save in the top right corner of the screen
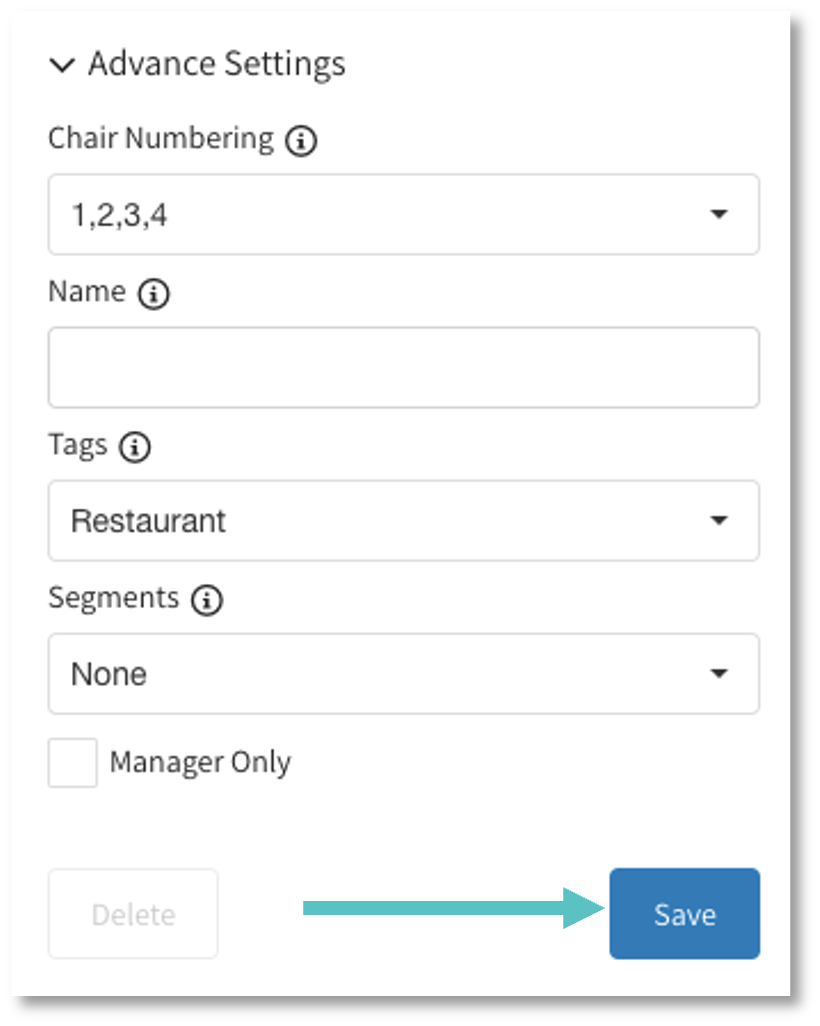
Advanced Settings
-
Chair Numbering
-
This is the Seat numbering system used at the site
-
-
Name
-
Displayed next to the table number in each order
-
Appears on Kitchen tickets and reports (acc. Configuration)
-
Can be used for multiple tables to be grouped together in reports
-
-
Tags
-
Maps the restaurant activity (e.g. sales, tips, cancellations, discounts) to be reflected in the reports
-
-
Segments
-
A permanent Tag that triggers the Promotion associated with each Order
-