Follow these steps to update Print Headers/Footers on a Guest receipt:
-
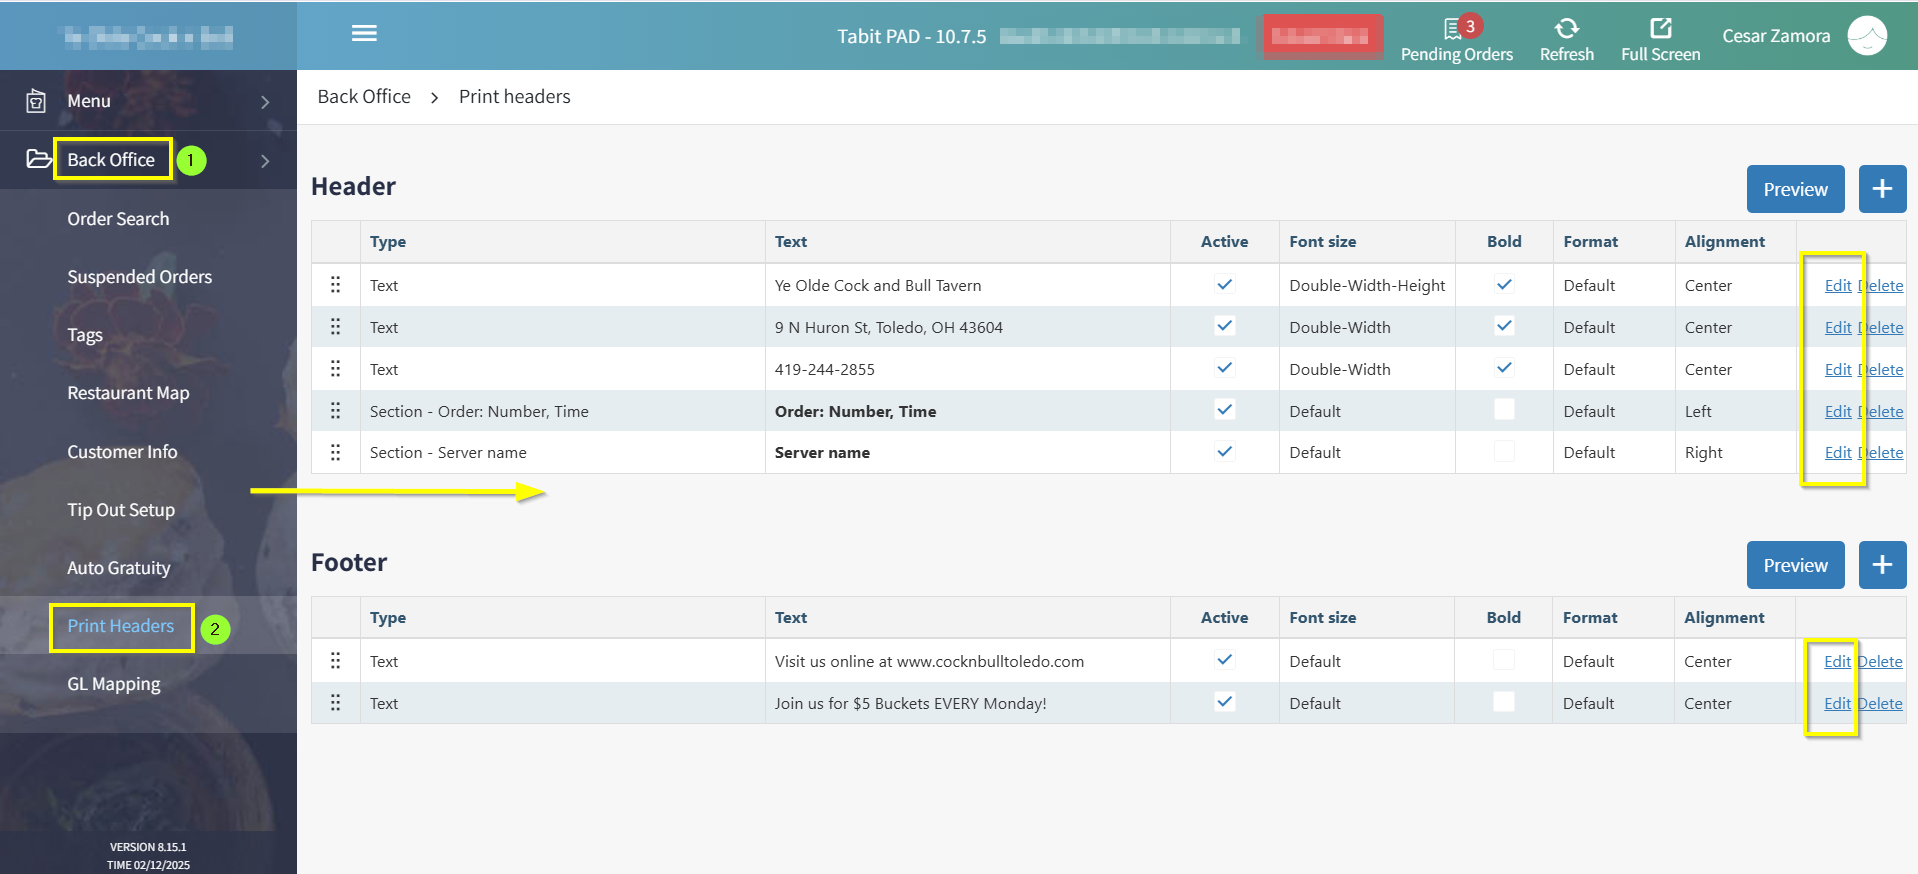
Login to Tabit Office with your manager credentials.
-
Go to Back Office → Print Headers
-
To add a new Header or Footer select the + Icon on the upper right of the section being updated
-
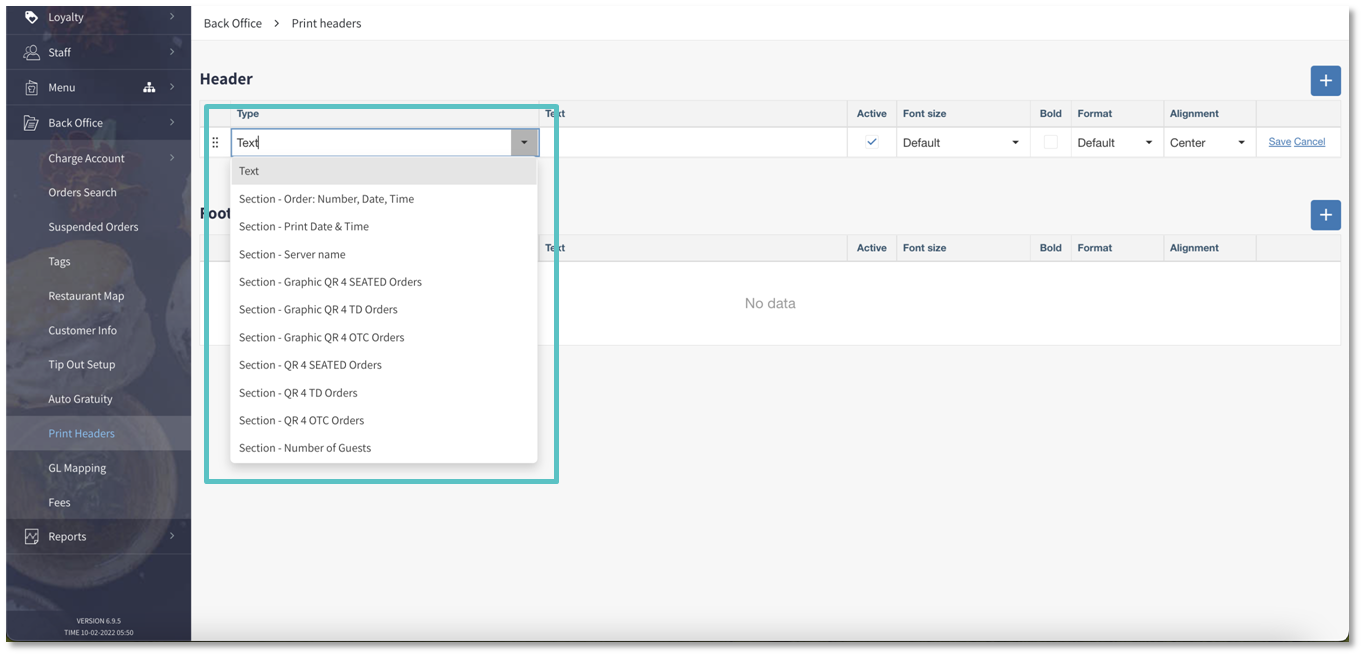
Select the desired option to display. There are several options to choose from under the Type dropdown menu:
-
Text: Free text option that allows for things such as name of the restaurant, address, phone number, thank you message, etc
⚡Best Practice: include the following three sections in every Header:
-
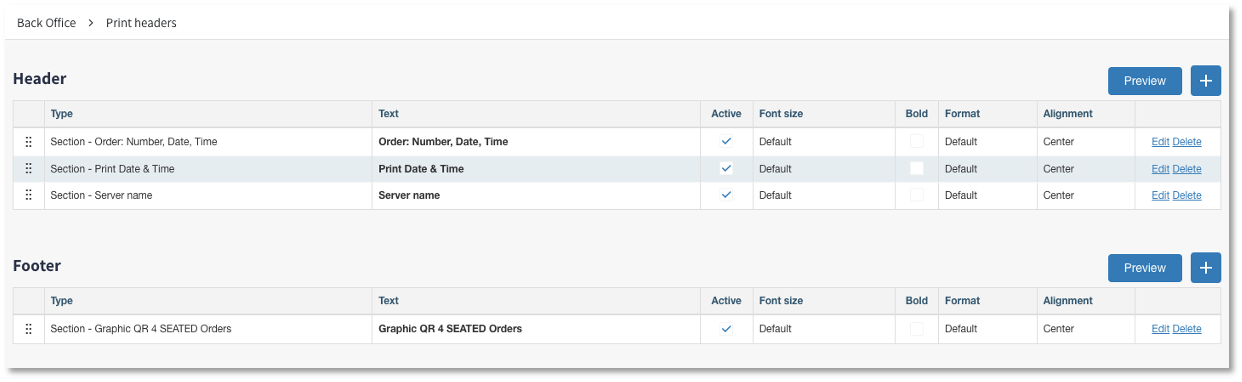
Section-Order: Number, Date, Time: Displays the Order Number, Date, and Time the Order was created (Header only)
-
Section-Print Date & Time: Date and Time the receipt was printed (Header only)
-
Section-Server Name: Name of the Server who owns the Order (Header only)
Additional Options
-
Section-Graphic QR 4 SEATED Orders: Not supported at this time
-
Section-Graphic QR 4 TD Orders: Not supported at this time
-
Section-Graphic QR 4 OTC Orders: Not supported at this time
-
Section-QR 4 SEATED Orders: Provides a QR Code for SEATED Orders that allows the Guest to pay on their phone (TabitPay must be active to use)
-
Section-QR 4 TD Orders: Provides a QR Code for TD (Takeaway & Delivery) Orders that allows the Guest to pay on their phone (TabitPay must be active to use)
-
Section-QR 4 OTC Orders: Provides a QR Code for OTC (Over the Counter) Orders that allows the Guest to pay on their phone (TabitPay must be active to use)
-
Section-Number of Guests: Displays the number of Guests that had active Orders at the table
-
Section-Tip Suggestion: 18,20,22,25% - Displays tip suggestions according to the pre-tax total of the Order (Footer only)
-
Section-Tip Suggestion: 18,20,22,25% w/Tax - Displays tip suggestions according to the post-tax total of the Order (Footer only)
-
Section-Room Pre-Charge Signature Slip: Displays the Room Number, Guest Name, Amount of the Bill, and lines for Additional Tip, Total, and Signature (only applicable for hotel environments) (Footer only)
-
-
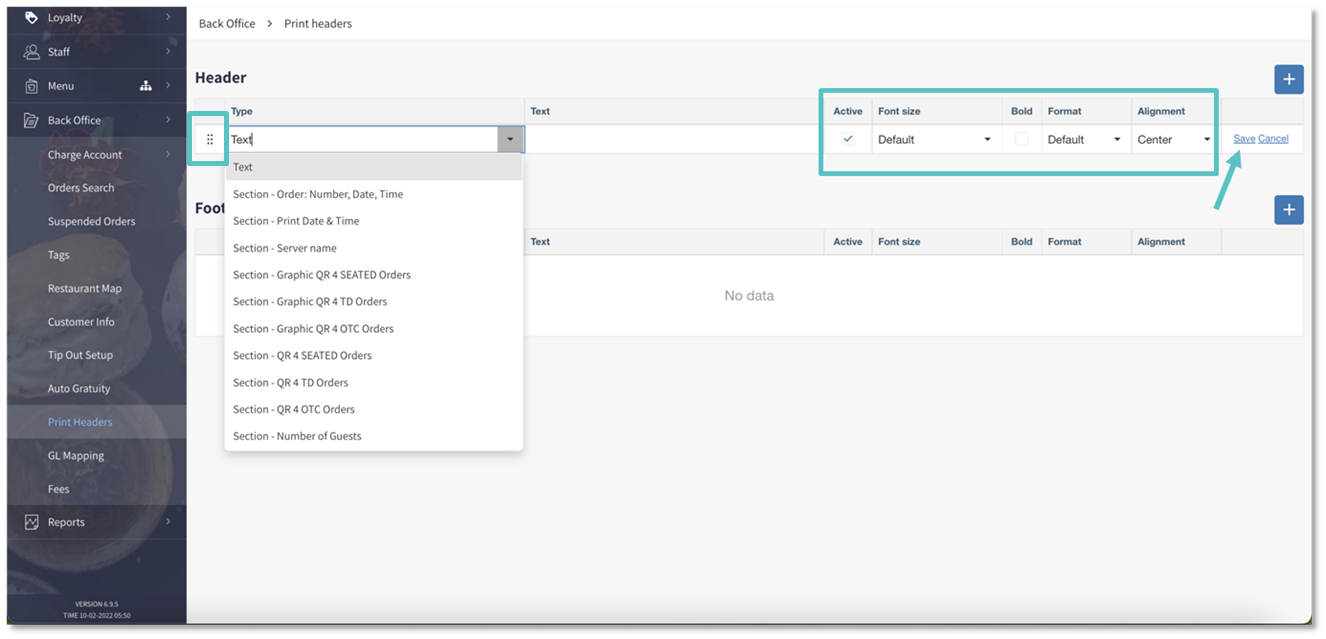
Once an option has been selected, five formatting options will appear to the right:
-
Active: Set the Header or Footer to Active or Inactive without deleting it
-
Font Size: Set the font size as Default, Double-Height, Double-Width, or Double-Width-Height
-
Bold: Display the information as Default or Bold font
-
Format: Format the information as Default, Underline, or Reverse
-
Alignment: Align the information to the Center, Left, or Right of the receipt
-
-
After selecting the type of Header or Footer and setting any formatting options desired, select Save
Once saved, the Headers or Footers can be rearranged in any desired Order by selecting and holding the six dots located to the left of each line
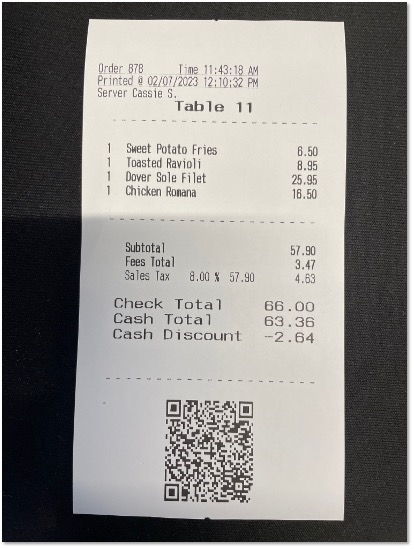
Example
The following Header and Footer setup in Office:
Will appear as below on the Check Preview on the PAD:
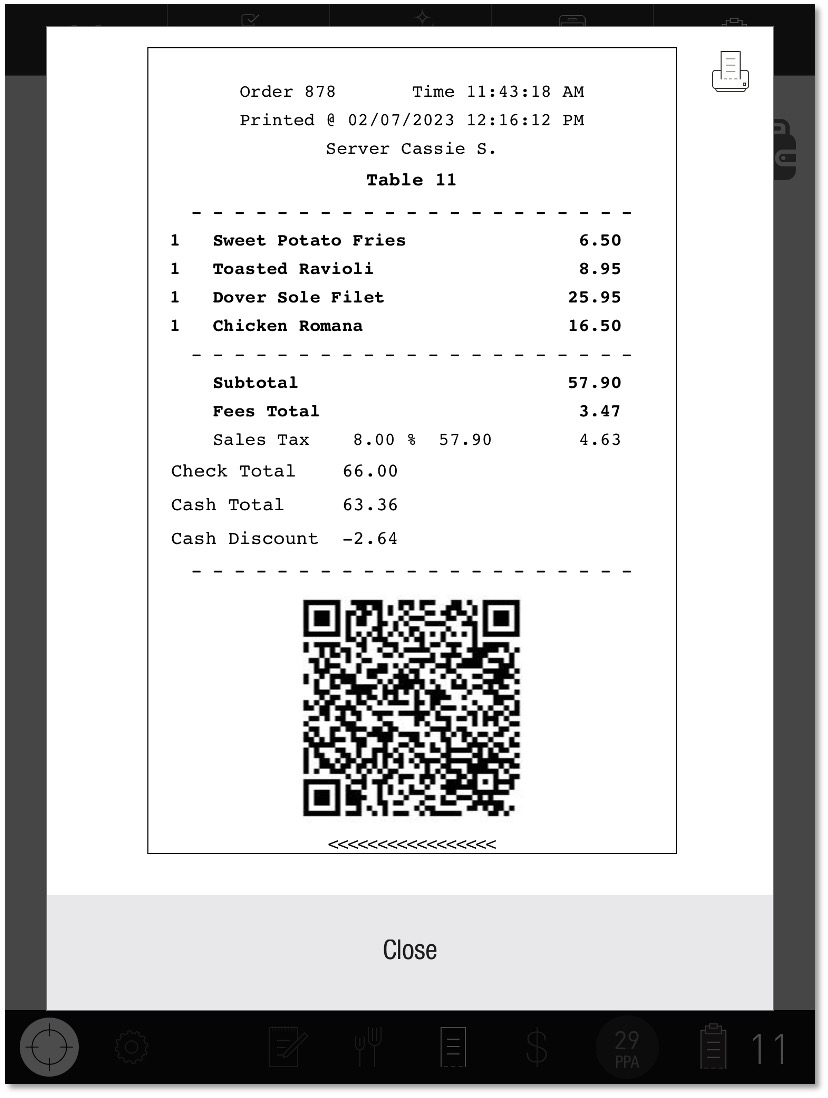
And as below on the physical printed Check