
Price Plans can be used to prepare a menu with price changes ahead of time. Multiple Price Plans can be made and published as needed. This enables you to publish only the required changes without publishing the full menu every time a change is made.
Price Plans are only available for single sites or HQs and their connected Sites working with Master Items
Learn how to create a Price Plan below:
Price Plans for Single Sites
-
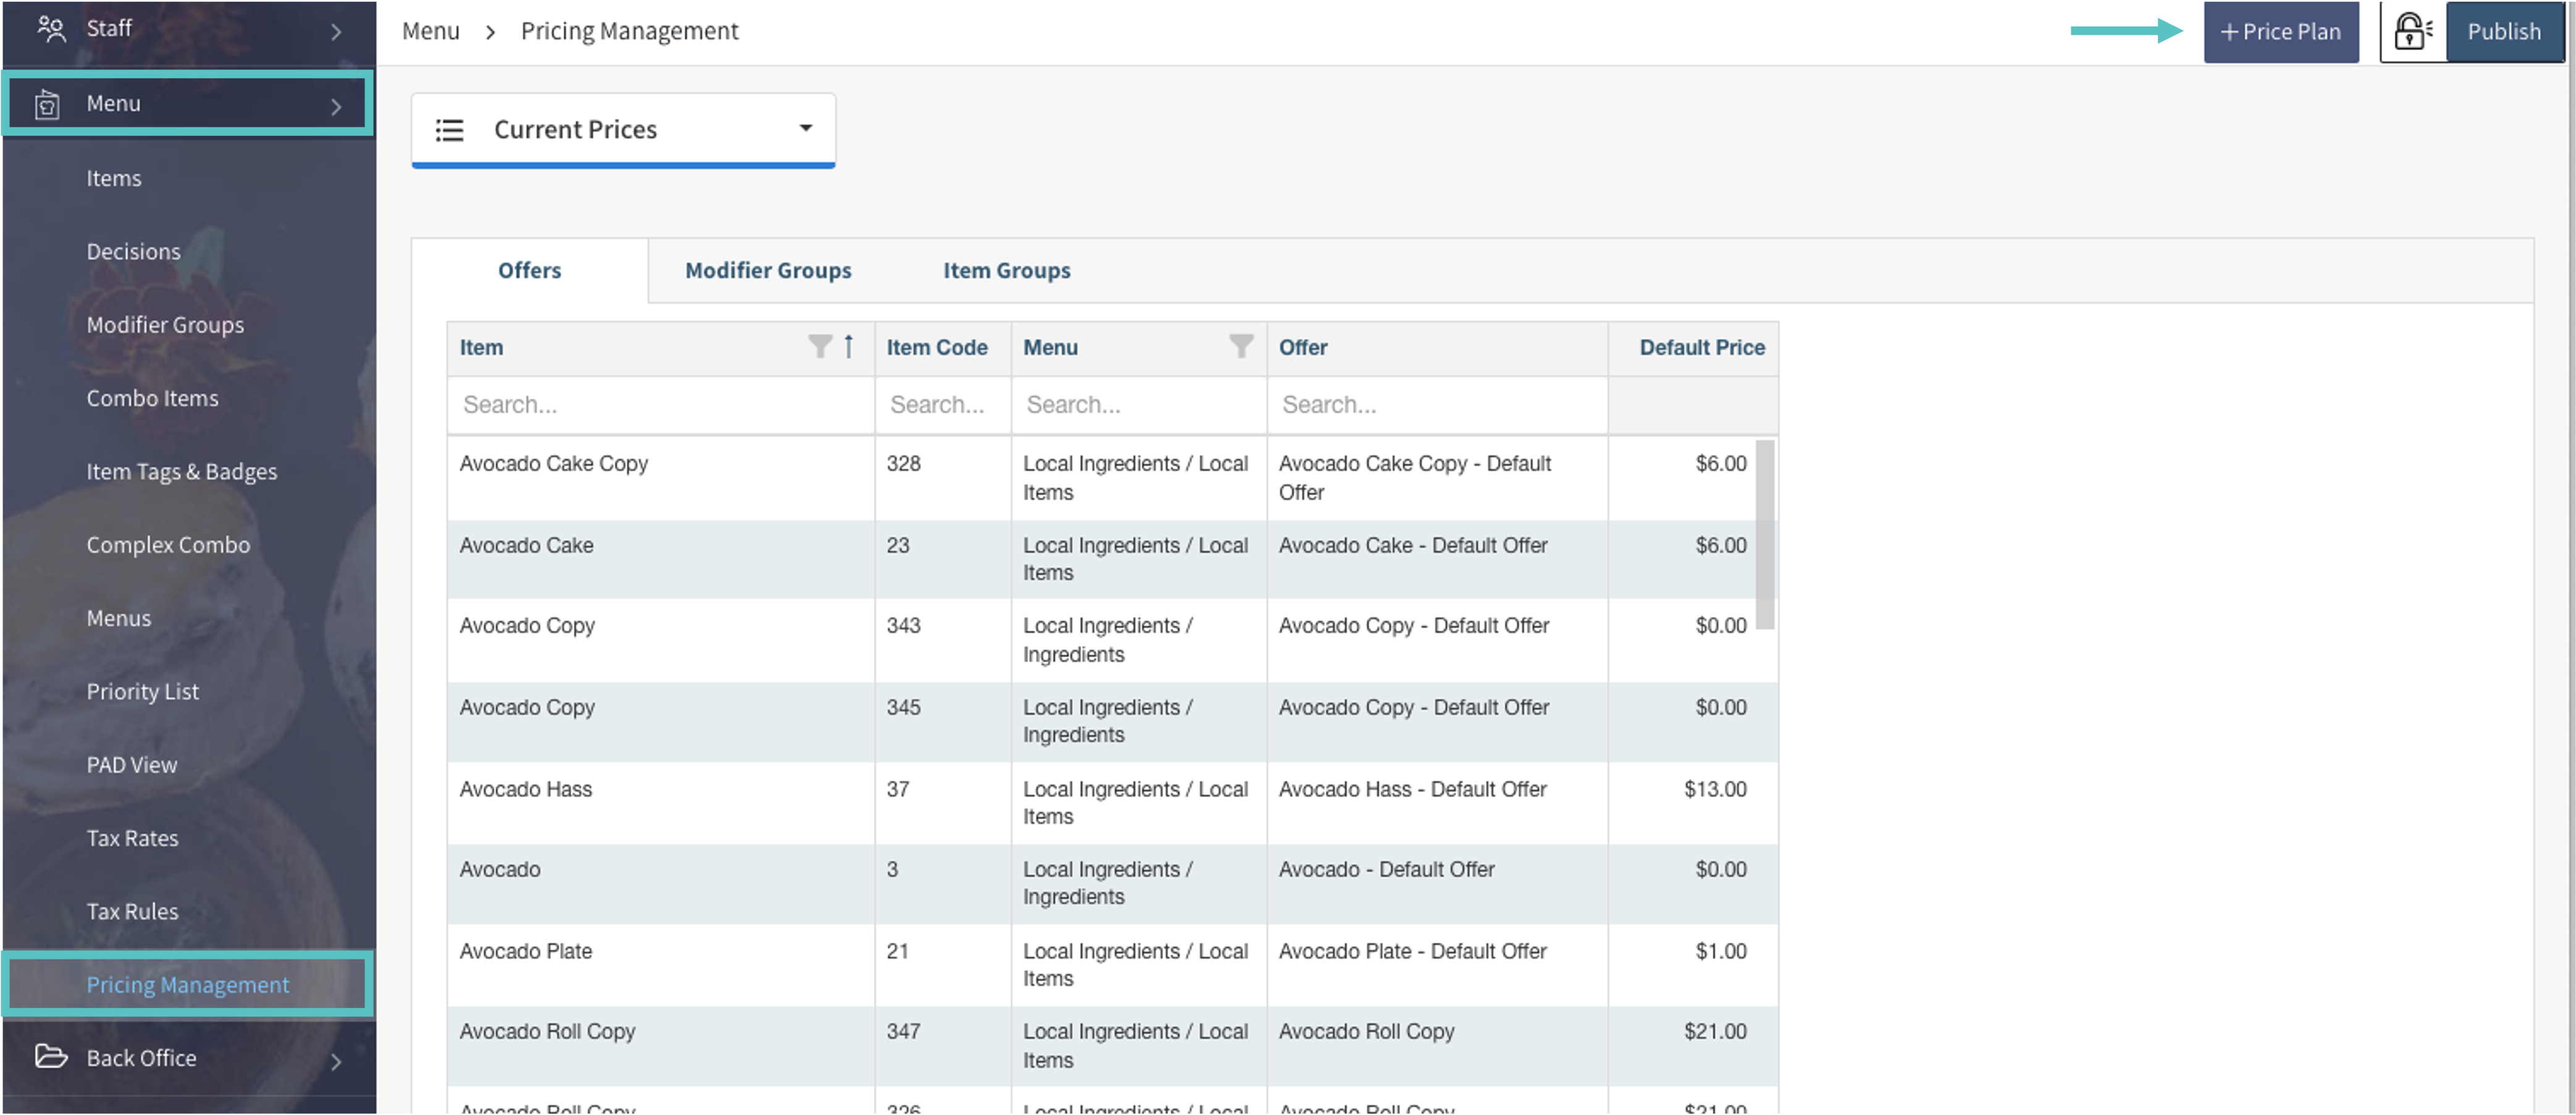
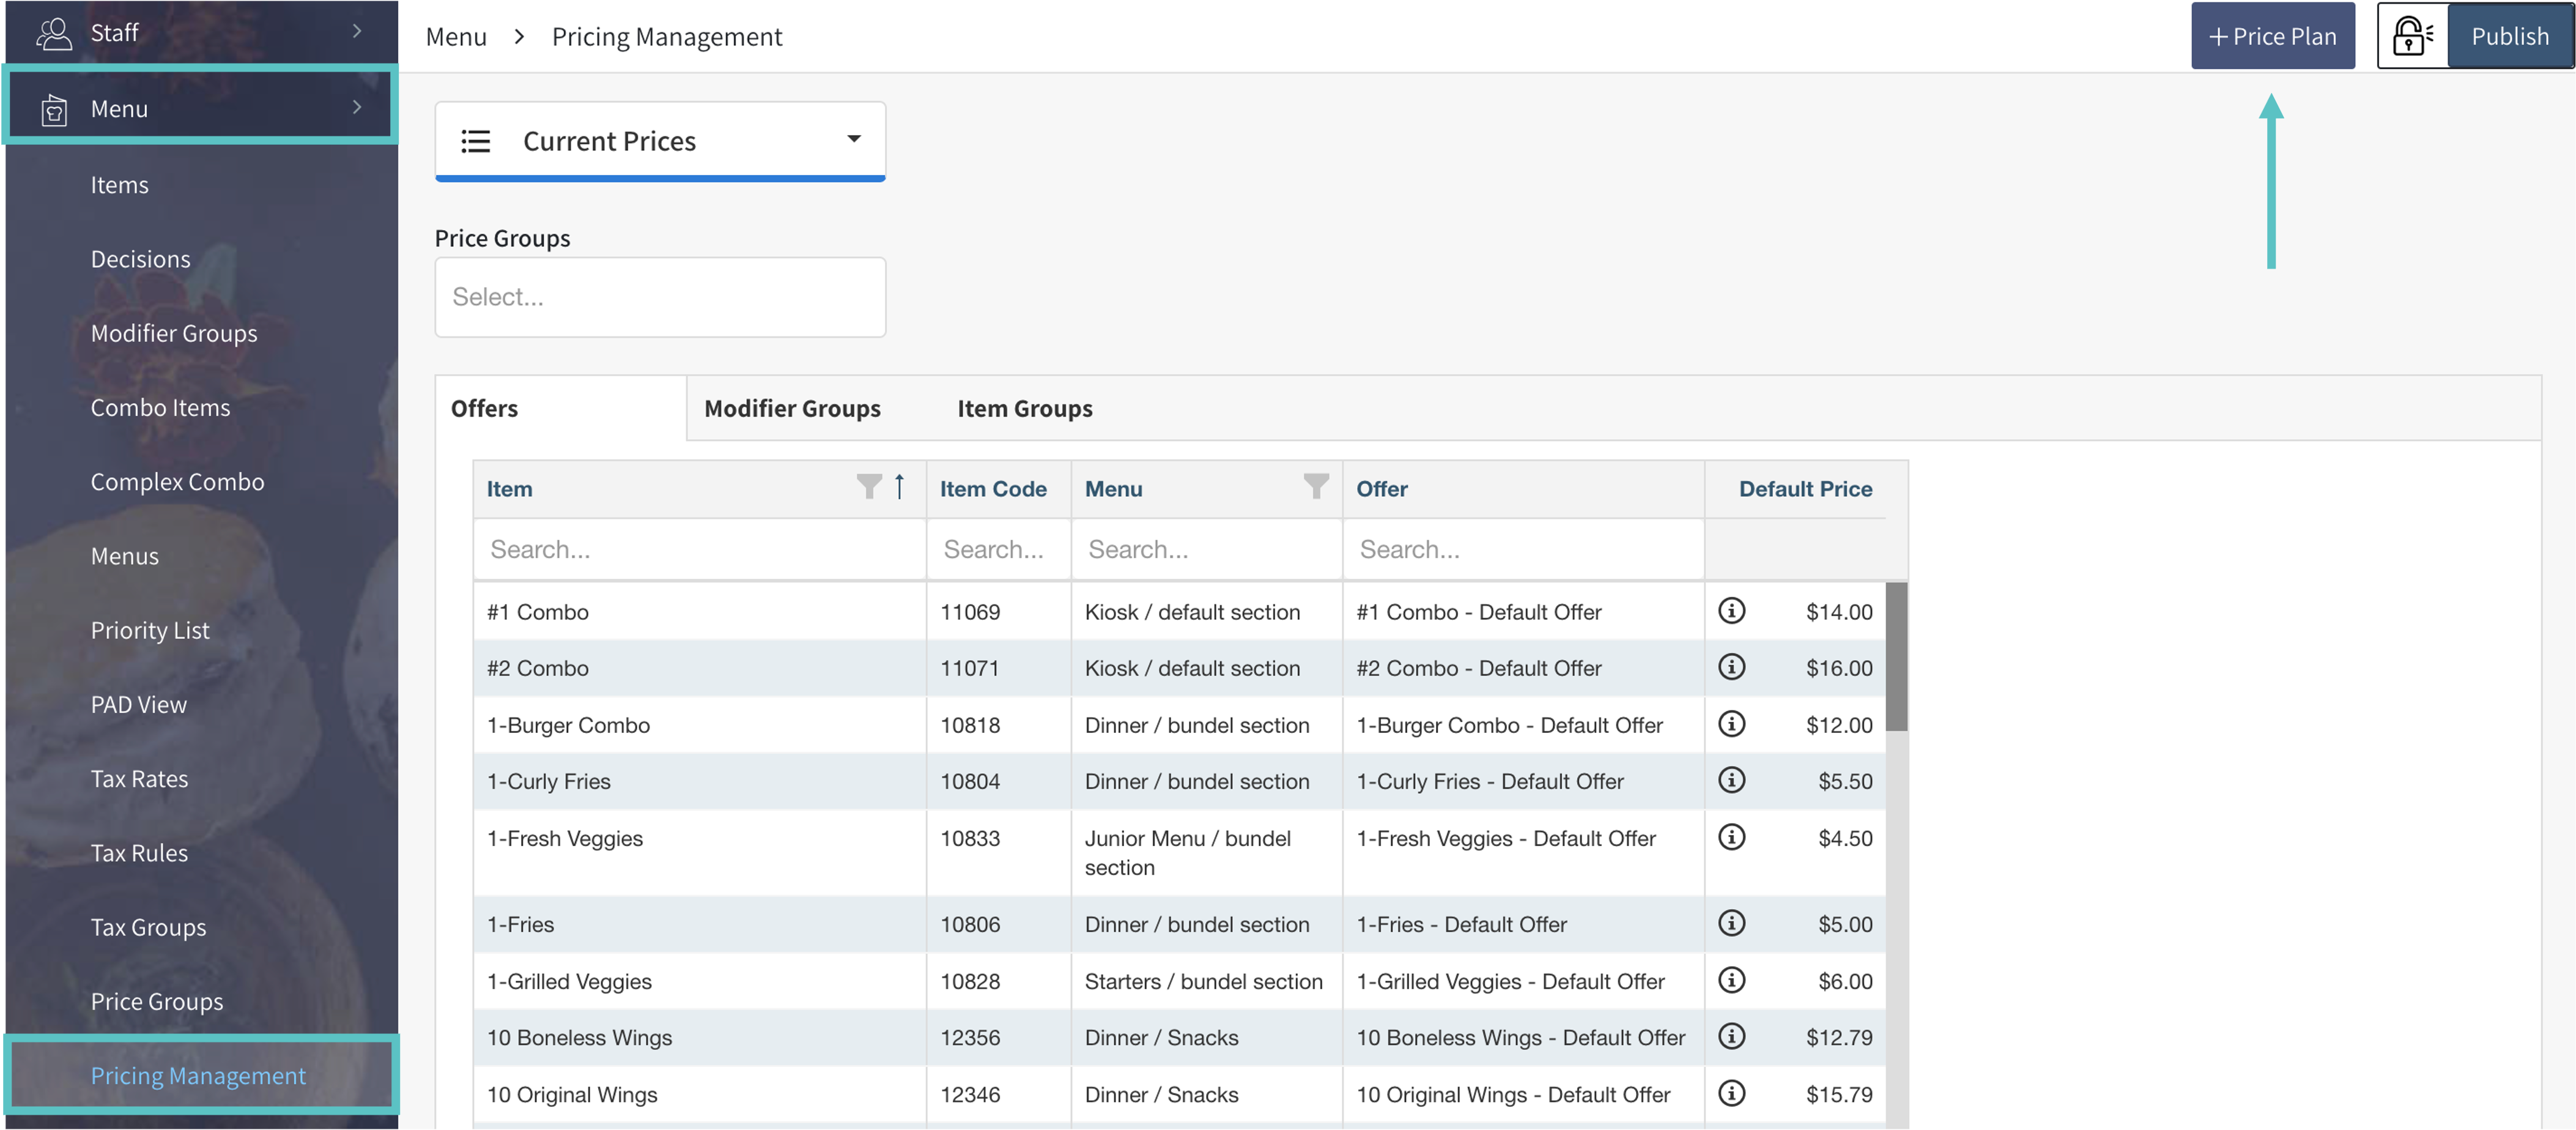
In Tabit Office, go to Menu > Pricing Management and select + Price Plan
-
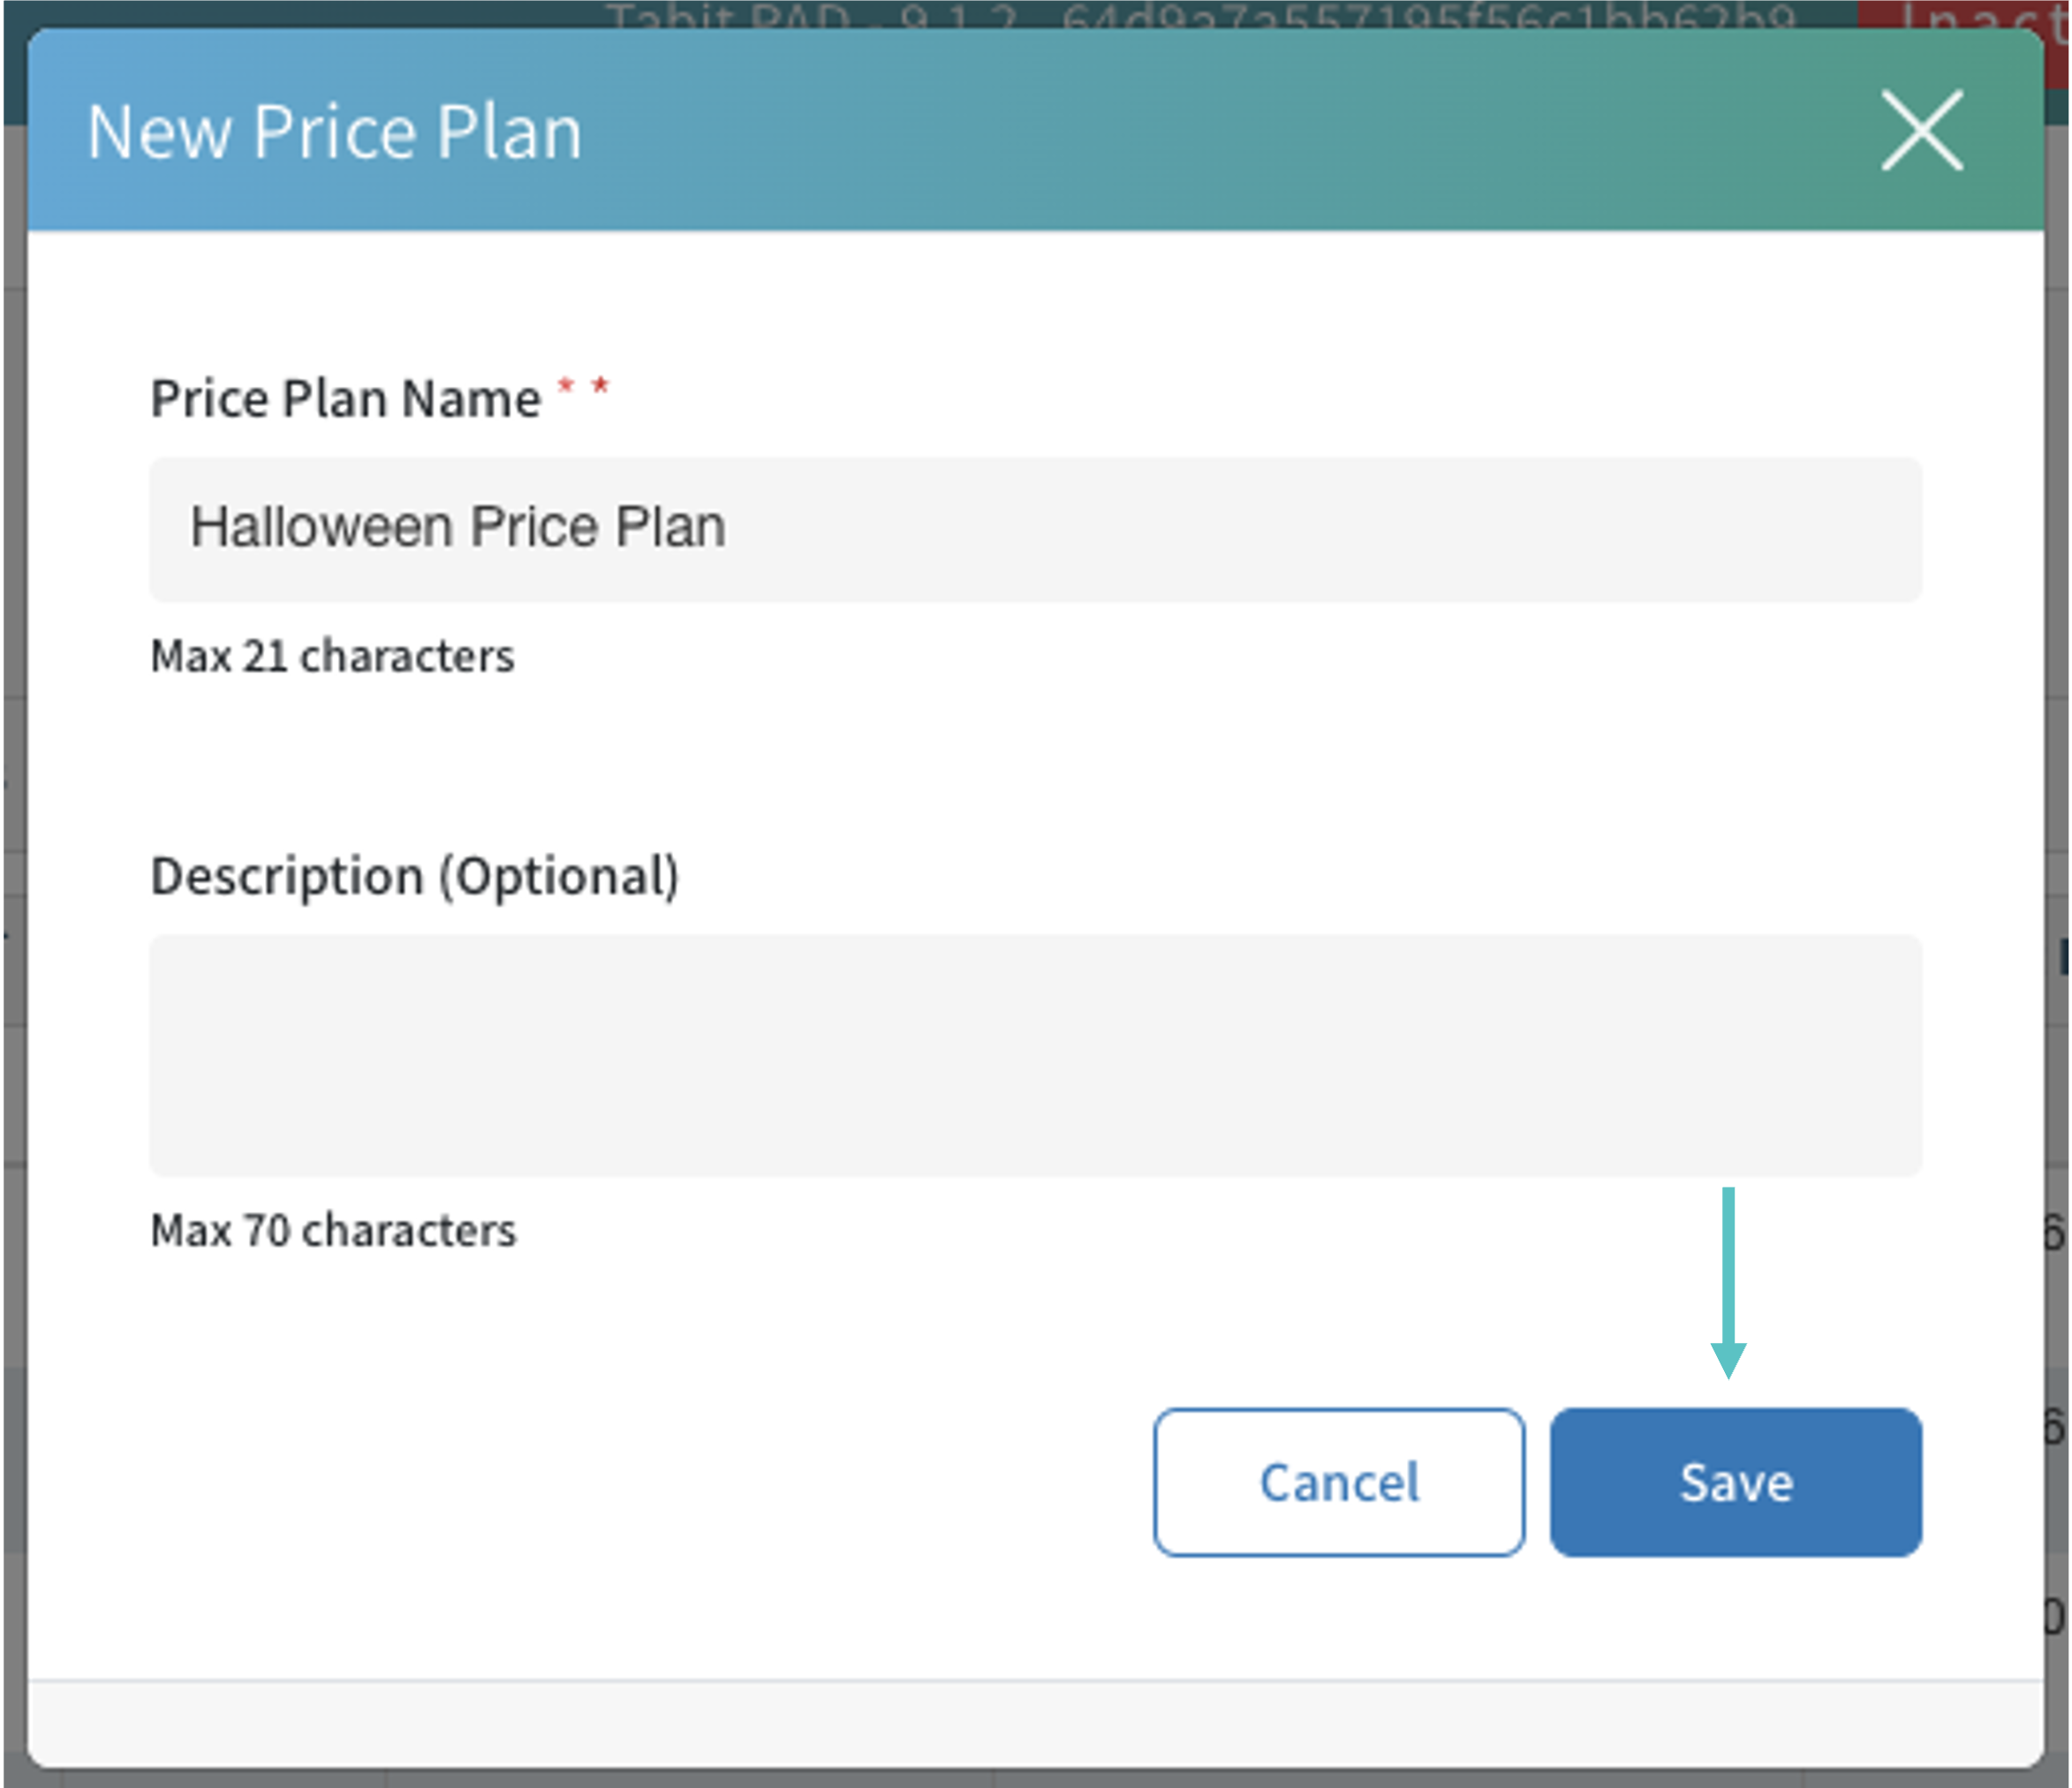
Enter a name and description for the Price Plan and then select Save
-
Each Item will appear with the following:
Item name
Item Code
Menu
Offer
Default Price: The current default price will appear as read only
-
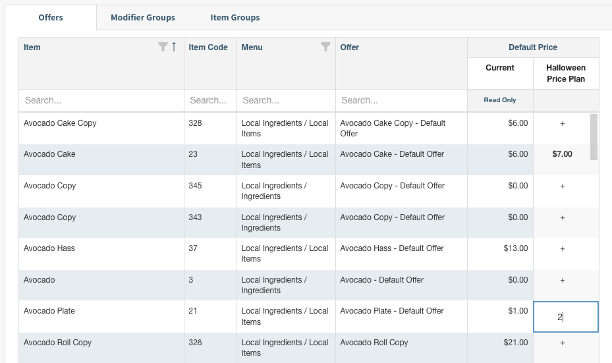
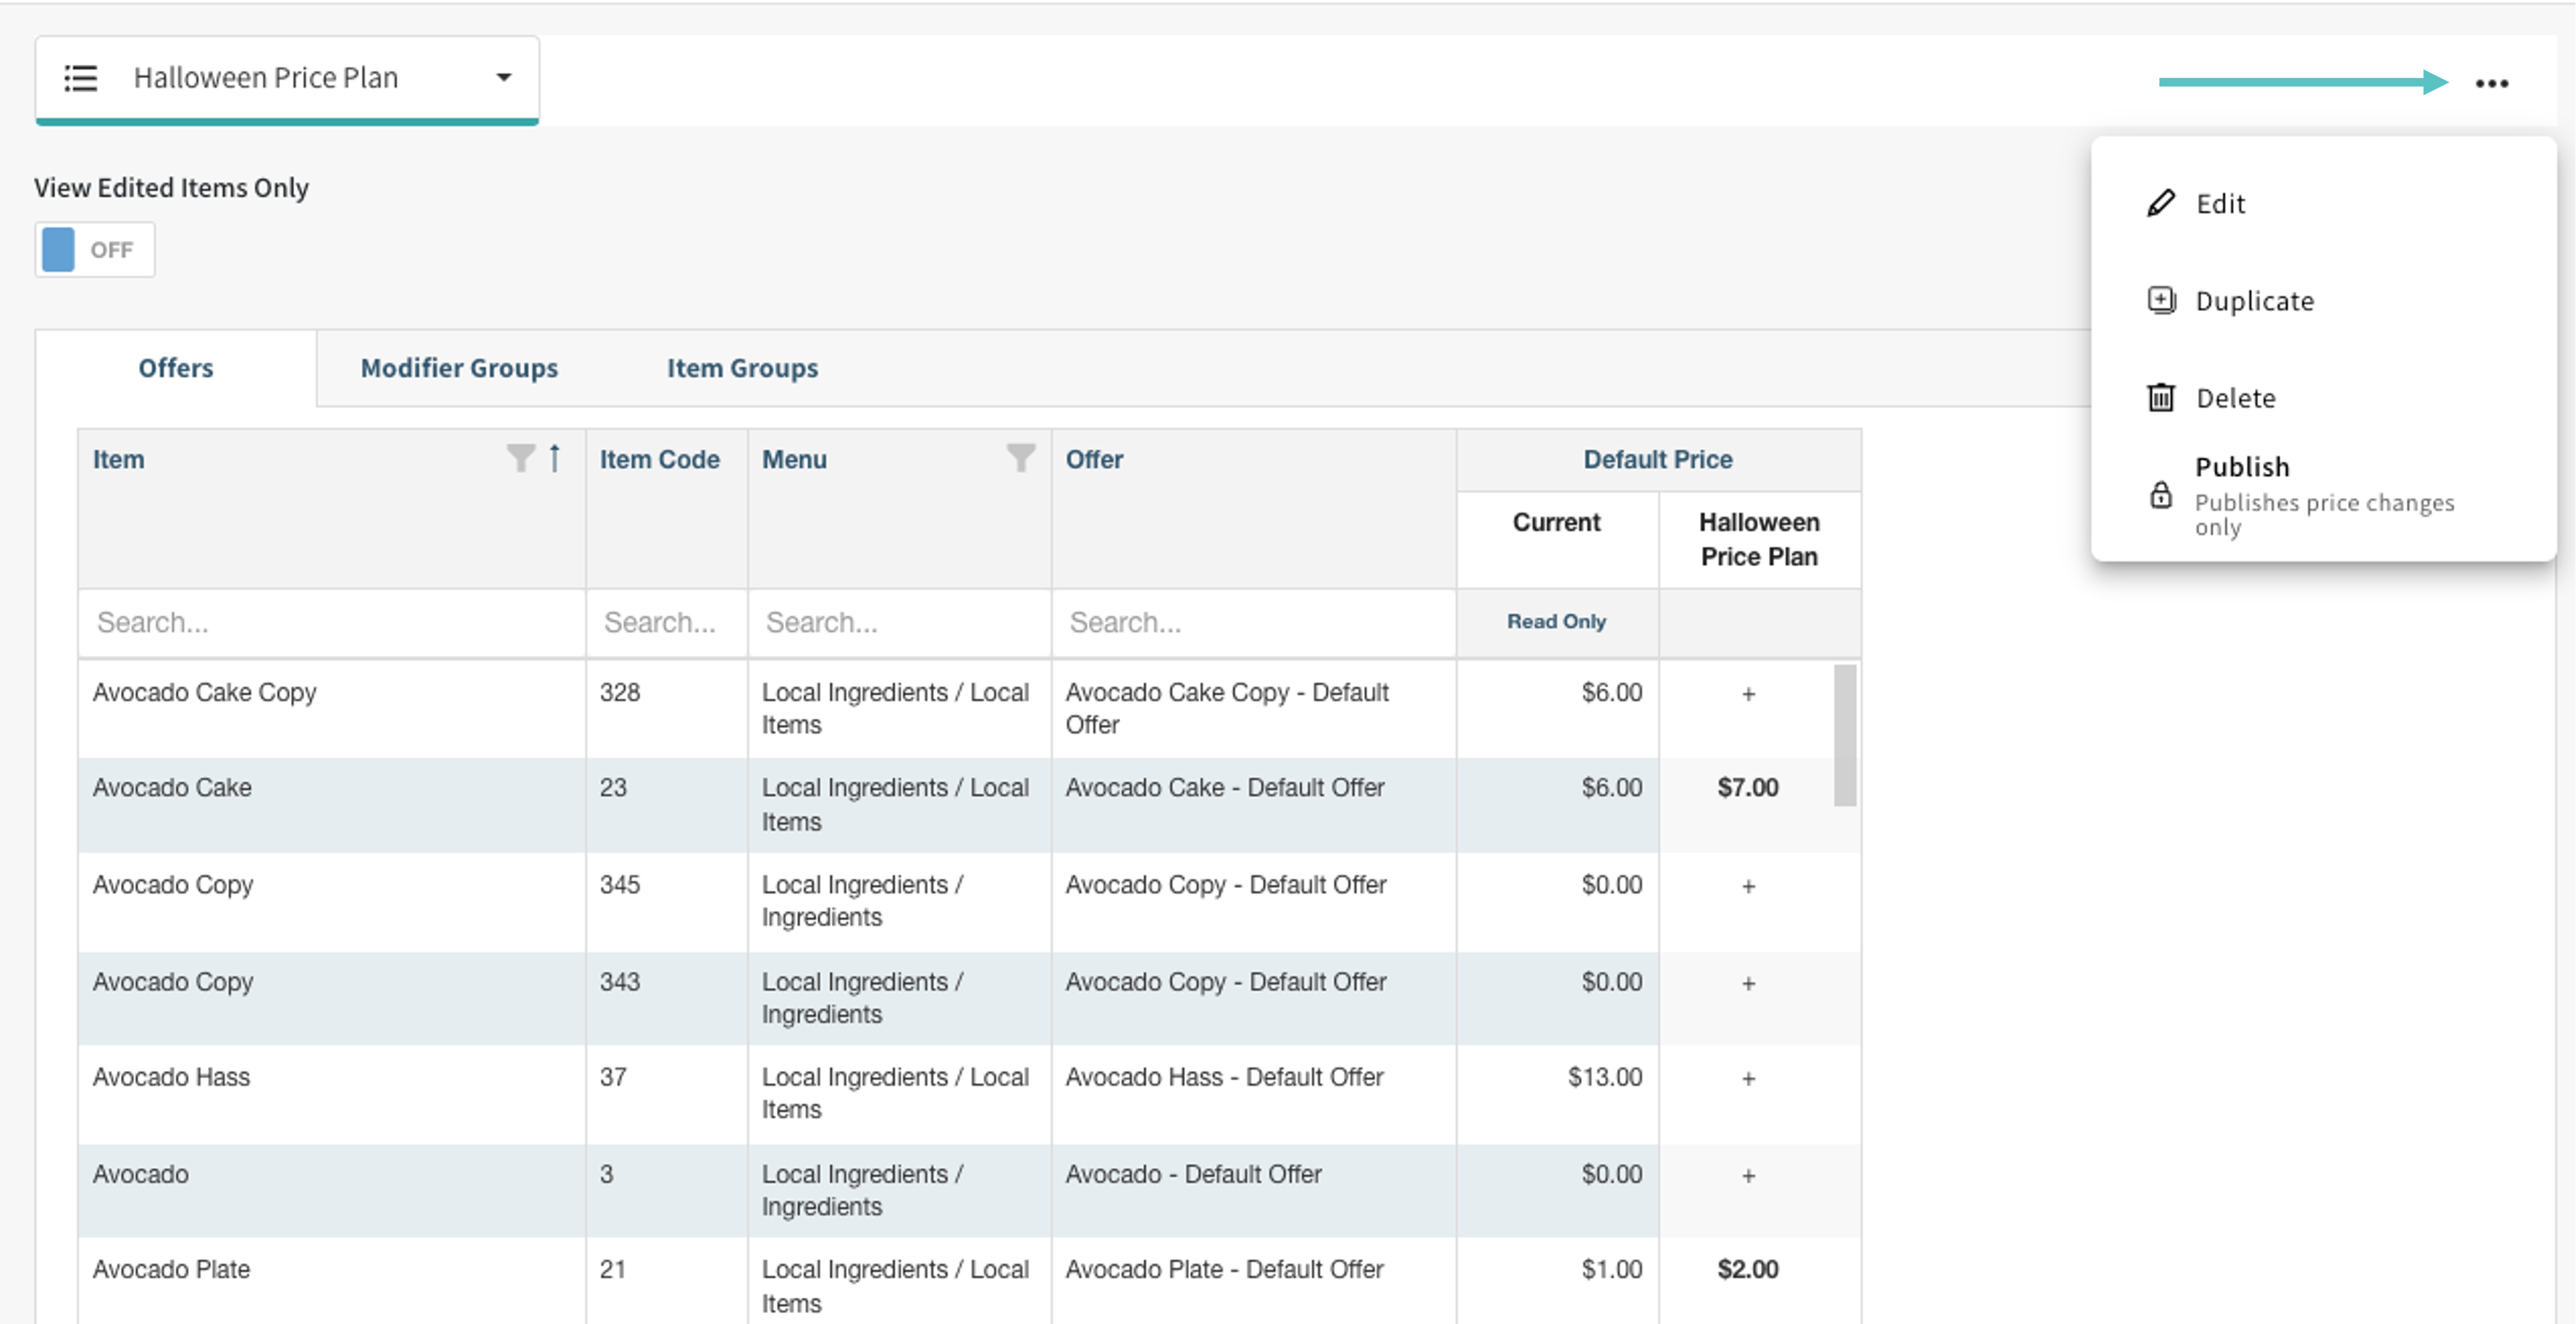
Select the + under the name of the Price Plan (here Halloween Price Plan) to change the price. To save time while editing, keyboard arrows can be used to navigate through the table
-
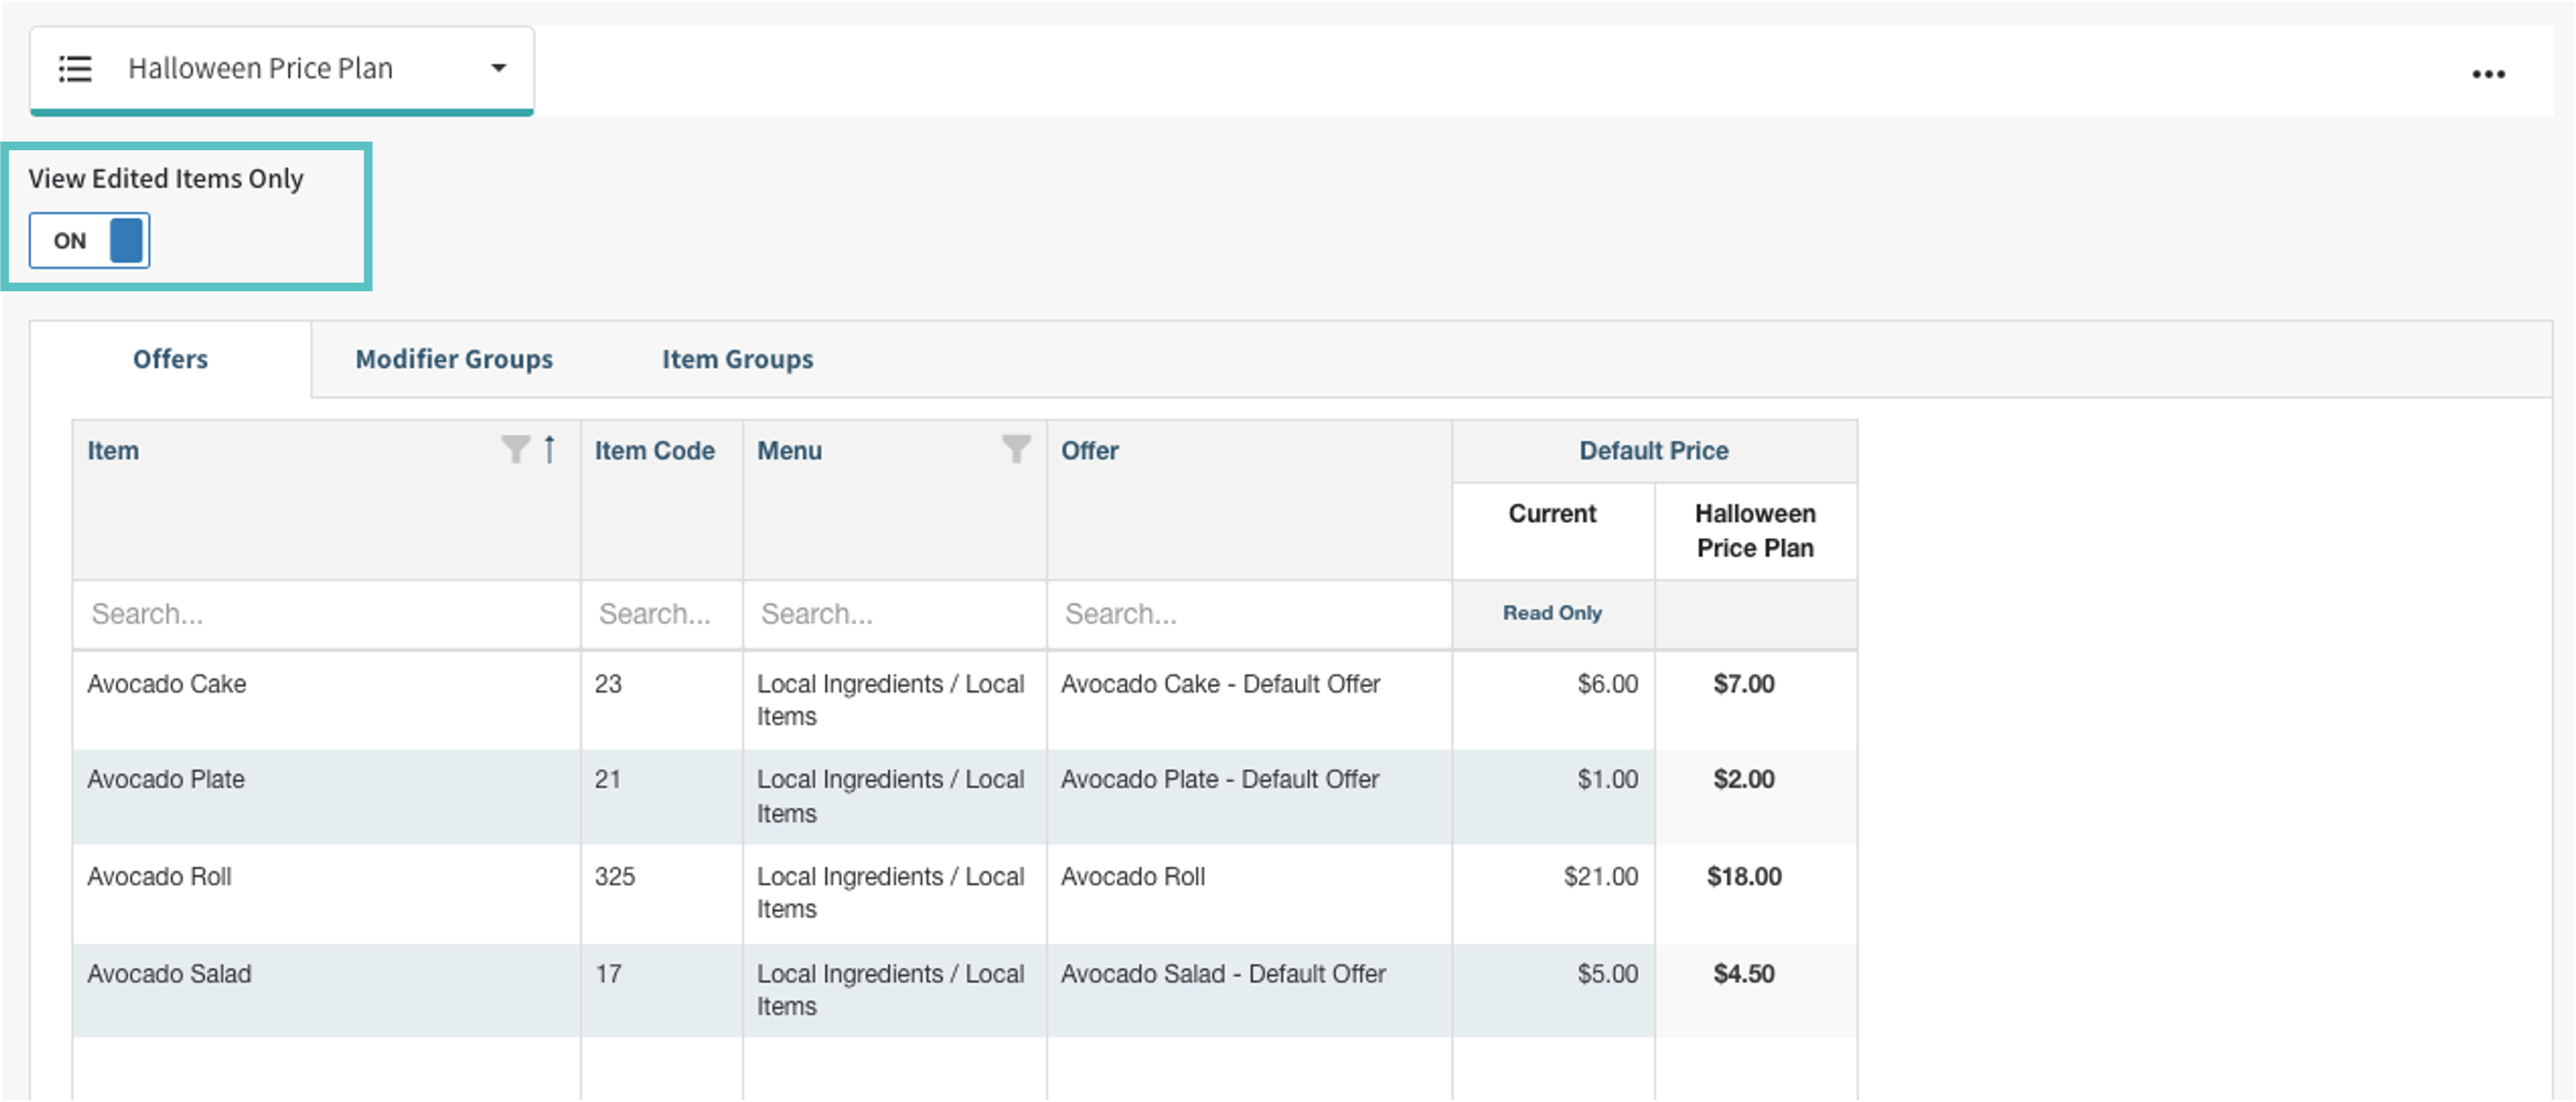
To see an overview at any time of the changes made so far, toggle View Edited Items Only to ON
-
Once all desired changes have been made, select the three dots in the top right of the screen
Edit: allows you to edit the Price Plan name and description
Duplicate: duplicates the current state of the Price Plan
Delete: deletes the Price Plan
Publish: publishes price changes only to all platforms
Now your Price Plan is ready to be used
Price Plans for HQ Sites
-
From the HQ Site, In Tabit Office, go to Menu > Pricing Management and select + Price Plan
-
Enter a name and description for the Price Plan and then select Save
-
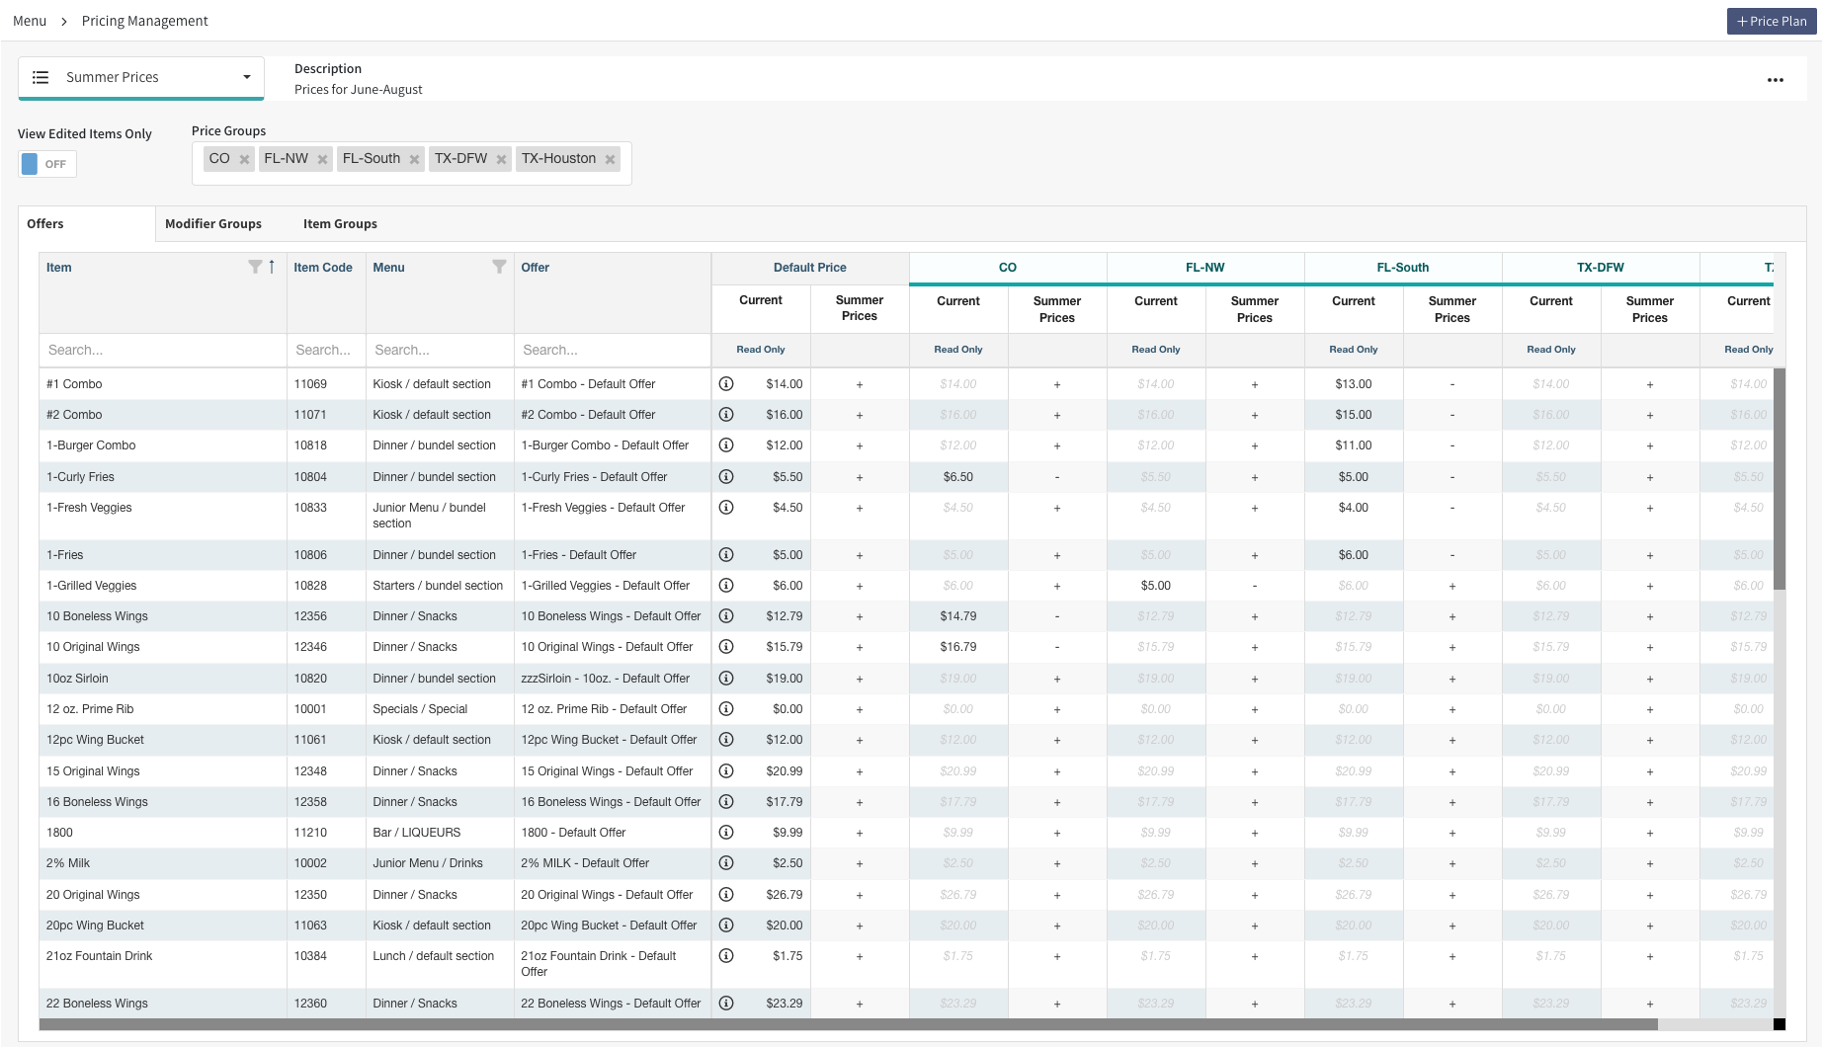
The Price Plan will open with all Price Groups added. If needed, certain Price Groups can be removed by selecting the X next to them
-
Each Item will appear with the following:
-
Item name
-
Item Code
-
Menu
-
Offer
-
Default Price: The current default price will appear as read only. If a different default price is required for the Price Plan it can be updated under the column next to it. Updating this column will change the default price across the board for all Price Groups for the duration of the Price Plan
-
Price by Price Group: Each Price Group will show the current price and the option to update the price
-
If any default prices are changed at any point, all Price Plans will update their Current prices accordingly
-
Select the + under the name of the Price Plan (here Summer Prices) to change the price for a specific Price Group or the default price. To save time while editing, keyboard arrows can be used to navigate through the table
-
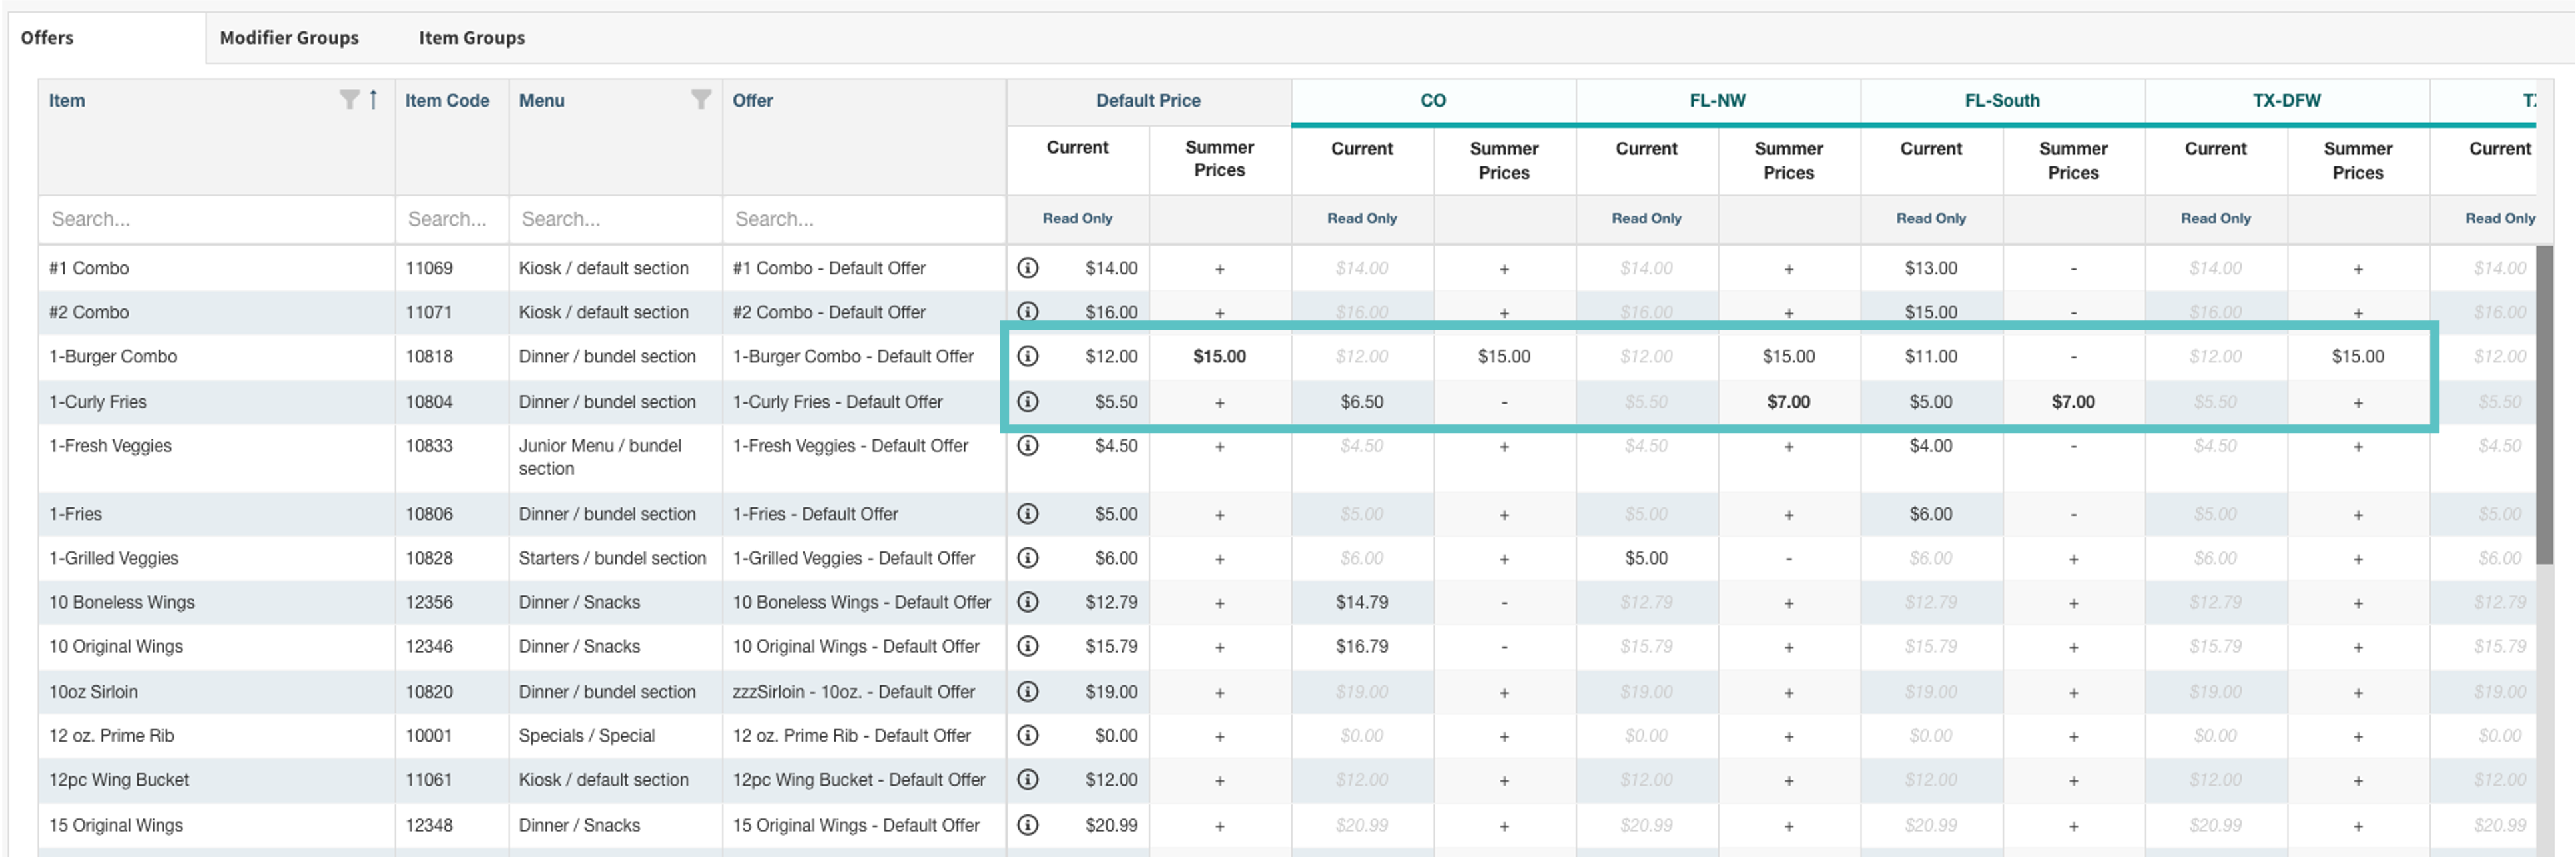
If a Price Group does not use the default price for an Item, changing the default for the Price Plan will not change its price, as seen for 1-Burger Combo in FL-South below
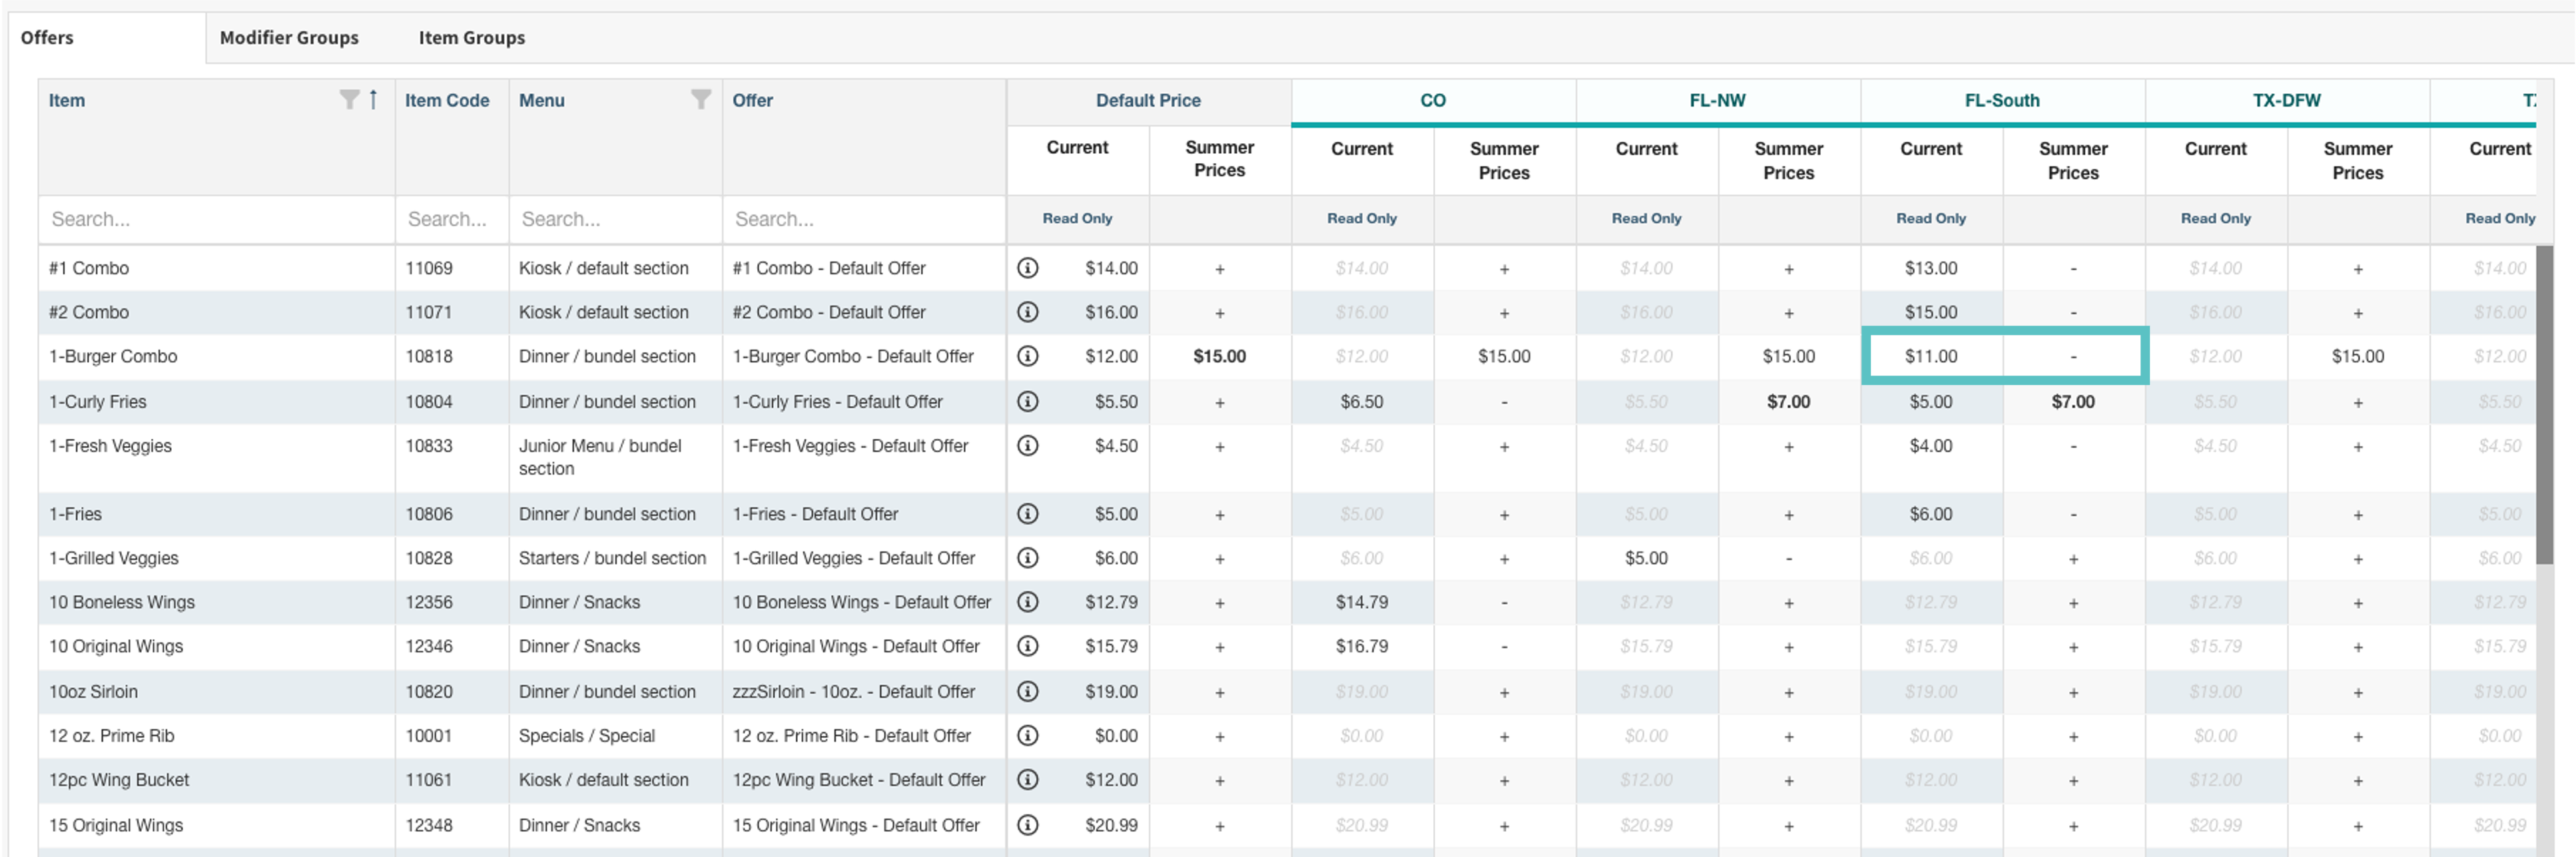
-
To see an overview at any time of the changes made so far, toggle View Edited Items Only to ON
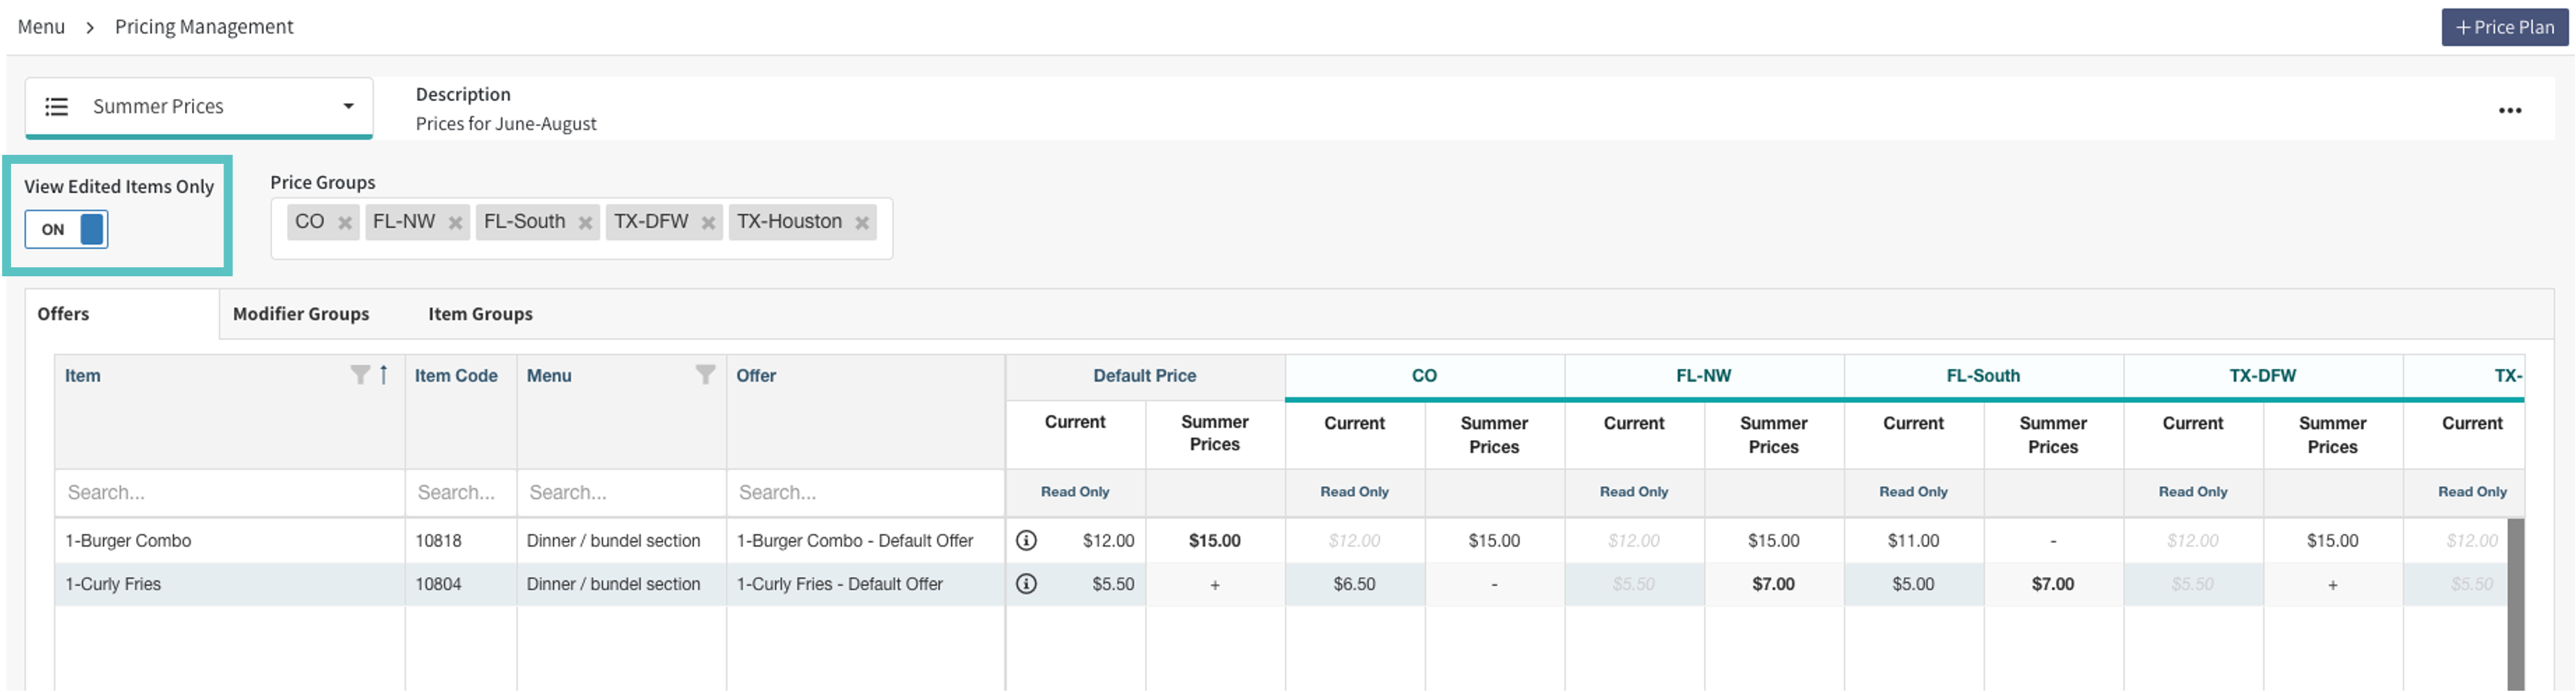
-
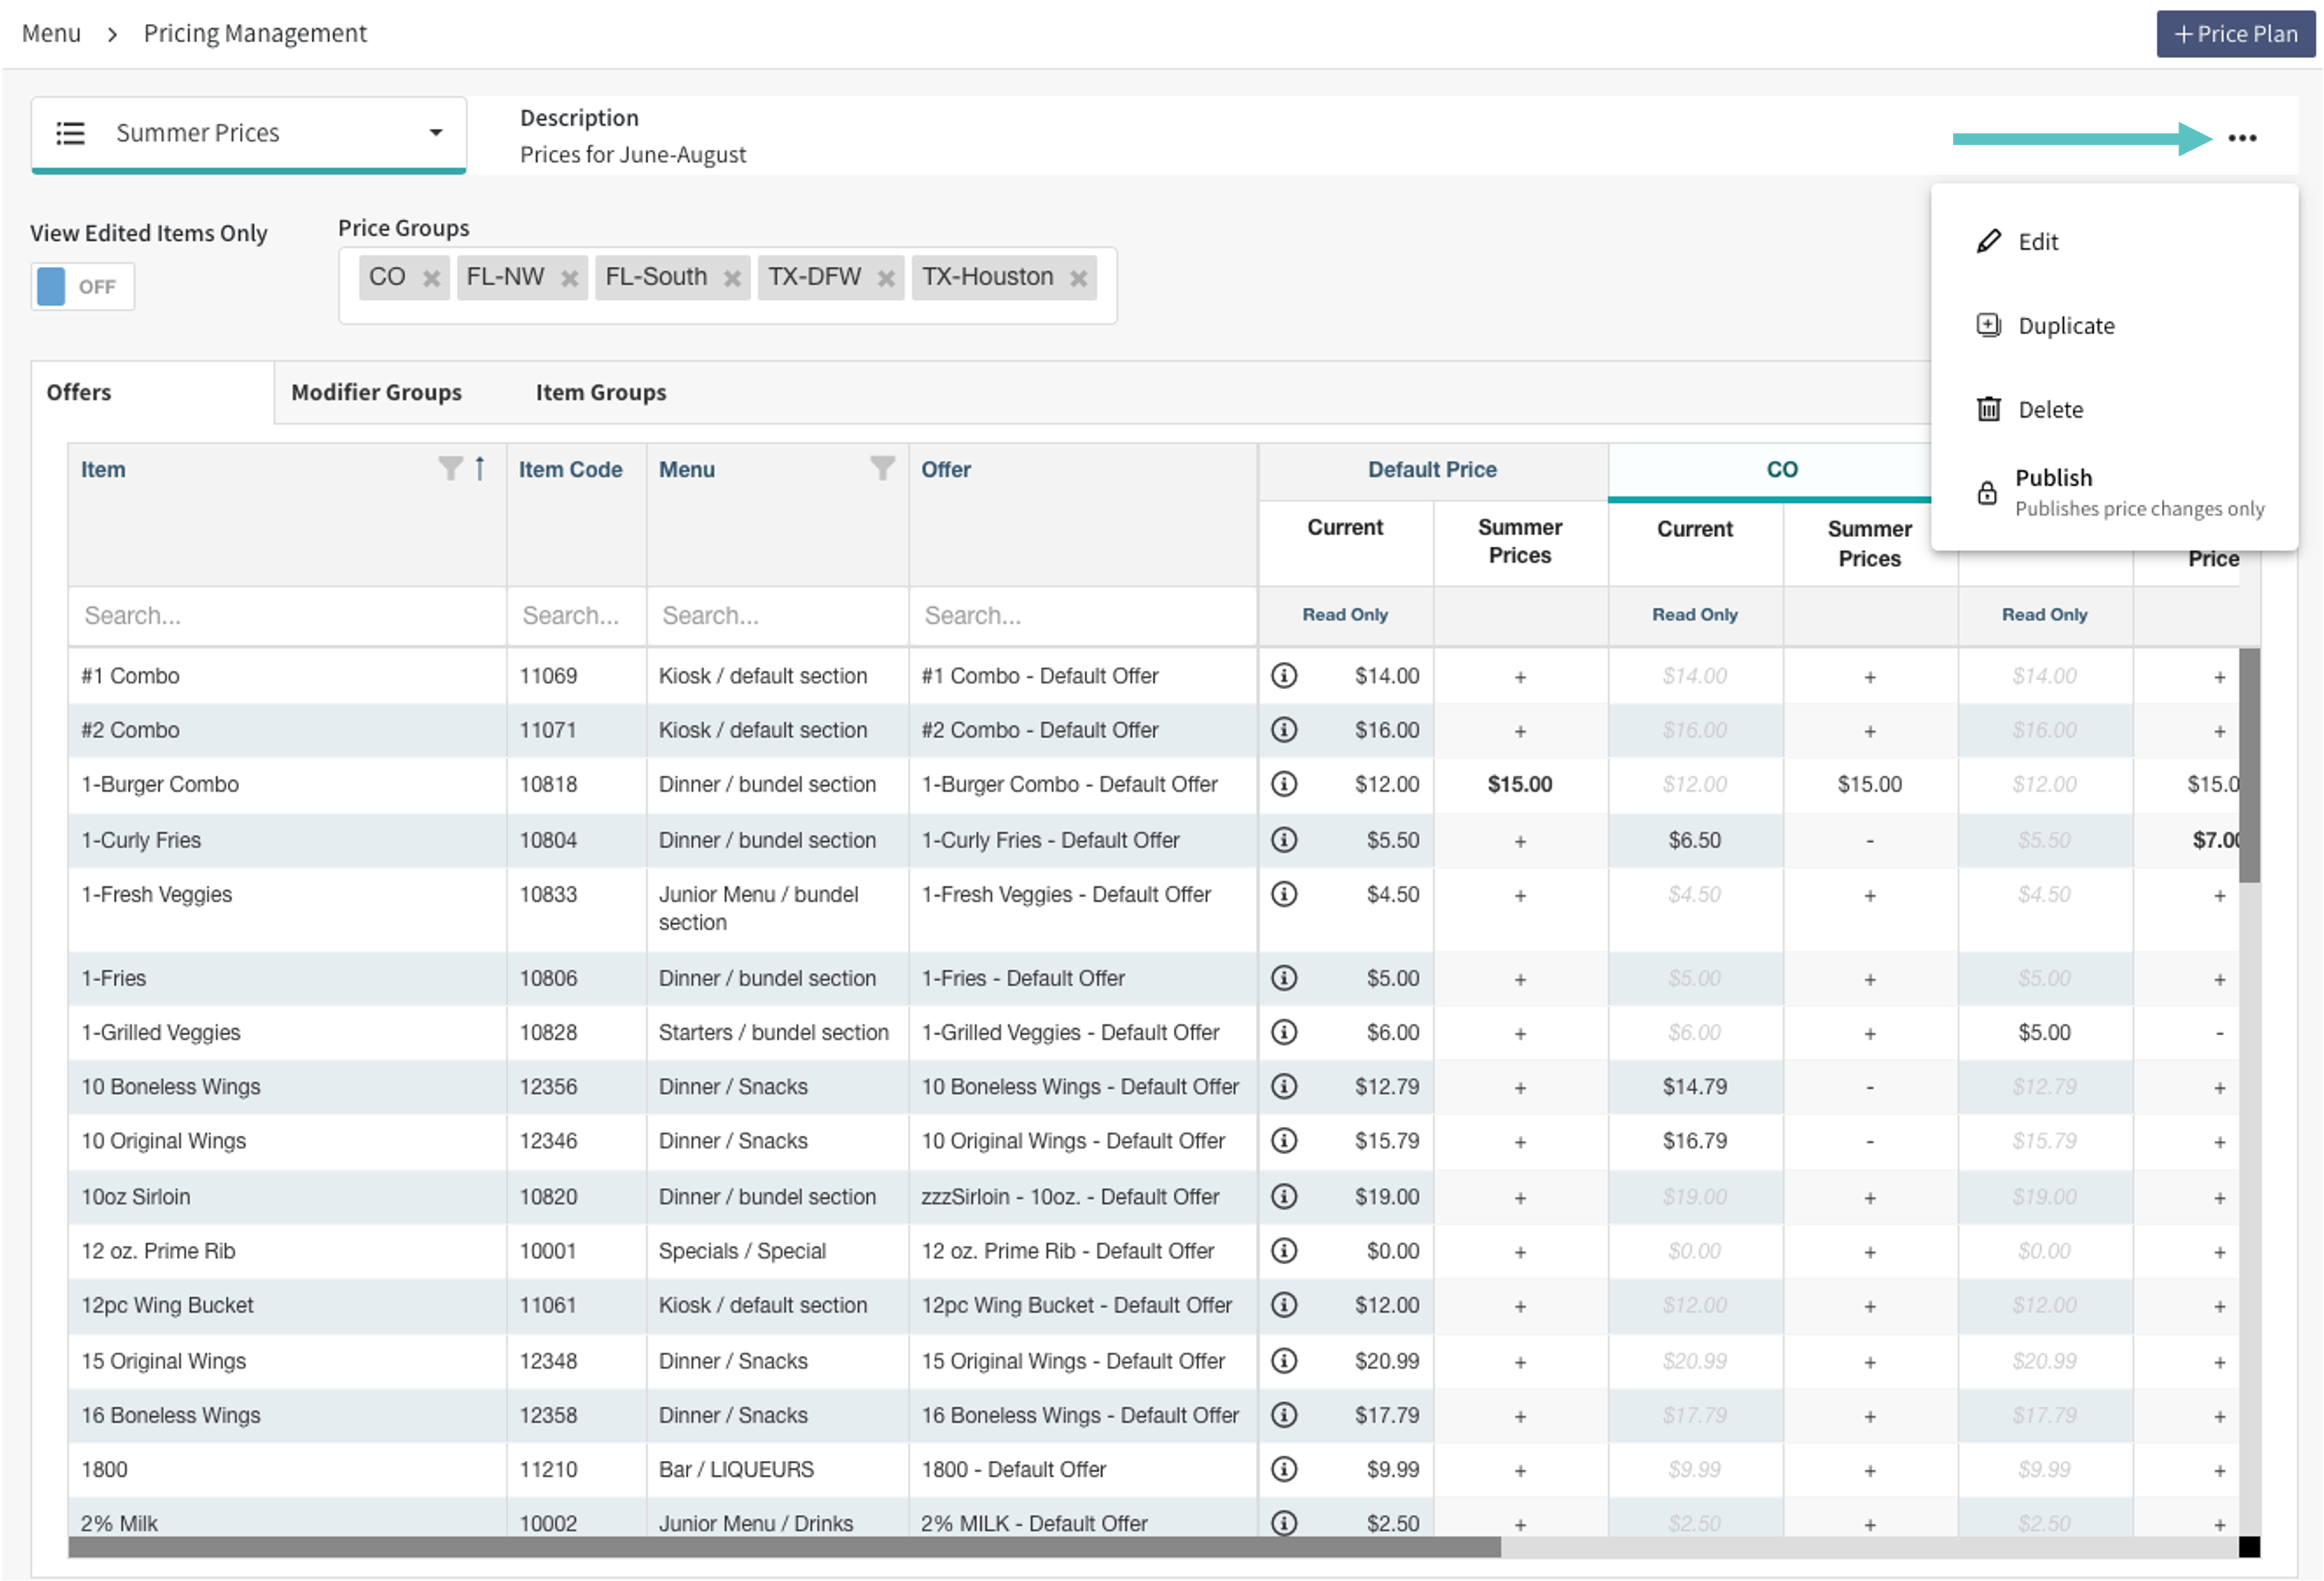
Once all desired changes have been made, select the three dots in the top right of the screen
-
Edit: allows you to edit the Price Plan name and description
-
Duplicate: duplicates the current state of the Price Plan
-
Delete: deletes the Price Plan
-
Publish: publishes price changes only to all platforms
Now your Price Plan is ready to be used
-