What are Tags?
Tags can be used to communicate additional notes to the kitchen or bar and can be customized by Course, Diner, Item, or Order.
Types of Tags
Diner Tags: Convey specific information related to a specific customer/seat. These Tags are visible on the PAD to help a Server easily identify the customer with specific needs. Ex, Allergy, VIP, Birthday, etc. These Tags do not print on the Kitchen Ticket
Item Tags: Convey specific information related to an Item. A selected Item Tag prints directly under the Item name on the Kitchen Ticket. Ex, RUSH!, ToGo, SOS (sauce on side), etc.
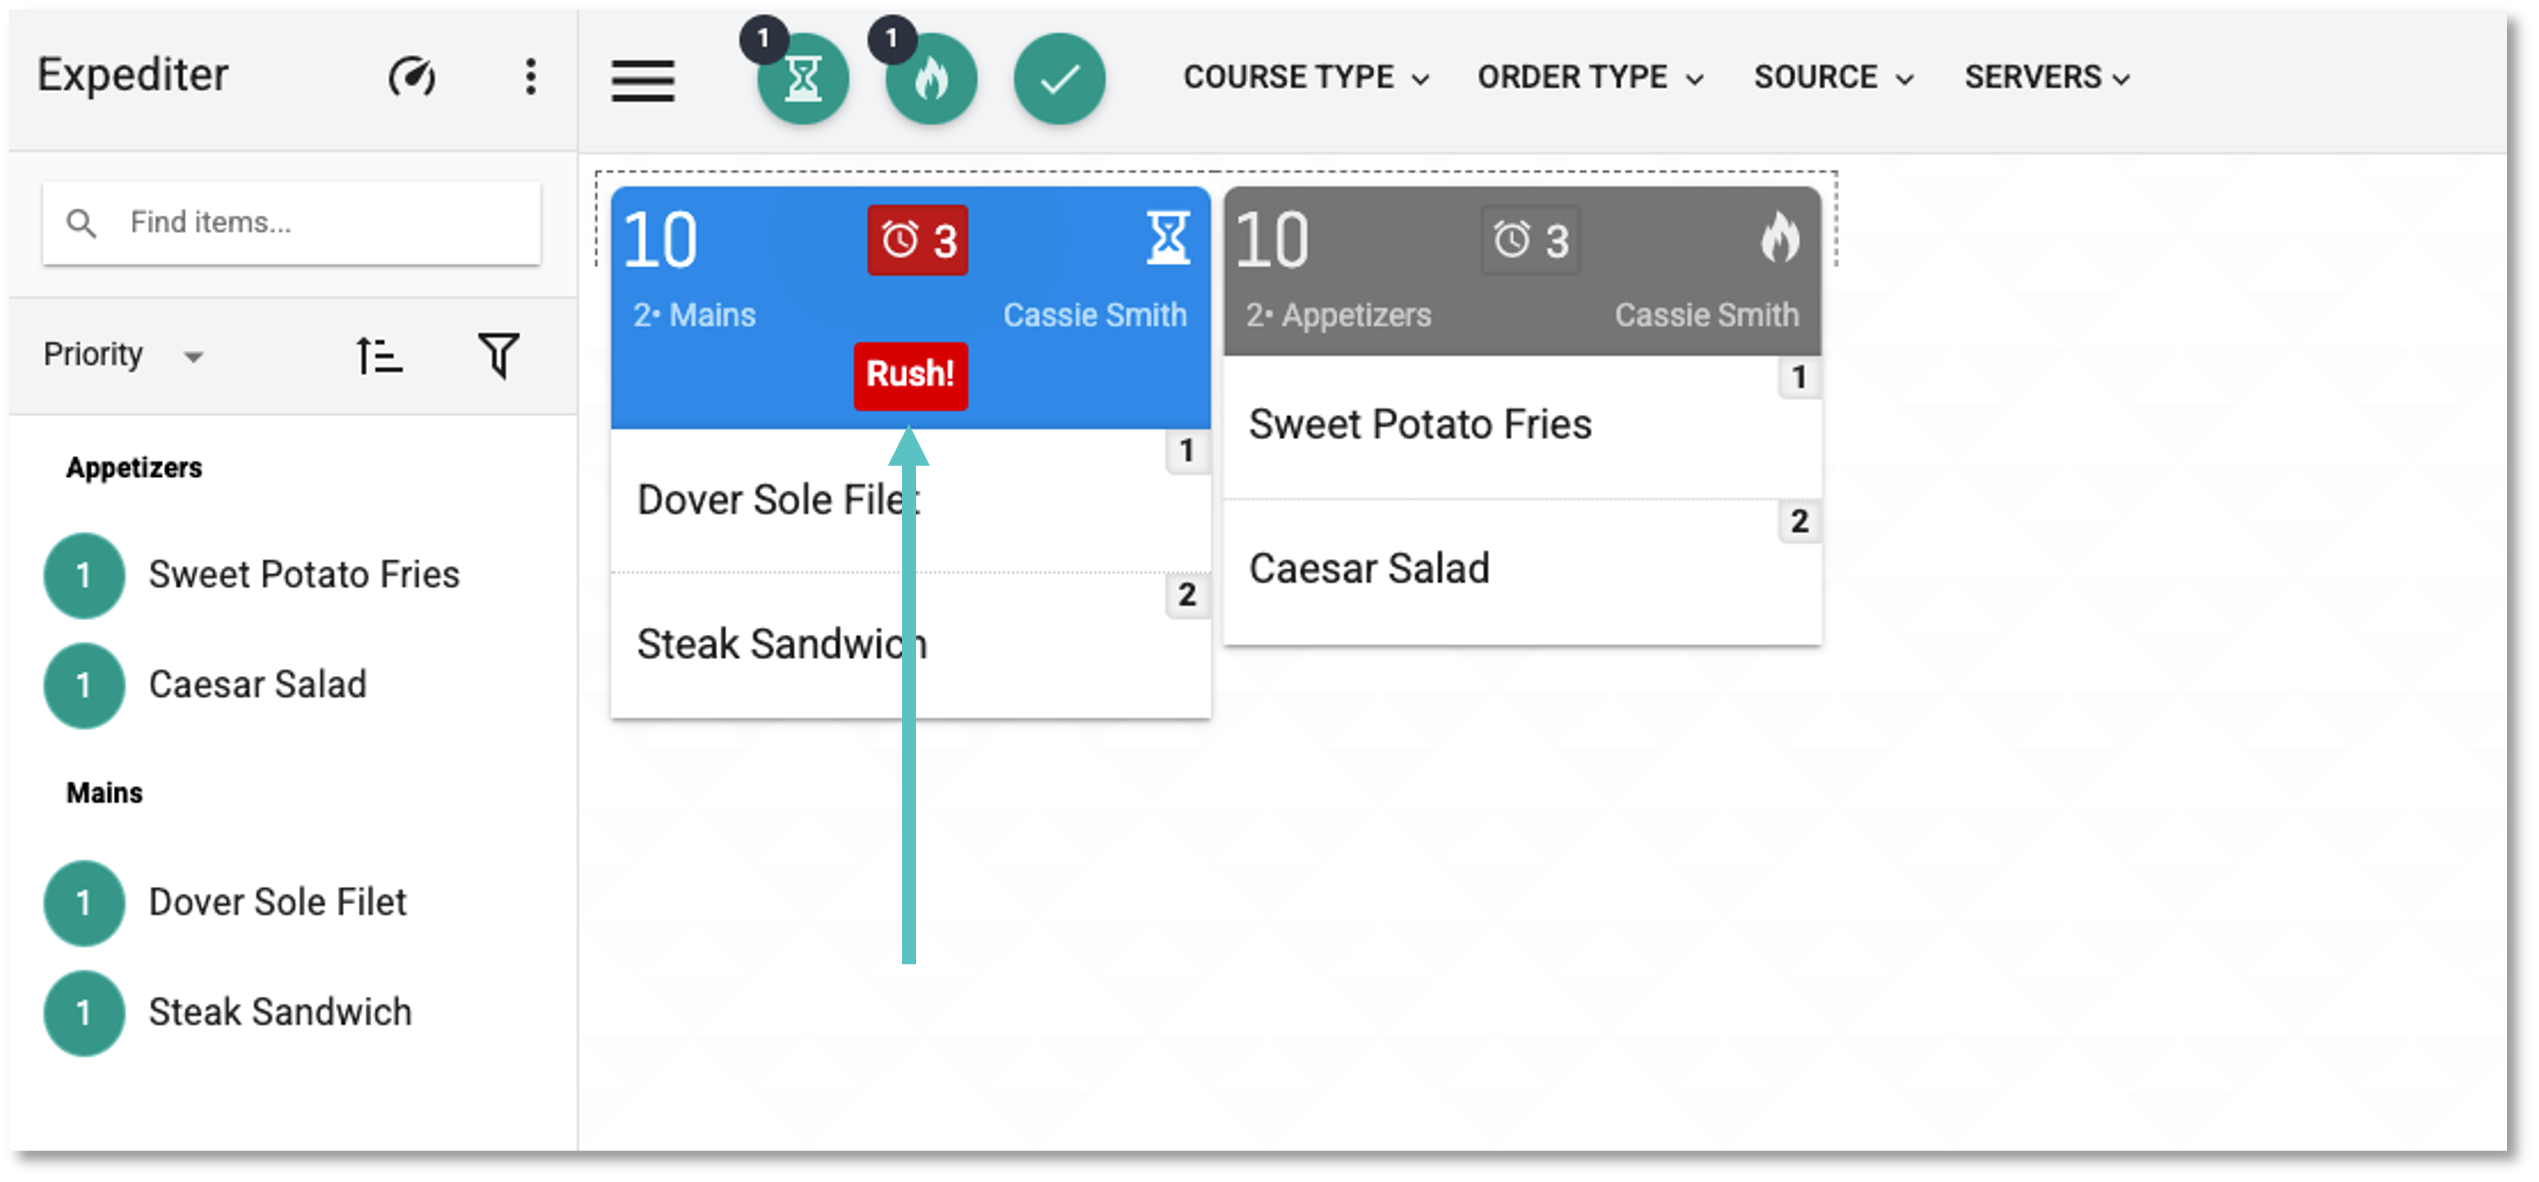
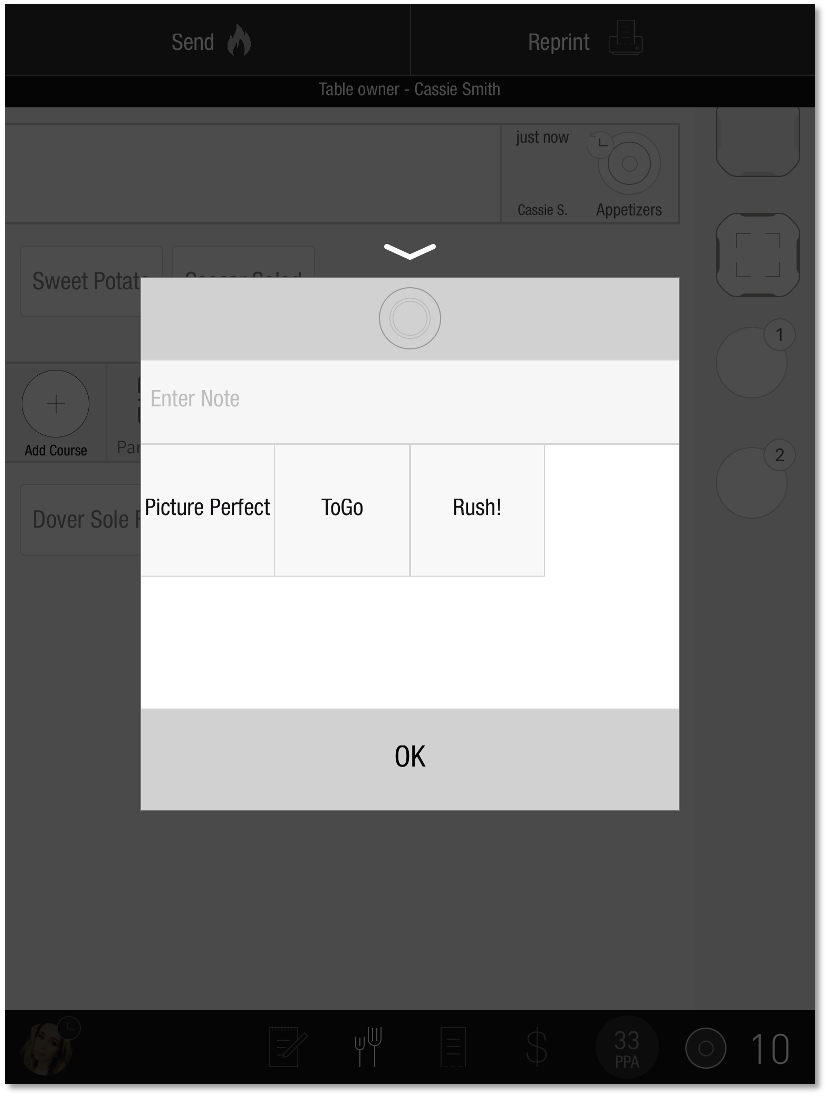
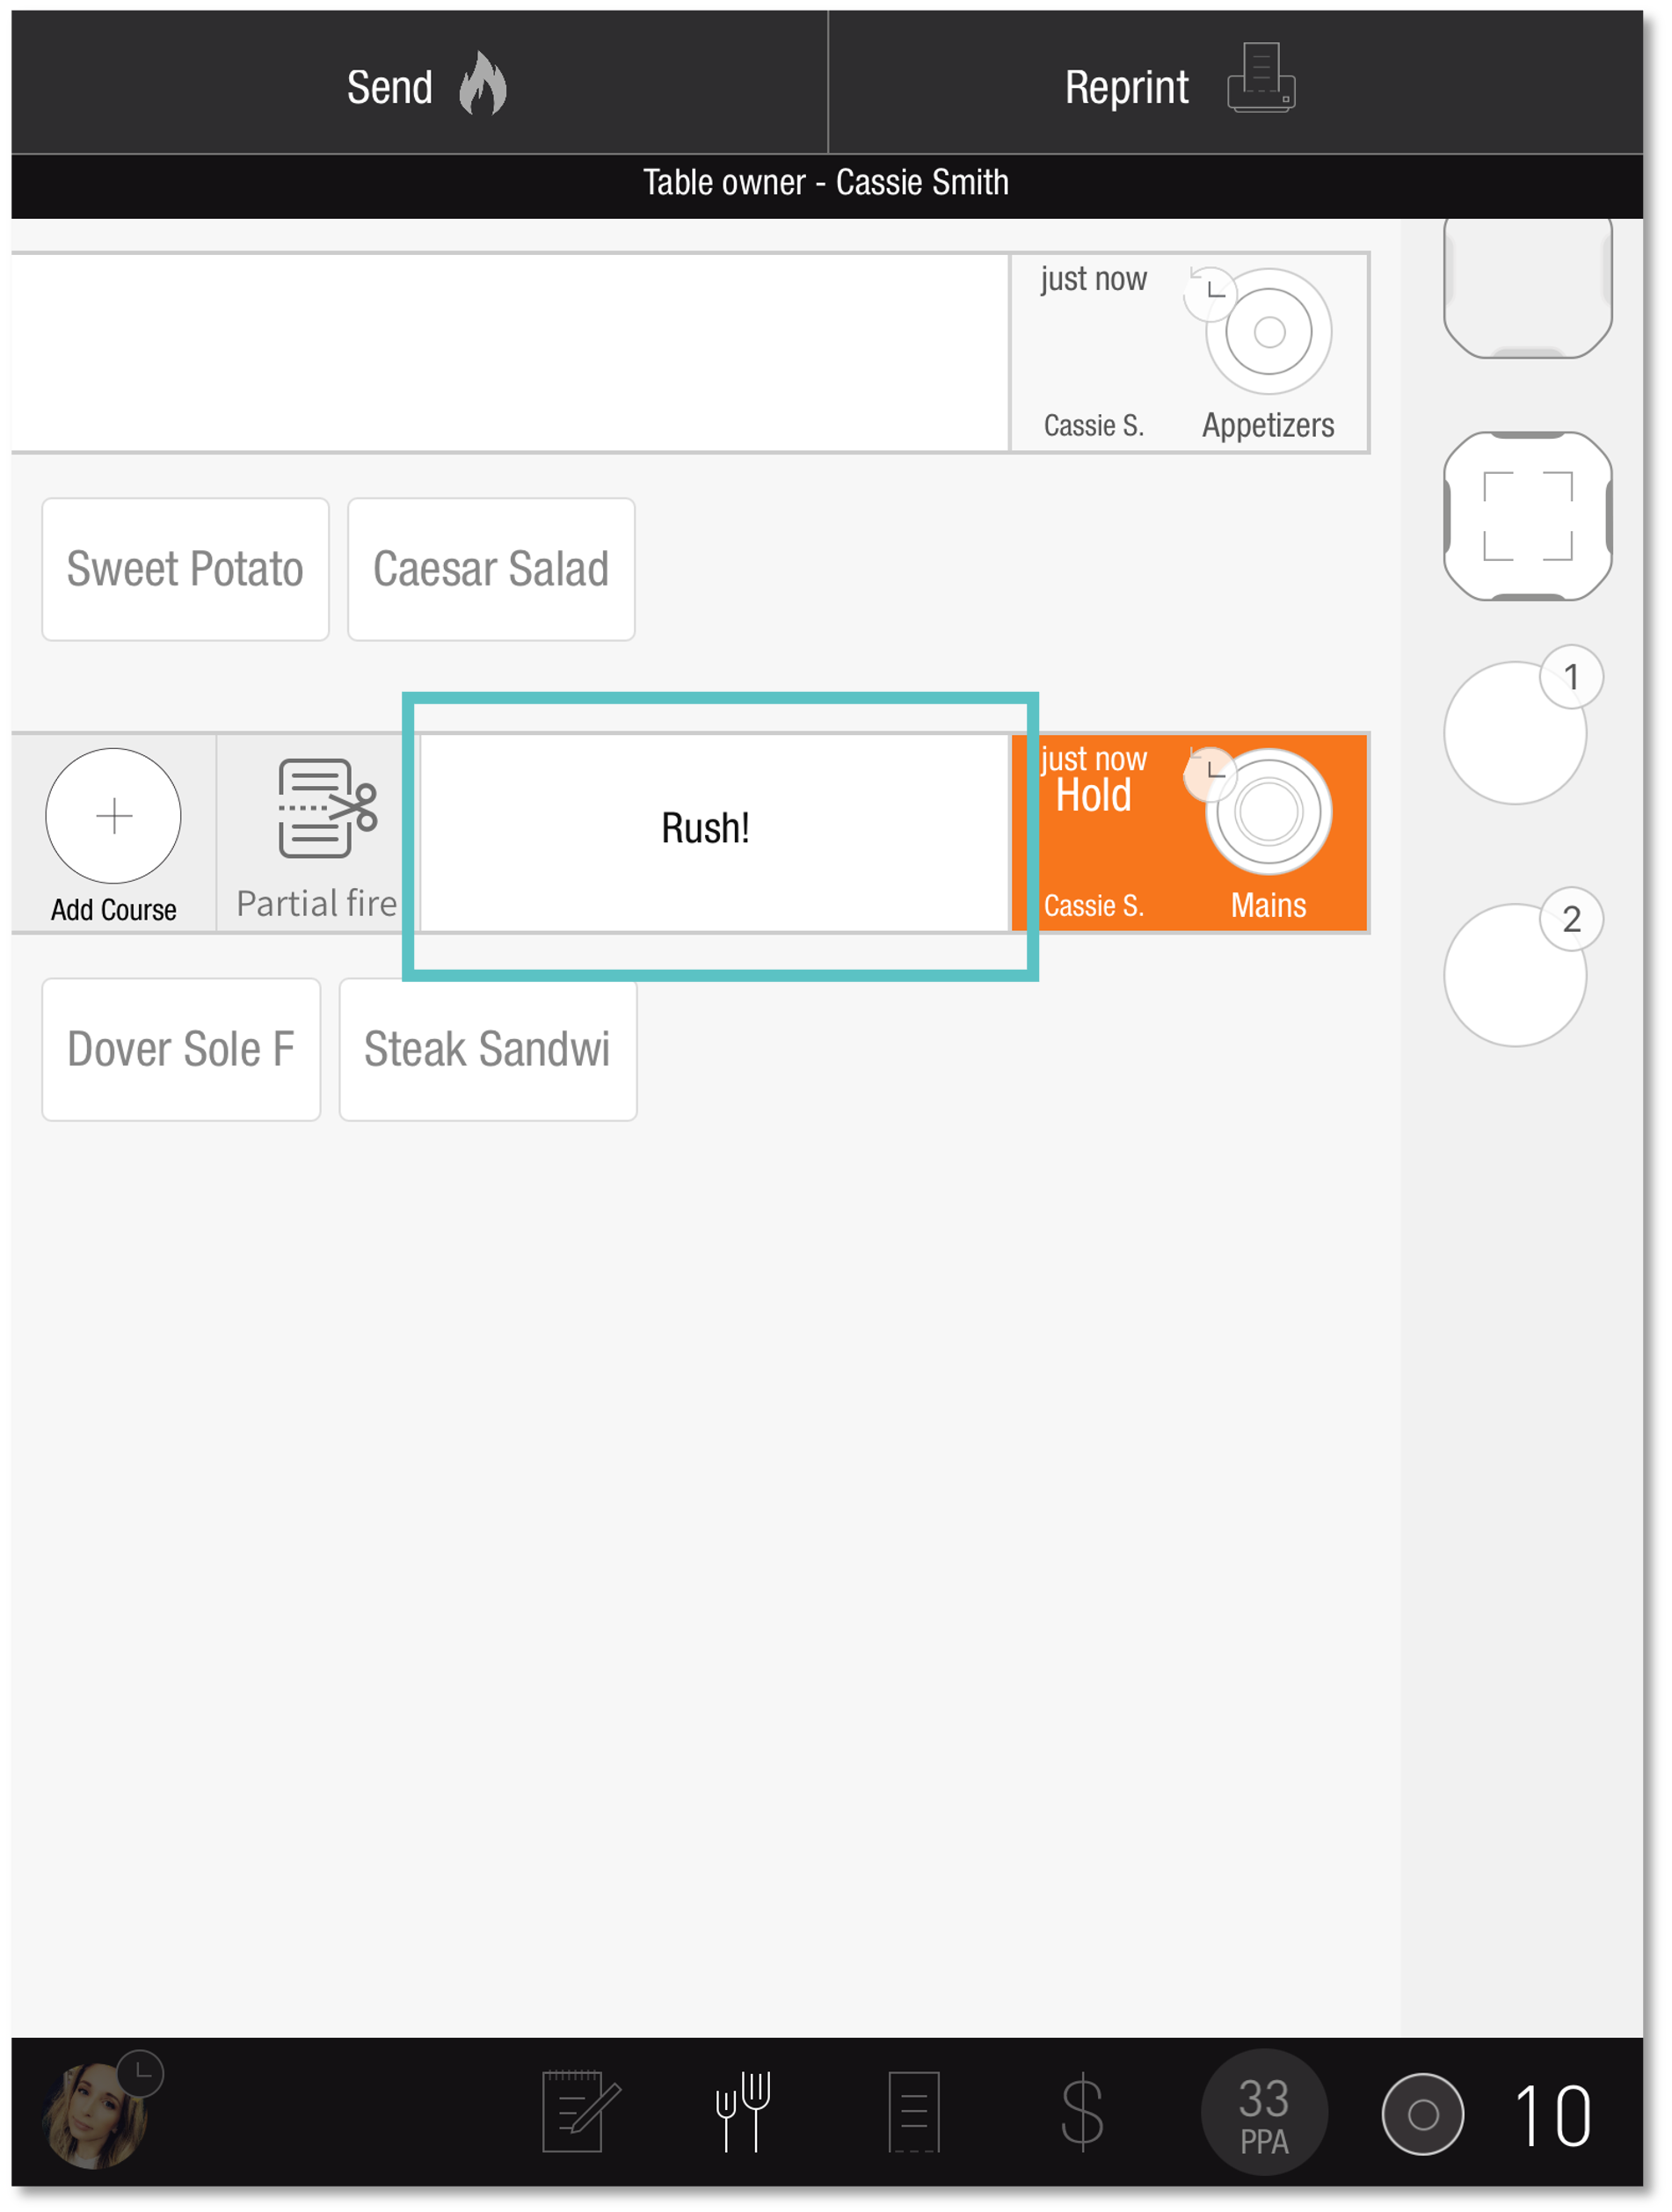
Course Tags: Convey information related to a Course. A selected Course Tag prints under the Course name on the Kitchen Ticket. Ex, RUSH! or ToGo
Order Tags: Convey information related to an entire Order. A selected Order Tag prints under the header of the Kitchen Ticket. Ex, ToGo, VIP, Special Occasion, etc.
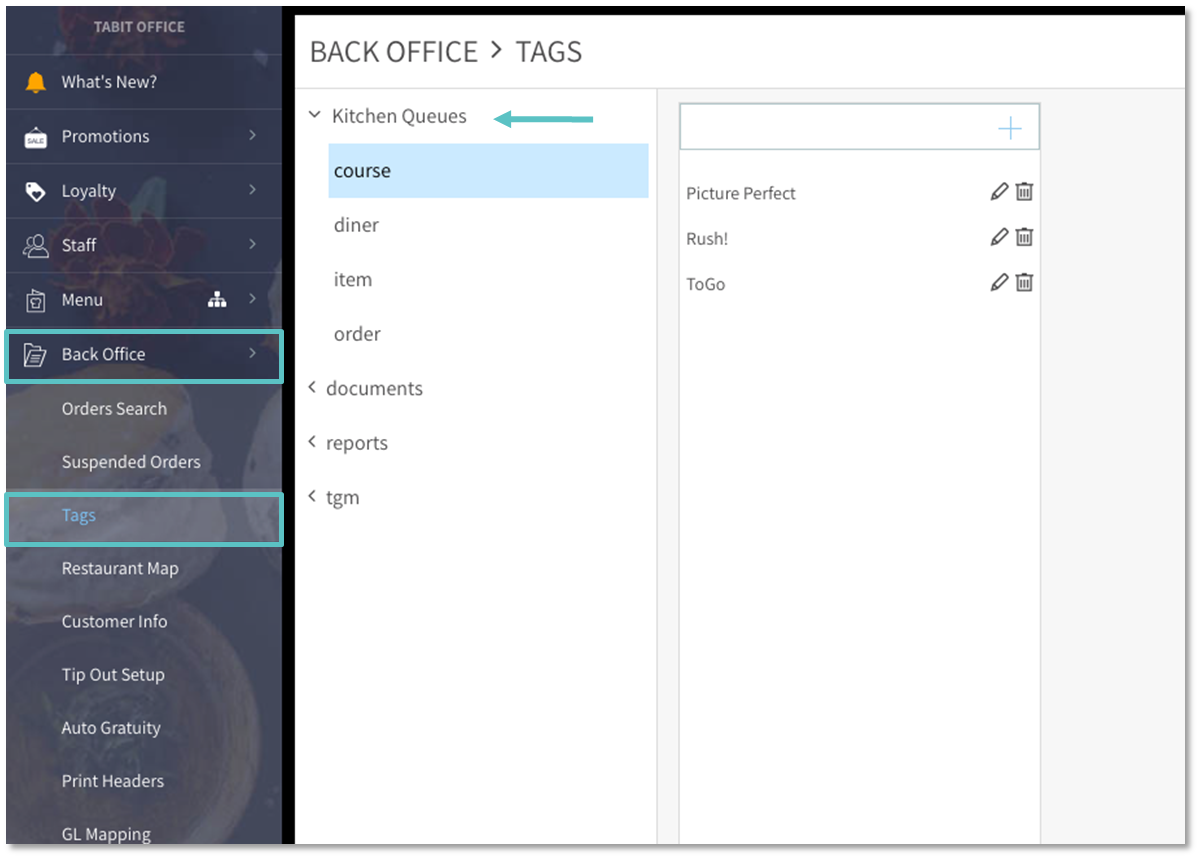
Follow these steps to set up Tags.
-
In Tabit Office, go to Back Office > Tags > Kitchen Queues and then select the corresponding location for the Tag
-
Enter the desired Tag (note) into the empty field and then select the + Icon to add it to the list
Best practice: don't add more than 12 Tags as it will require the Server to scroll down on the PAD to see them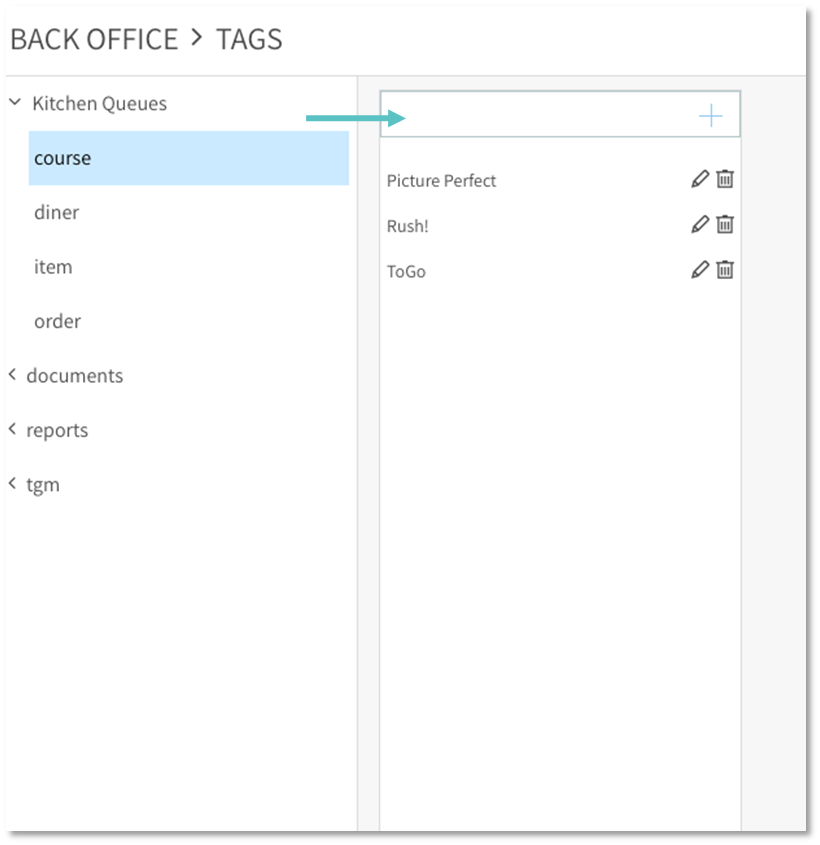
Course Tags will appear on the PAD as follows:
-
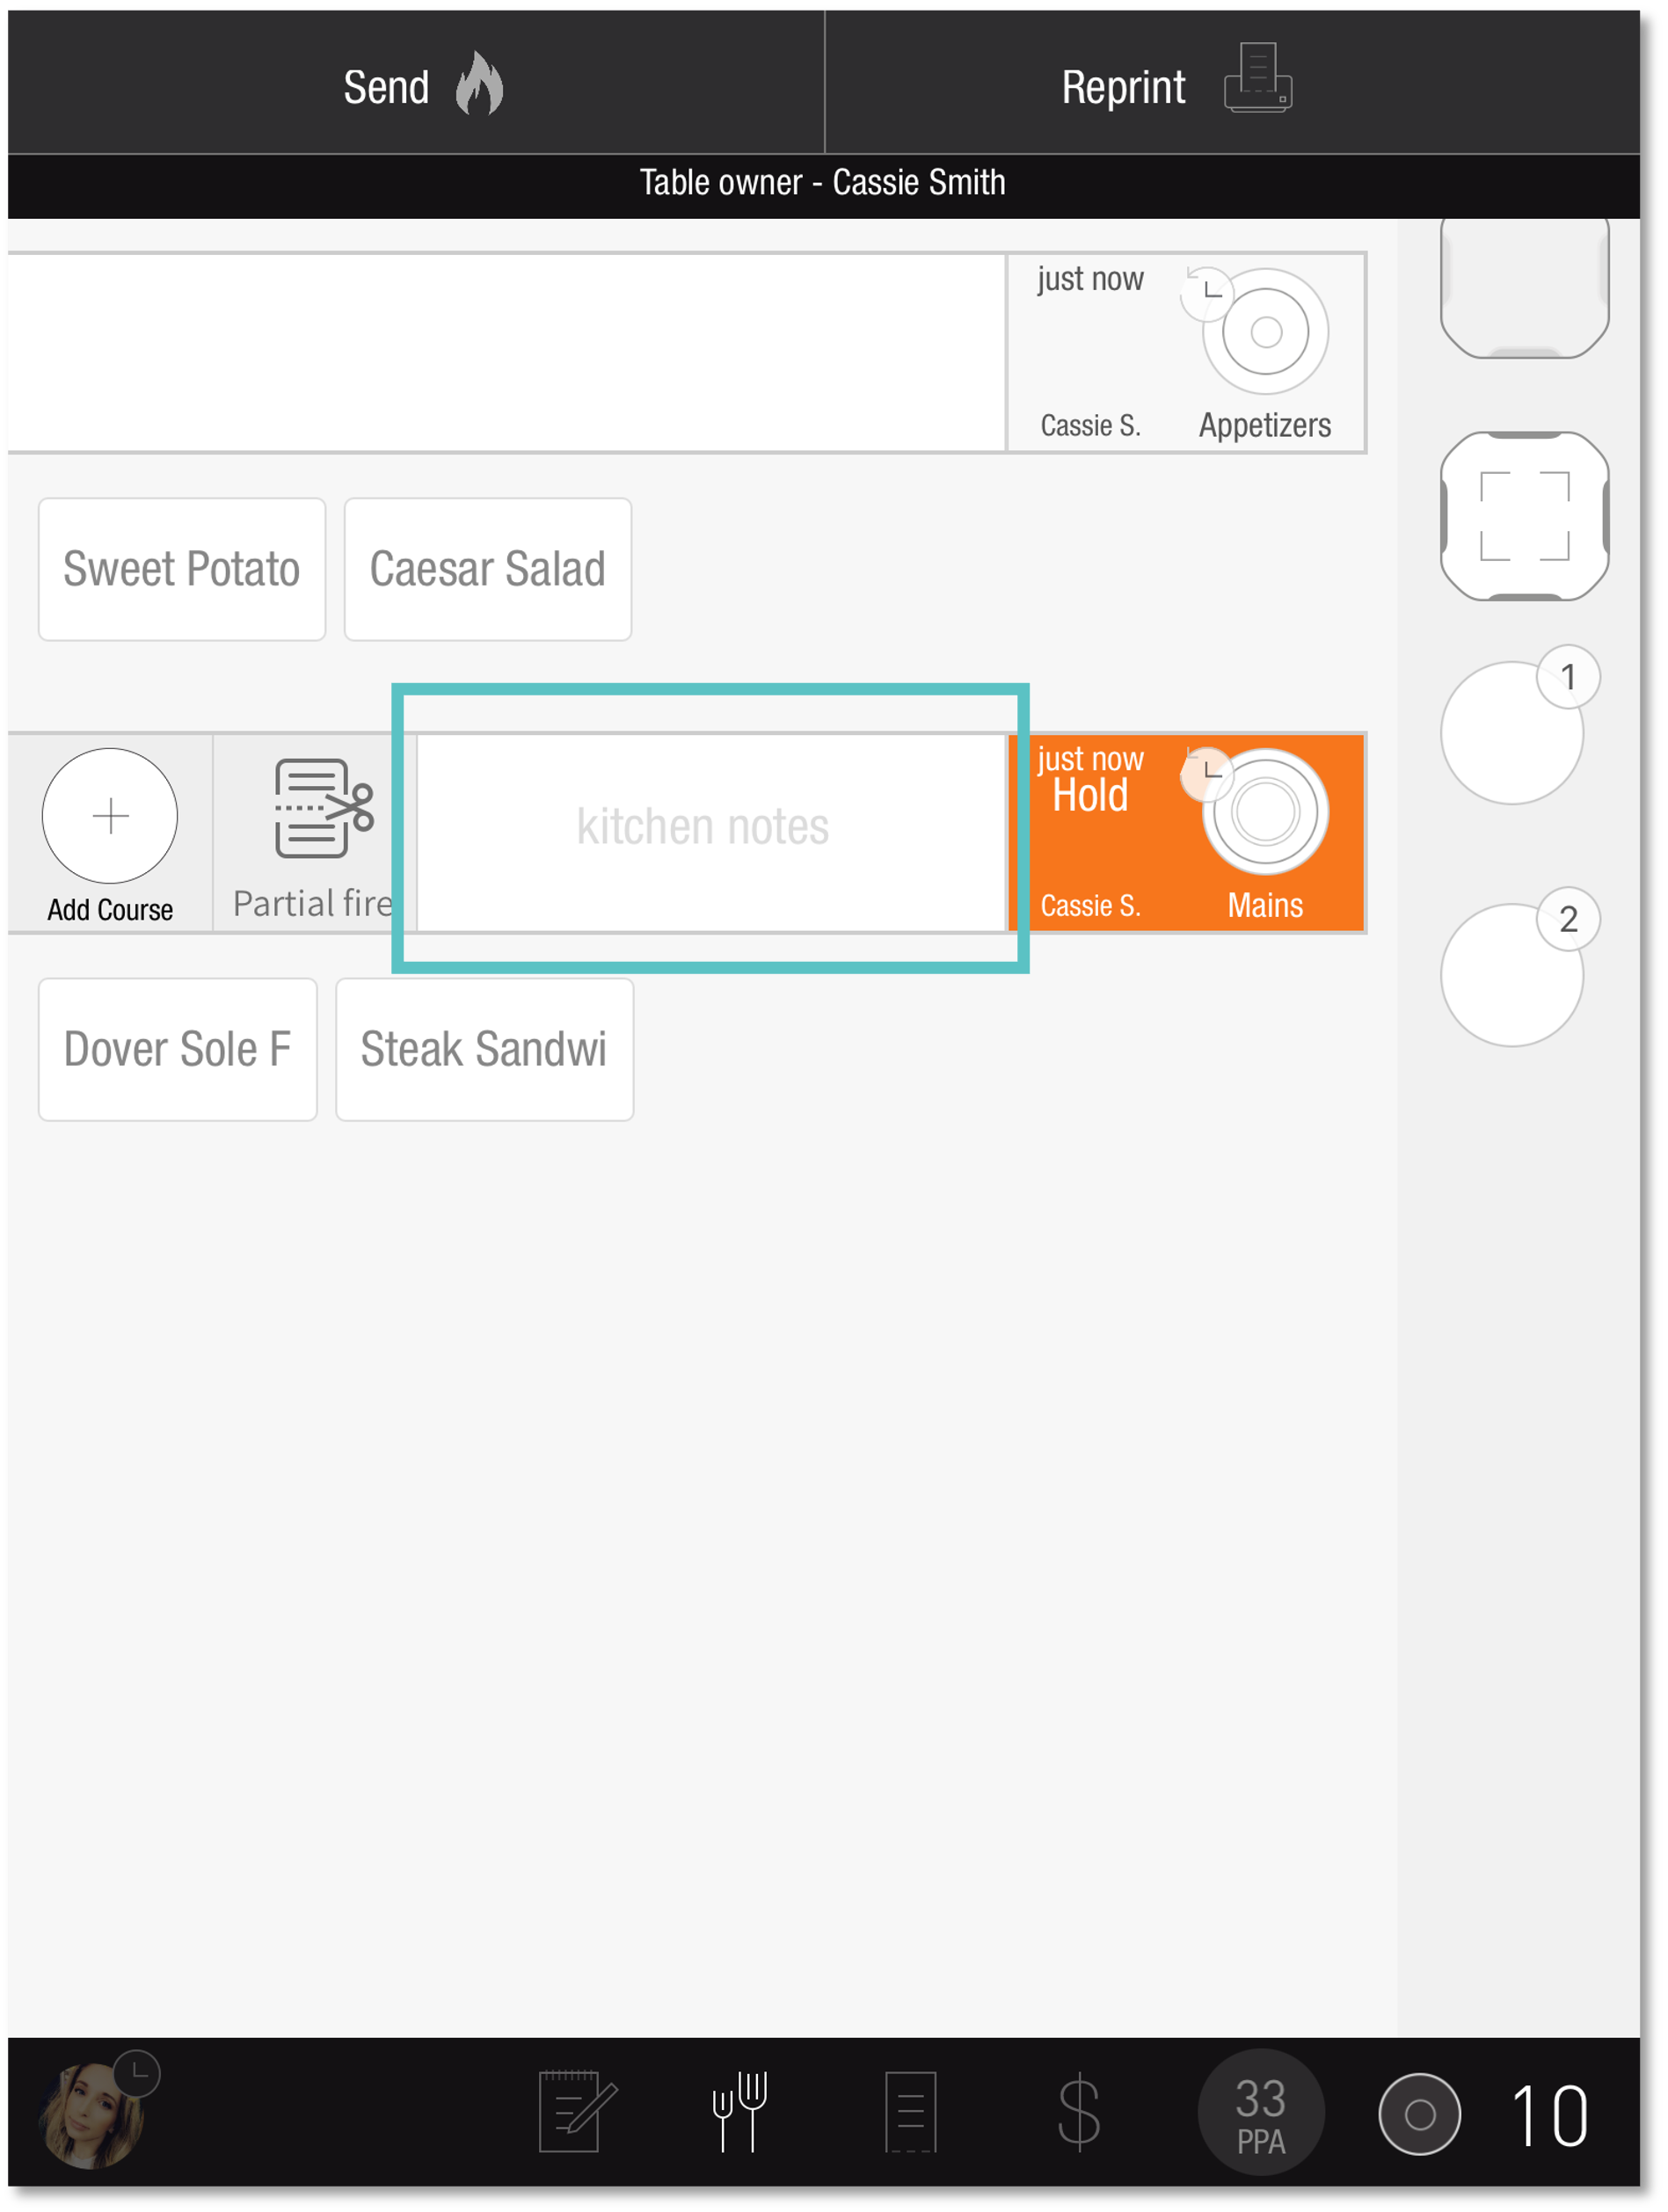
Long press on the Kitchen Notes bar on the Coursing Screen
-
Select the relevant Course Tag
-
Now the Course is tagged
If the Site works with Tabit Kitchen, the Tag will also appear on the KDS Screen, as seen below