
Overview:
-
Import Spreadsheets are site specific and require that Menus, Menu Sections, Tax Rates, and Tax Rules have been created ahead of time. For reference on these topics, reference the course Building a Menu
-
It is HIGHLY recommended that the Partner Success Manager proof read the spreadsheet before importing it into Tabit as once items have been mass uploaded they will need to be manually adjusted
-
Best used when 10 or more Items need to be added into Tabit or when a new menu is being built
Download the Menu Import Tool
Always download a clean file per site as this is the most updated version available
See this sample Menu Import spreadsheet:
Setting up the Menu Import Tool Spreadsheet
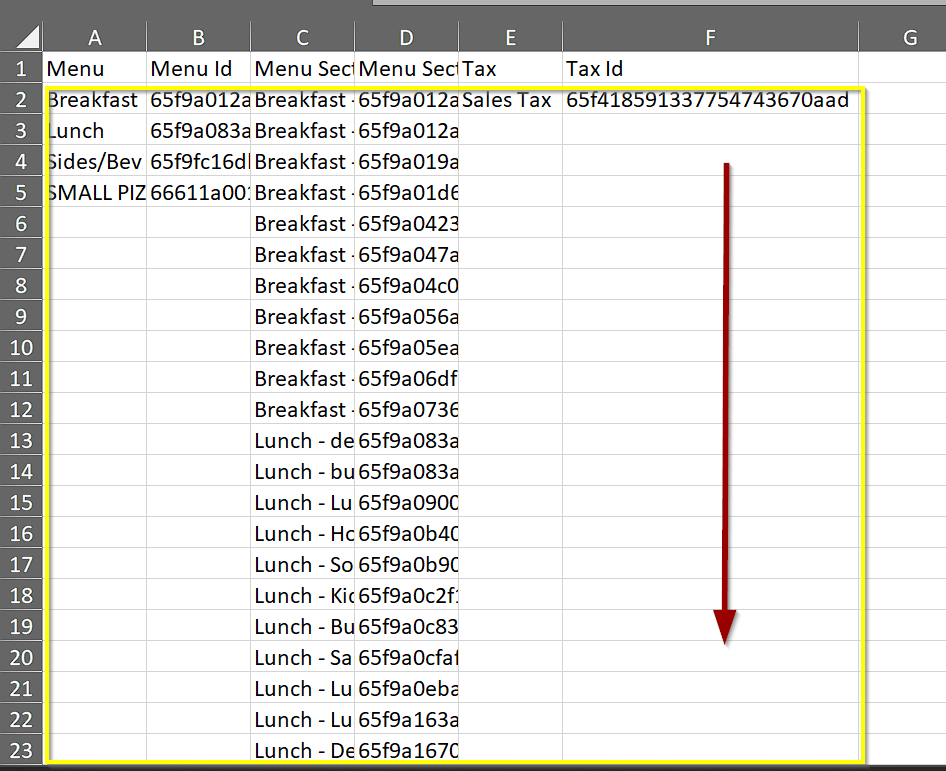
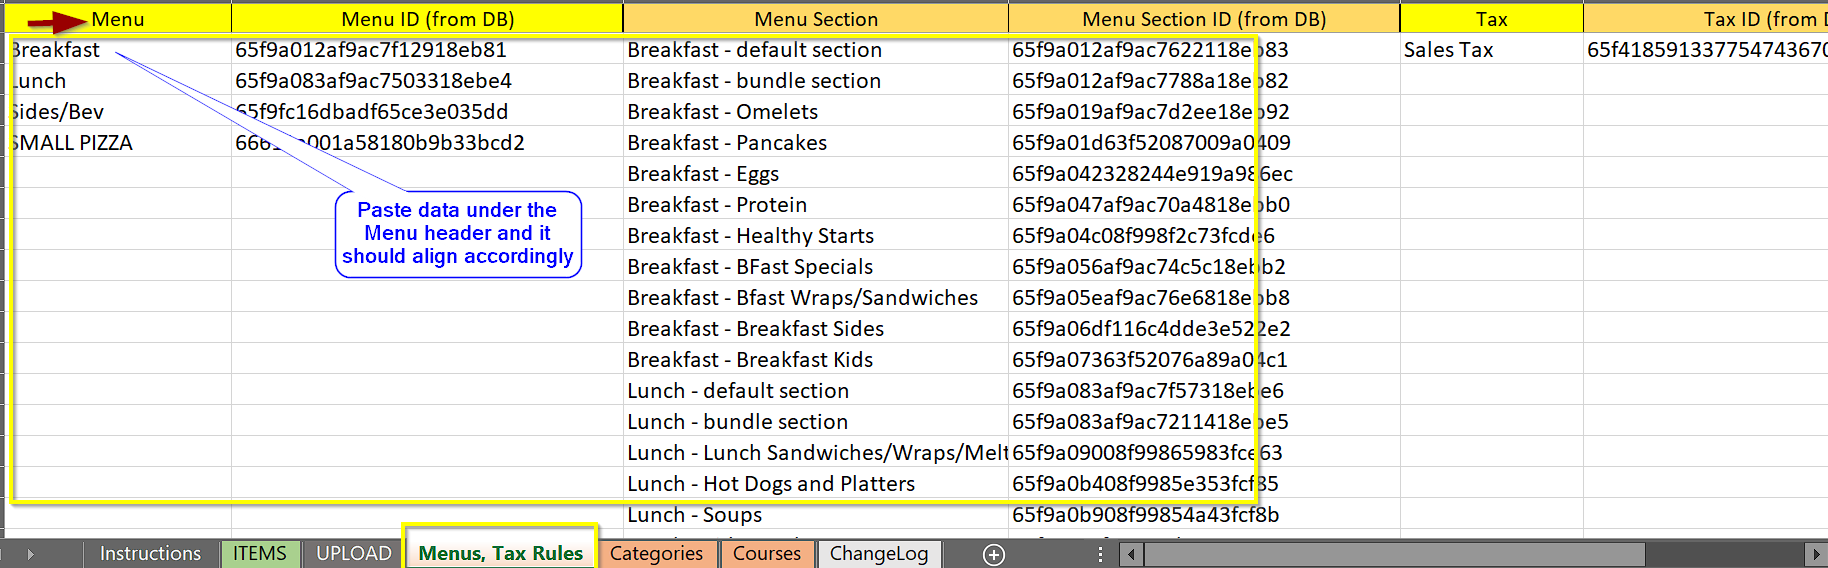
Each Menu, Section, and Tax Rule creates a unique site ID that needs to be uploaded into the Menu Import Tool.
Menu Import Tool's Column Descriptions
Column Descriptions and Purpose
Below are the specific descriptions of each of the columns and what their purpose is in the Menu Import Tool - the next section shows an example of how to fill out the Menu Import Tool
Uploading the Menu Import Tool into Tabit Office
Example of an Item Completely Filled Out

How to Edit the Menu Import Tool and Upload it to Tabit Office
-
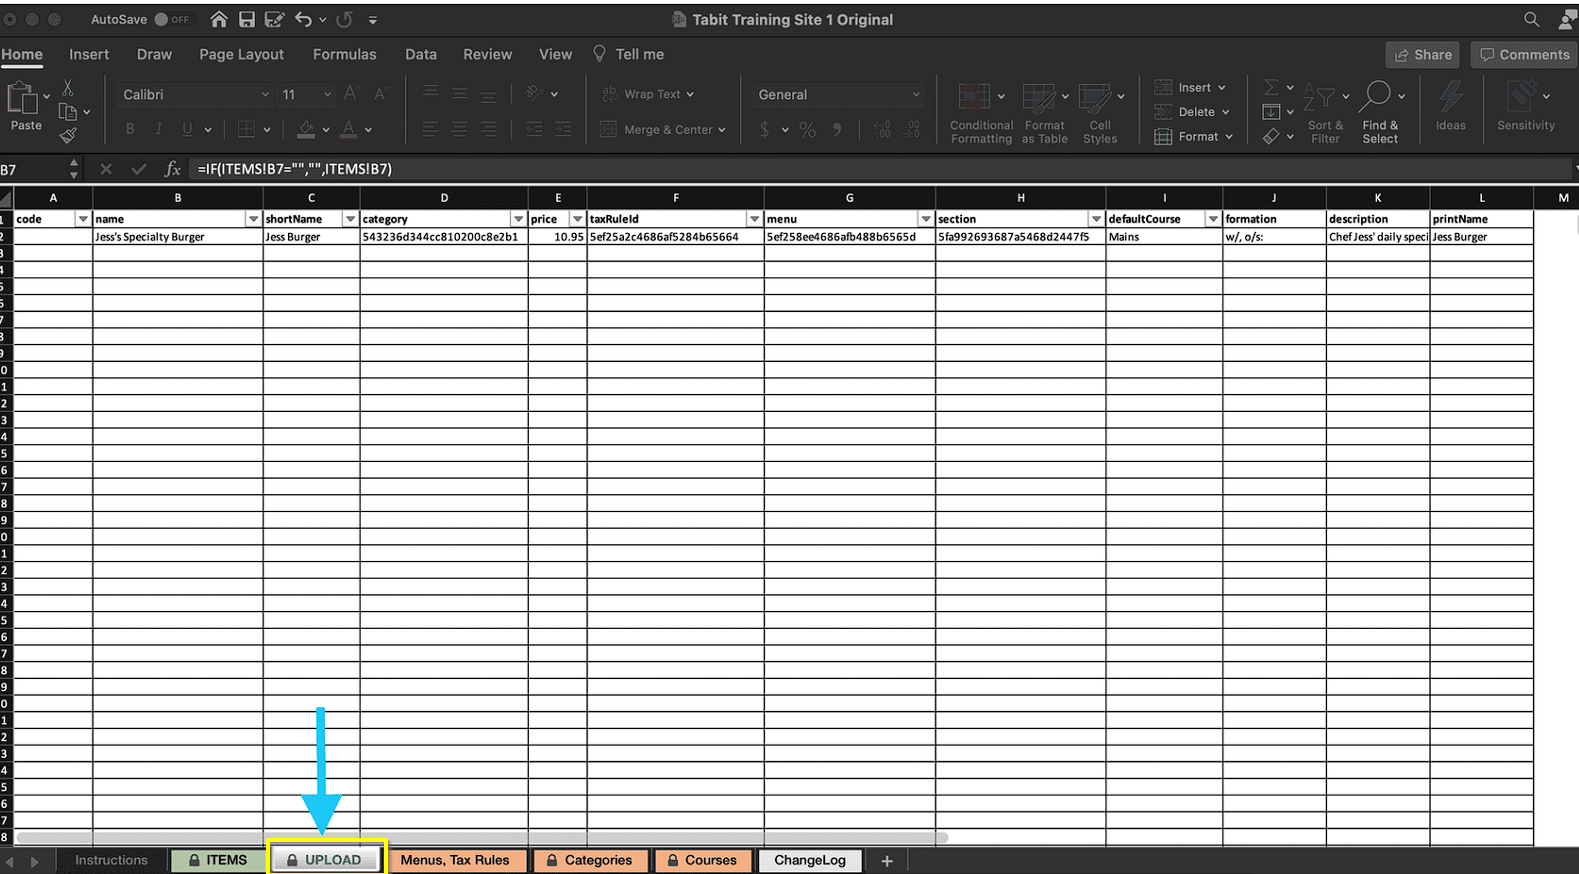
Open the Menu Import Tool you’ve downloaded from the this article and click on the Upload sheet, as shown below:
-
Right-click on the Upload tab and create a copy of it into a new book. See video on how to do this:
-
Save the New Book in “CSV-UTF-8” format
-
Open your browser and login to the Tabit Office website.
-
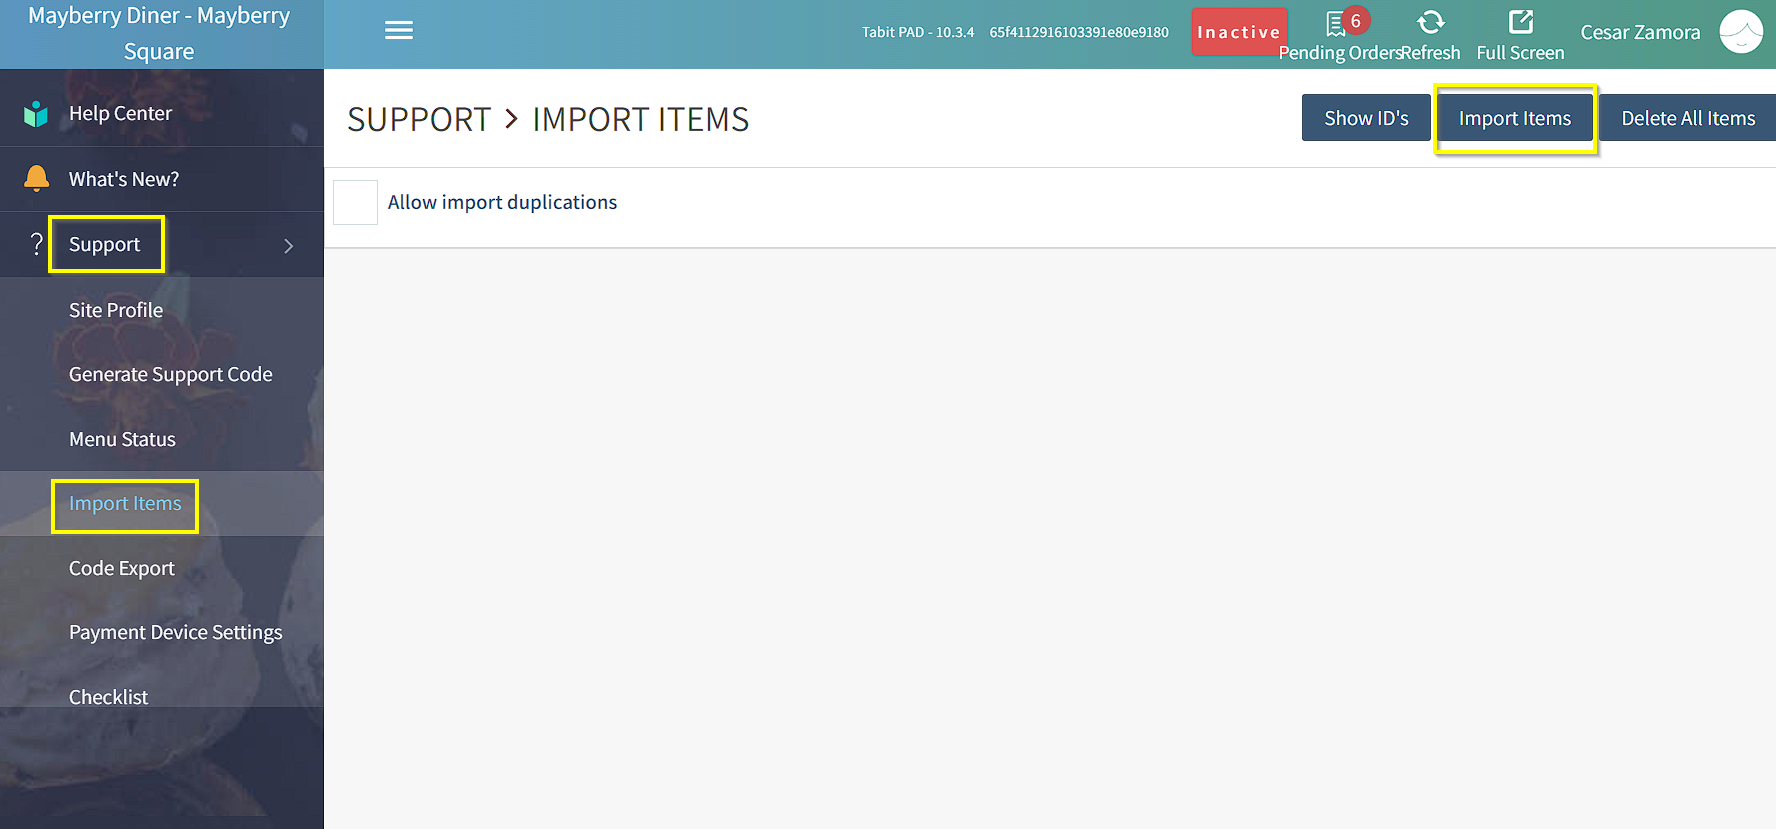
Go into Support → Import Items and click on Import Items button.
-
Locate the CSV file you saved from Step 3 above and double-click on it or select the file and click on the Open button.

-
The upload will start. Once completed, a summary will display indicating how many items were uploaded.
-
To confirm successful Item Import, go to Menu, Item, and search for the uploaded item.
How to Setup Menu Import Tool
-
Login to Tabit Office with your manager credentials.
-
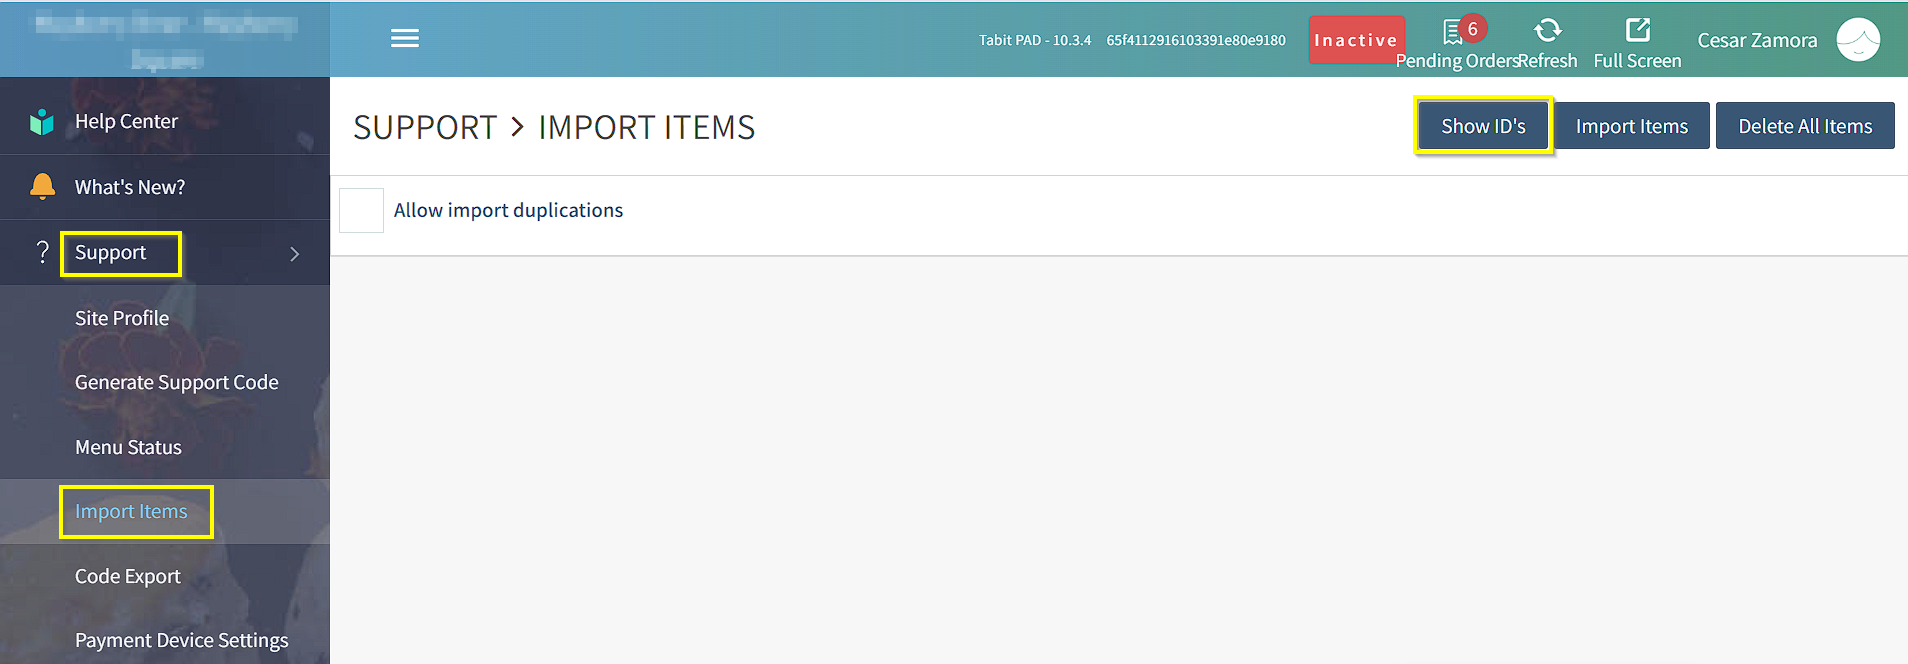
Click on Support then select Import Items
-
Click on Show ID’s
-
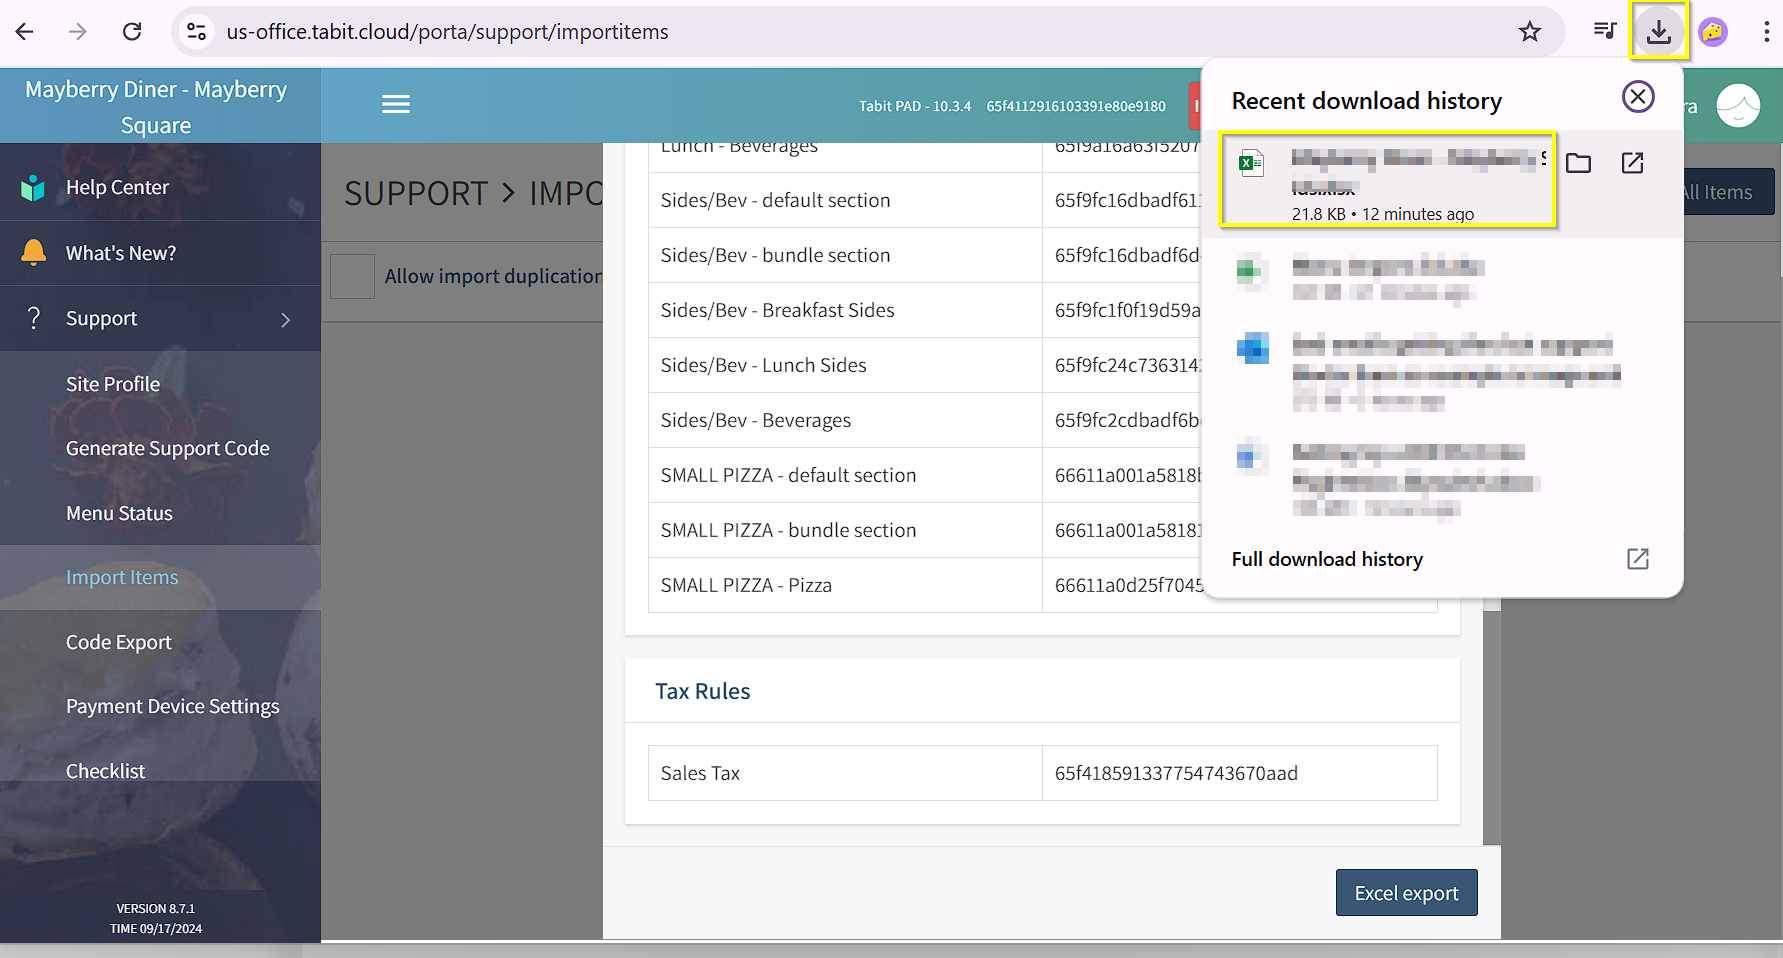
Scroll the resulting window to the bottom until you see the “Excel export” button. Click on it.

-
Open the downloaded file.
-
Select and copy all the extracted data except the top row where the headers are.
-
Open the Menu Import tool and select the Menus, Tax Rates sheet

-
Paste the copied data and make sure to align with the same headers. Usually, you’ll need to paste under the Menu header.
-
Save this spreadsheet as the original for this site and begin filling out with menu items.