
Overview
PAD View controls how Menus appear on the PAD, including the order Items appear in, their icons, colors, and more. Follow the steps below to edit a restaurant's PAD View and learn how to sync information created in Office to the PAD
Saving: allows work to be updated without making changes to the PAD
Publishing: pushes all changes to the Cloud for the PAD to update at designated intervals
Adding an Item to the PAD View
-
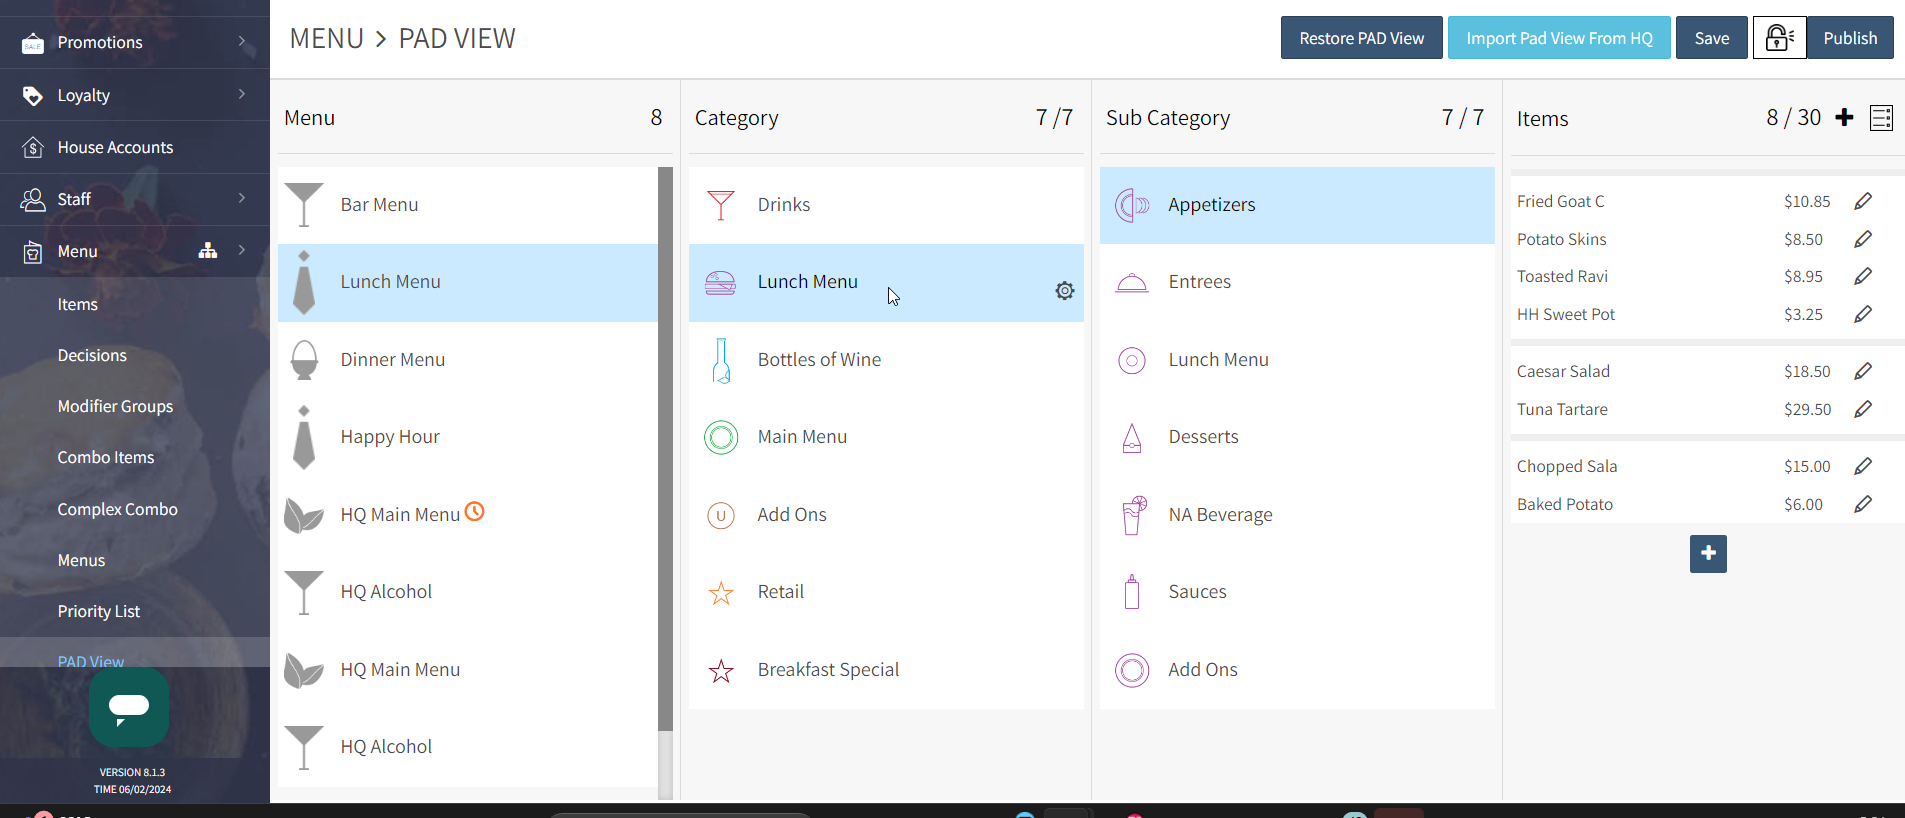
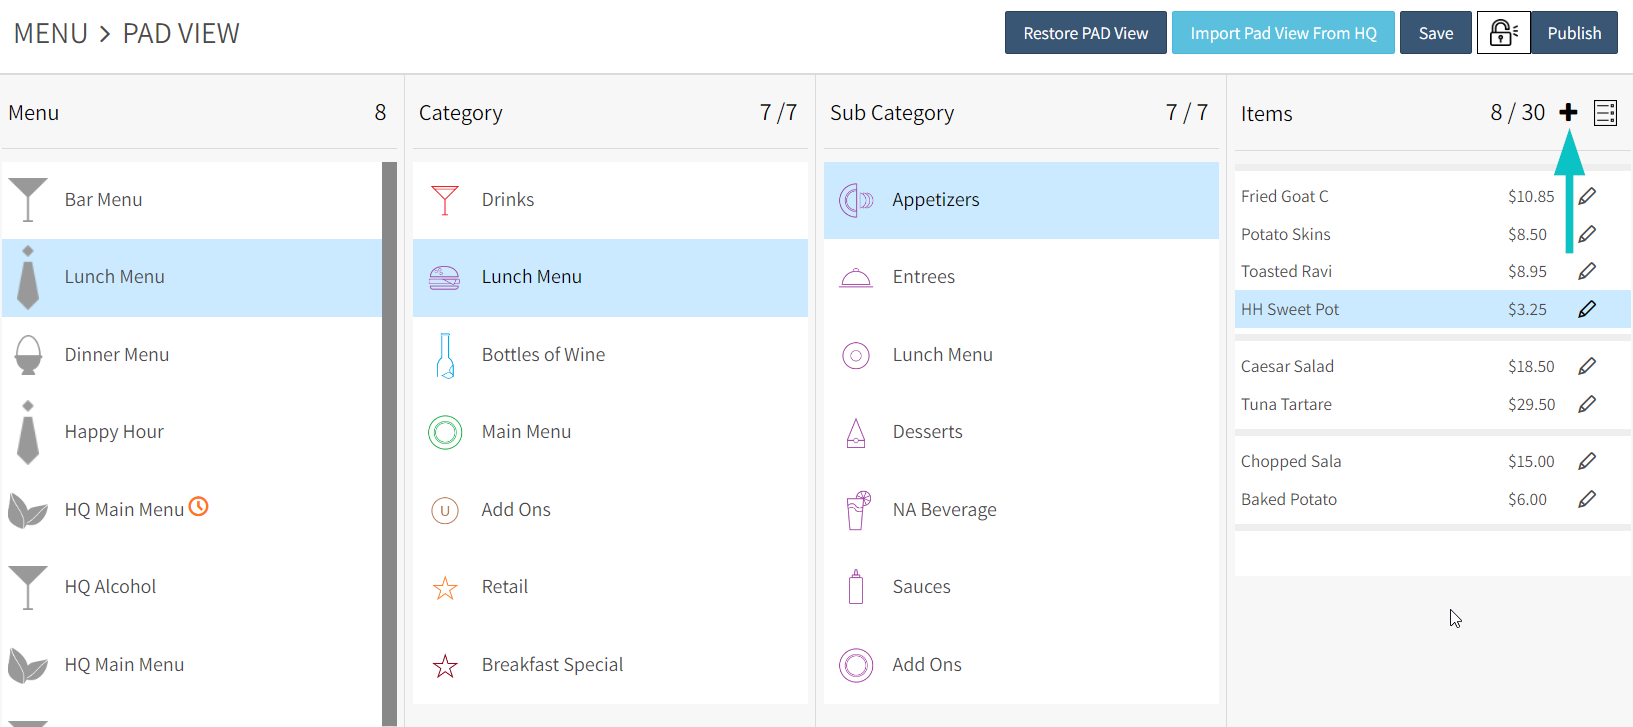
In Office, go to Menu > PAD View
-
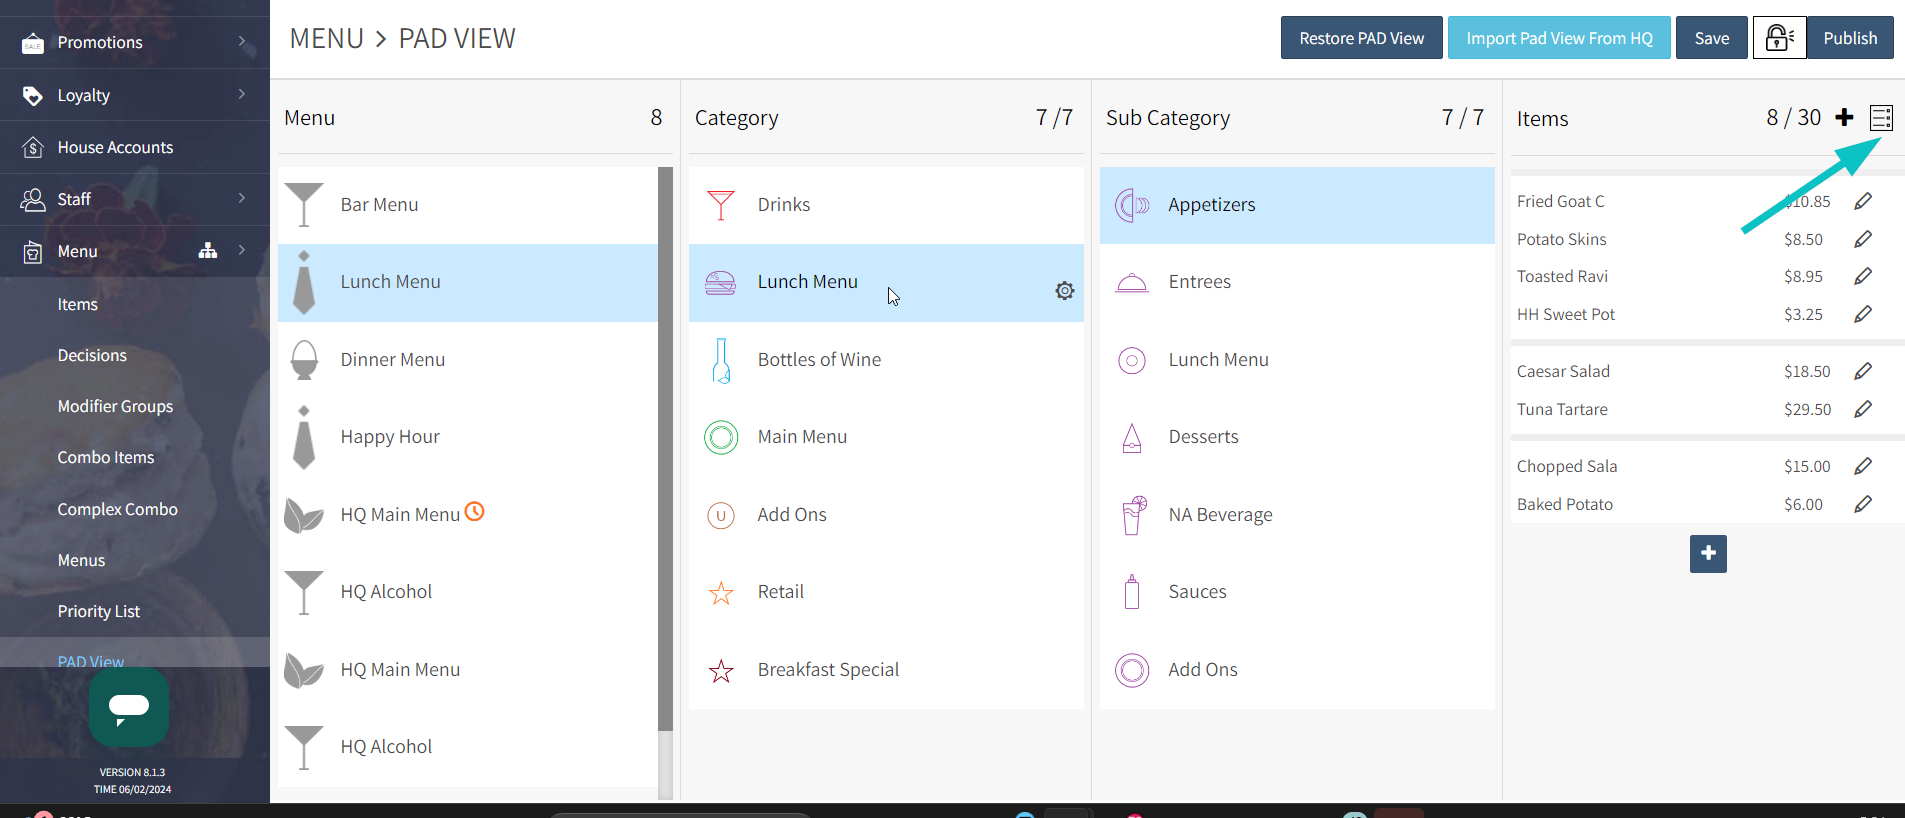
Select the relevant Menu > Category > Sub Category and then the Menu Icon to the right of the Items category
-
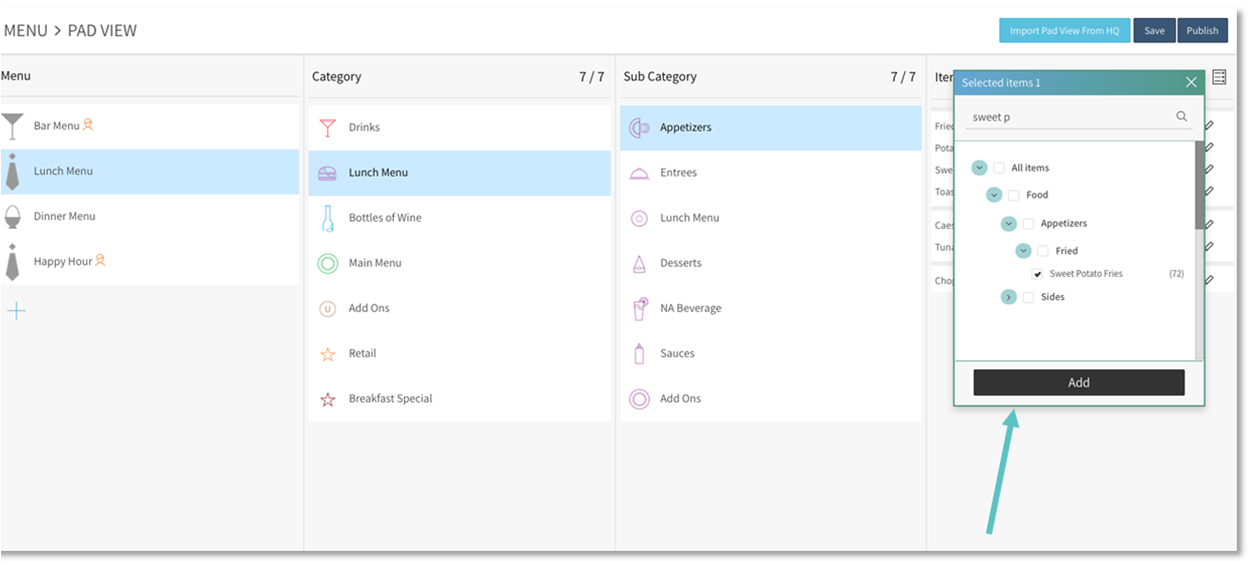
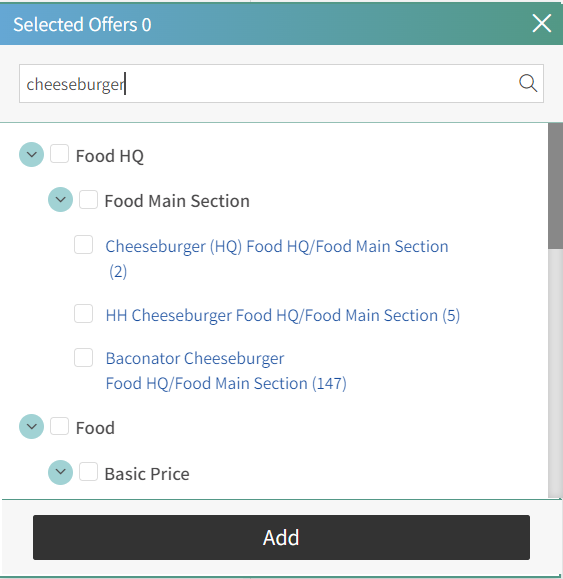
Using the Item Catalog or free text, search for the Item(s) to add to the PAD View
-
Select the Check Box next to the Item to add to the PAD View and then select Add
-
Select the Item and drag it into the desired order
Within the Sub Categories, put the highest-selling Items at the top of the list to ensure maximum priority and visibility
Selecting an Item Offer
-
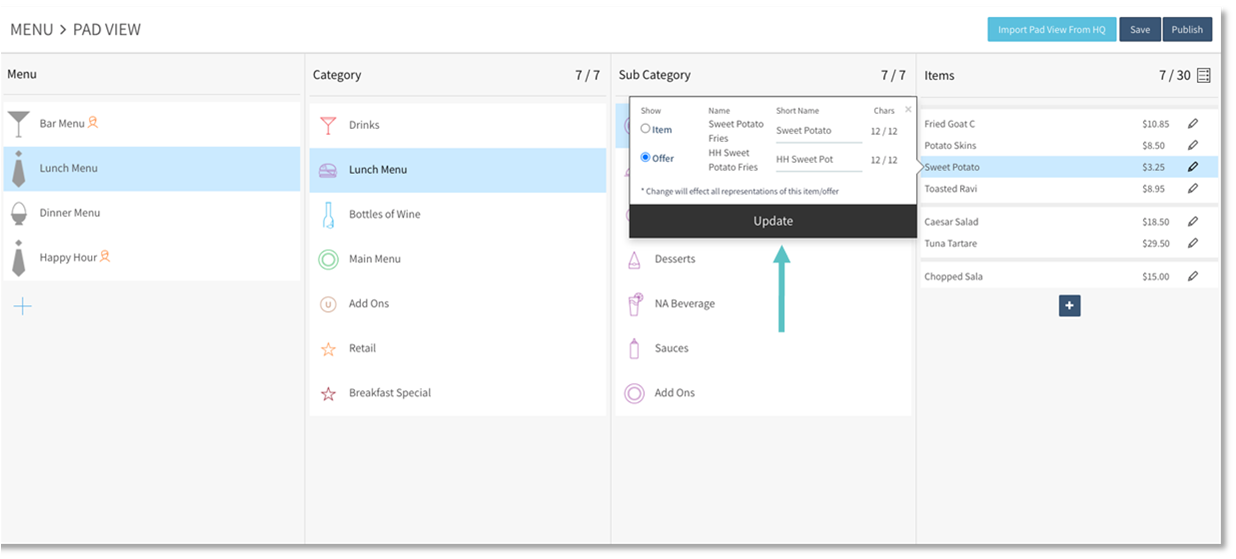
In Office, go to Menu > PAD View
-
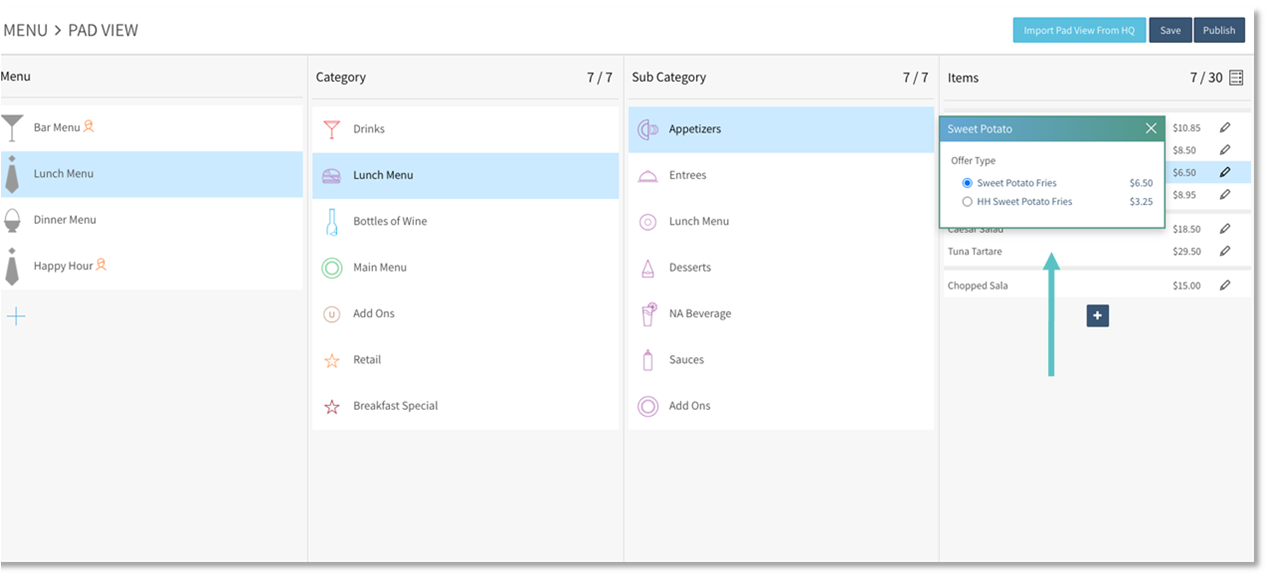
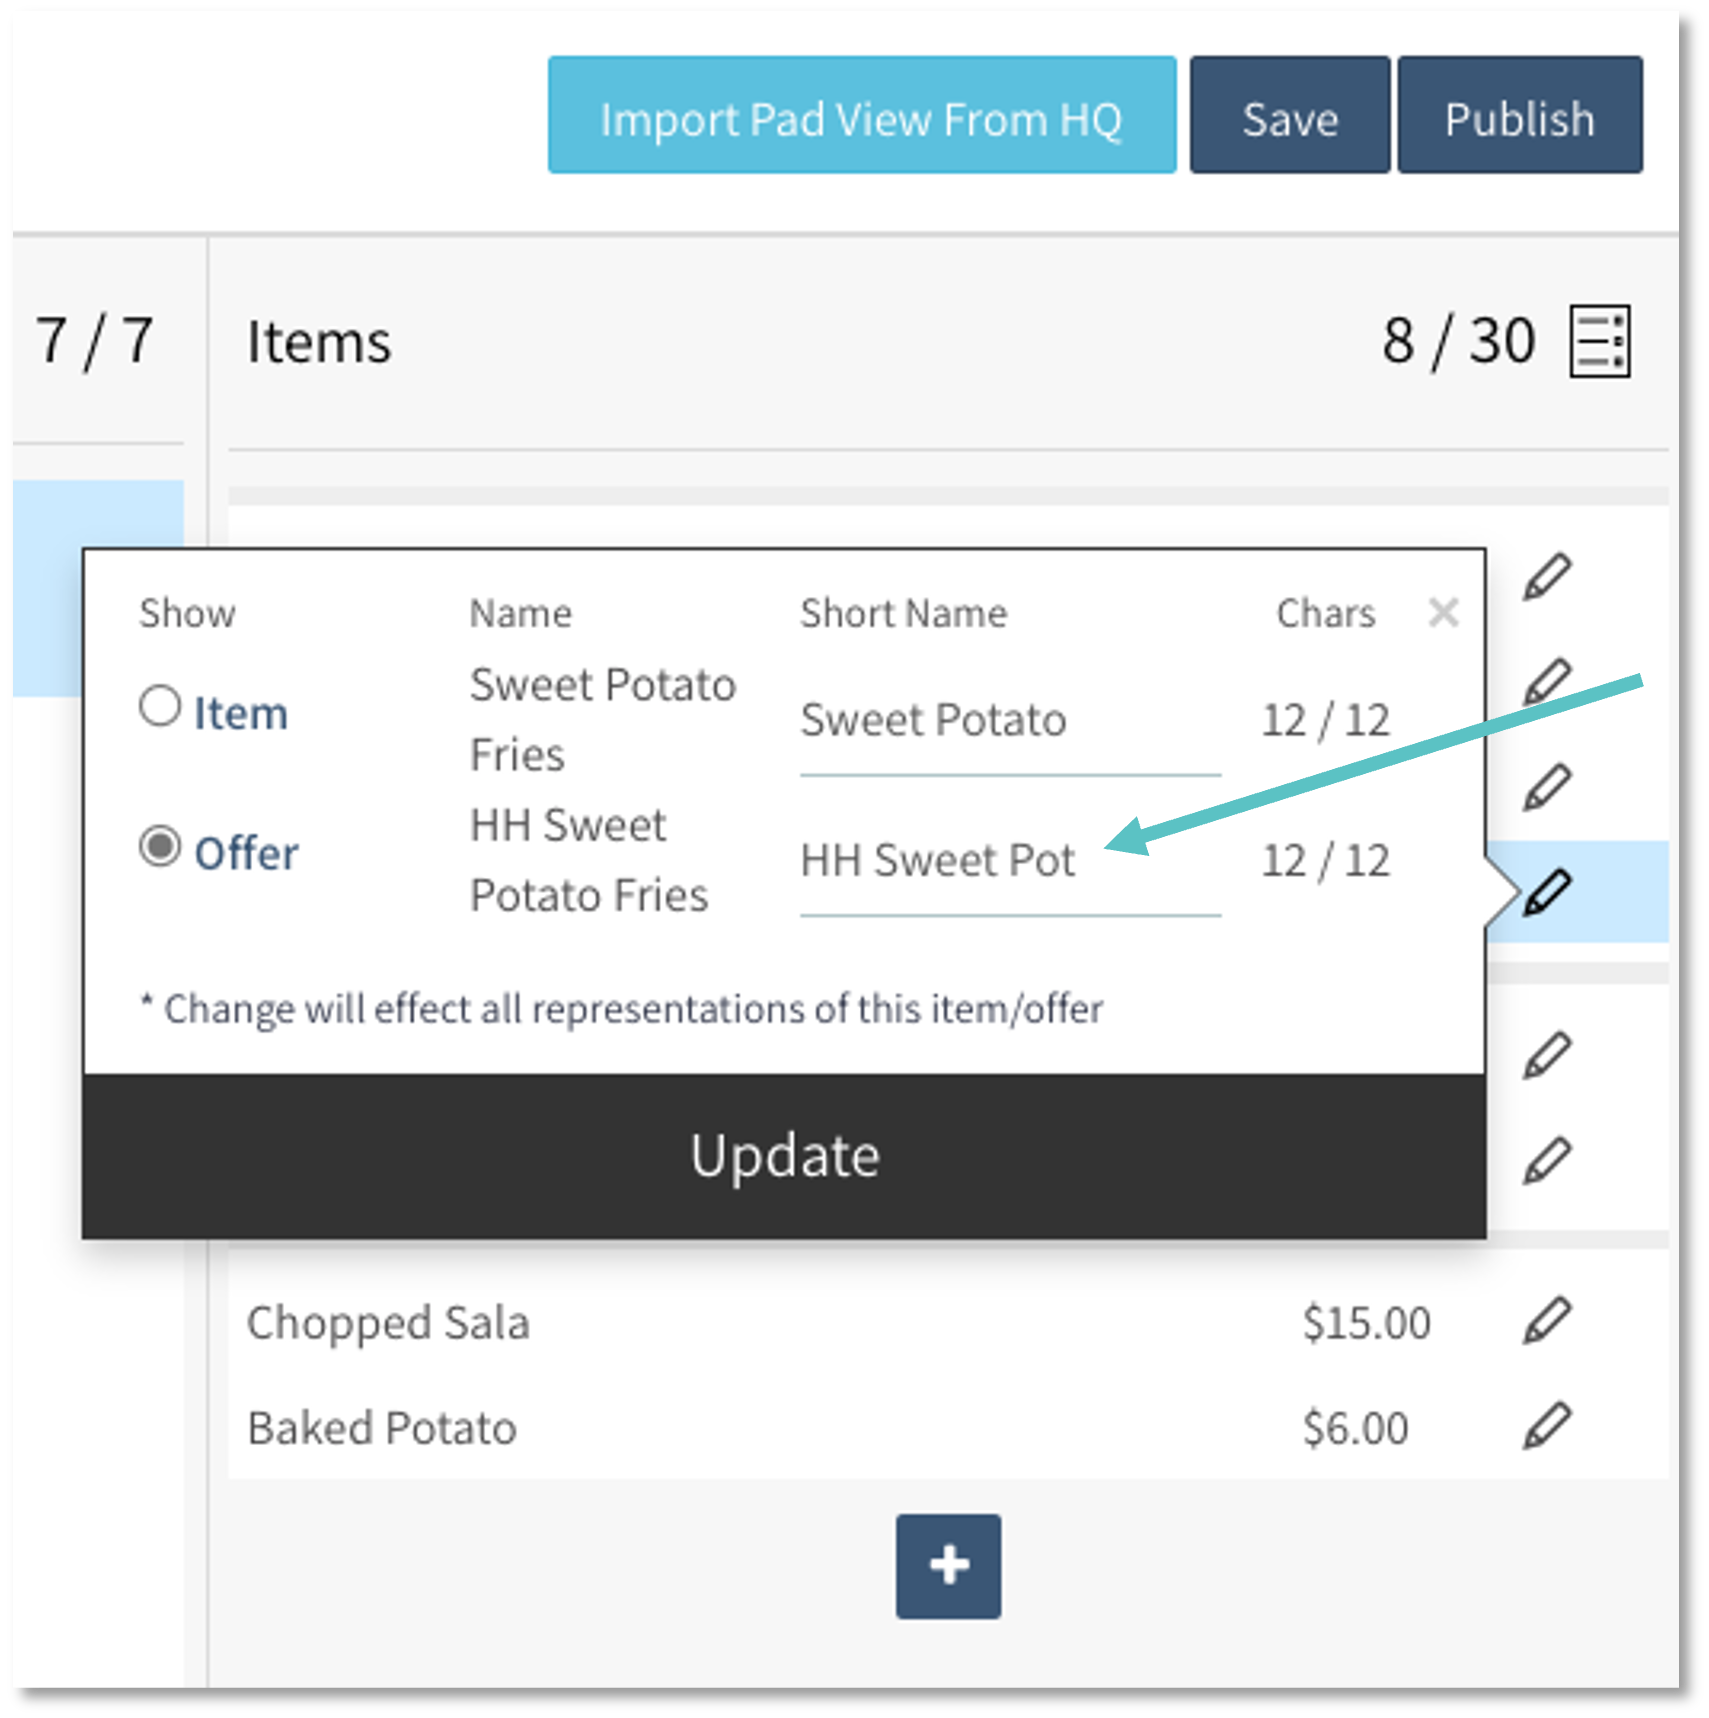
Select the Menu > Category > Sub Category and then select the Edit Icon next to the relevant Item to open up the Offer Type box
-
If an Item has more than one Offer, select the relevant Offer Type
-
Select the name of the Item and then select the correct name
-
Select Update.
-
Another option is to select the "+" button on the top right of the screen
-
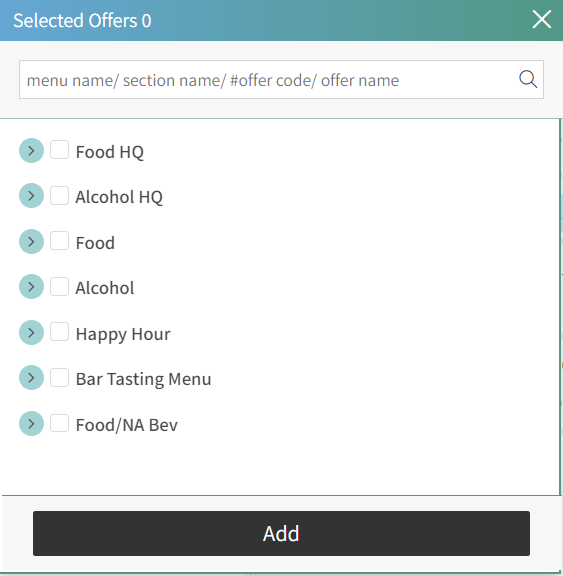
From here you can search for an Offer by Menu name, Section name, Offer code, or Offer name, or browse to find the relevant Offer
-
Select the relevant Offer(s) and then select the Item
The changes will be saved and now automatically reflect in the PAD View
To restore a previous PAD View, please contact Flyght Support