
Overview
When creating an item or an offer, the system organizes them based on the default catalog for standard menu reports. Menus and menu sections are customized menus designed for your restaurant's reports. They offer an extra level of BI reports to meet your reporting needs. For instance, you might have a menu specifically for lunch, happy hour, or employee meals.
What is an Item?
-
Can have an Offer (price point) associated with it and can be reported on
-
Can be part of a Modifier and/or Decision Groups
-
Can have a Modifier/Decision Group attached to it
What is an Offer?
A price point that an Item is sold at, each is defined by a unique Offer Code
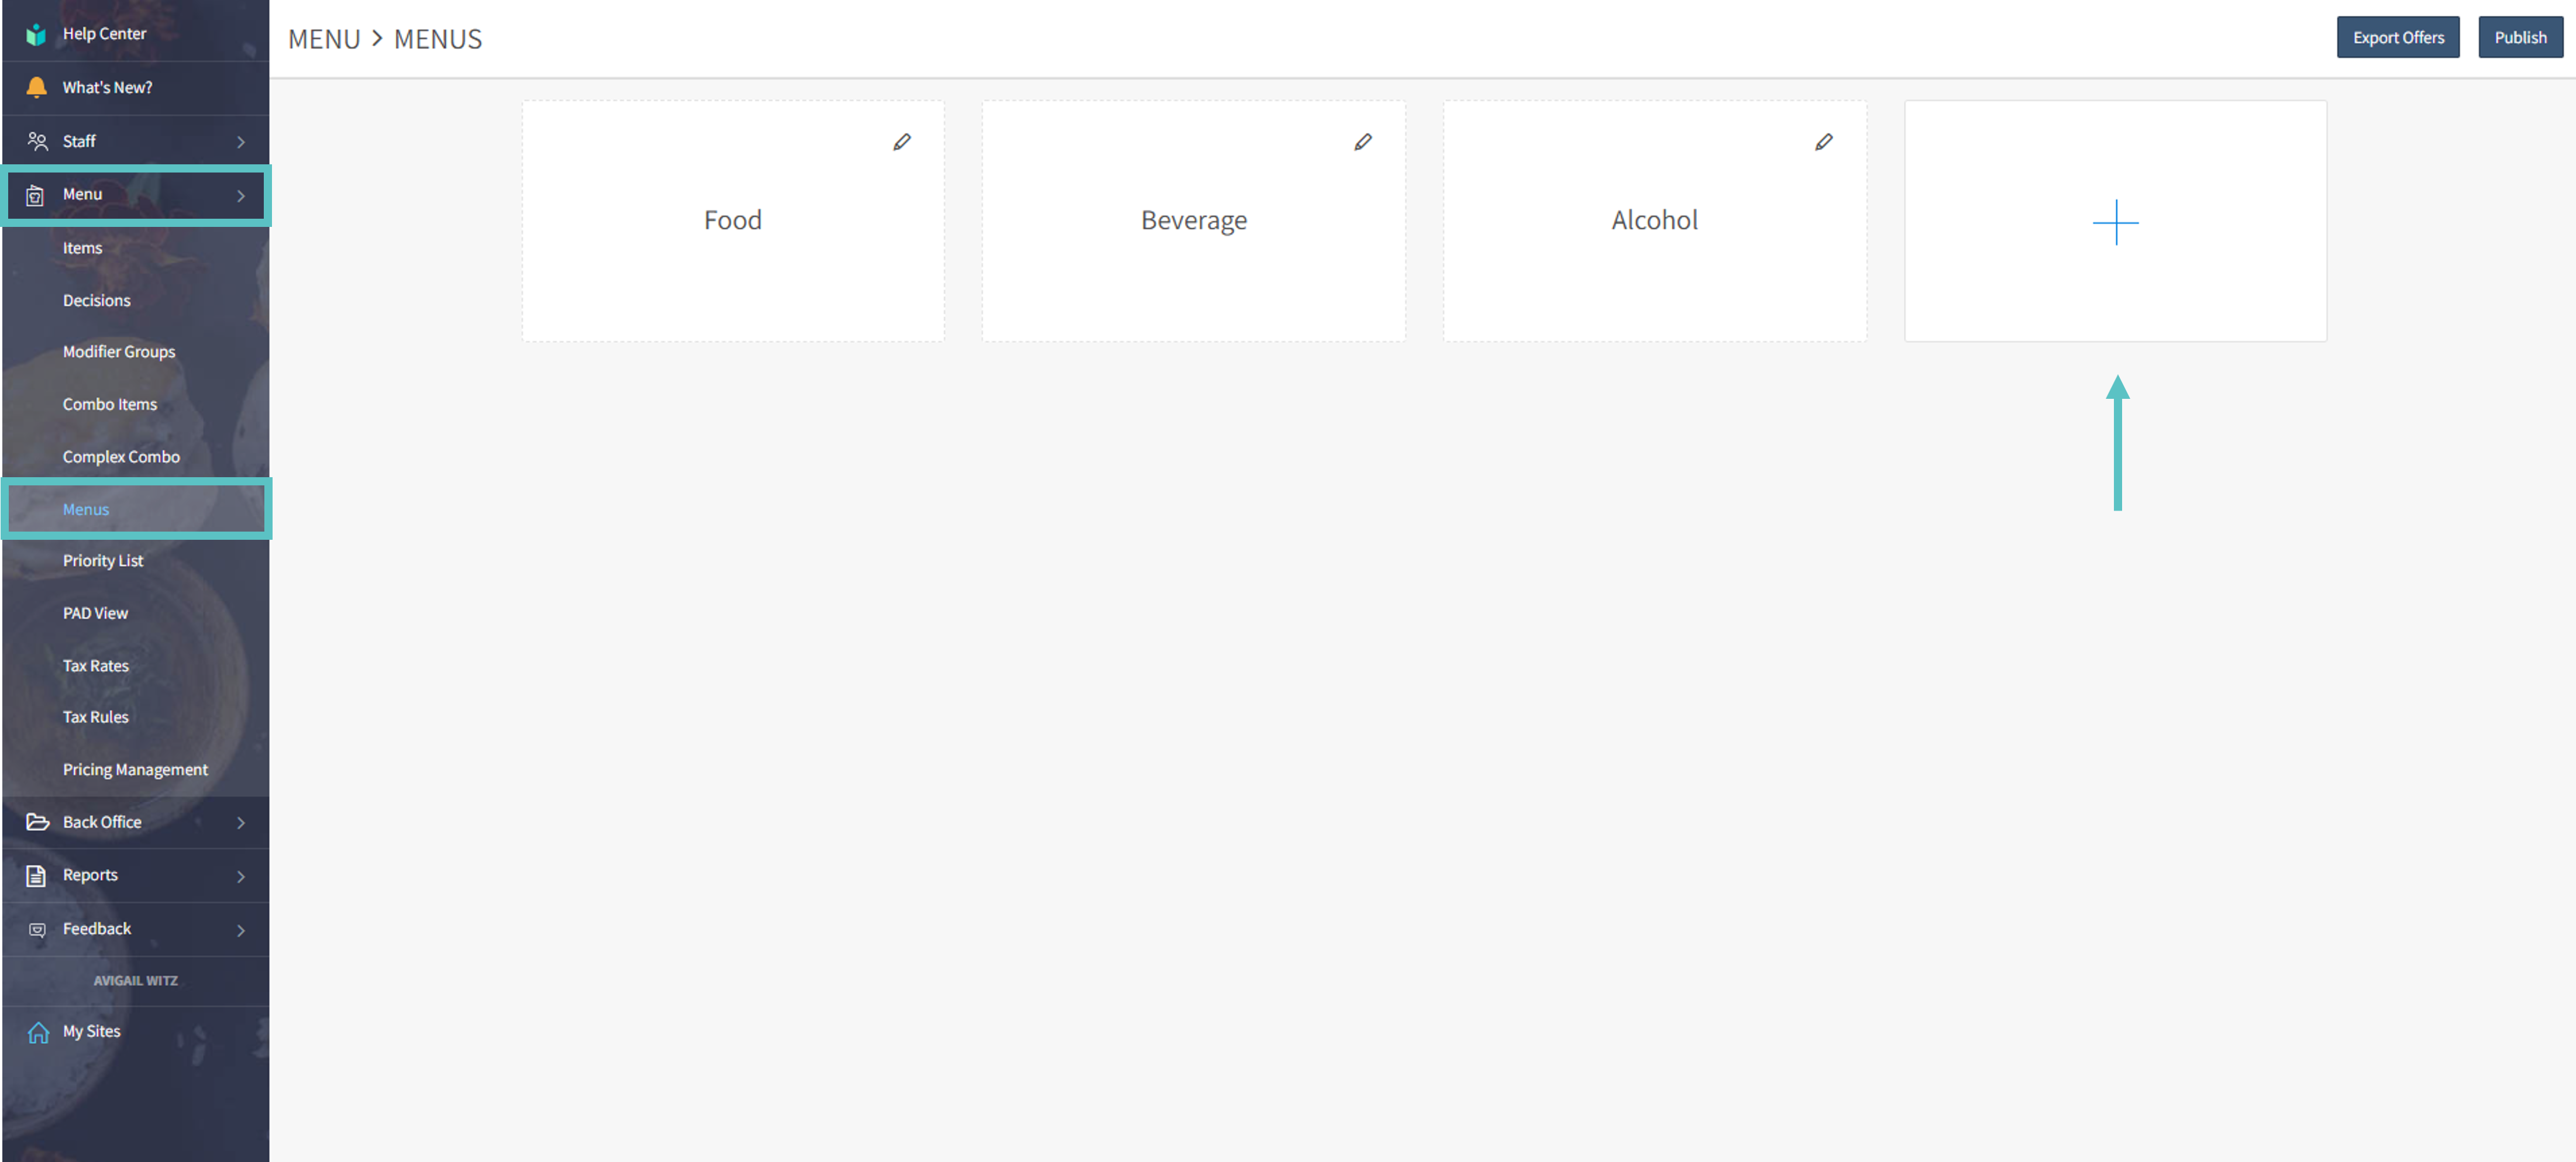
Follow the steps below to add a menu section:
-
Login to Tabit Office with your Manager credentials
-
Go to Menu > Menus and then select the + Icon
-
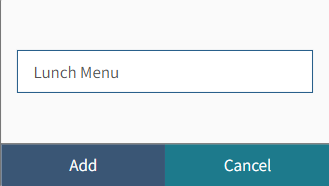
Then, type the Menu Name and select Save
-
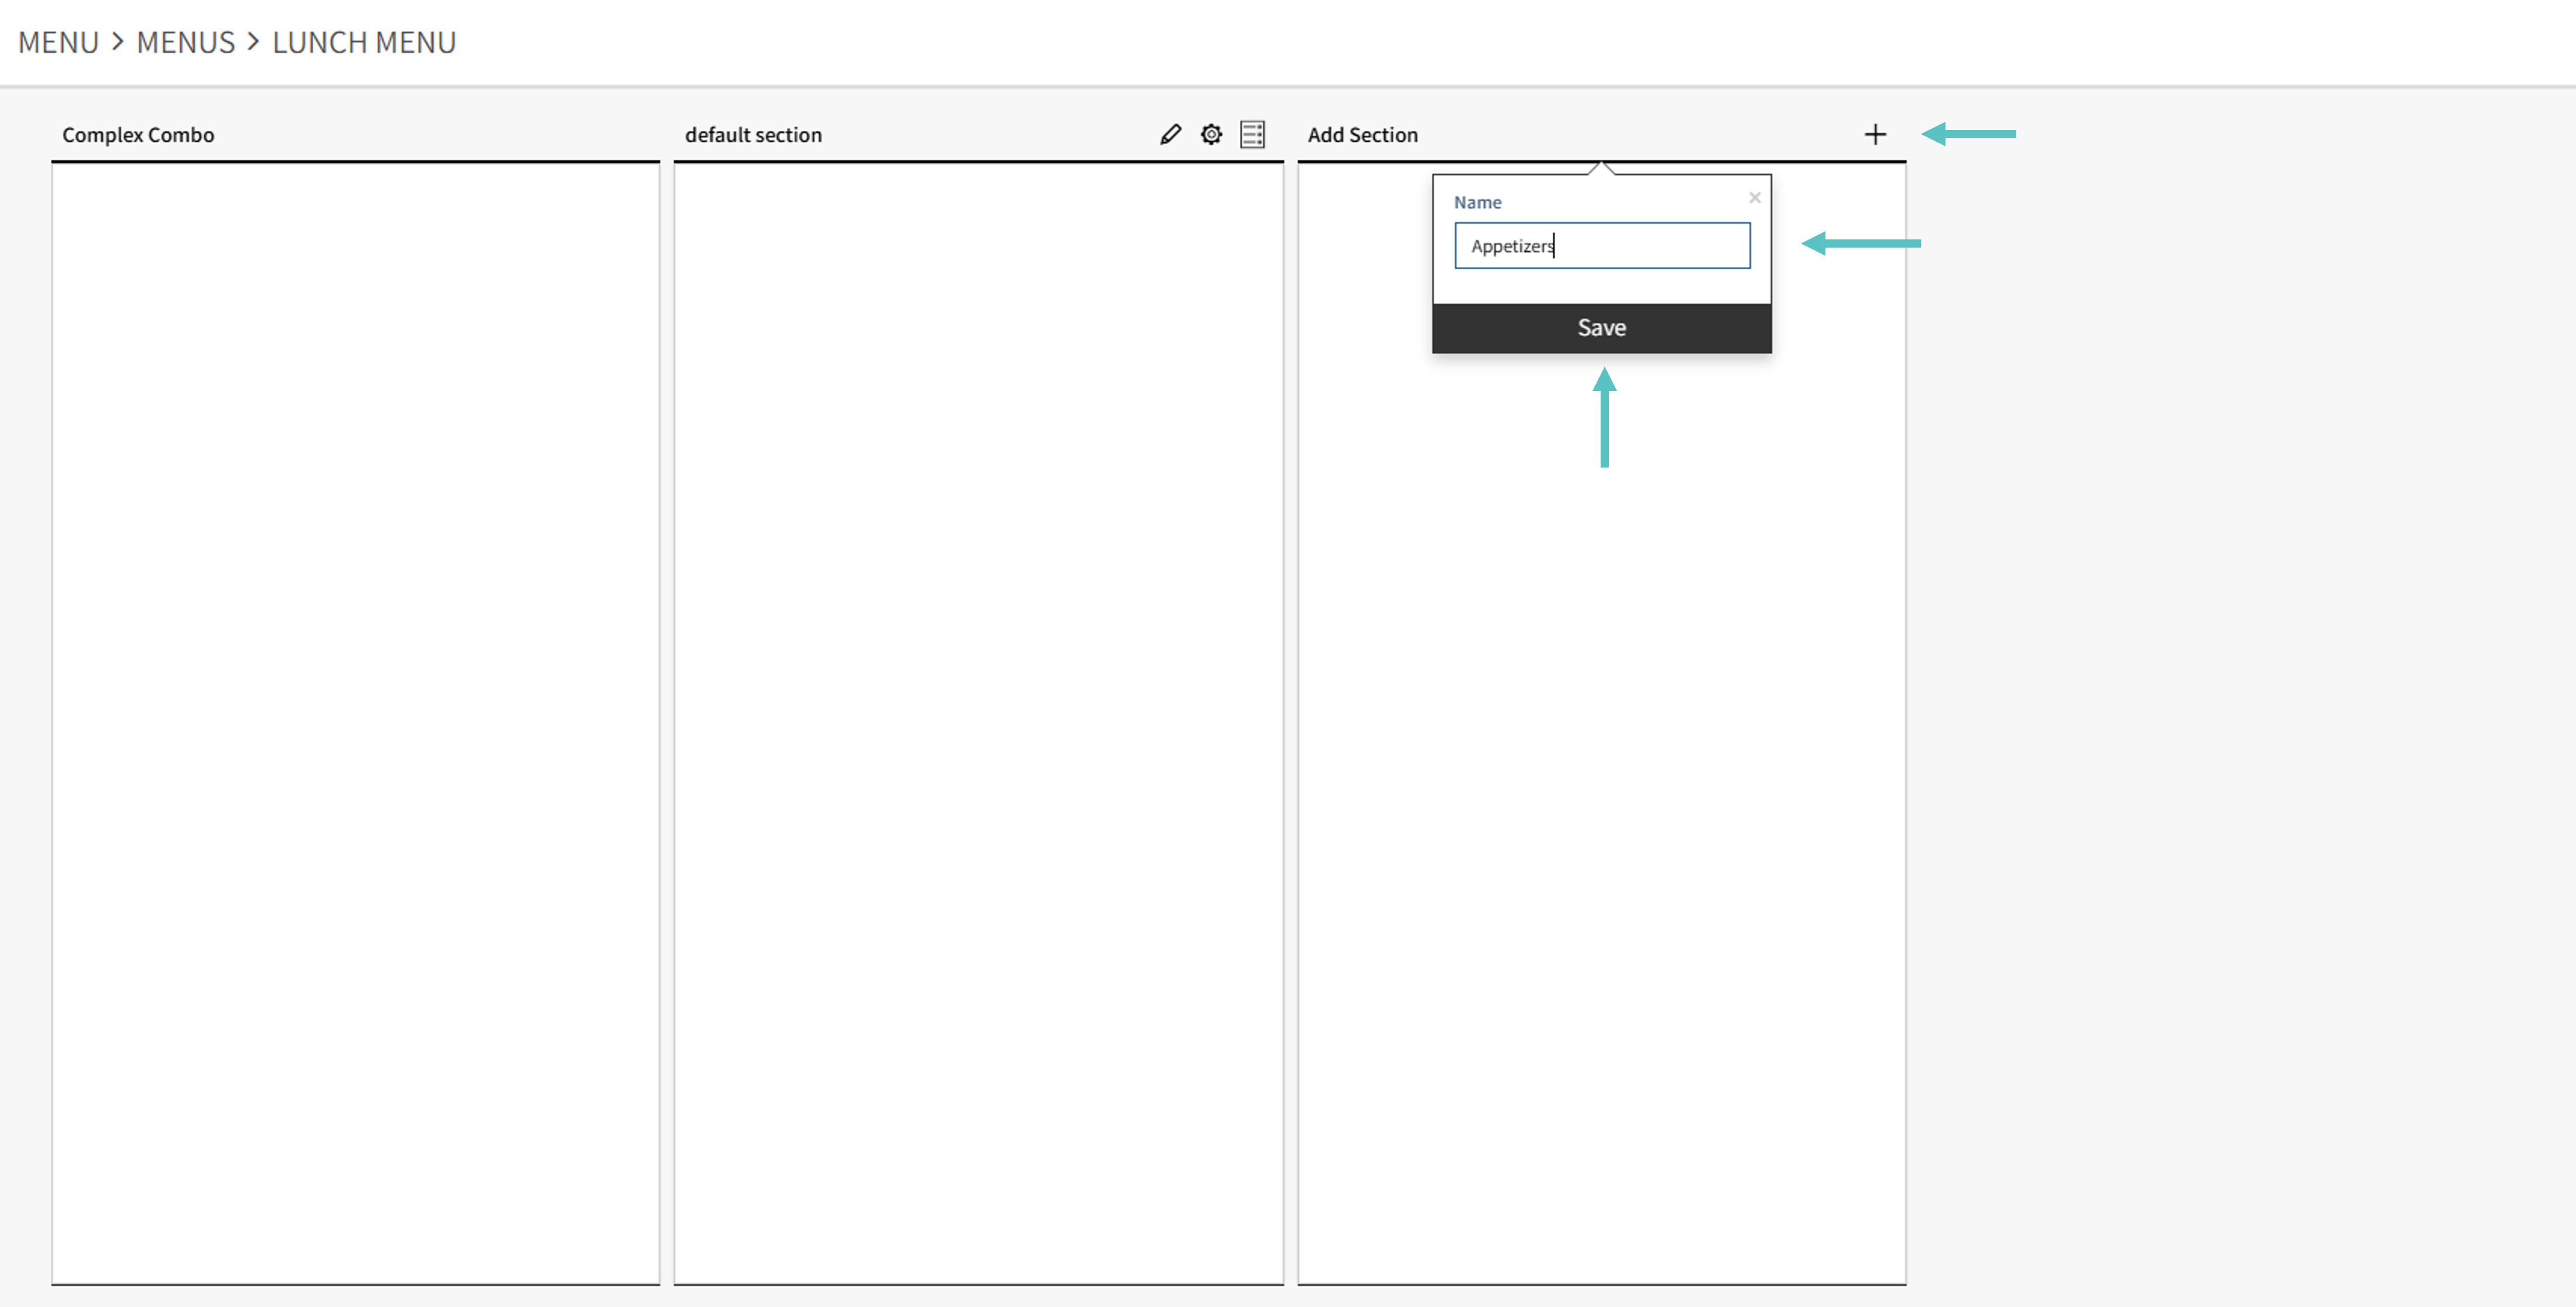
Now, go to the menu you added, select the + Icon, and type the section's name. Then select Save to add the section
-
Repeat this process to add more sections if needed.