
Organize pricing across HQ sites
A Price Group brings related offers together for pricing management across the HQ. A Price Tier lets you manage pricing for selected sites. This helps when restaurants need different prices because of their location, supplier costs, or site type.
For example, wine pricing might apply to Sites 1 and 2, beer pricing to Sites 2 and 3, and seafood pricing to Sites 1 and 3. Separate groups and tiers let you manage those combinations.
Before you begin: Price Tiers require an HQ and connected sites using Master Item, together with Menu Admin permissions at the HQ level.
Create the Price Group
-
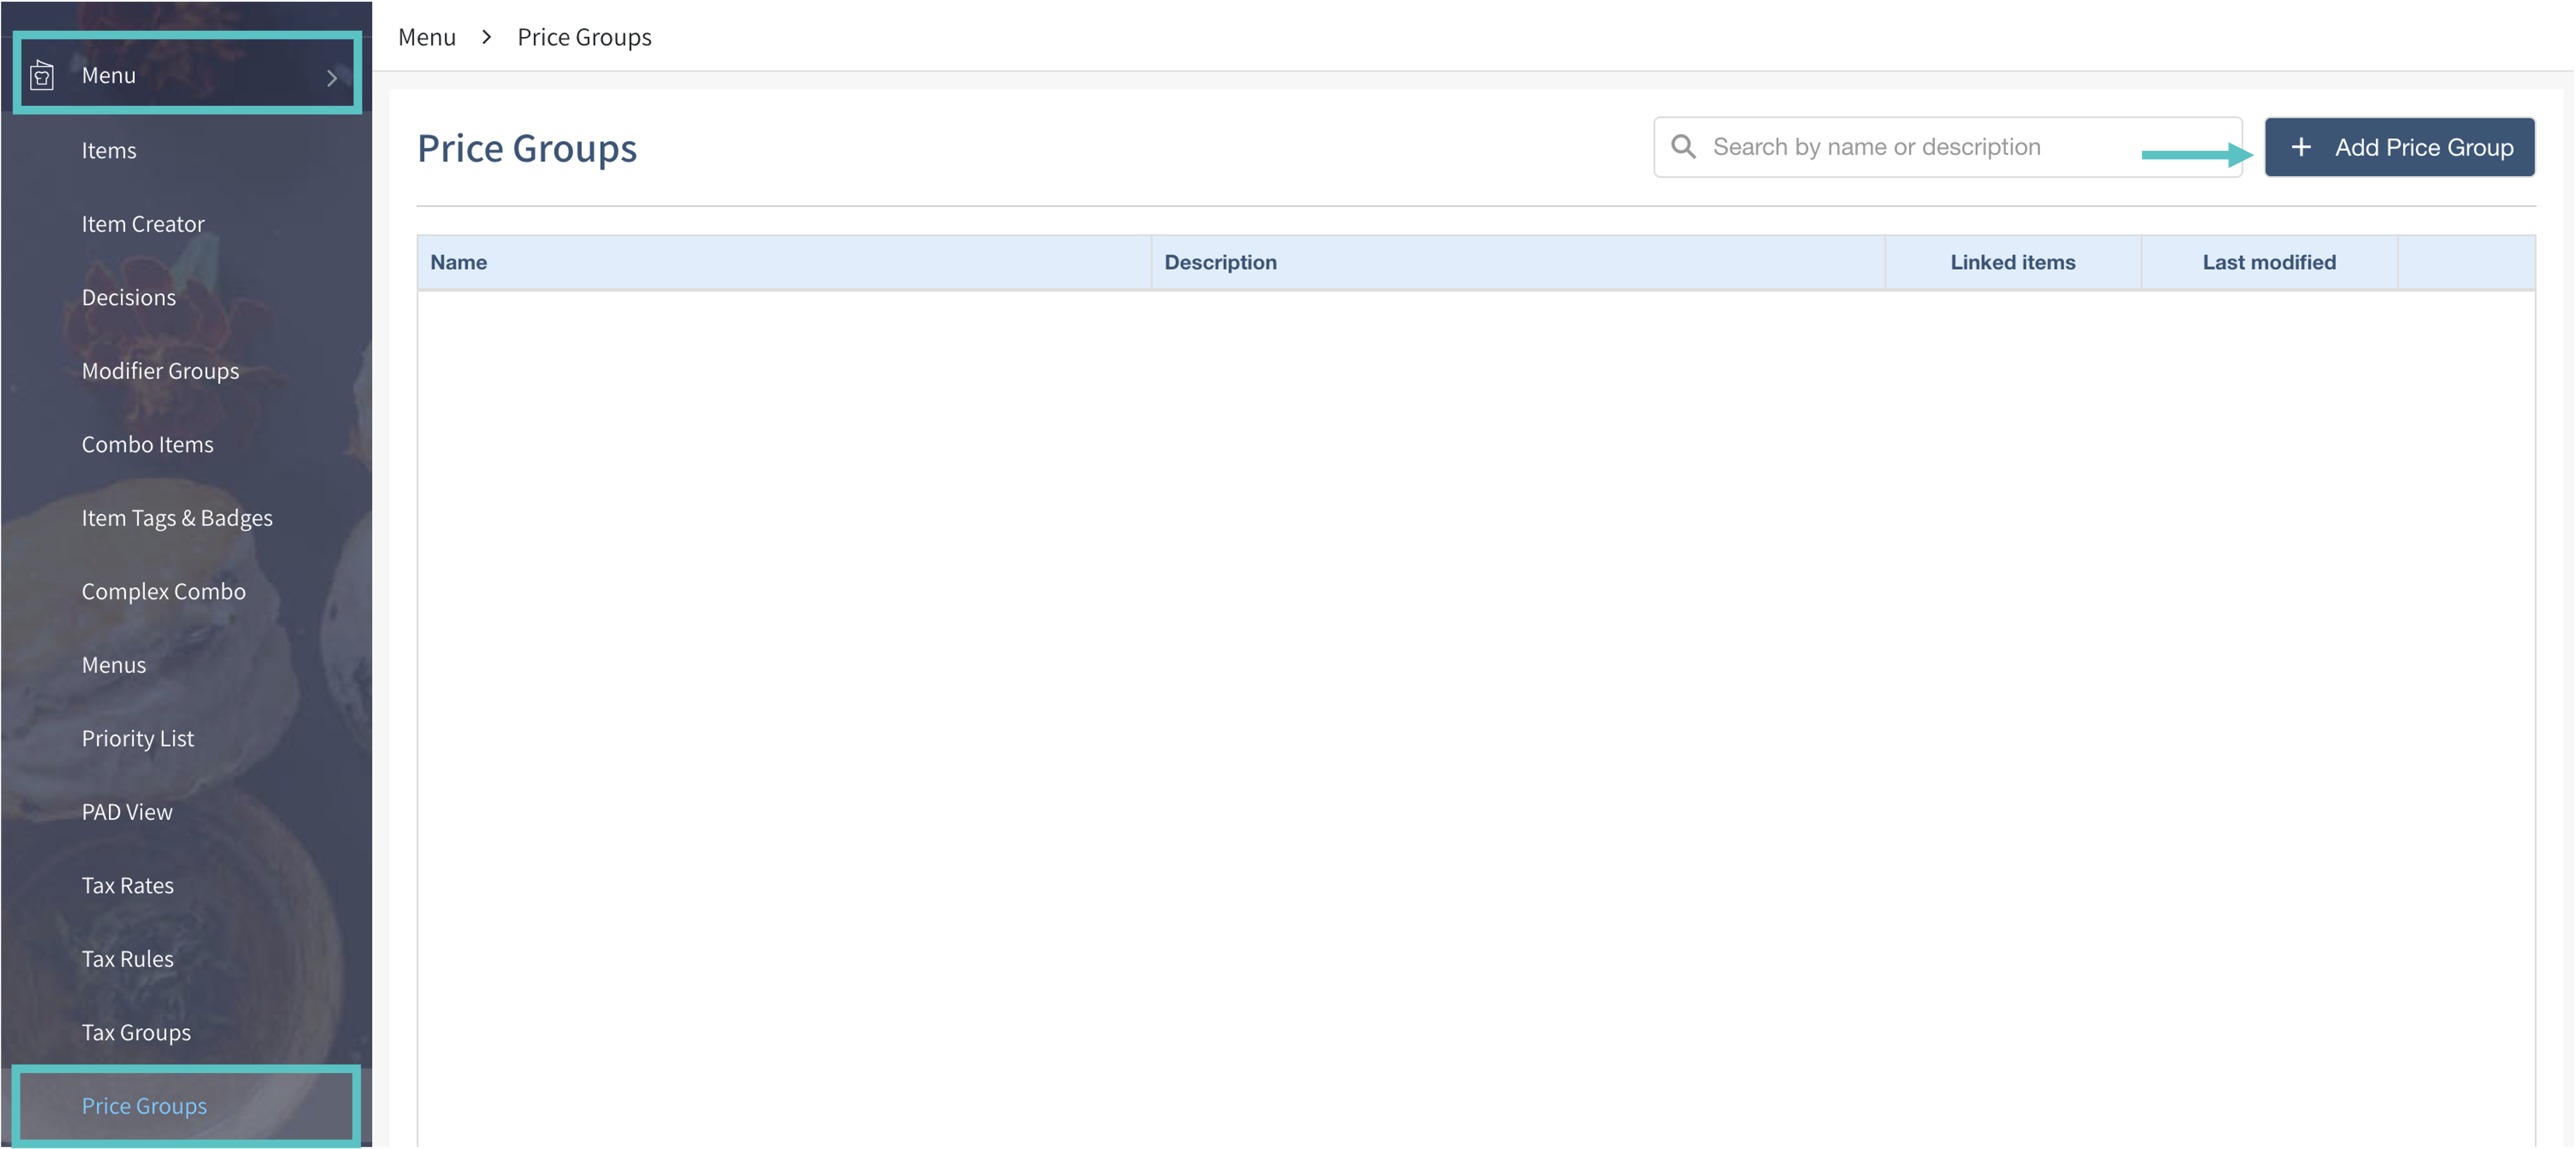
From the HQ site, open Menu > Price Groups.
-
Select + Add Price Group.
-
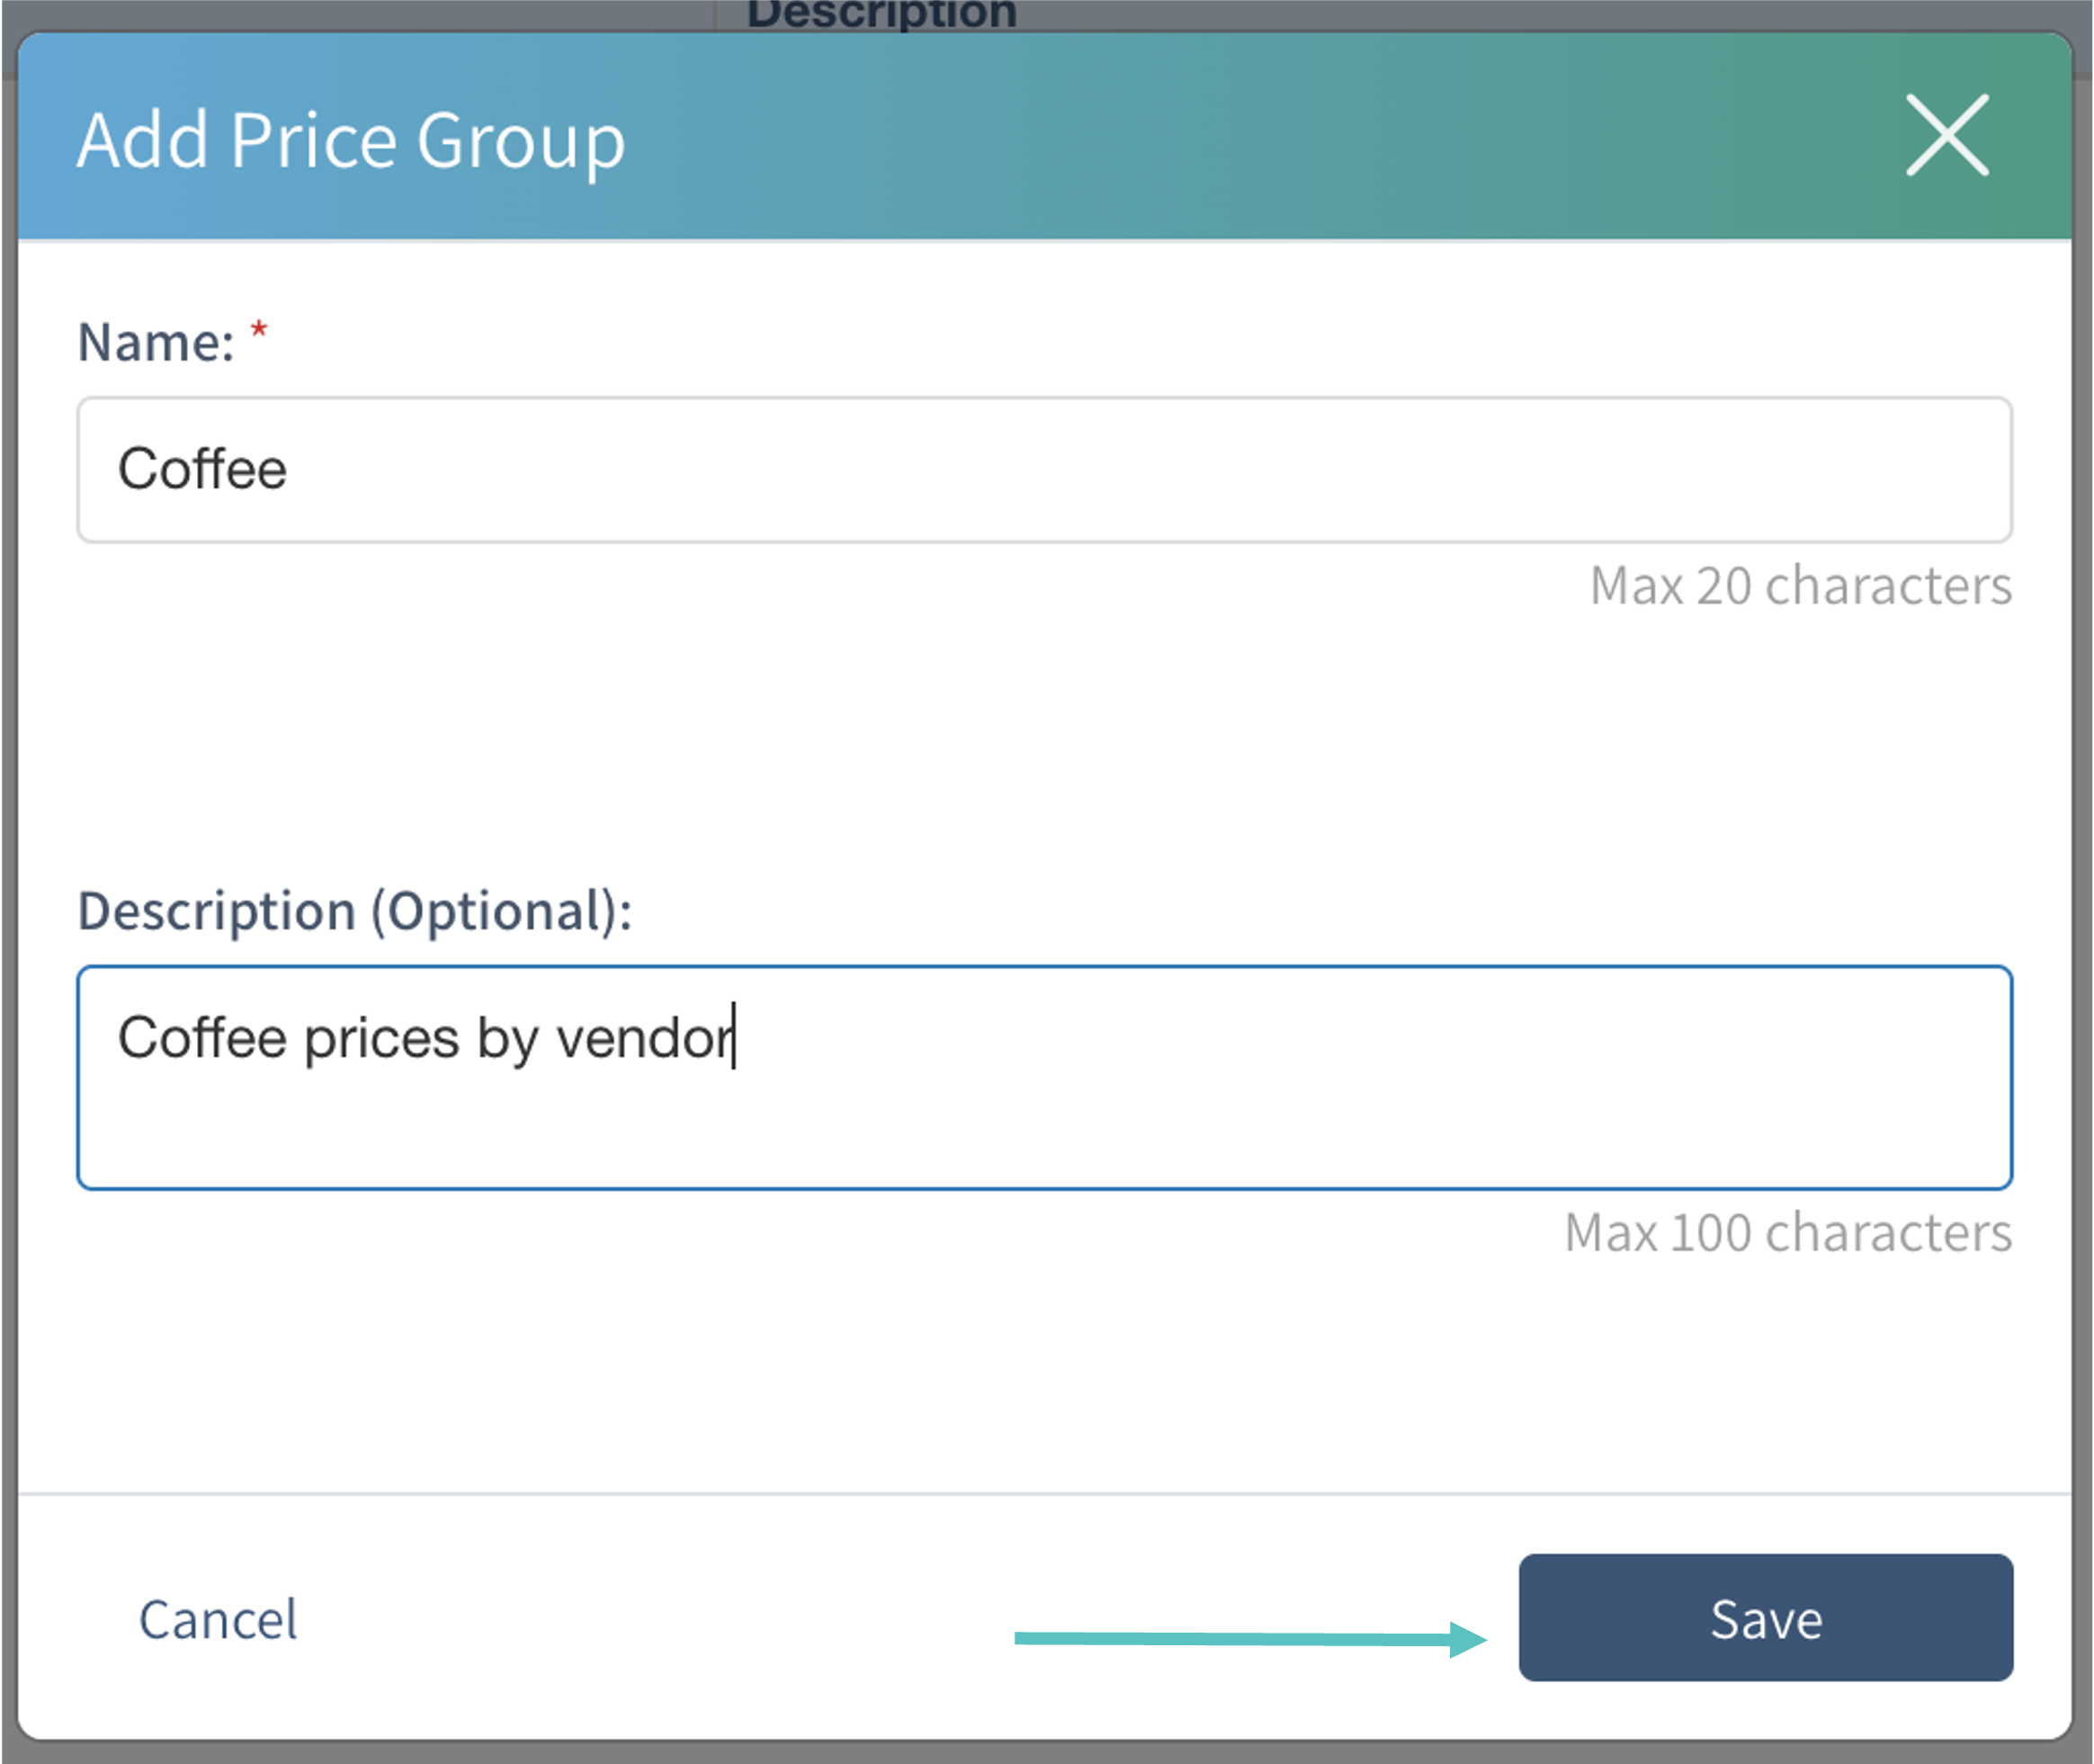
Enter a required name and, if helpful, a description. Select Save.
Choose the sites for pricing
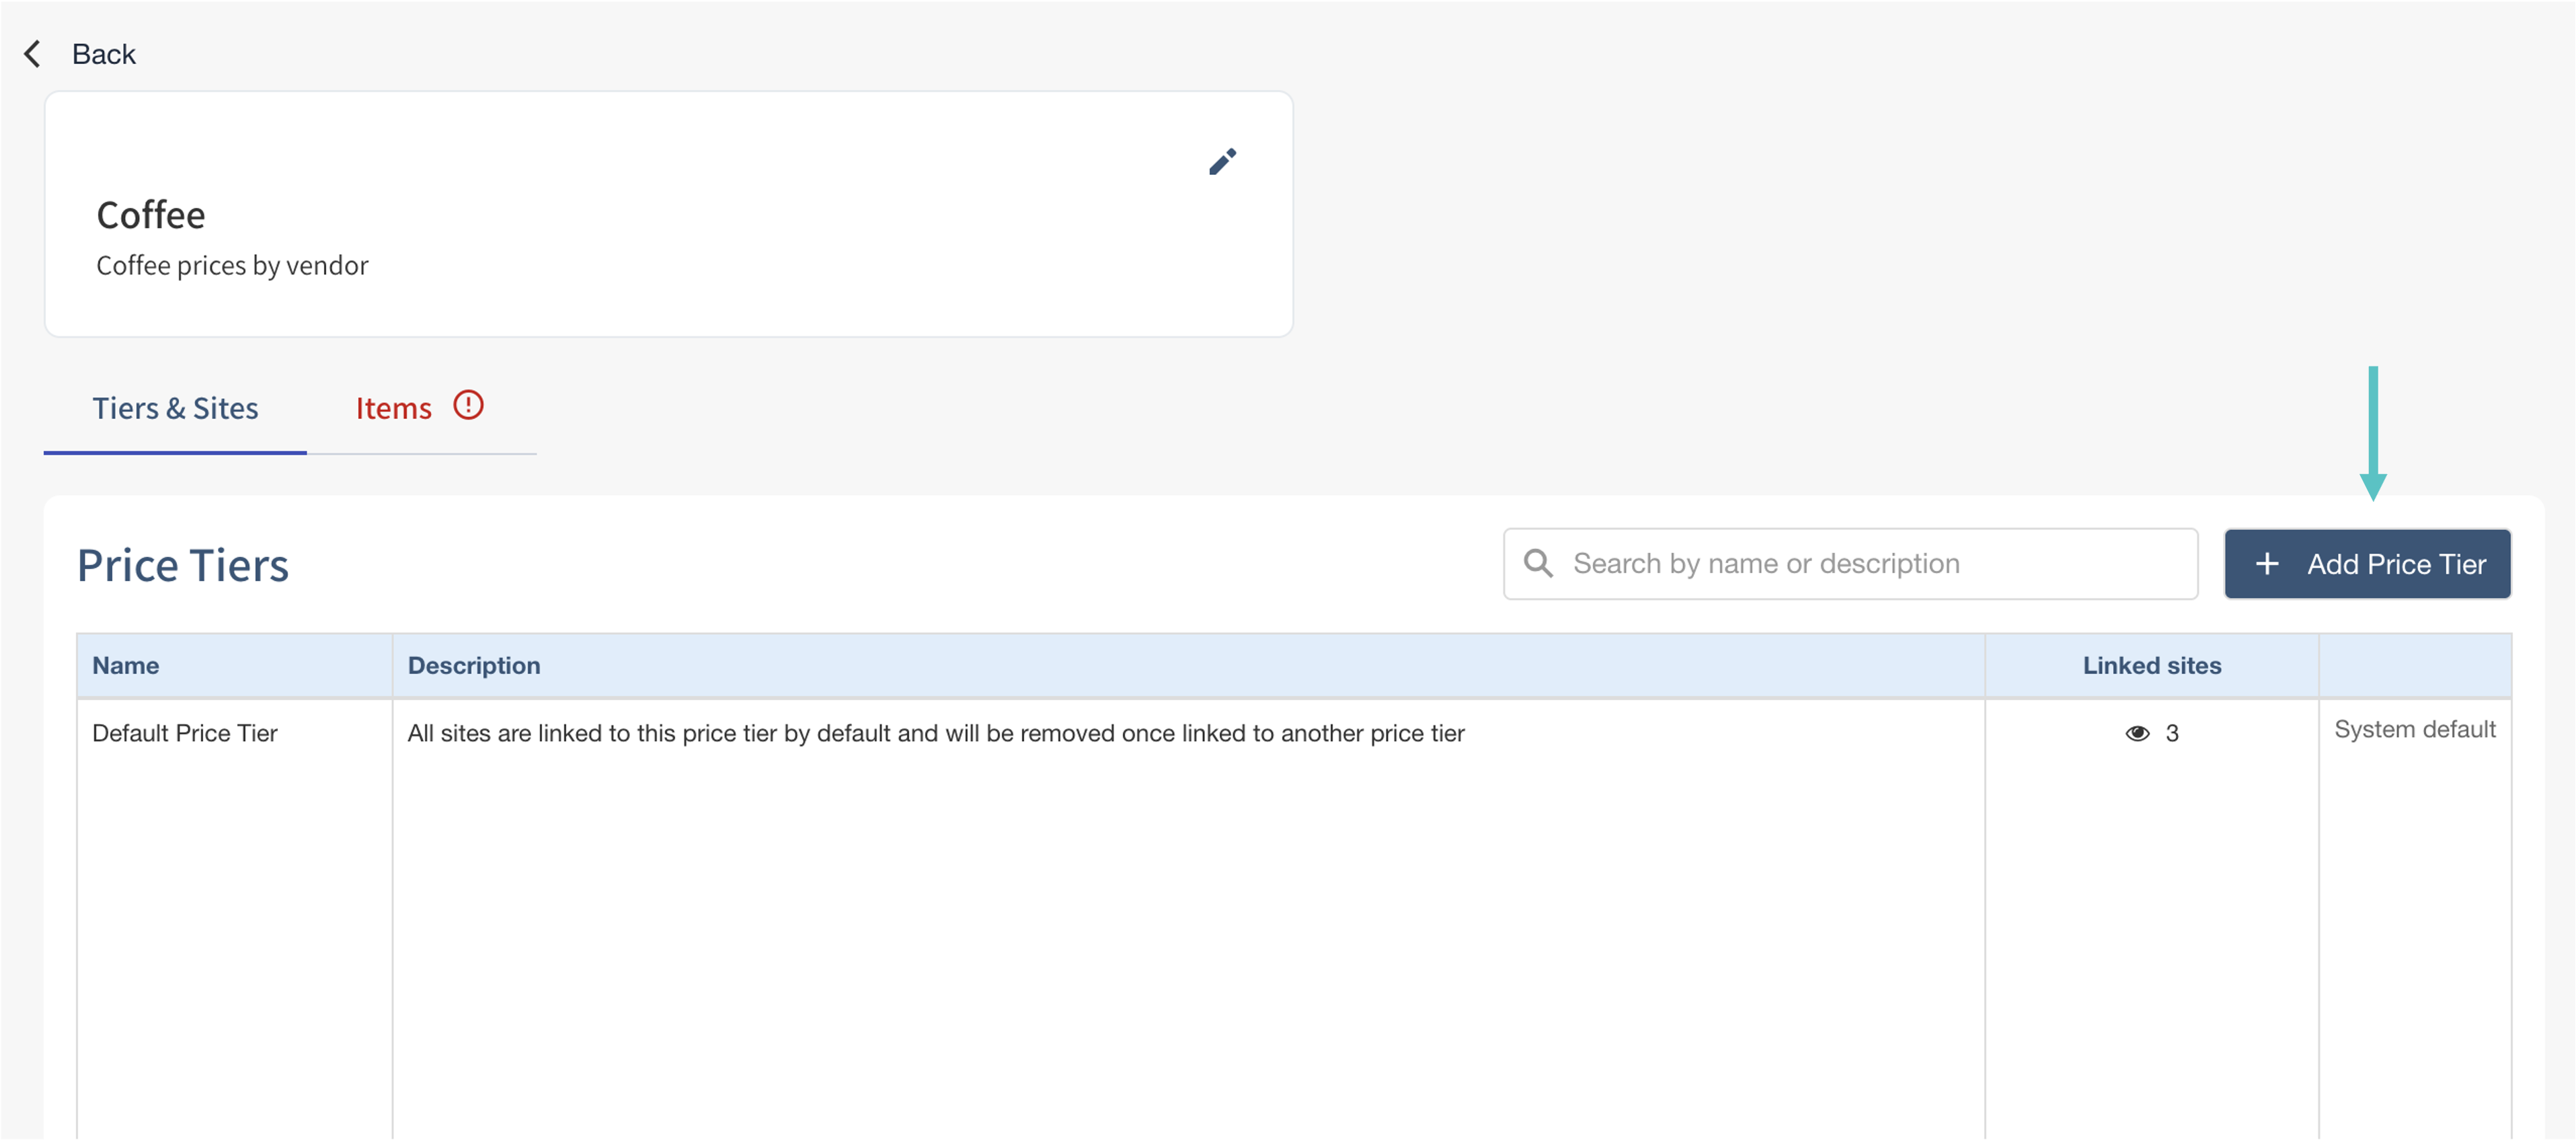
The default Price Tier includes every site under the HQ. Use it when the group should share pricing across all those sites. To create a tier for a selected set of sites:
-
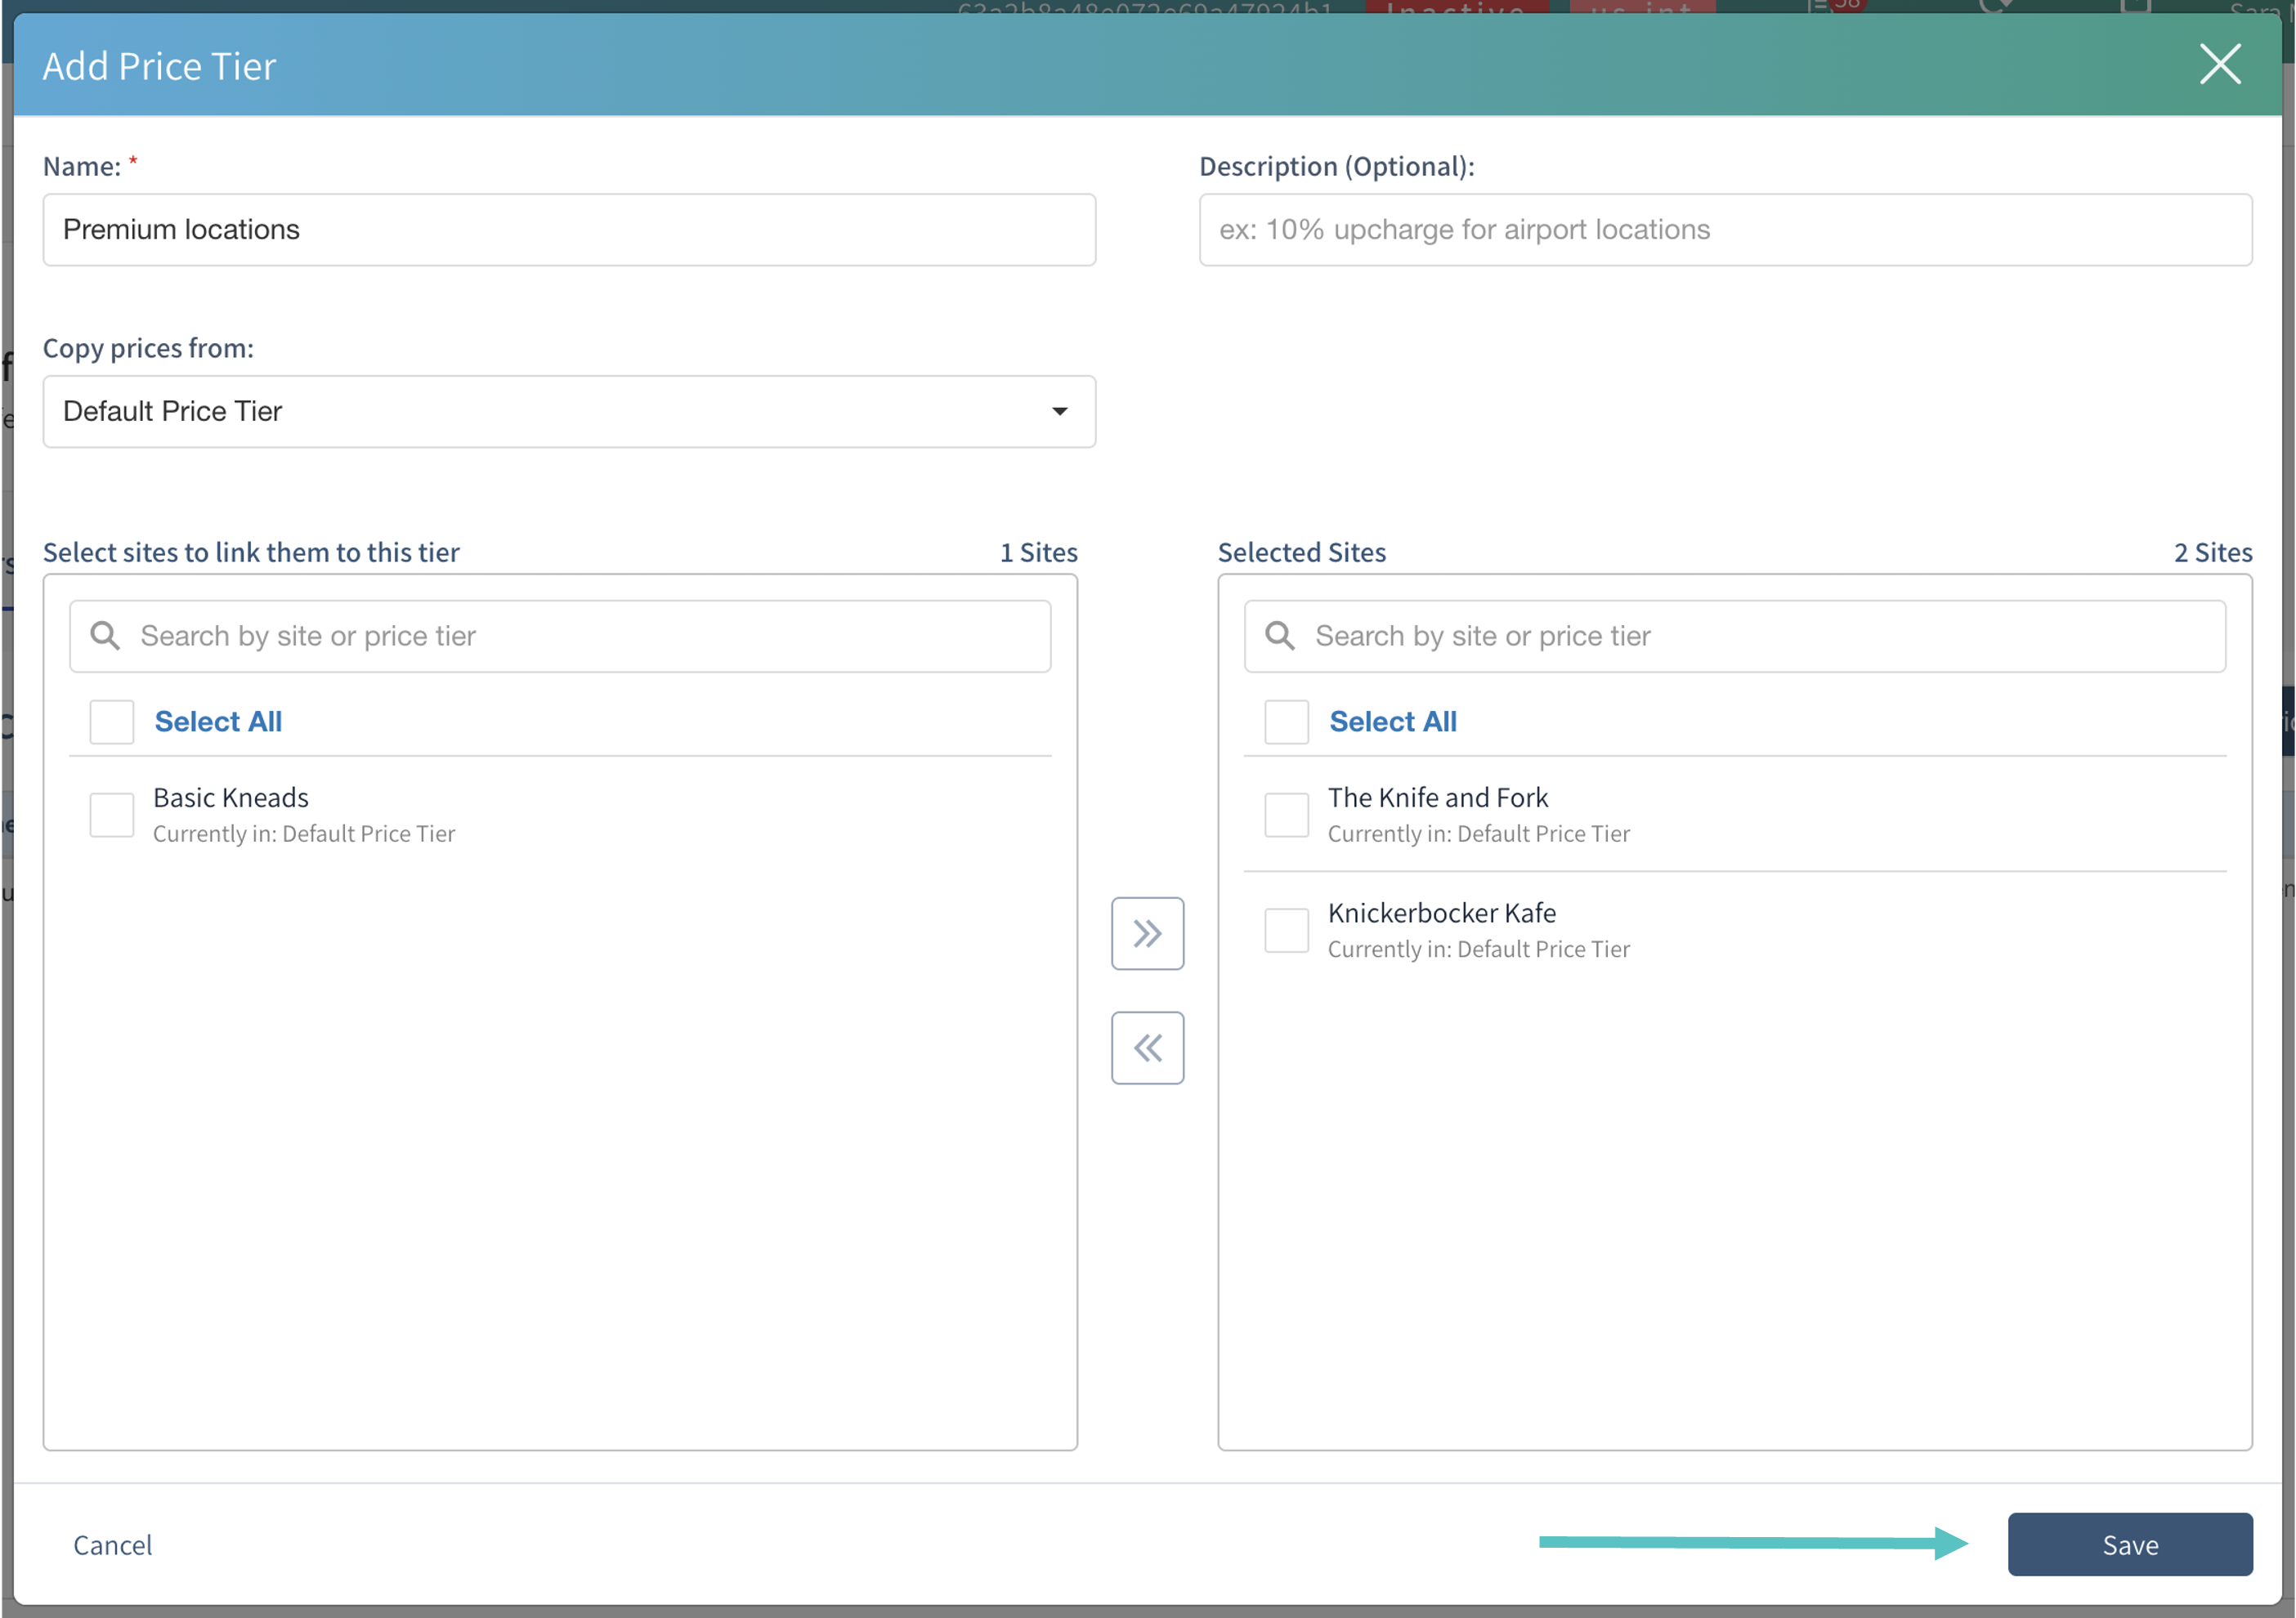
Select + Add Price Tier.
-
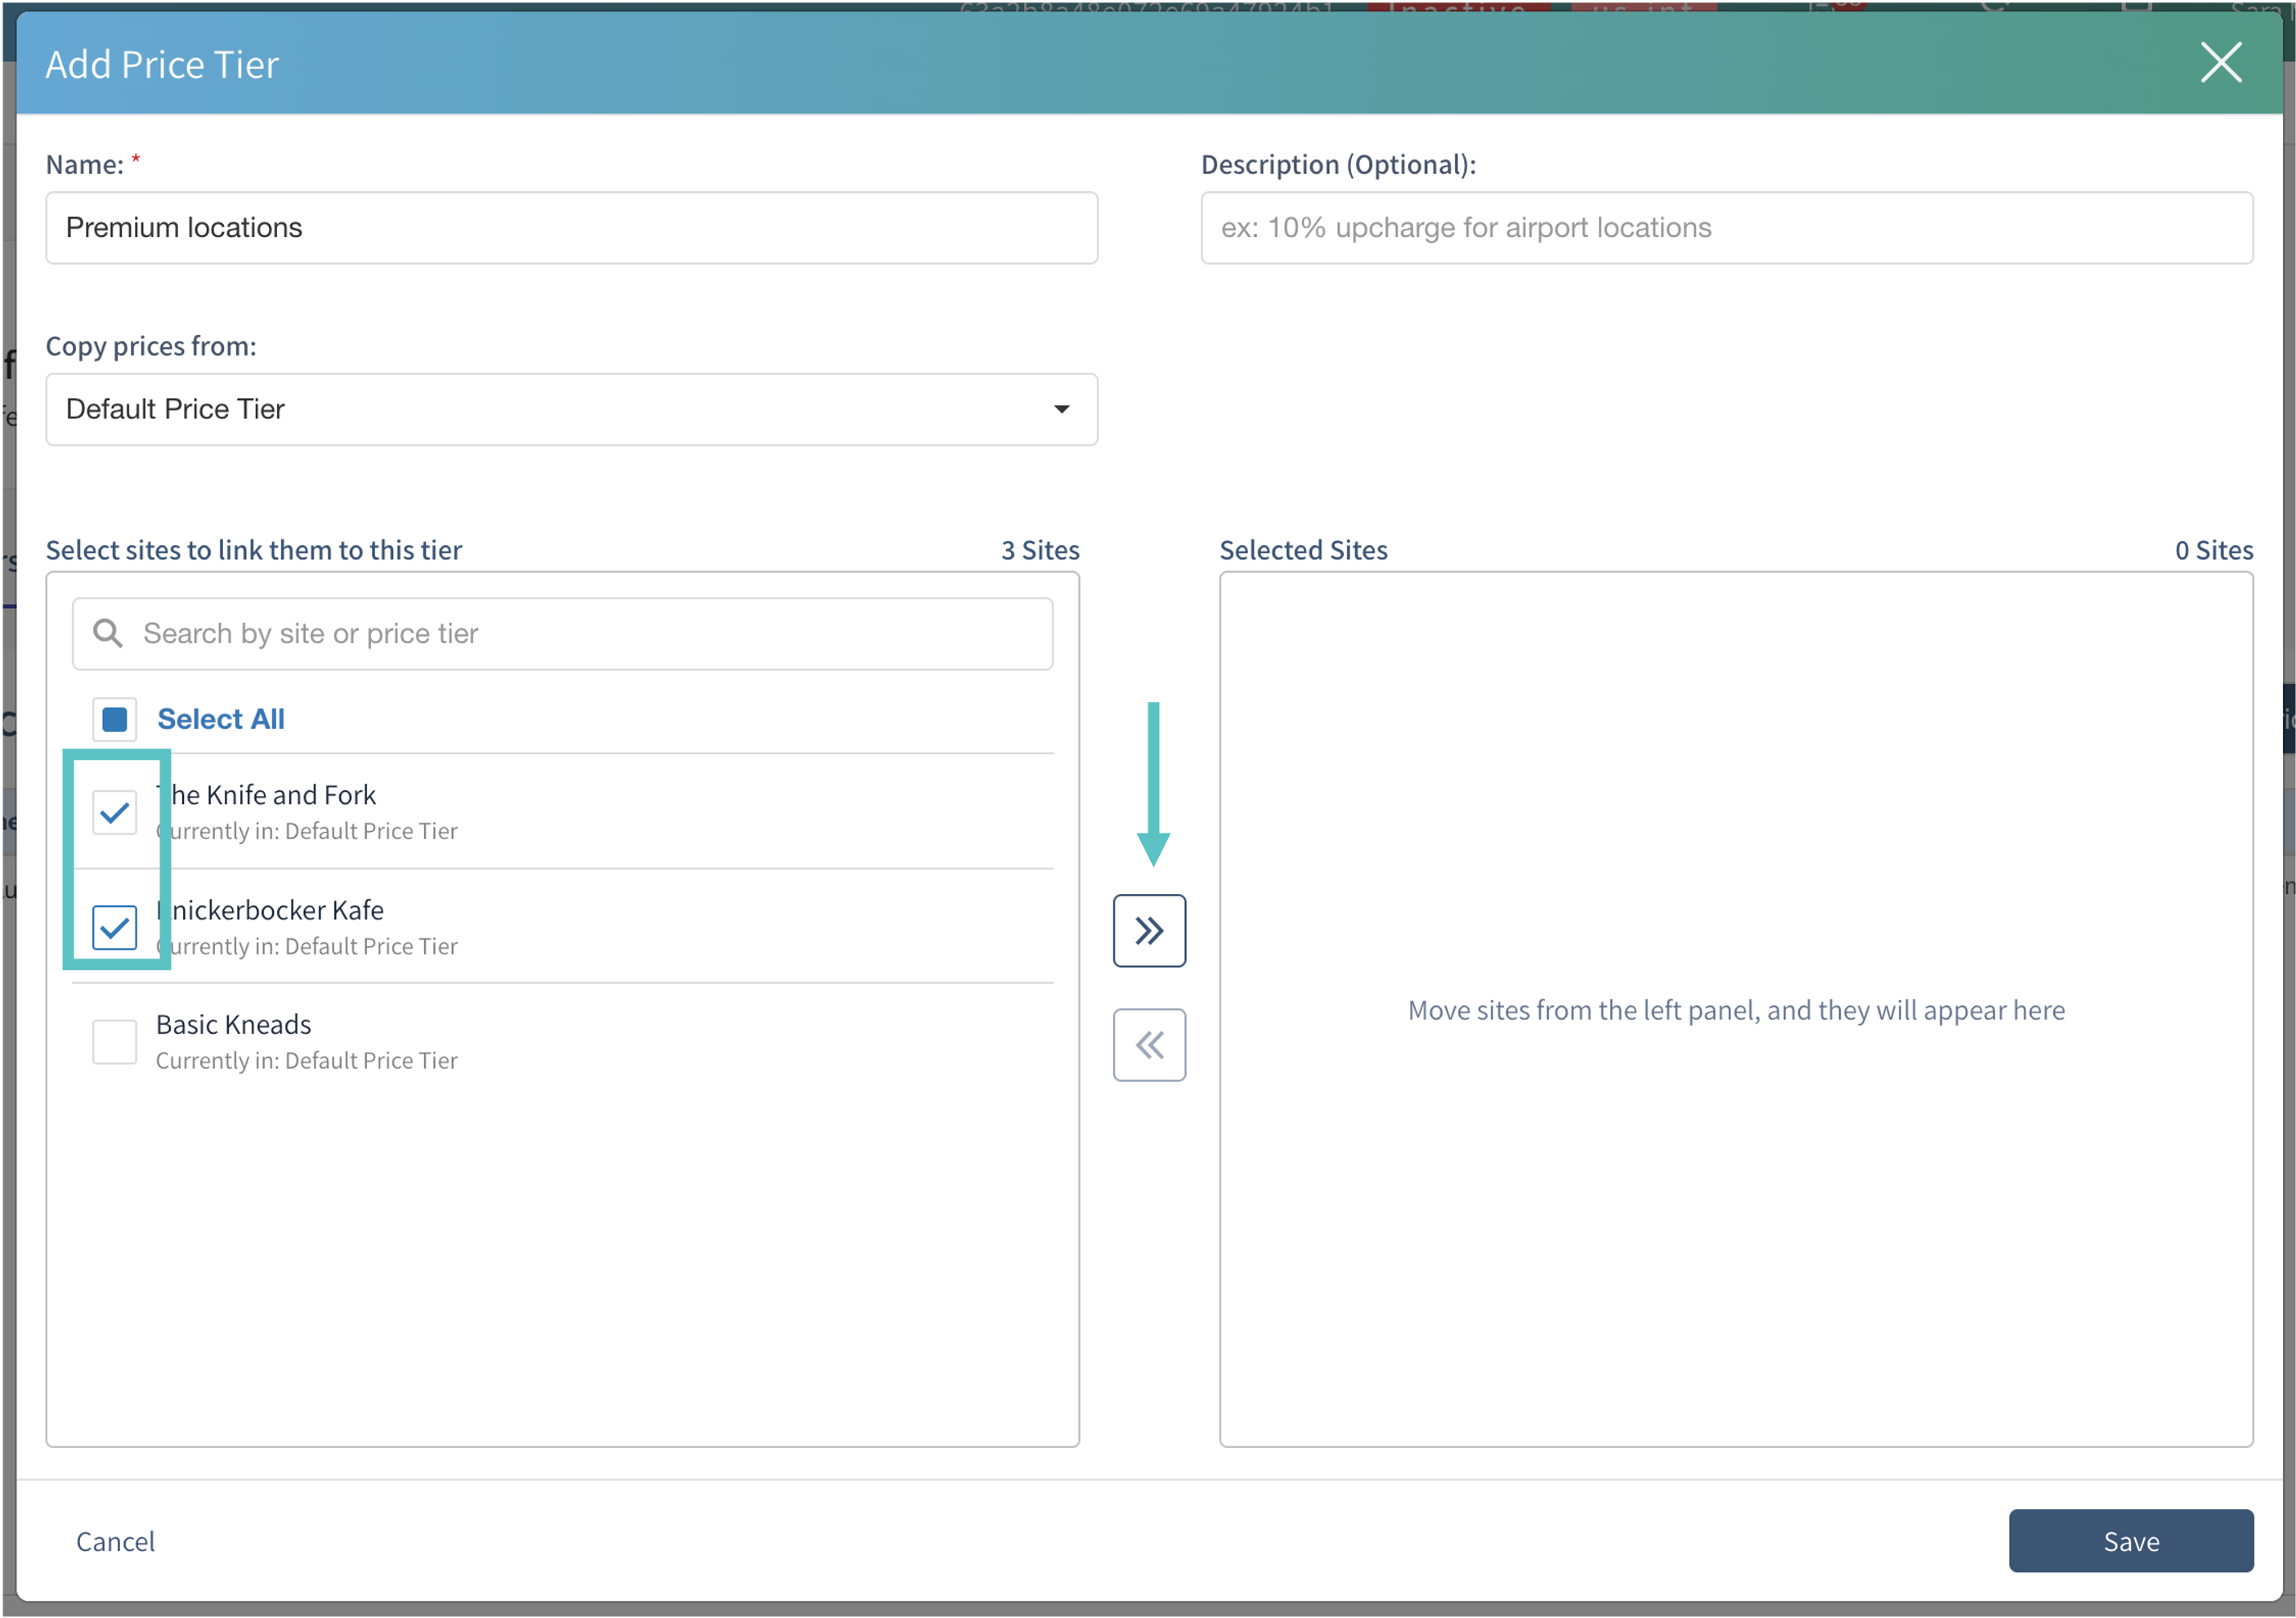
Enter a name and an optional description.
-
Choose the source site whose prices you want to copy.
-
Select the sites to include and use the right arrow to move them into the selection.
-
Select Save.
Assign the items
-
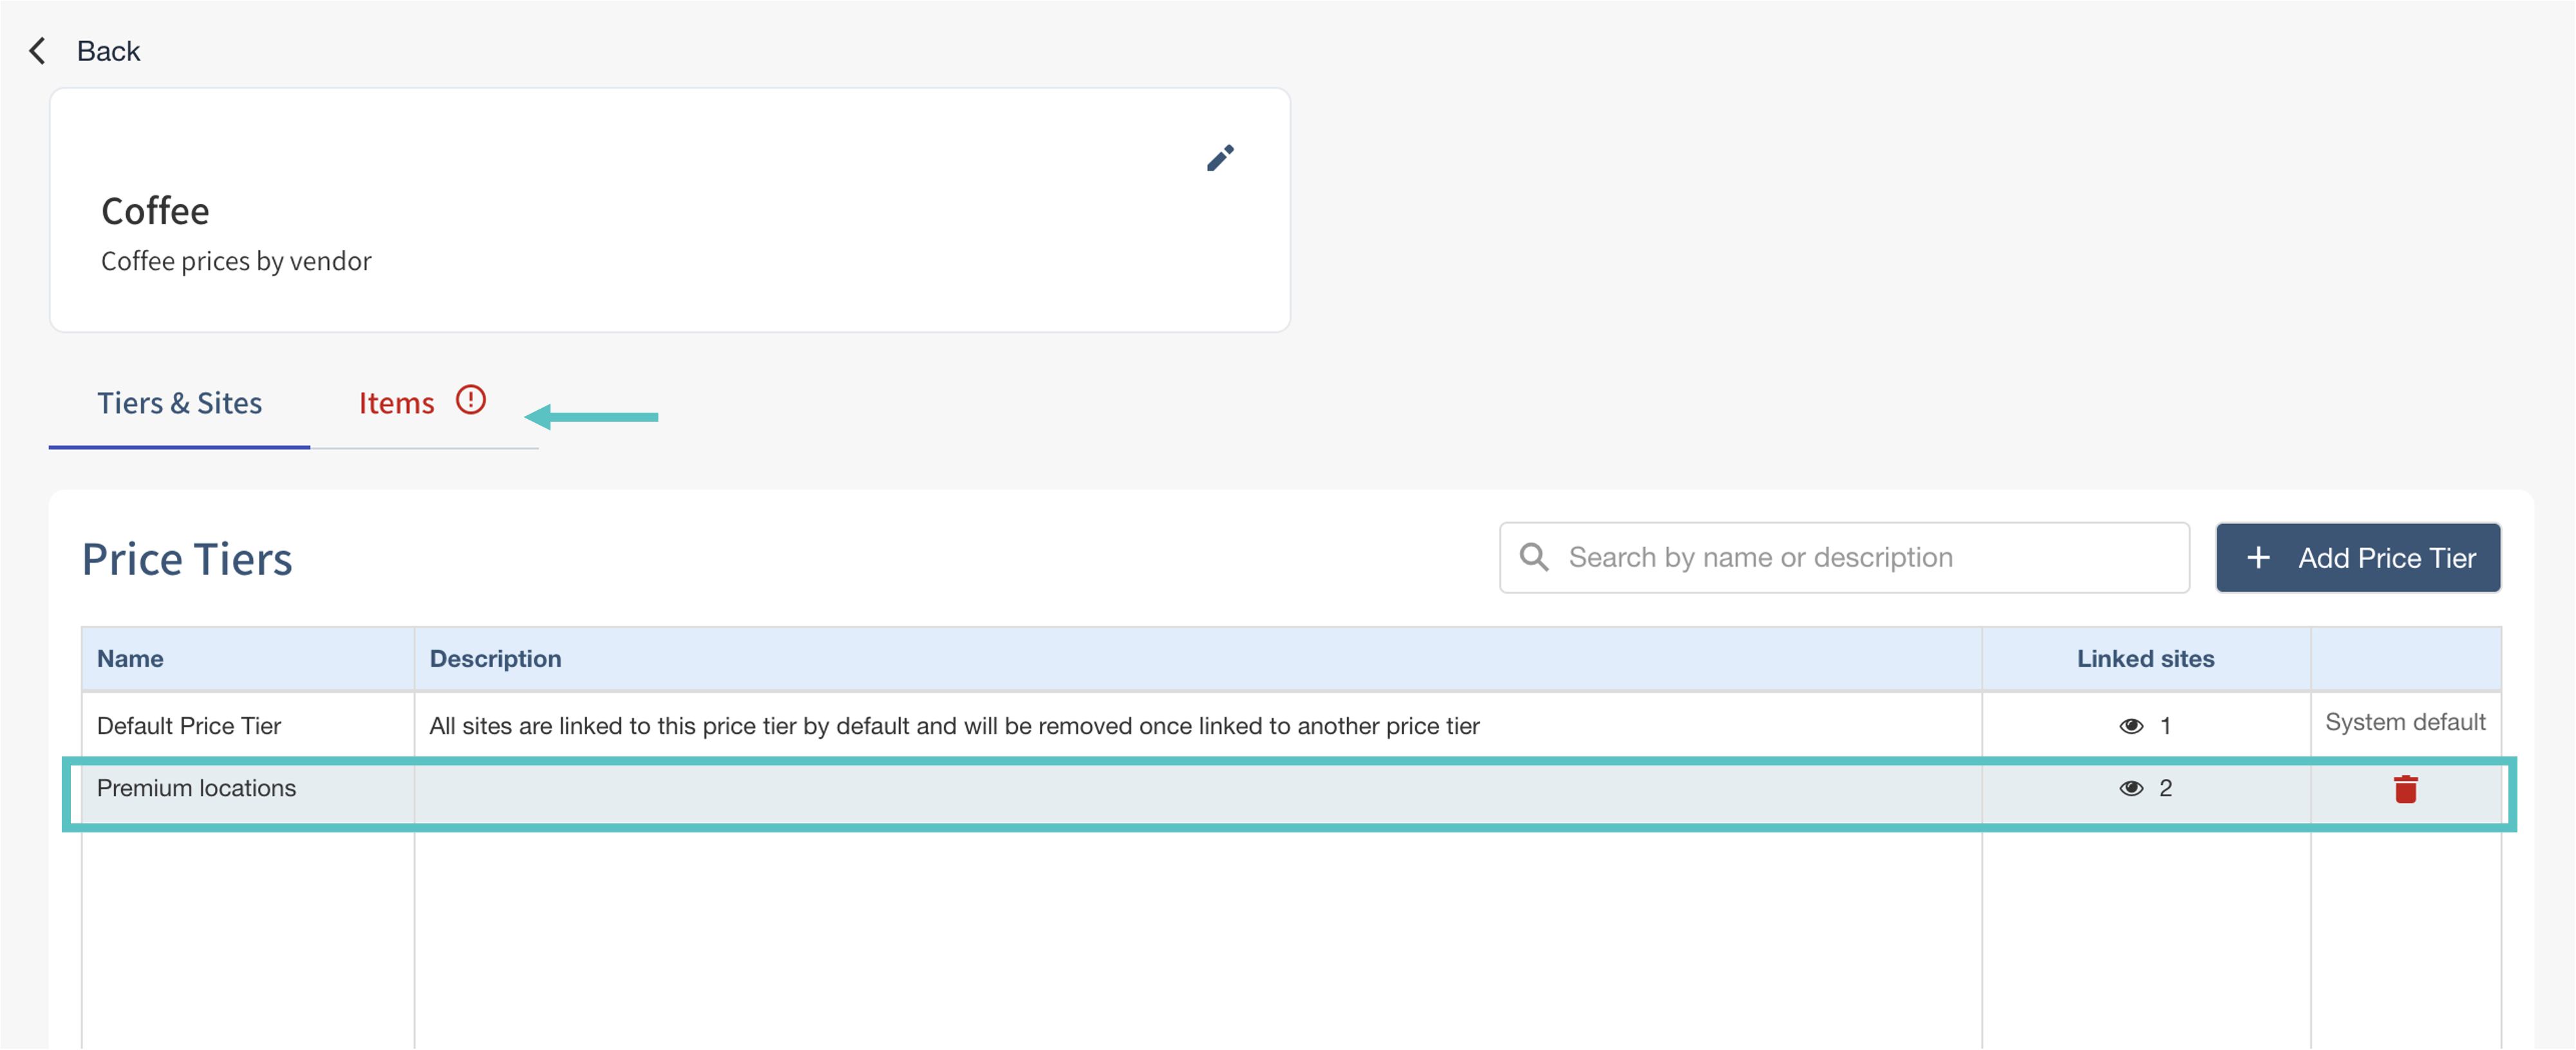
Open the Items tab in the Price Group.
-
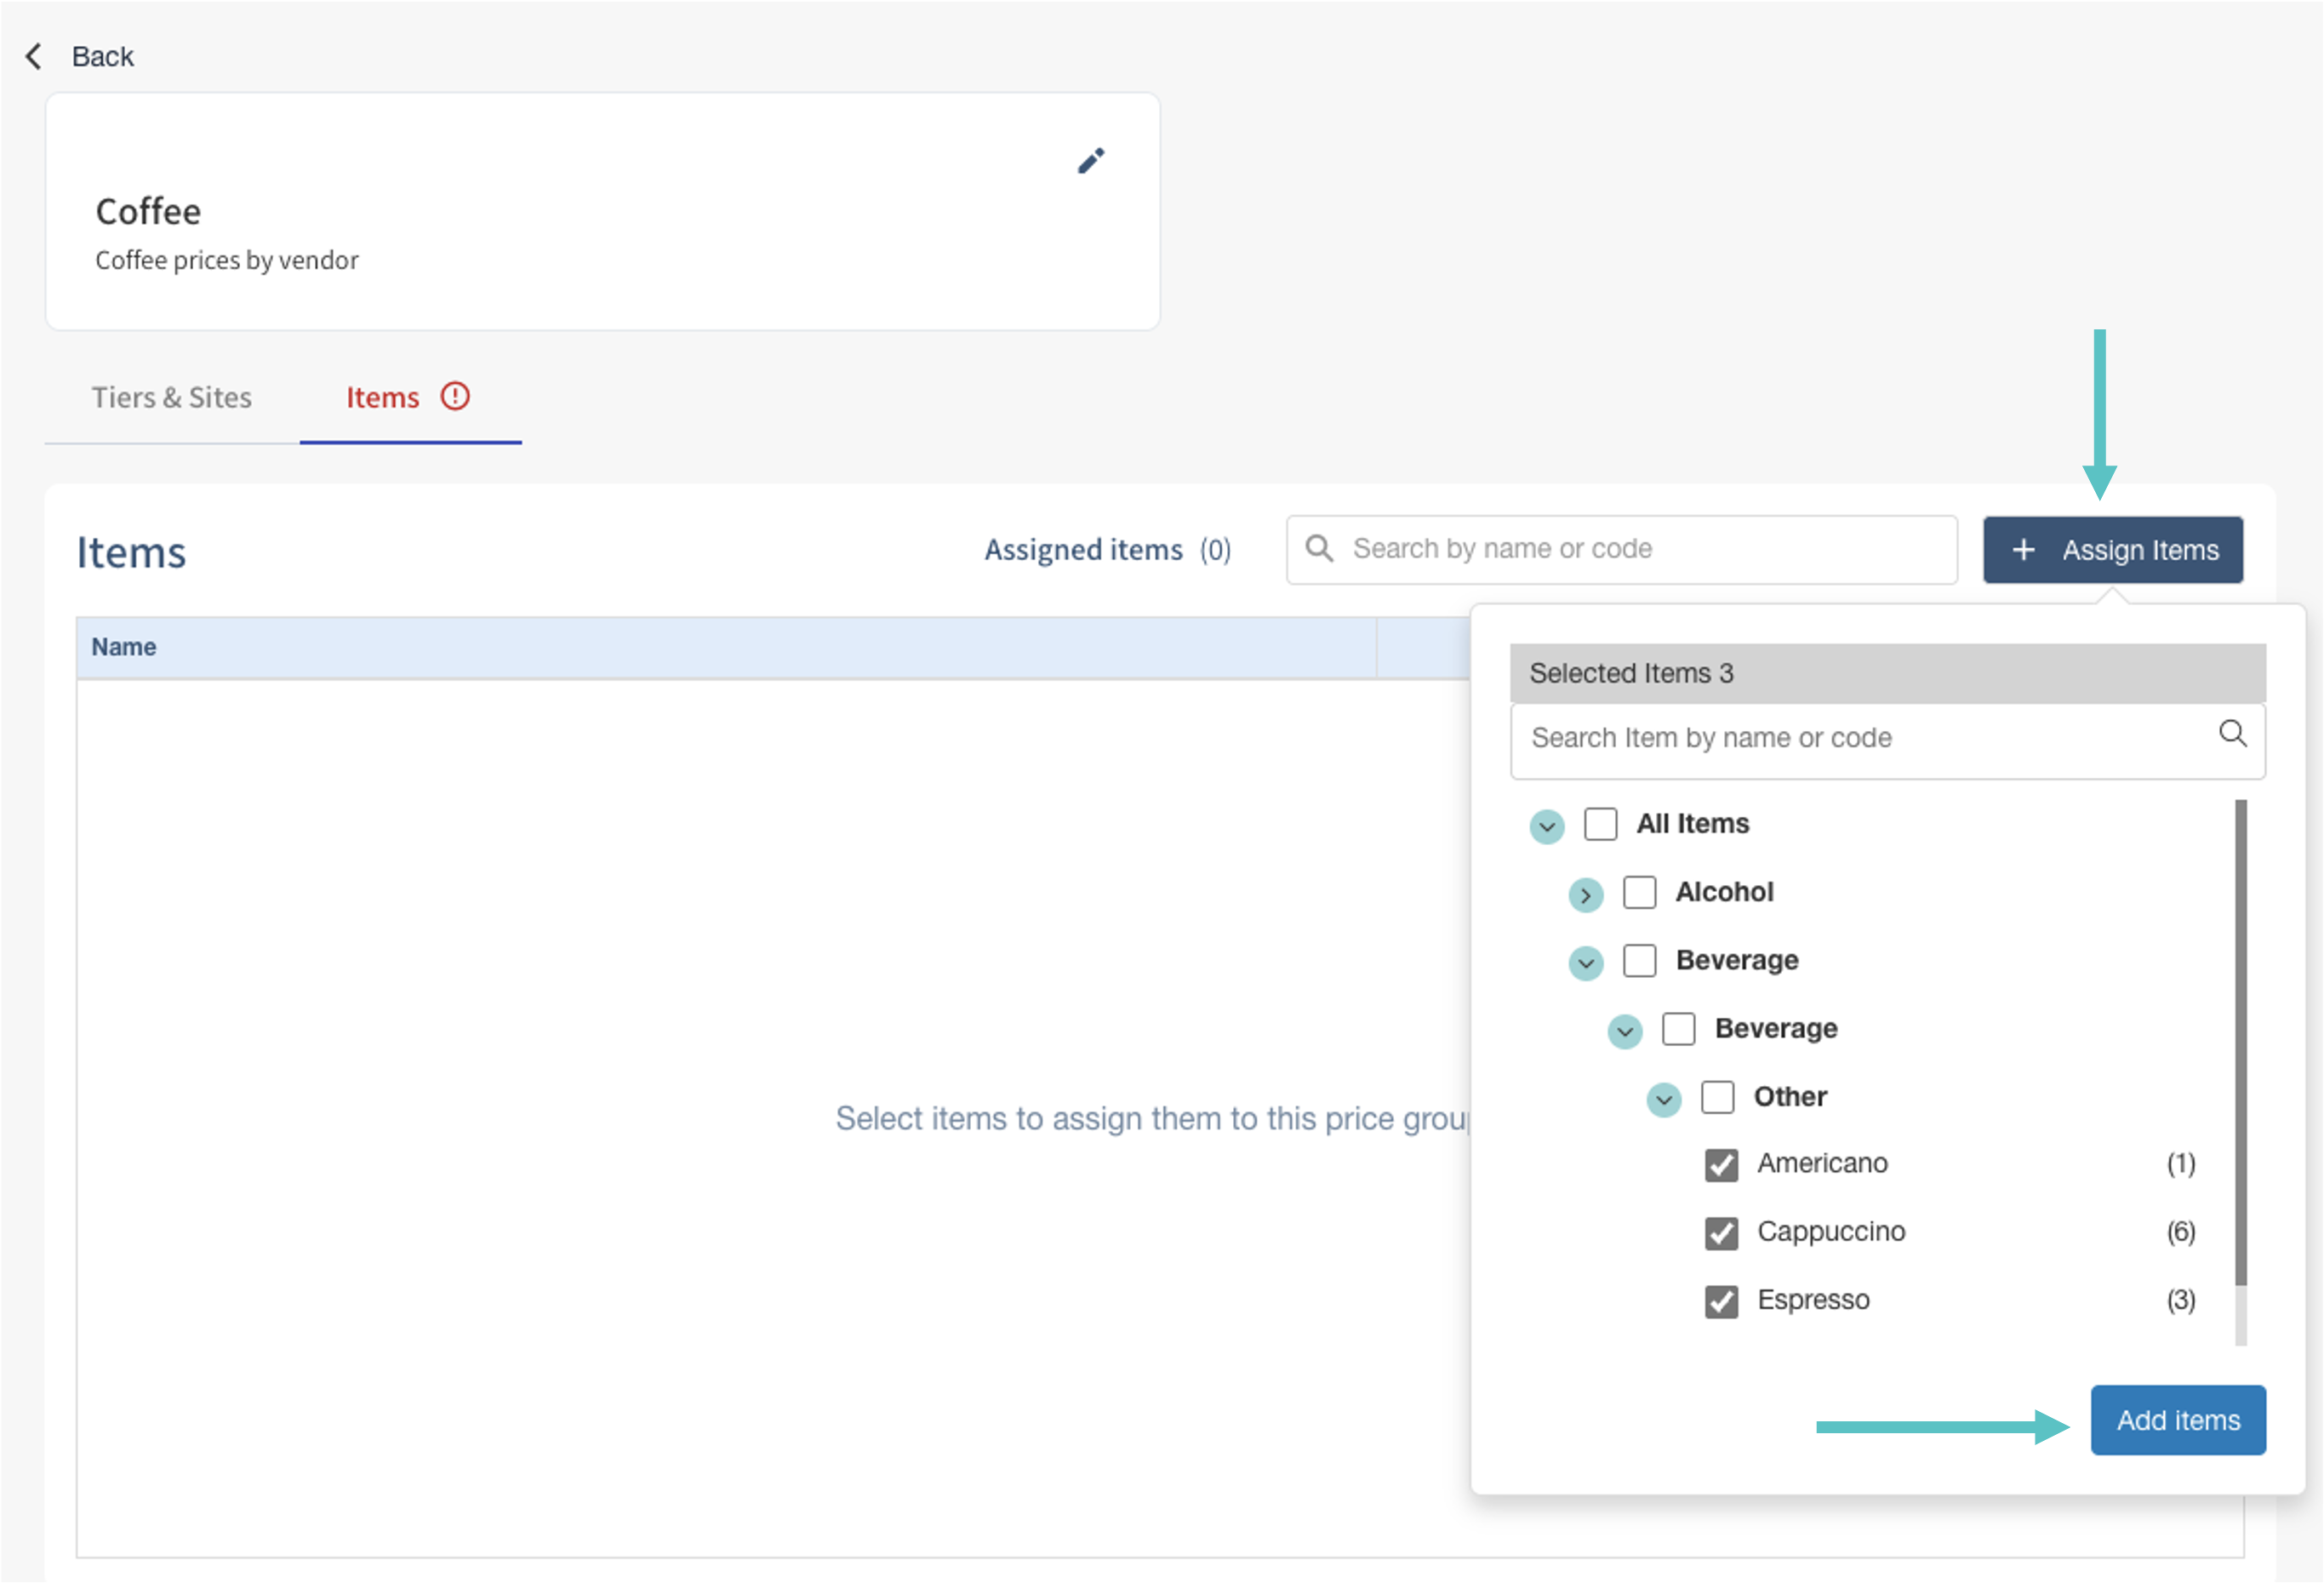
Select + Assign Items, choose the required items, and select Add Items.
-
If an item belongs to another Price Group, review the confirmation before moving it. Adding it here removes it from its previous group.
Continue with managing prices across local sites.