
Overview
Just as employees can clock in and out on the PAD, they can also take breaks on the PAD as well. Breaks can be configured according to local laws and requirements for each site as needed
Follow the steps below to set up and edit breaks:
-
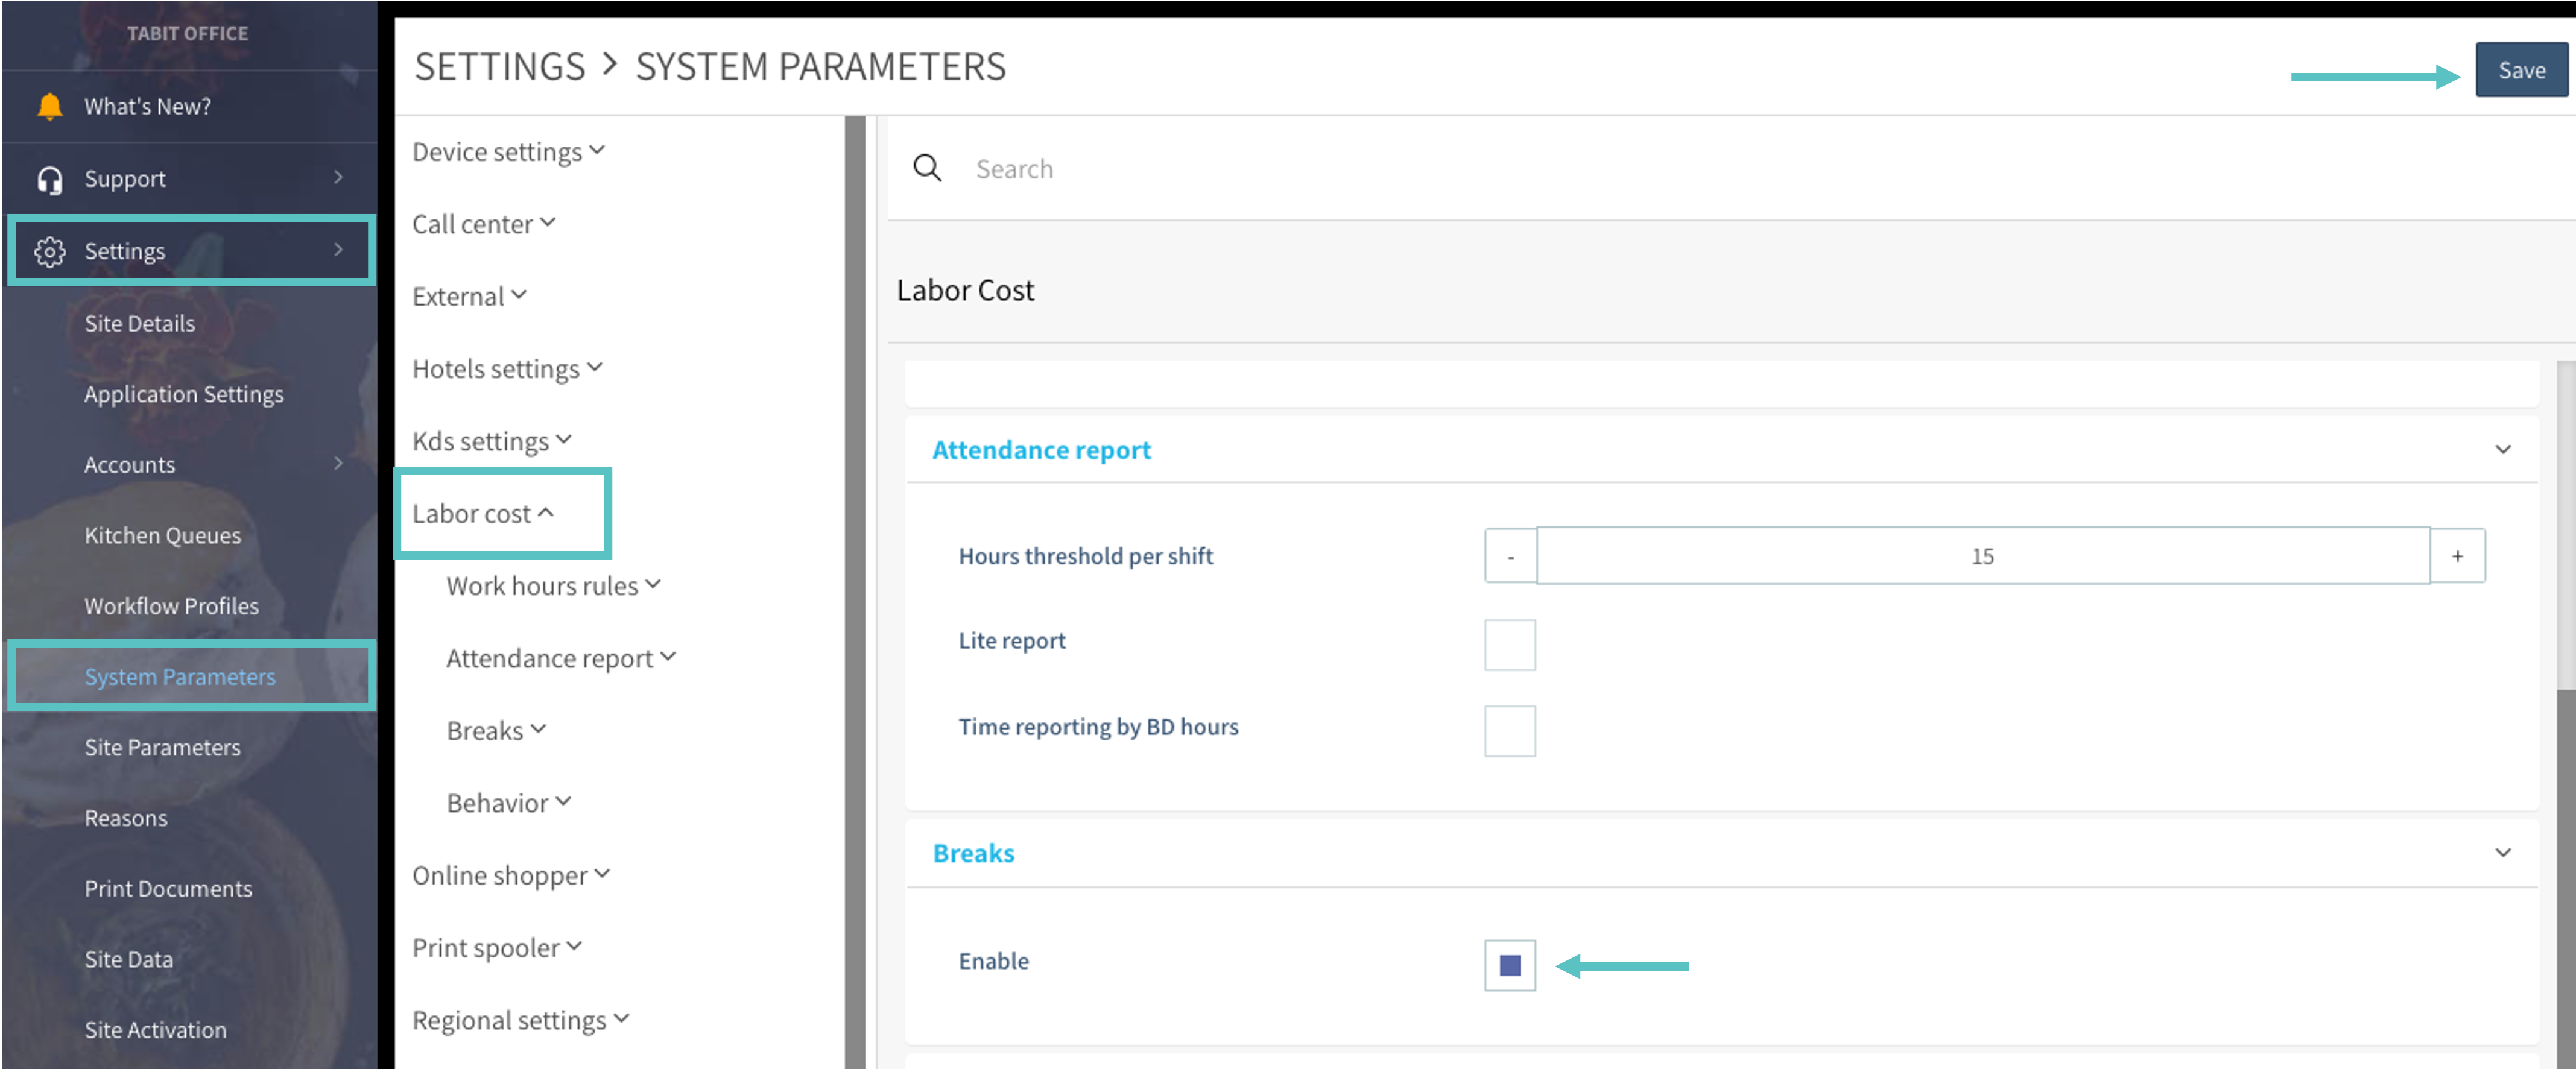
First, ensure that breaks are enabled
-
In Tabit Office, go to System Parameters > Labor Cost > Breaks
-
Mark the checkbox next to Enable and then select Save
-
-
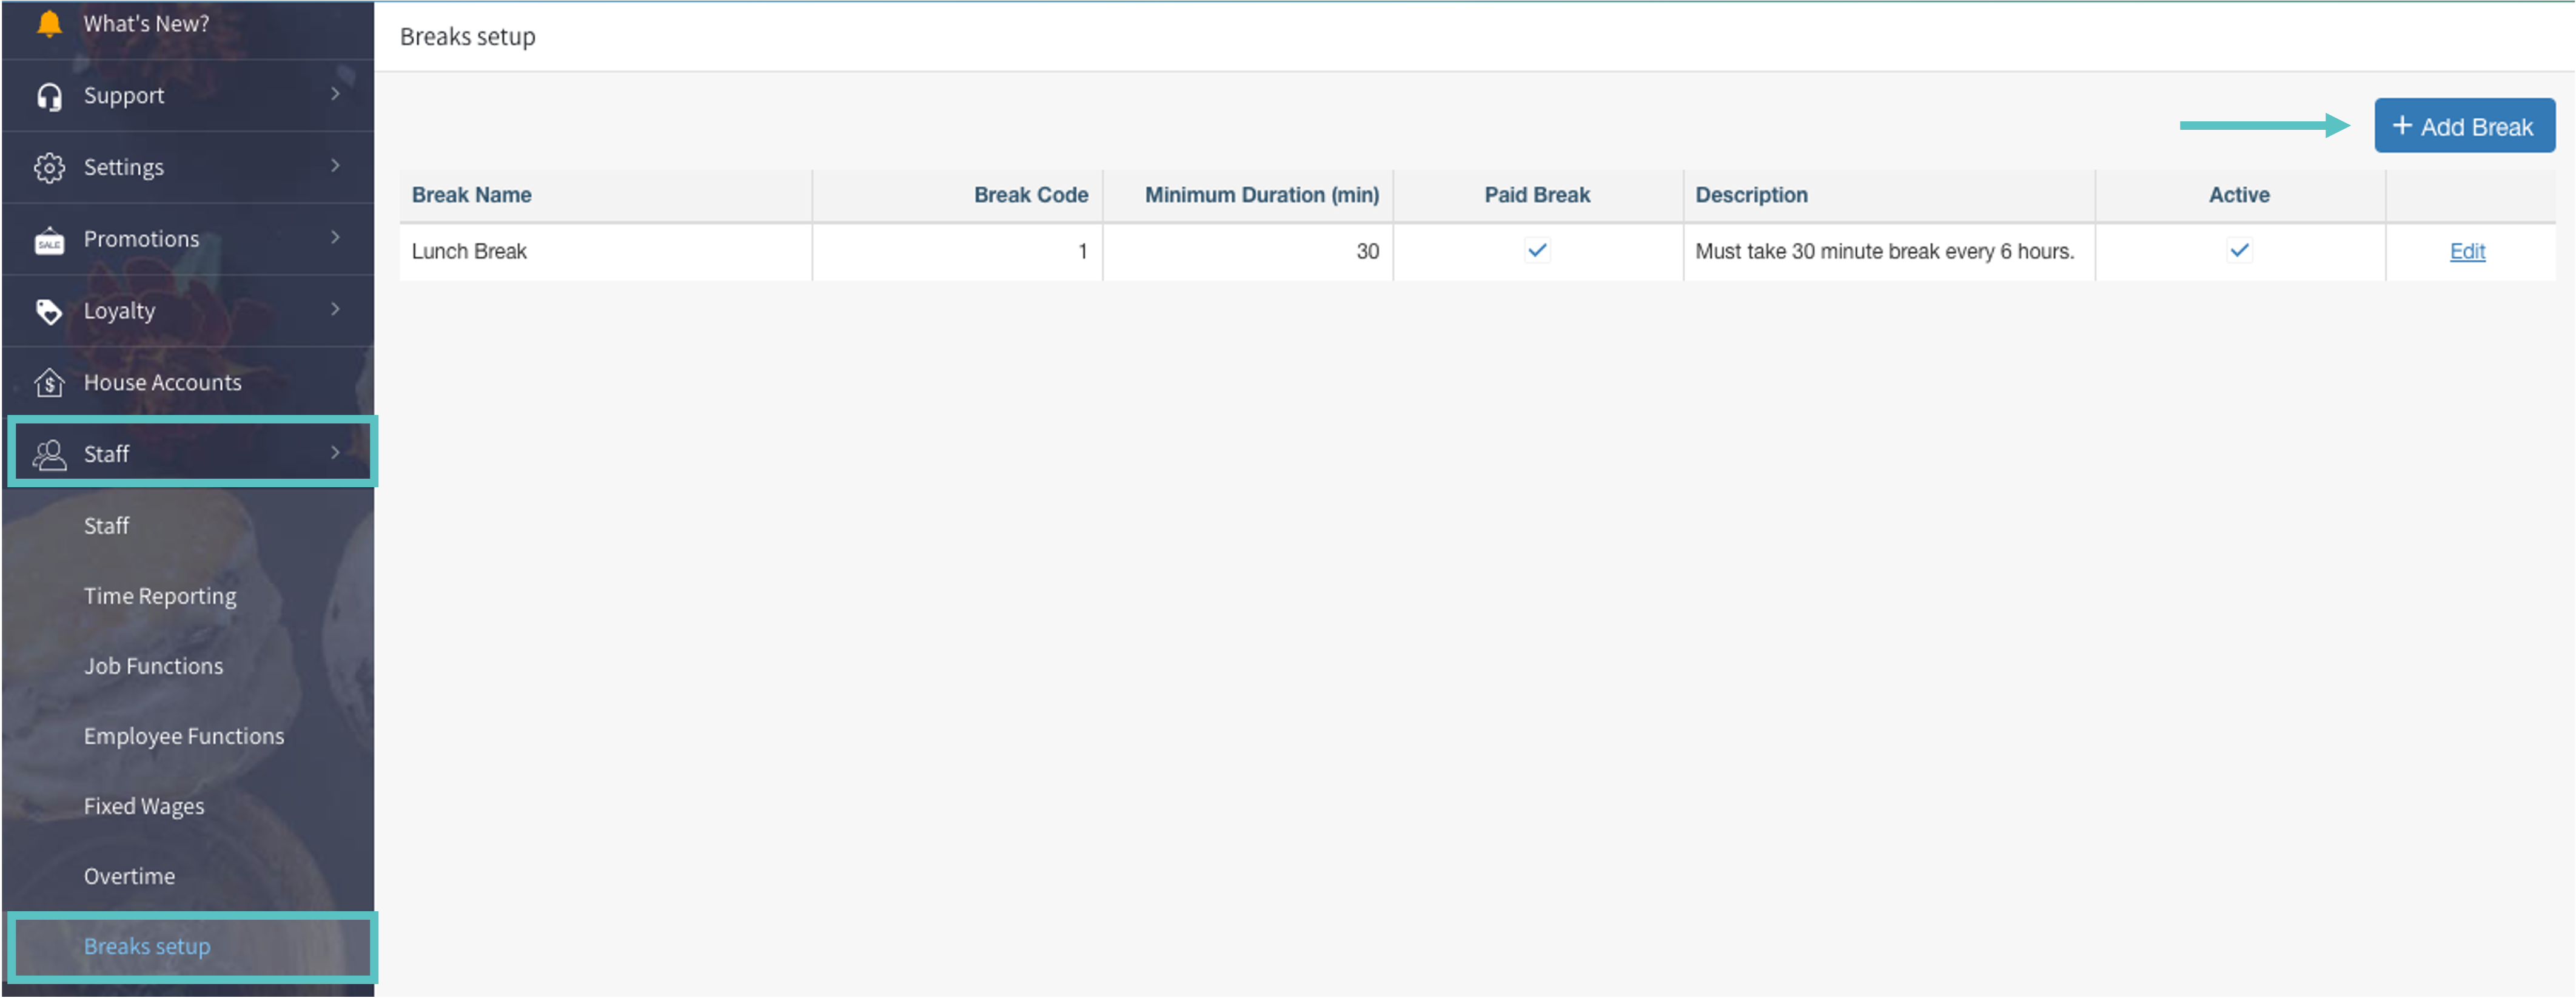
Once breaks are enabled, go to Staff > Break setup
-
Select + Add Break in the top right corner
-
Enter the name of the break and a code
-
Best Practice is to start with 1 as the numerical value for the Break Code
-
Break Codes are required and can be any numerical value. It will not automatically generate and if a code is not entered, the break will not work as intended
-
-
Enter the desired minimum duration of the break. This will set the amount of time passed before an employee is allowed to clock back in from their break. If enough time has not passed, a warning will be displayed notifying the employee that they have not taken the full break. If they try to end the break anyway, there will be a notification of break end failure. A Manager can override this from the Shift Manager screen in case of emergency
-
Indicate if the break is a paid or unpaid break
-
Enter a description of the break for internal records. This description will not appear on the PAD. Then select Save

-
Once the break is saved and marked Active, it will be available to employees at any point