
Overview
Customize your PAD view in Tabit Office to fit your operational needs. You can modify menu visibility, access permissions, and icons to make your workflow more efficient.
Steps to Follow:
-
Login to Tabit Office with your registered credentials.
-
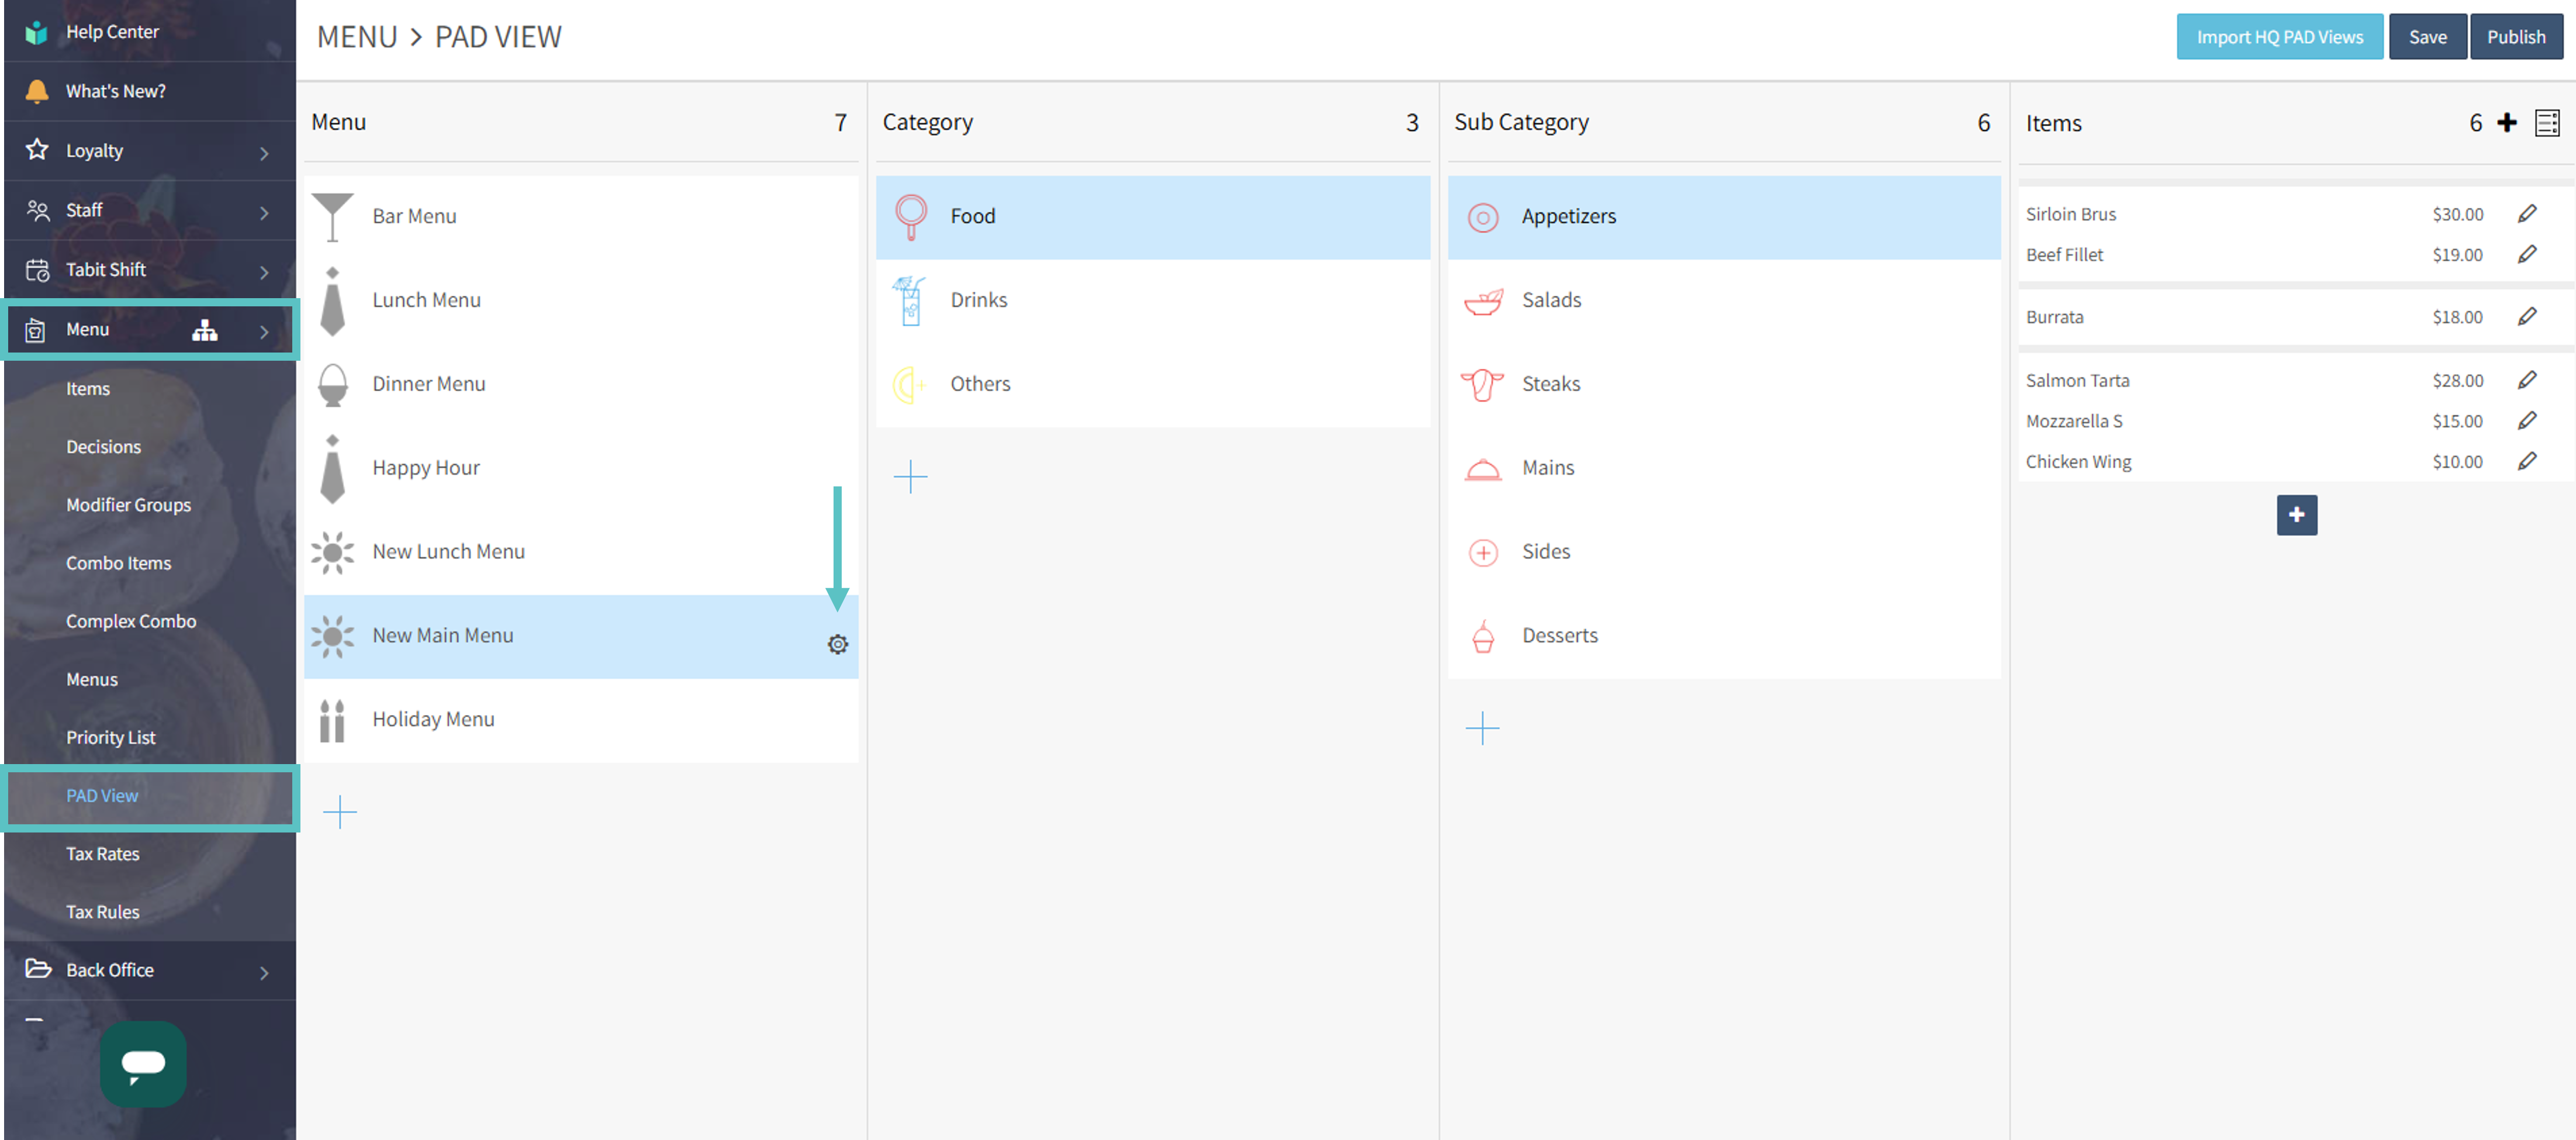
To access the advanced menu set in Tabit Office, go to Menu > PAD View, hover over the menu you want to edit, and select the Gear icon
-
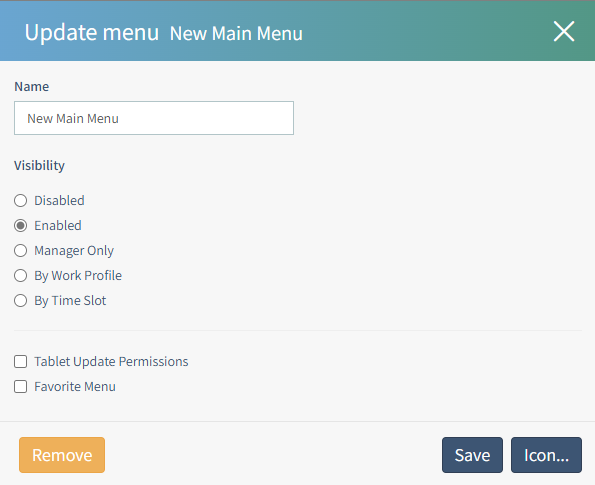
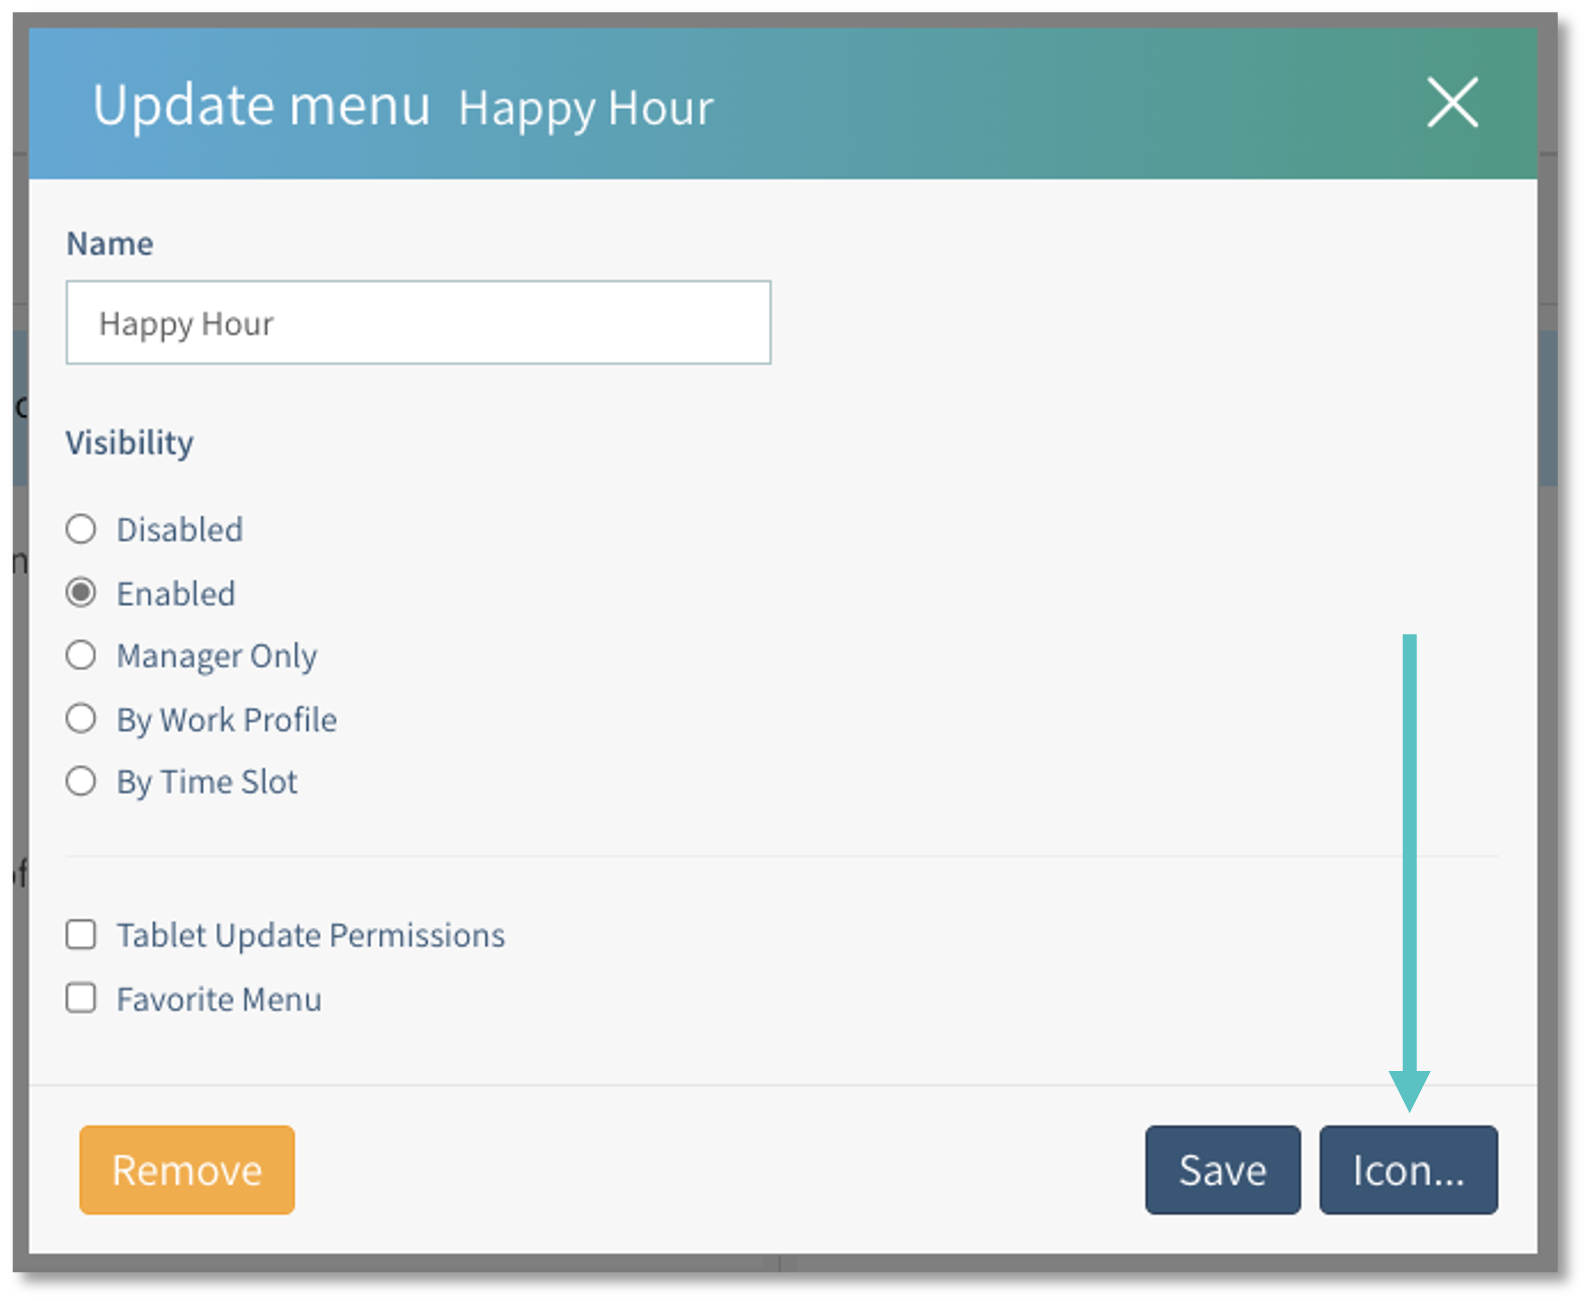
Select the desired Visibility for the Menu based on the following:
-
Name: Edit the menu name
-
Disabled: Keeps the menu view in Tabit Office but hides it from the PAD's display
-
Enabled: This is the default. Anyone can see it and use it at any time
-
Manager Only: Only a manager can access this menu
-
By Work Profile: Allows the Menu View to be limited to only servers, bartenders, OTC, etc. (The Profile must exist before selecting this option)
-
By Time Slot: Enables the menu to display based on the day of the week and time frame
-
Tablet Update Permissions: Gives a manager the ability to override the settings in Tabit Office without having to log onto a computer
-
Favorite Menu: Gives the menu being created top placing above all other created menus
-
-
To update the menu icon, select the Icon tab on the bottom right
-
Select the icon relevant to the menu, and then select OK

-
To delete the menu, select the Remove tab on the bottom left
-
Don't forget to select Save on the top right before leaving the page, and Publish to update the changes on the PAD.