
How to Add a Loyalty Customer to a Ticket on the PAD:
To add a loyalty member to a ticket, there are two available options:
Option A
If the Customer is an Existing Loyalty Member
-
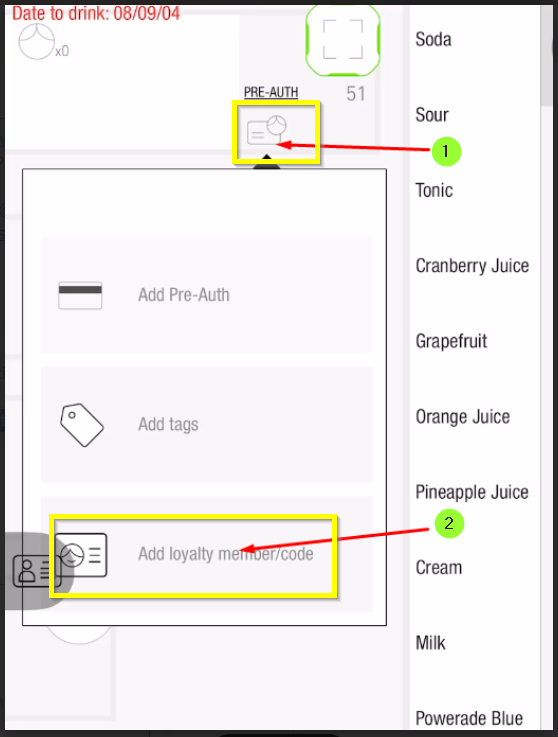
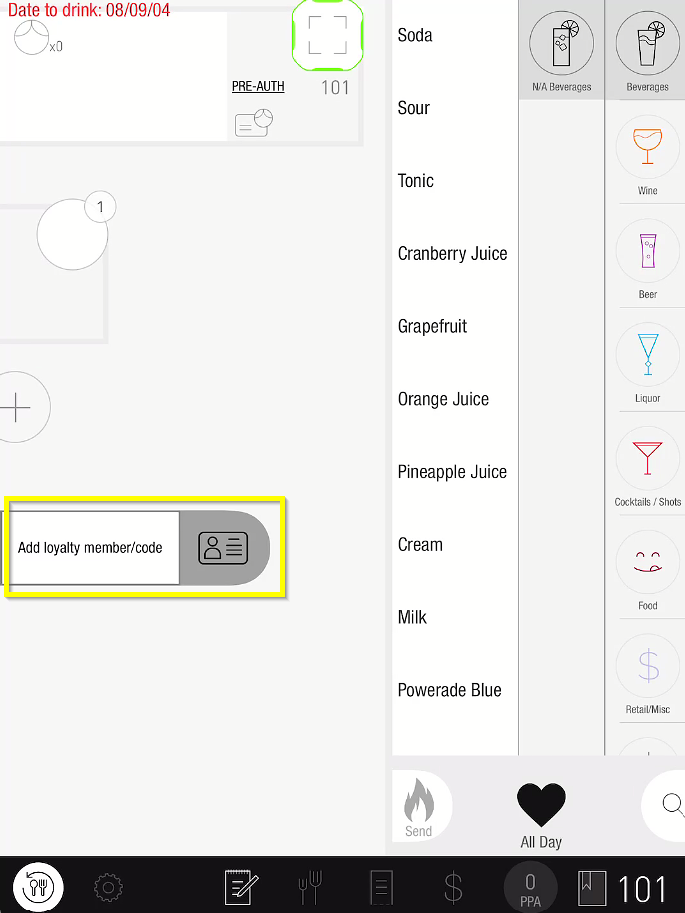
In the Order Screen, you may tap the membership button in the top of the ticket where the Pre-Auth icon is and then select "Add Loyalty Member/Code"
-
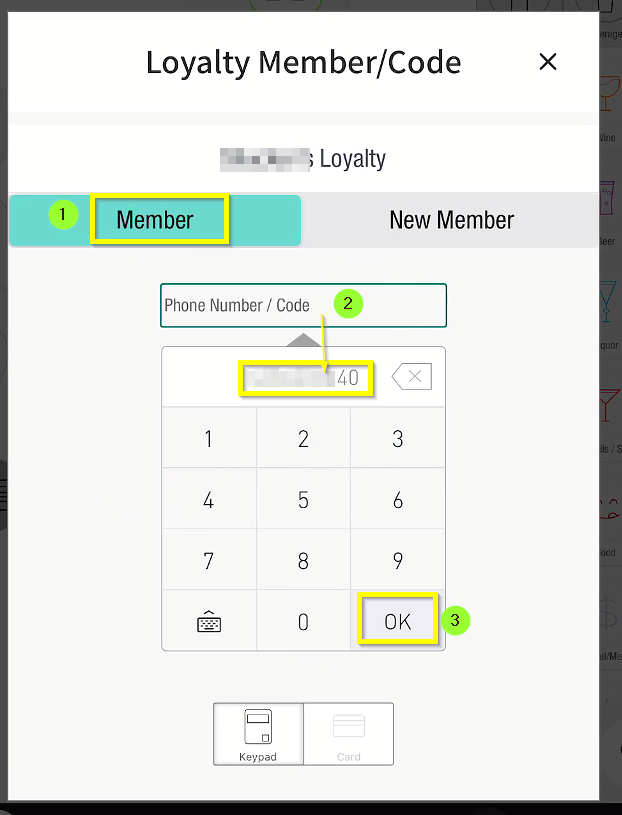
Tap on the Member tab if you’re adding an existing Loyalty Member.
-
Key-in either the member’s phone number or Member Code
-
Tap OK
-
-
Once a member is added to the ticket, you would see the available Rewards automatically.
Tap on Return to Order to go back to the Order Screen.
-
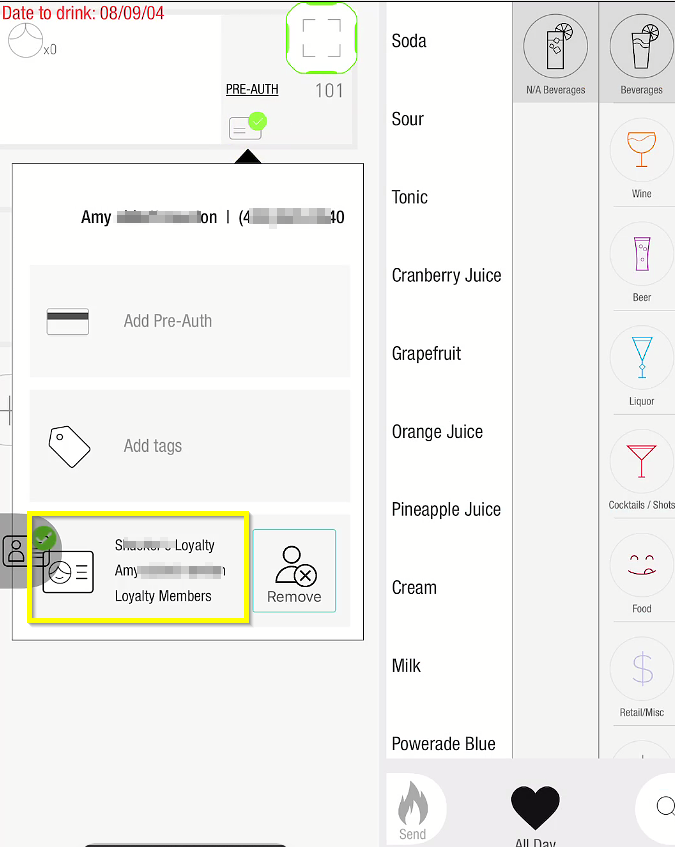
You would now see the Loyalty Member added to the ticket.
-
If in case the Loyalty Member needs to be removed from the ticket, simply tap on the Remove icon; or to switch to a different Loyalty Member code, tap Switch Member/Code
Otherwise, you’re good to proceed with the order and ultimately, on the Payment screen.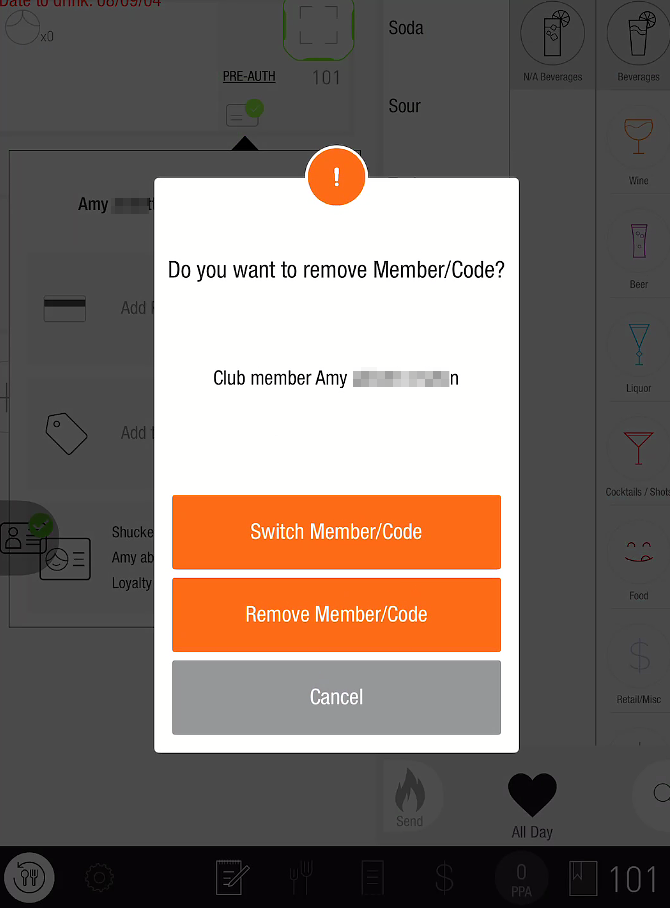
If the Customer is to be a New Loyalty Member
If a customer is new and you'd like to sign them up as a Loyalty Member, follow the steps below:
-
In the Order Screen, you may tap the membership button in the top of the ticket where the Pre-Auth icon is and then select "Add Loyalty Member/Code"
-
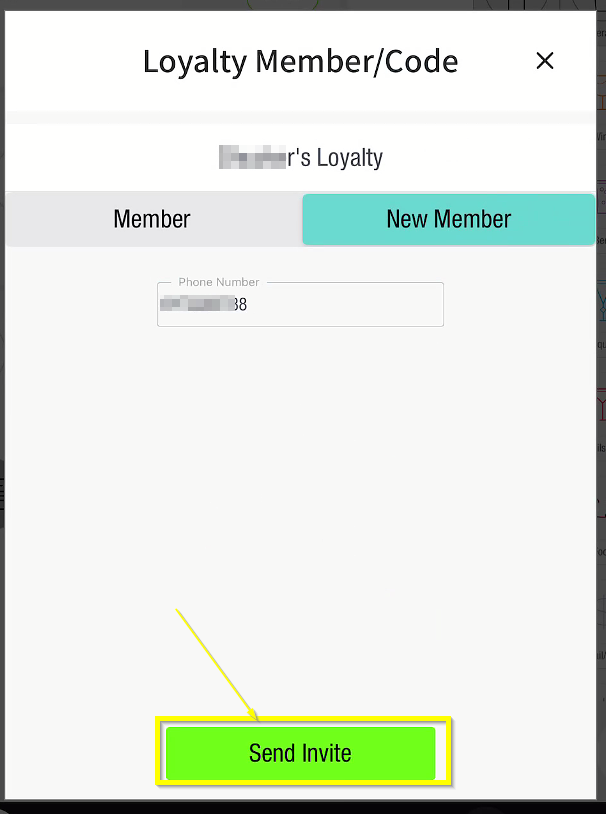
First, tap "New Member," then enter the customer's phone number. Once you're done, tap "OK." This will activate the "Send Invite" button, which you can then tap.

-
Once the phone number is entered, the new loyal member will receive a text message with a link to accept the Privacy Policy/Terms and Conditions, and enter any demographic information like birthday etc into their account.
Option B
-
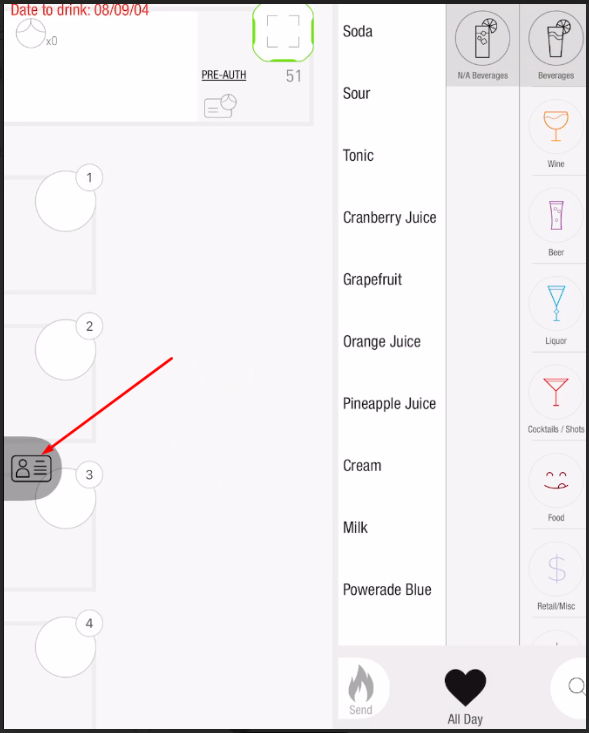
In the Order Screen, you may tap the icon at the left part of the screen and select Add Loyalty Member/Code.
-
The next steps would be the same as the ones described in Option A above.
Enabling Multiple Checks per Table Location
Workaround for the One Loyalty Member per Table Limitation
By default, Tabit only allows one loyalty member per table. If multiple guests at the same table want to earn or redeem rewards separately, you need to enable the Site Parameter: Multiple Checks per Table Location. This parameter allows servers to split a table into multiple checks, each tied to its own loyalty account.
Why This Matters
-
Without this parameter, only one loyalty member can be attached per table.
-
Enabling Multiple Checks per Table Location allows:
-
Multiple loyalty members to be attached at the same table.
-
Separate checks, payments, and redemptions per guest.
-
Steps to Enable the Parameter
-
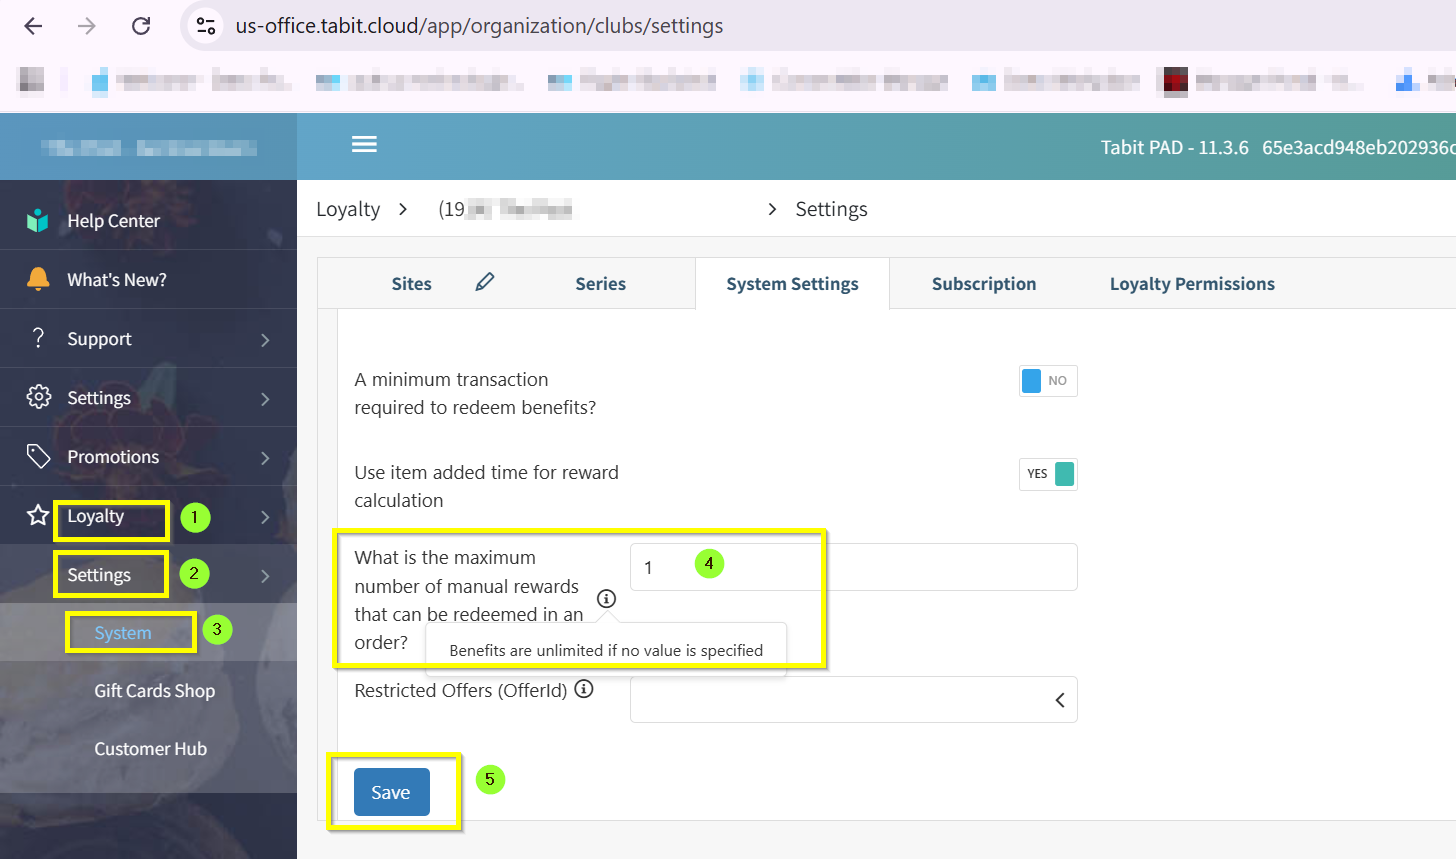
Log in to Tabit Office at:
https://us-office.tabit.cloud/app/organization/clubs/settings
-
From the left-hand menu, navigate to:
Loyalty > Settings > System -
Locate the parameter: What is the maximum number of manual rewards that can be redeemed in an order?
-
Update the value to a higher number (or leave blank for unlimited).
-
Click Save to apply changes.
-
In the screenshot above, the setting is currently set to 1, which restricts a table to a single loyalty reward. Increasing this value (e.g., 2, 3, or blank for unlimited) will allow multiple loyalty members to redeem rewards at the same table.
Best Practices
-
Train servers to split checks when multiple guests want to use loyalty rewards.
-
Confirm the correct loyalty member is attached before closing each check.
-
Monitor reports to verify loyalty redemptions are posting correctly.
Adjusting the Maximum Number of Manual Rewards per Order parameter in Tabit Office is the recommended way to work around the one-loyalty-member-per-table limitation.
Enabling Multiple Orders on the Same Table
By default, staff are not allowed to manually open multiple orders or checks on the same table via the tables map.
There is a Site Parameter in Tabit Office which can be set to get around this limitation of one loyal member per table, as shown in below screenshot:

If you need help updating this Site Parameter for your business, please contact Flyght Support.