
Overview:
Creating an Item is the first step in putting together a menu. An item can have various price points and can be included in specific groups that modify other items or be part of combo meals.

What is an Item?
-
Can have an Offer (price point) associated with it and can be reported on
-
Can be part of a Modifier and/or Decision Groups
-
Can have a Modifier/Decision Group attached to it
Before You Begin:
Once an item is created, it cannot be deleted. Prior to adding a new item, select All Items and then search for your item. For example, if you want to add a Gin Martini, search for “martini” to see if the item already exists so that you don’t accidentally create a duplicate item.
When creating an item, it’s often easier to copy an existing item than to start from scratch. Keep in mind to follow the same structure when building new Items to ensure continuity.
Steps to Create an Item:
-
Log in to Tabit Office
-
Use your manager credentials to log in.
-
-
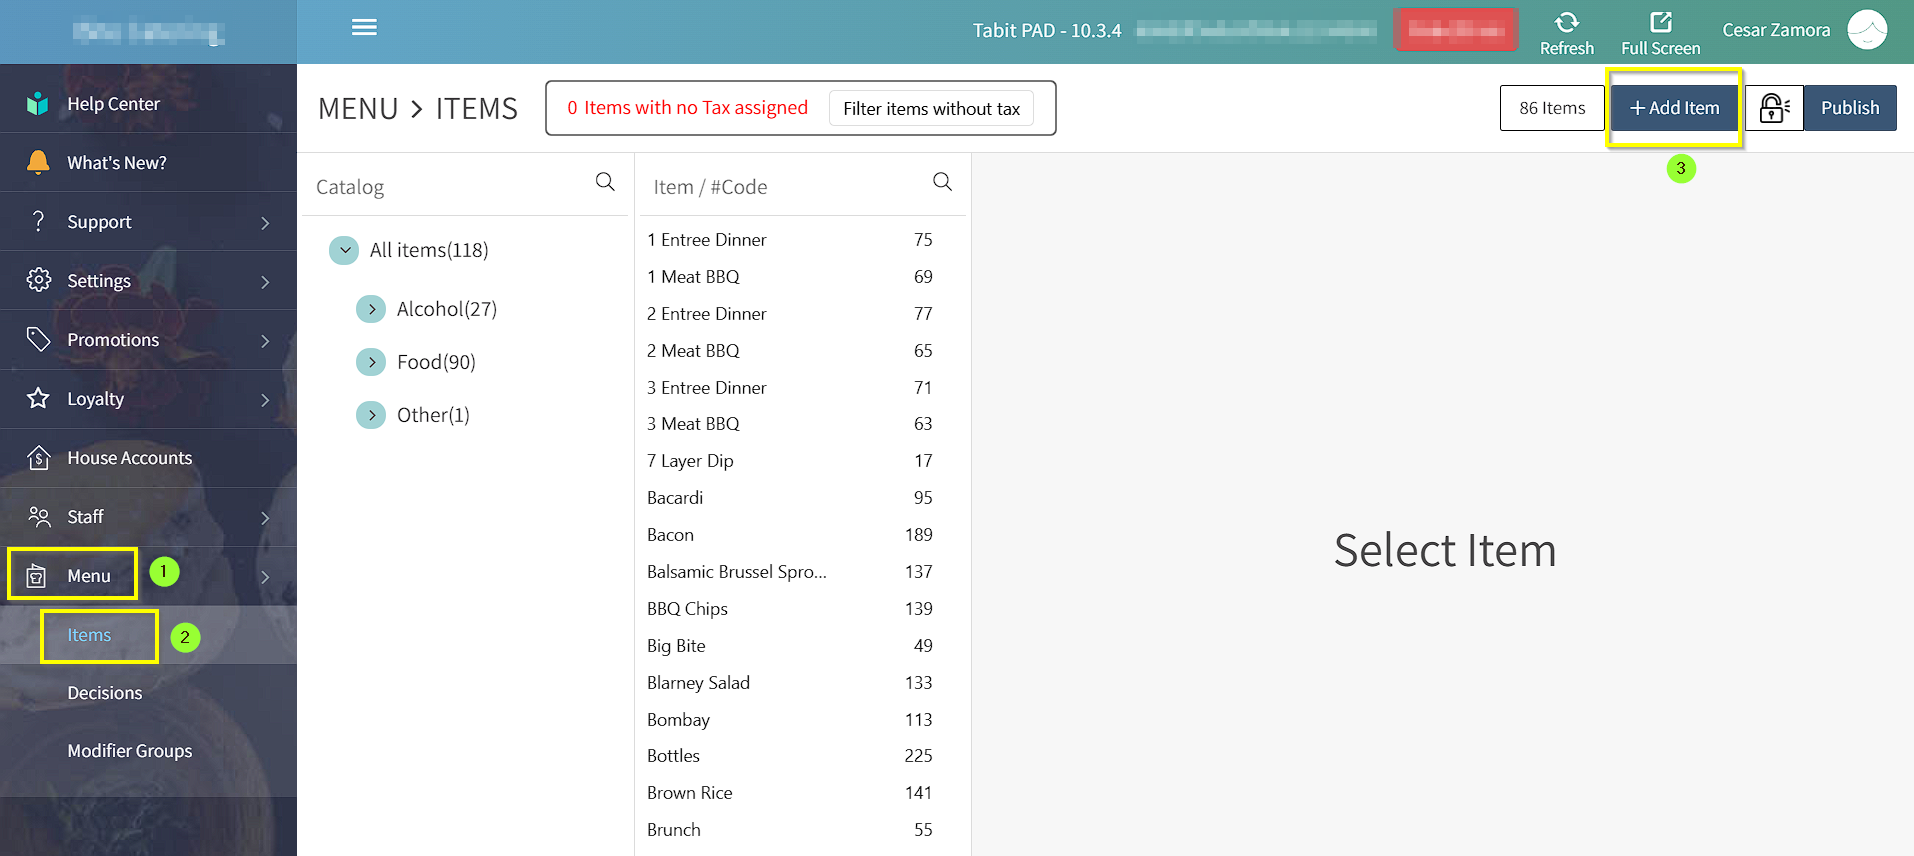
Navigate to Items
-
Click on Menu → Items, then click the Add Item button.
-
Category: place the item in the most appropriate category for reporting. These categories are default and cannot be changed
Required Fields
|
Item name |
Type in the item's name, it should match the name written in the menu. This name will appear on the bill |
|
Menu and section |
These are the customized categories for your restaurant |
|
Default course |
Controls where the item will be placed on the coursing screen and how it will appear in the kitchen |
|
Price |
Should be the same as what is listed on the menu. This field is not mandatory. If not filled, the default price |
|
Taxes > Tax Rule |
Select the appropriate Tax Rule from the dropdown. For adding tax rules contact Flyght Support |
-
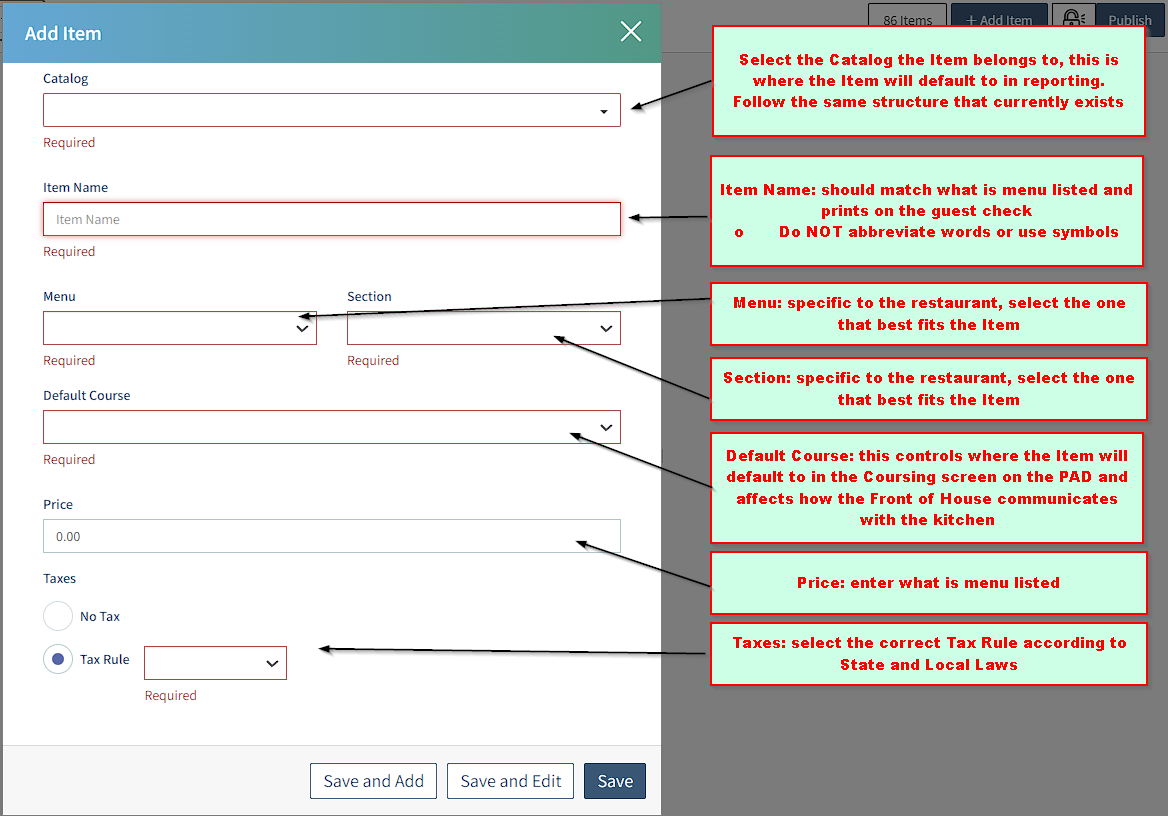
Select a Catalog
This Catalog is where the Item will default to in reporting. Follow the same structure that currently exists.-
Click the Catalog drop-down list and select the appropriate category for the new item.
-
For example, to add a food item, select Mains and then Pizza.
-
-
Enter Item Name
Item Name should match what is menu listed and prints on the guest check. Do not abbreviate words or use symbols.-
Set the Item Name (e.g., Spaghetti Al Forno).
-
-
Choose the Menu where the item will appear.
Menu is specific to the restaurant. Select the one that best fits the Item. -
Choose the Section that best fits the Item.
-
Select the Default Course where the item will be offered.
This controls where the Item will default to in the Coursing screen on the PAD and affects how the Front of House communicates with the kitchen. -
Set the Item Price.
-
Set Tax Options
Select the correct Tax Rule according to State and Local Laws-
Choose the appropriate tax setting. You can either select “No Tax” or apply a Tax Rule.
-
-
Review and Edit
-
Review the item details and make any necessary changes. If everything looks good, proceed.
-
-
Save the Item
You have the following options for saving:-
Save and Edit – This allows you to edit additional settings related to the item after saving.
-
Save and Add – This saves the item and lets you immediately start creating another one.
We always recommend pressing Save and Edit, as it’s important to explicitly set the Short Name and Kitchen Print names, as well as connect any modifiers or decisions to the new item.
-
-
Once the new Item is saved, proceed on editing it. To learn how to do it, you may refer to the next lesson:
Lesson 1.2: How to Edit an Item
It’s a good practice to edit and finalize each item before creating a new one.
Watch the Video Tutorial
Here’s a video that walks you through the process of creating an item in Tabit Office: