
Purpose:
This guide will walk you through the steps of editing a new item created from the previous learning material: Lesson 1.1: How to Create an Item in Tabit Office
Steps to Edit an Item:
-
After selecting “Save and Edit” from the previous lesson, fill out the additional fields in the General tab:
-
Item Name: This is the way this item will appear on staff pads and customer facing ordering screens.
-
Item Code: Every Item and Offer get a unique Item Code that can be customized. This is important if you are connecting to a third-party inventory software, for example.
-
Short Name: Will default to the first 12 characters of the Item Name. This is the name the staff member will see when they order the Item on the PAD. Flyght recommends updating this Short Name for readability and brevity.
-
Item Name for Printing: controls how the kitchen or bar sees the Item when ordered. If nothing is entered, the Item Name will print and may be truncated based on length of name. This field can be up to 22 characters in length (anything higher will truncate on kitchen printers).
-
%20(210%20x%20200%20mm)%20(210%20x%20180%20mm).gif?cb=852887f7937f7510c8a9a67d42cb2678)
-
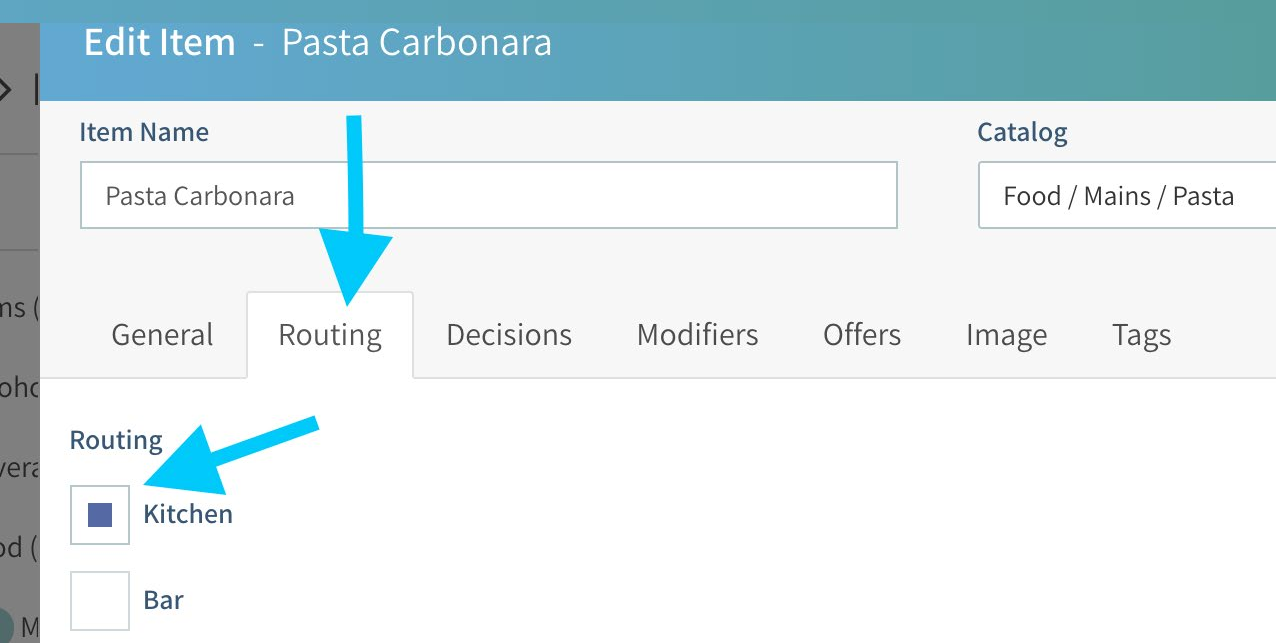
In the Item Routing tab:
-
All Kitchen Queues will be displayed under this tab
-
Select or deselect the correct Kitchen Queue
-
Depending on how the Kitchen Queues are set up, the correct printer may already be selected.
-
-
-
In the Decisions tab add any Decision Groups required for this item. You may learn more from this lesson:
-
In the Modifiers tab add any Modifier Groups required for this item. You may learn more from this lesson:
-
An Offer is created automatically when creating or copying an item. Multiple Offers can exist for a single item, to allow for the same item to be priced differently on different Menus. Adding an Offer to an Item will be discussed in this article.
-
Photos and item descriptions are used in PadView for staff to long-press an item and then be able to show customers a photo or description, and for bartenders to view recipes; as well as on all customer-facing ordering methods like Kiosk, Online and Mobile ordering.
Adding a Photo and Item Description in the Image tab:-
Select the “Image” Tab
-
Upload a photo to be available on the PAD, Kiosk and Online Ordering
-
Photo width should not exceed 600 px and max size should not exceed 100 kb for the images to load effectively on mobile devices
-
Ideal photo type is JPEG/PNG
-
-
Add an Item description to be available on the PAD and on customer facing ordering devices.
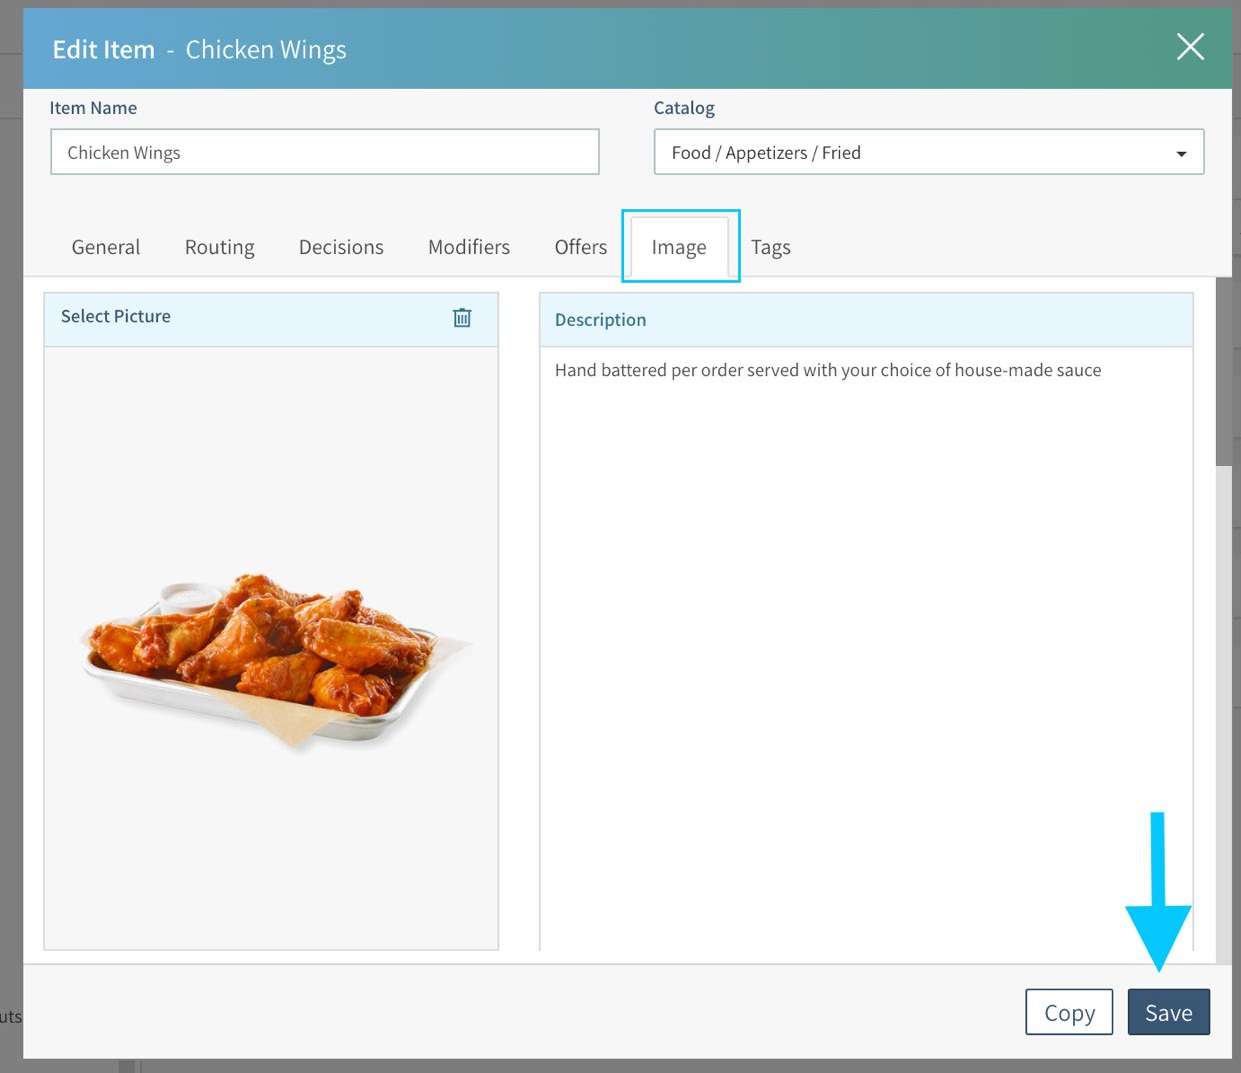
Sample Item with an Image and Description
-
-
Item Tags convey specific information related to an Item. A selected Item Tag prints directly under the Item name on the Kitchen Ticket or on the Kitchen Display System. For example, RUSH!, ToGo, SOS (sauce on side), etc.
-
Click on the Save button. You can still make further edits to the Item as needed.