Overview
Workflow profiles are used to manage different types of employees and accommodate multiple service flows within a restaurant operation. Depending on the concept and style of service, not all Workflow Profiles may be needed.
Types of Workflow Profiles:
-
S (Server)
-
B (Bartender)
-
H (Host)
-
TD (Takeaway/Delivery)
-
OTC (Over the Counter)
-
CD (Cash Drawer)
Before setting up Workflow Profiles, two key tasks must be addressed:
-
Adding Peripherals – We will need to assign printers and cash drawers to the workflow profiles; therefore, we need to add these to our settings beforehand.
Workflow profiles can be created without peripherals, yet it is Best Practice to have Printers and Drawers set up in advance.
-
A Profile needs a Map and a Map needs a Profile - anything configured at the Profile level is associated with the corresponding Map, and vice versa.
Setting up a Bartender, Server, or Host Workflow Profile
B "Bartender" | S "Server" | H "Host" profile setup
This Workflow Profile is best used for seated orders (Tabs and Tables)
To create a workflow profile for a Bartender, Server, or Host - best used for seated orders such as tabs and tables - follow the steps below:
-
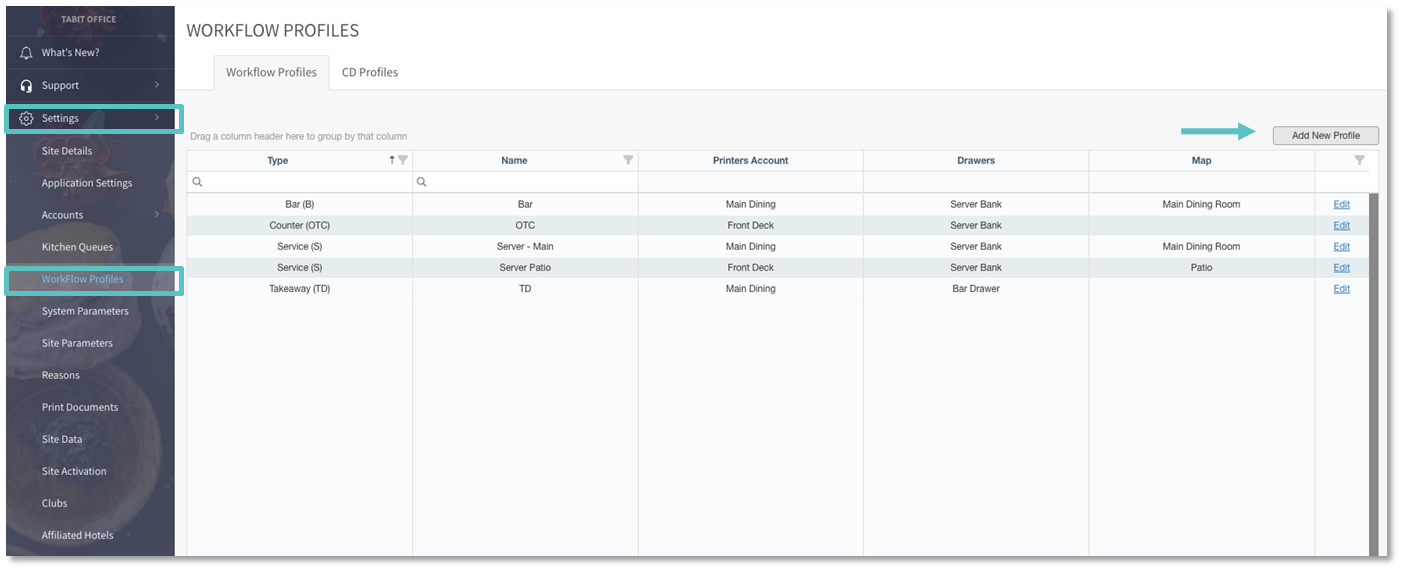
In Tabit Office, go to Settings > Workflow Profiles > Add New Profile
-
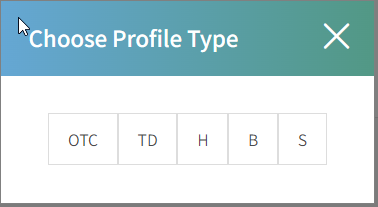
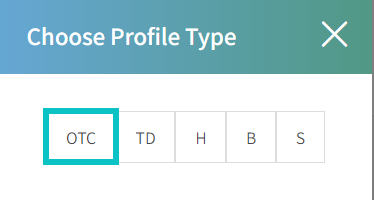
Select B for Bartender, S for Server, or H for host accordingly from the Choose Profile Type pop-up
-
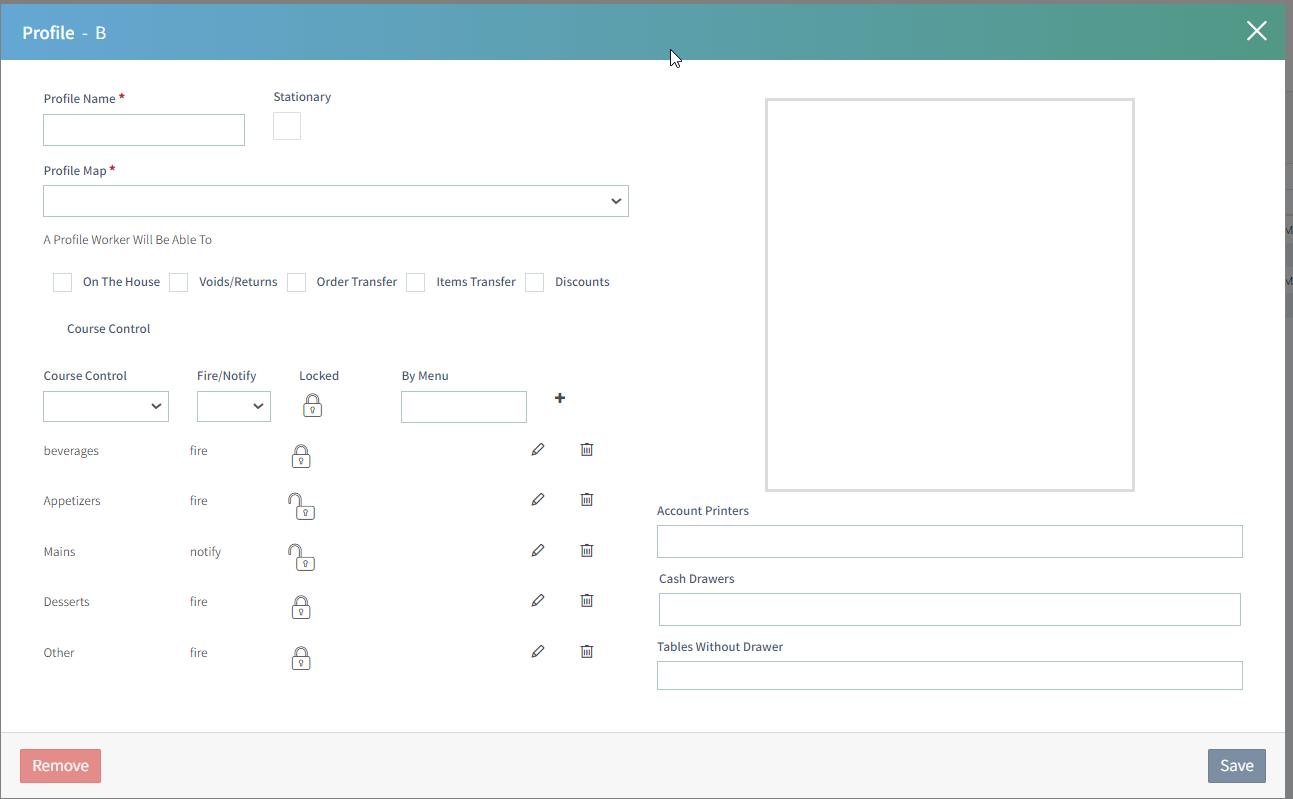
In the Profile pop-up fill in the following fields:
-
Profile Name: Enter a name
Best practice is to have the name of this Profile match the name of the Profile Type and the corresponding Map. Ex: Server – Main
-
Stationary: If you want to set up this profile as a Stationary Workflow Profile linked to a single PAD device
-
Profile Map: Select a Map to be attached to this profile. Ex: Main
Please note:-
A Workflow Profile must be create for each map that we want staff to access
-
If we want different Roles to be able to access the same map, we need to create a Workflow Profile for each Role.
-
To allow different Roles to access the same map, a Workflow Profile must be created for each Role
-
-
Select the permissions that users assigned to this profile will have access to:
-
On The House: Enables users to request Comps and Discounts
-
Voids/Returns: Enables users to request Voids
-
Order Transfer: Enables users to transfer orders from one tab or table to another
-
Items Transfer: Enables users to transfer Items from one order to another
-
Discounts: Enables users to request a Discount
-
-
Course Control: This section defines the Coursing structure for orders places in this profile.
-
The default Courses are Beverage, Appetizers, Mains, Desserts, and Others.
-
Fire/Notify: Defines if there is any holding allowed or automatic holding of courses. We have the option to automatically set courses to Fire or Notify, which means the item will be held and the kitchen will be notified. We can add, edit, or delete courses as needed.
Note: By default, main courses are set to “notify” when creating a new profile, please keep in mind if this restaurant does not hold, this needs to be updated
-
Locking/Unlocking: Allows the user to override the course setting of Fire/Notify
Best practice is to adjust settings based on the style of service
-
-
Account Printers: Will drive the available printers for the User when printing guest bills, with mobility in mind
Best practice is to assign the printers that are within a short distance from this area of the restaurant
-
Cash Drawers: If the Open Tab feature is being utilized this will define where the Cash is deposited
-
Tables Without Drawer: Any table on the map that is not linked to a cash drawer will be listed here
-
-
Select Save on the bottom right
Setting up an Over the Counter Profile
OTC "Over the Counter" profile setup
This Workflow Profile is best used for OTC eat-in and OTC takeaway
To create a workflow profile for a OTC (over the counter) orders, whether they for are takeaway or eat-in , follow the steps below:
-
In Tabit Office, go to Settings > Workflow Profiles > Add New Profile

-
Select OTC from the Choose Profile Type pop-up
-
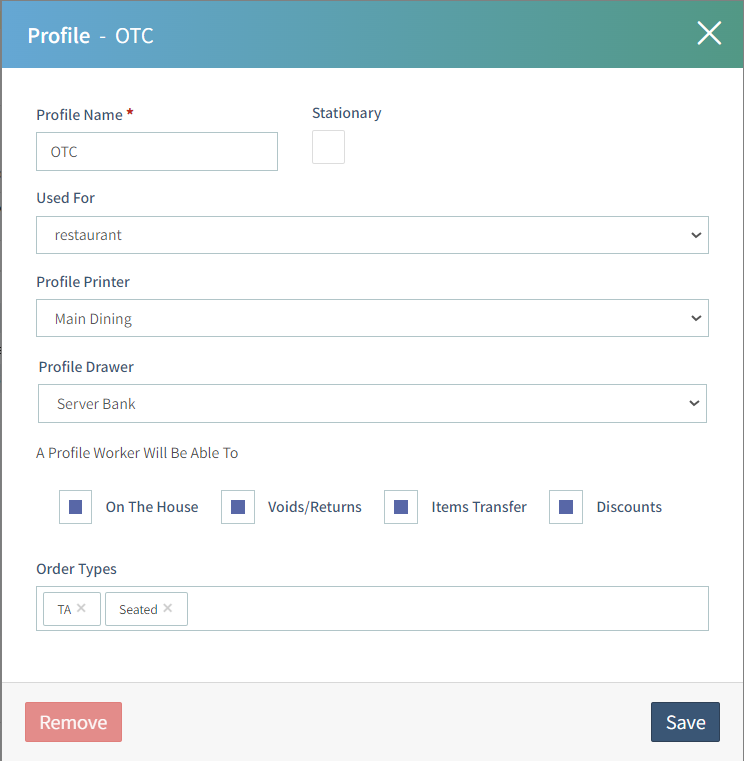
In the Profile pop-up, fill in the following fields:
-
Profile Name: Enter a name
Best practice is to have the name of this Profile match the name of the Profile Type = OTC
-
Stationary: If you want to set up this profile as a Stationary Workflow Profile linked to a single PAD device
-
Used For: The options are Restaurant, Online and Center (not supported in US).
Restaurant (Default) = Allows staff staff to perform restaurant functions as well as receive orders from online platforms and 3rd party integrations.
Online = Only allows for receiving online orders and third-party orders. -
Profile Printer: Will drive the available printers for the User when printing Guest Bills, with mobility in mind. Only one printer can be selected in this profile
-
Profile Drawer: The Cash Drawer setting at the profile level is only relevant for open Tabs generated from this Profile
-
Select the permissions that users assigned to this profile will have access to:
-
On The House: Enables users to request Comps and Discounts
-
Refund/Cancellation: Enables users to request Voids
-
Items Transfer: Enables users to request moving between Checks
-
Discounts: Enables users to request a Discount
-
Order Types: Define if this profile is for Takeaway, Eat-In, or both
-
-
-
Select Save on the bottom right.
Making Quick Cash Payments in OTC Profile
Using quick cash in the OTC profile is a quick and easy way to improve efficiency while working in a quick service atmosphere.
Follow the steps below to receive Quick Cash payments:
-
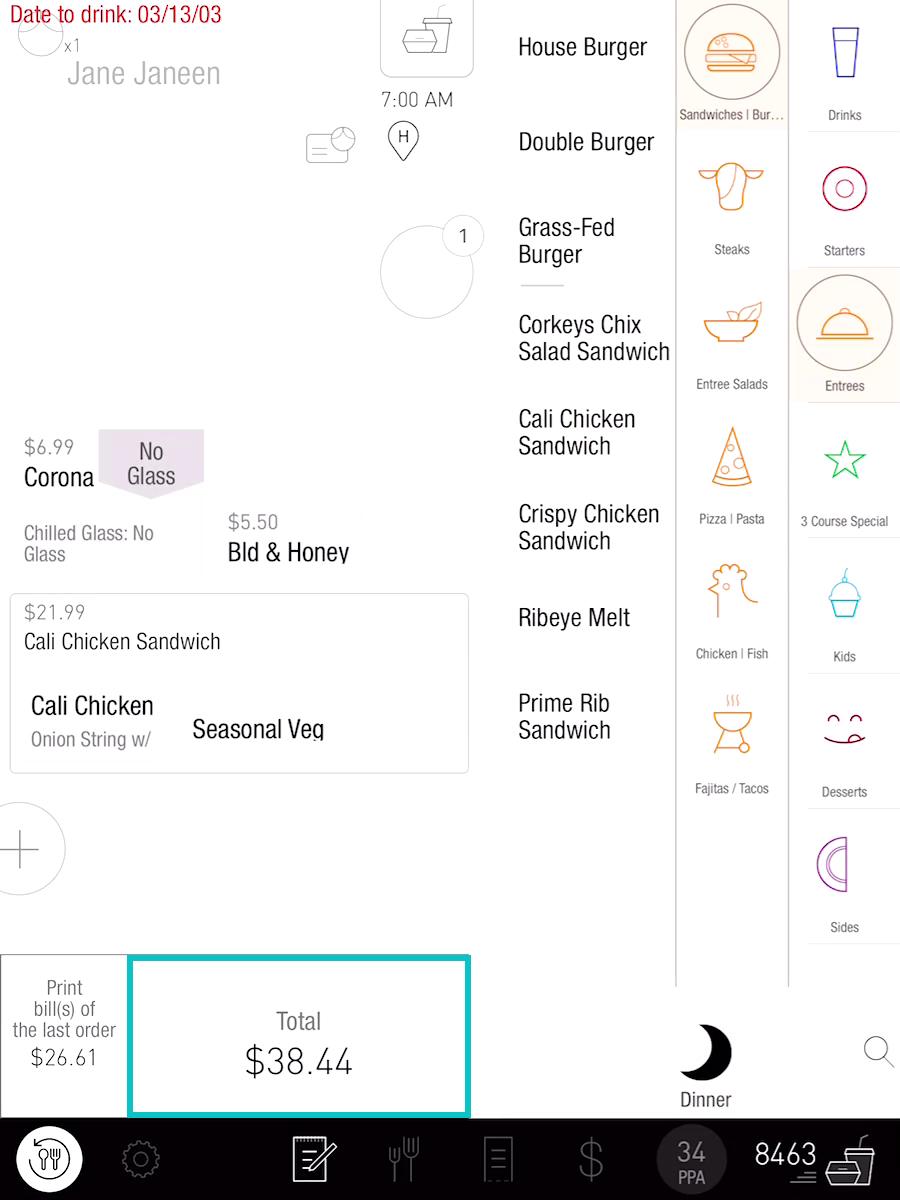
After adding items to your order, select the Total at the bottom of the screen
-
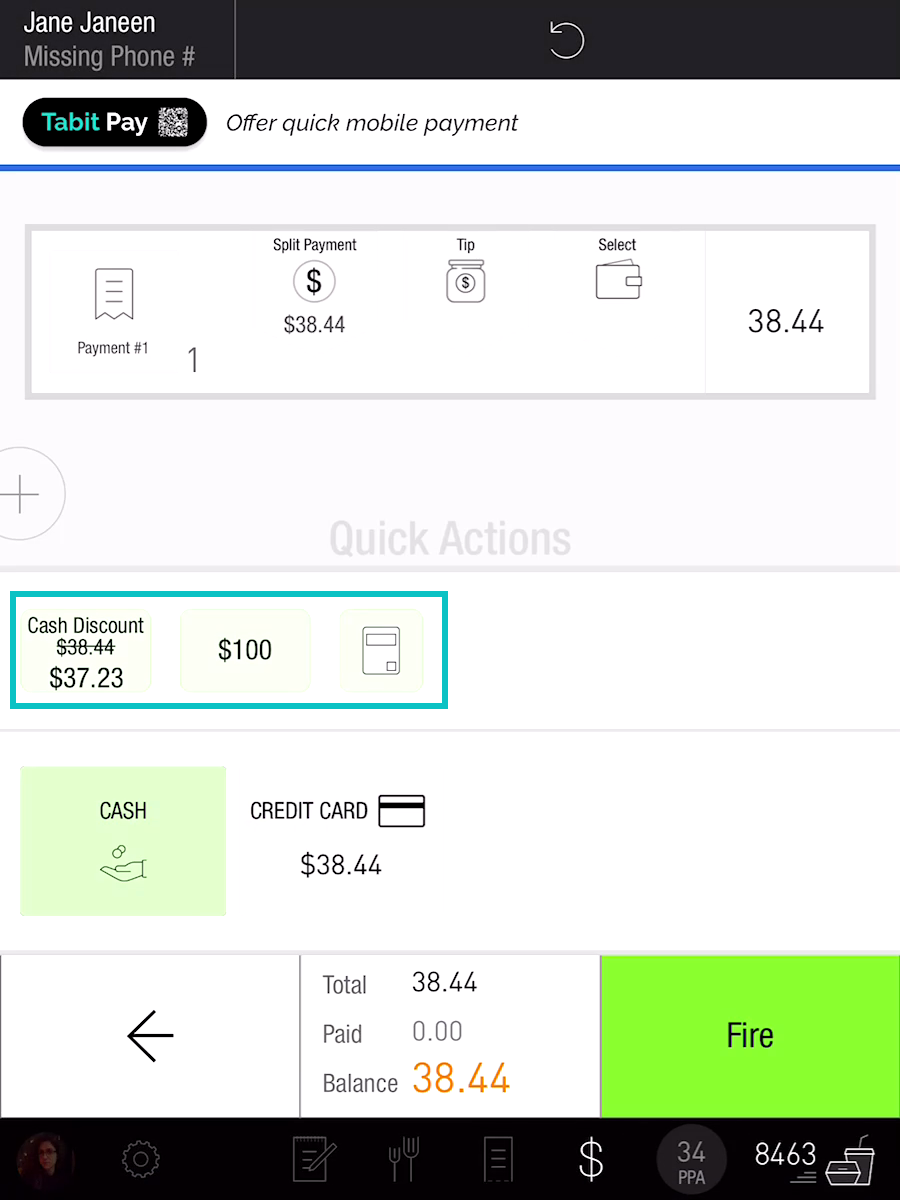
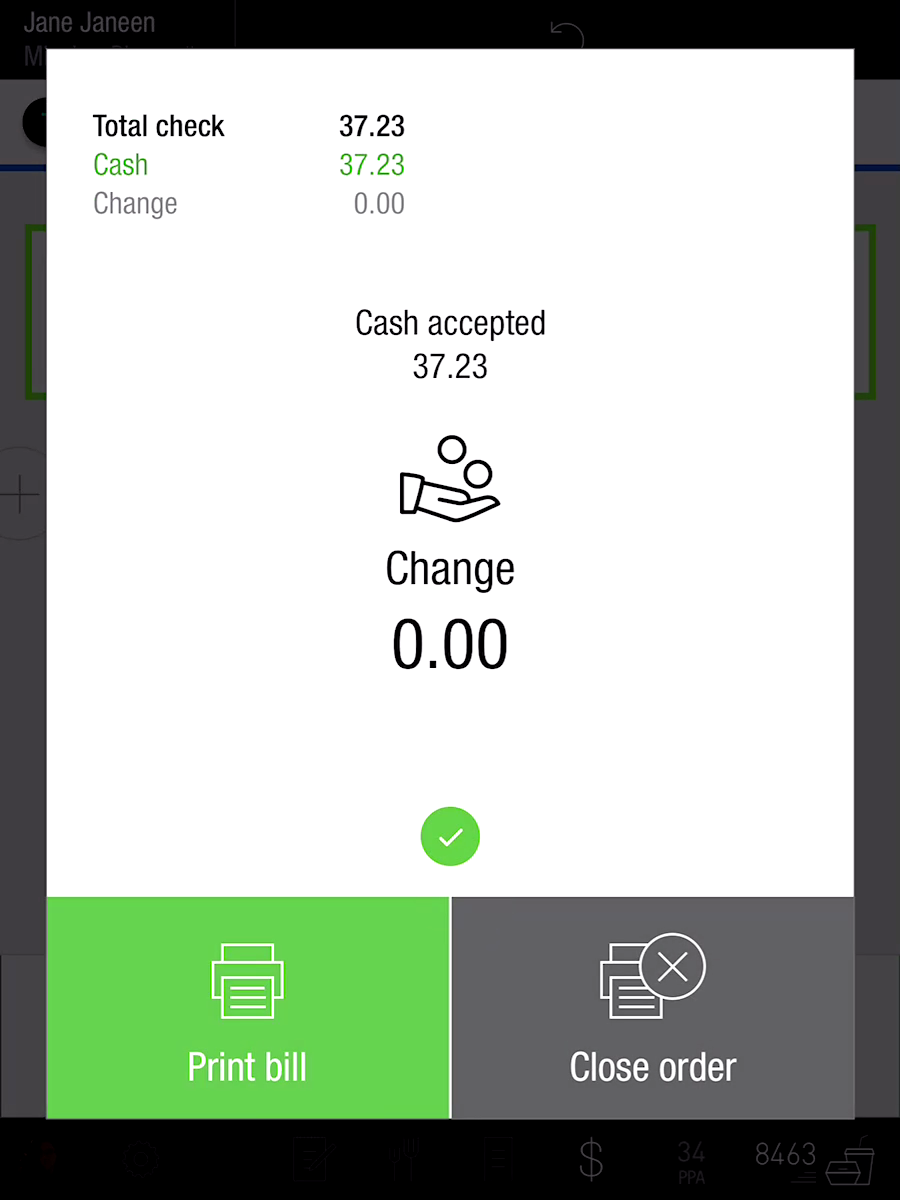
After choosing the total amount, you will be taken to the Payment screen. Here, you can choose either Cash or Credit Card. If you pick Cash, you'll see different cash amounts, including exact change and a calculator for custom amounts.
-
In this example, exact change was selected. From here, you can select to print the bill, or simply close the order
Reprint an OTC Receipt
To reprint the most recent OTC receipt, tap on the button in the bottom left-hand corner of the screen, as seen below:
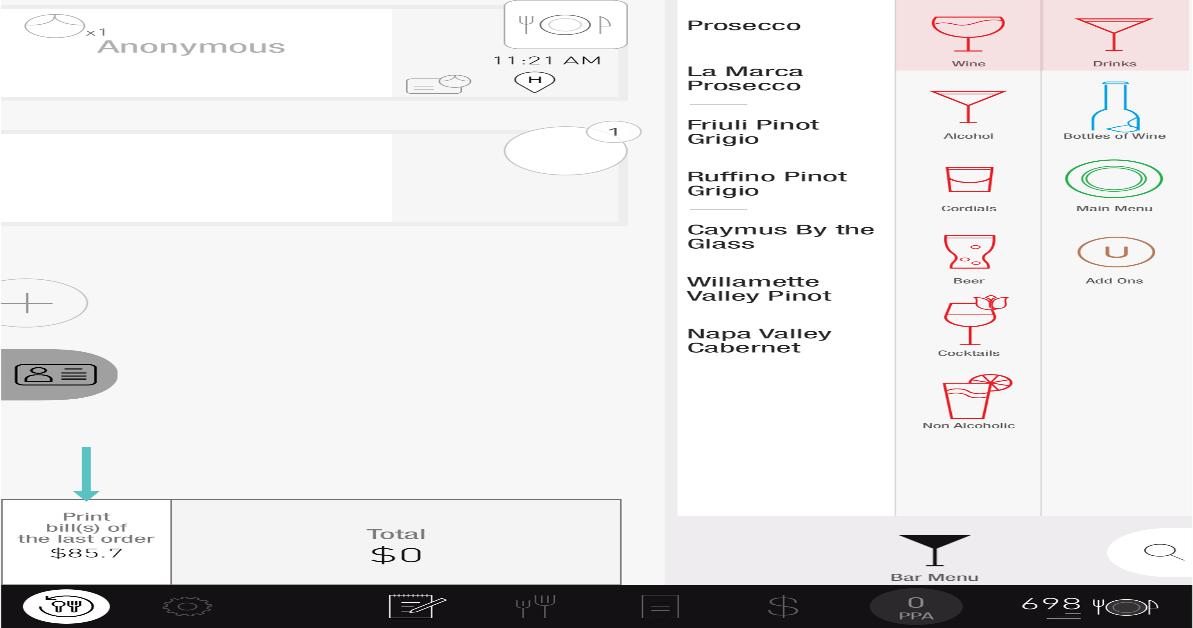
If you are looking to reprint an older receipt, review the “Reprinting a Closed Check from a Server Profile” documentation.
Setting up a Takeaway and Delivery Workflow Profile
TD "Takeaway Delivery" profile setup
This Workflow Profile is required for inbound Tabit Order orders and management.
To create a workflow profile for a TD (Takeaway & Delivery) orders, follow the steps below:
-
In Tabit Office, go to Settings > Workflow Profiles > Add New Profile

-
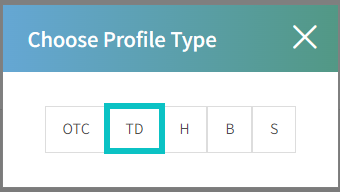
Select TD from the Choose Profile Type pop-up
-
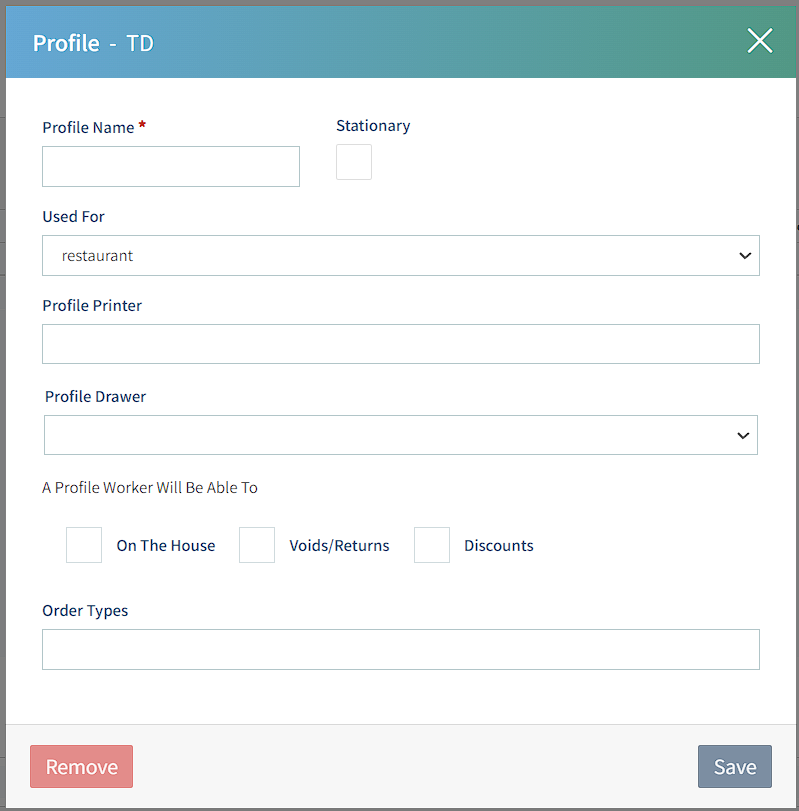
In the pop-up window, refer to the following when filling-up the fields.
-
Profile Name: Enter a name
Best practice is to have the name of this Profile match the name of the Profile Type = TD or Takeaway/Delivery
-
Stationary: If you want to set up this profile as a Stationary Workflow Profile linked to a single PAD device, select this
-
Used For: The options are Restaurant, Online and Center (not supported in US).
Restaurant (Default) = Allows staff staff to perform restaurant functions as well as receive orders from online platforms and 3rd party integrations.
Online = Only allows for receiving online orders and third-party orders. -
Profile Printer: Will drive the available printers for the User when printing Guest Bills, with mobility in mind. Only one printer can be selected in this profile
-
Profile Drawer: The Cash Drawer setting at the profile level is only relevant for open Tabs generated from this profile
-
Select the permissions that users assigned to this profile will have access to:
-
On The House: Enables users to request Comps and Discounts
-
Refund/Cancellation: Enables users to request Voids
-
Items Transfer: Enables users to request moving between Checks
-
Discounts: Enables users to request a Discount
-
Order Types: Define if this profile is for Takeaway, Delivery, or bothIn the Profile pop-up, fill in the following fields:
-
-
-
-
Select Save on the bottom right.
Setting up a Cash Drawer Profile
CD "Cash Drawer" profile setup
This Workflow Profile is required for each cash drawer added to a Site
Cash Drawers will be assigned to every table in the event the customer pays in cash and to specific profiles based upon use within the restaurant. A virtual ‘Server Bank” will need to be set up in addition to physical cash drawers.
Creating Cash Drawer Profile
-
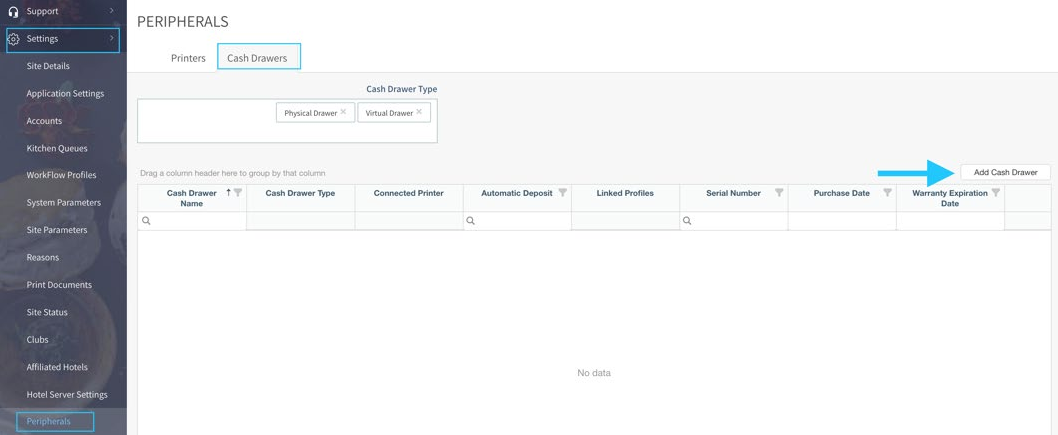
In Tabit Office, go to Settings → Peripherals → Cash Drawers → Add Cash Drawer
-
Select type of Cash Drawer
Types of Cash Drawer Profiles
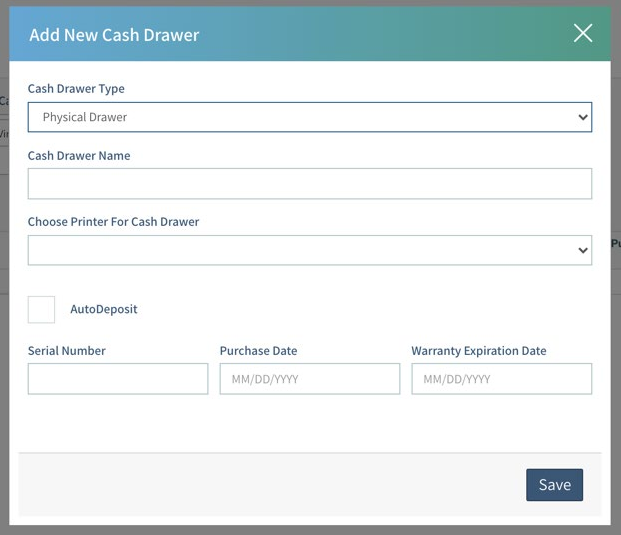
Physical Drawer
Should be limited to physical drawers in the building that are connected to specific terminals and printers
-
Cash Drawer Name: Internal name, will print on all reporting
-
Best practice is to be named after the printer or stationary iPad nearby
-
-
Choose Printer for Cash Drawer: When this Cash Drawer is selected it will automatically print to the selected printer(s)
-
Auto Deposit: If multiple cash drawers exist the user will need to select which drawer they’re placing the cash in
-
Serial Number, Purchase Date, Warranty Expiration Date: Optional fields for internal use
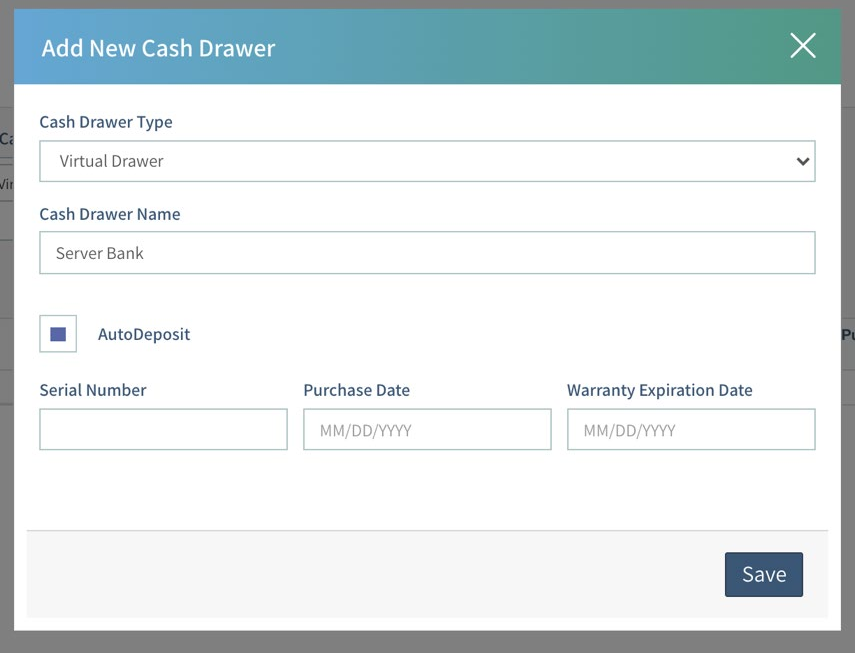
Virtual Drawer
Allows for placing of cash in a non-physical drawer like a “Server Bank”
-
Cash Drawer Name: Internal name, this name will appear on all reporting
-
Auto Deposit: Allows for faster functionality when cash is selected as a Tender Type
-
Best practice is to enable for Server Bank
-
-
Serial Number, Purchase Date, Warranty Expiration Date: Optional fields for internal use
-
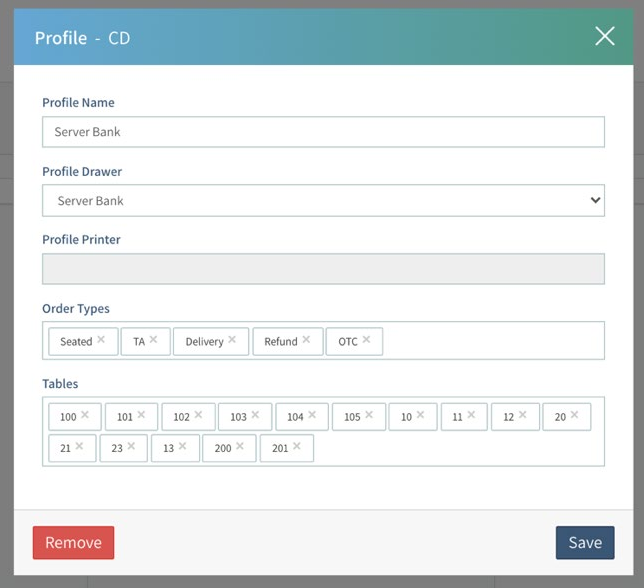
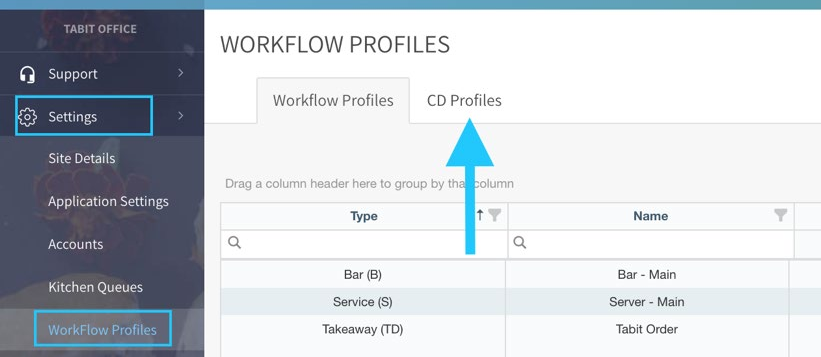
Go to Settings → Workflow Profiles → CD Profiles → Add New CD Profile
-
Profile Name: Server Bank
-
Profile Drawer: Server Bank
-
Profile Printer: NA
-
Order Types: Enable all necessary order types (Seated, TA, Delivery, Refund, OTC)
-
Tables: Select which tables need to be linked to the specific profile. Can be added as the restaurant map is created