
Overview
A Decision Group is a list of item(s) or free text related to a lead item. It can have a default choice, and only one value can be selected. Typically, a decision group is used for simple, essential decisions or common modifications.
Two Ways to Add a Decision to an item:
Through the Lead Item (this article) - usually used for attaching a group to one item
Through the Decision group is usually used for attaching a group to multiple items
Follow these steps below to add a Decision to an item through a Lead Item:
-
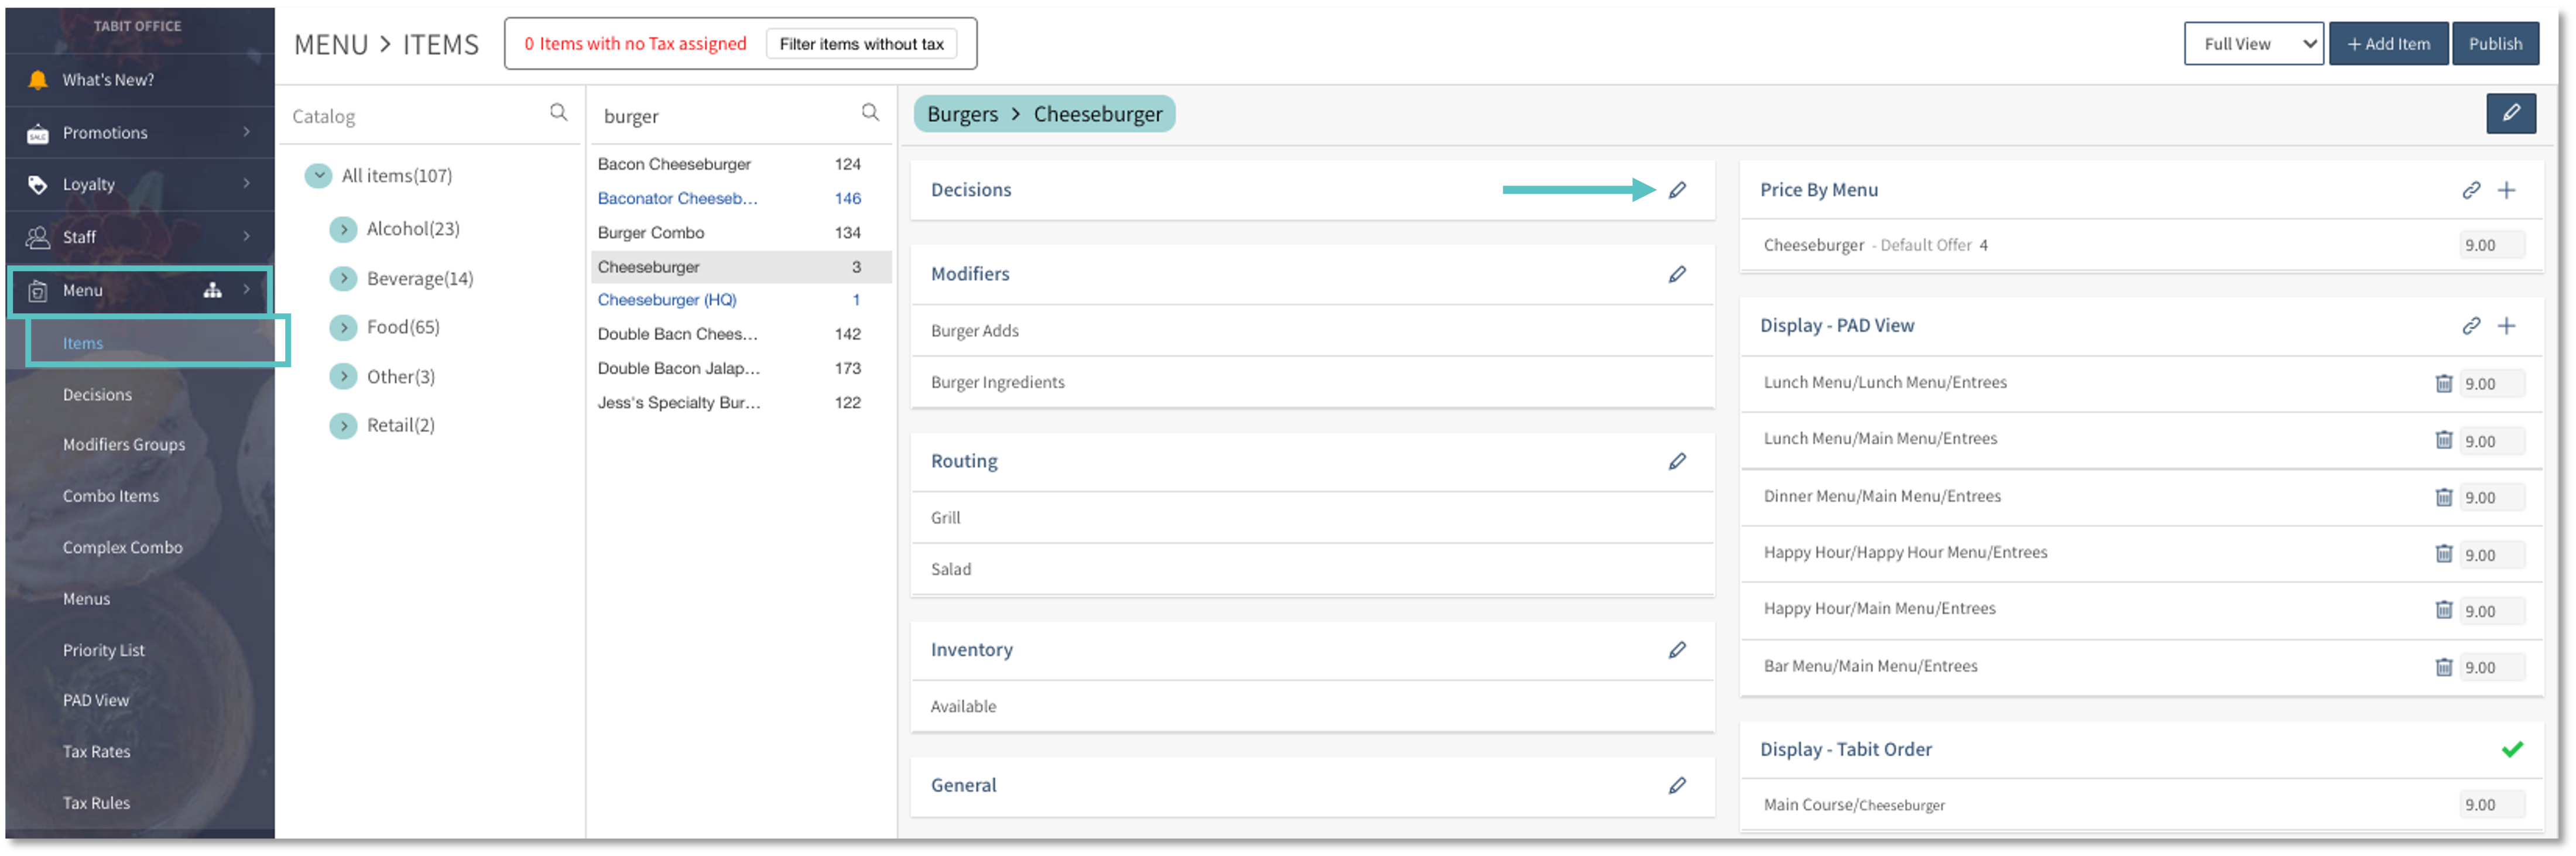
In Tabit Office, go to Menu > Items, search and select the relevant item
-
Then, select the Edit icon to the right of Decisions
-
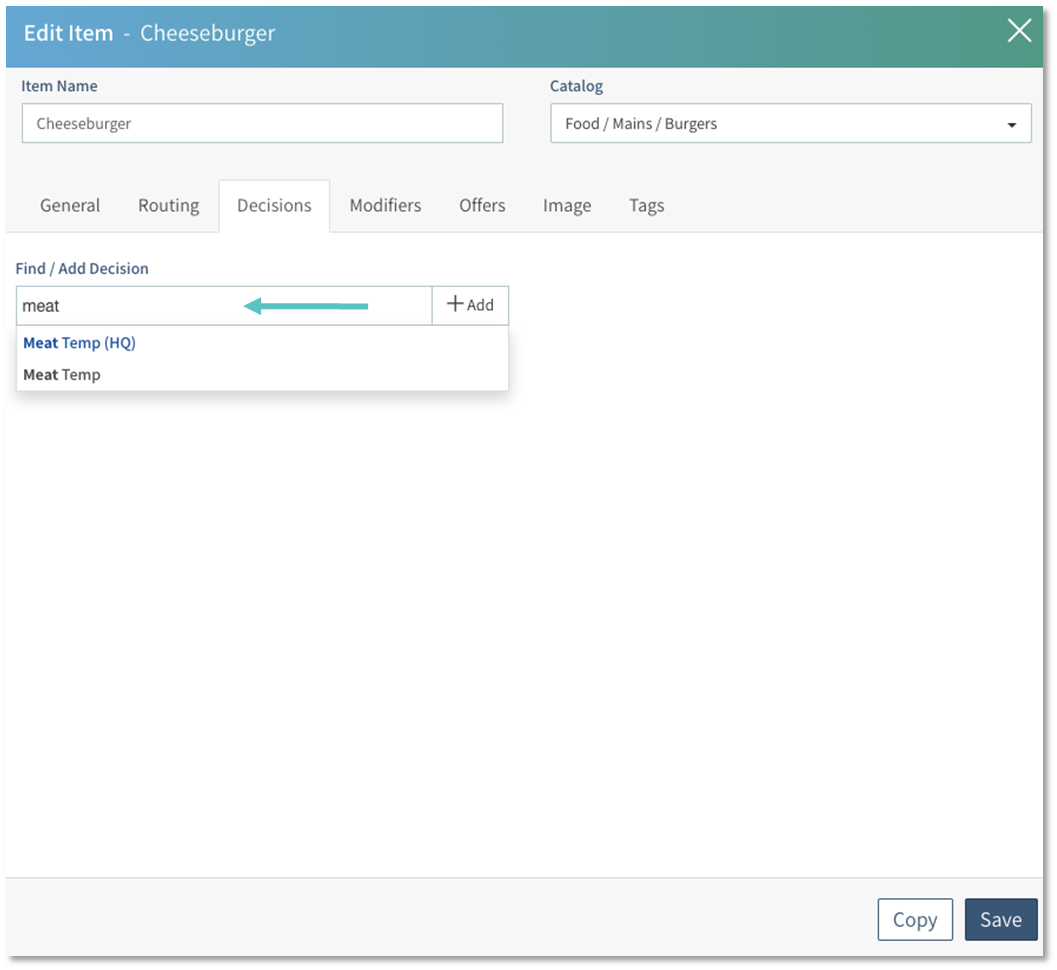
Now, search and select the Decision Group you want to attach in the Find / Add Decision field
-
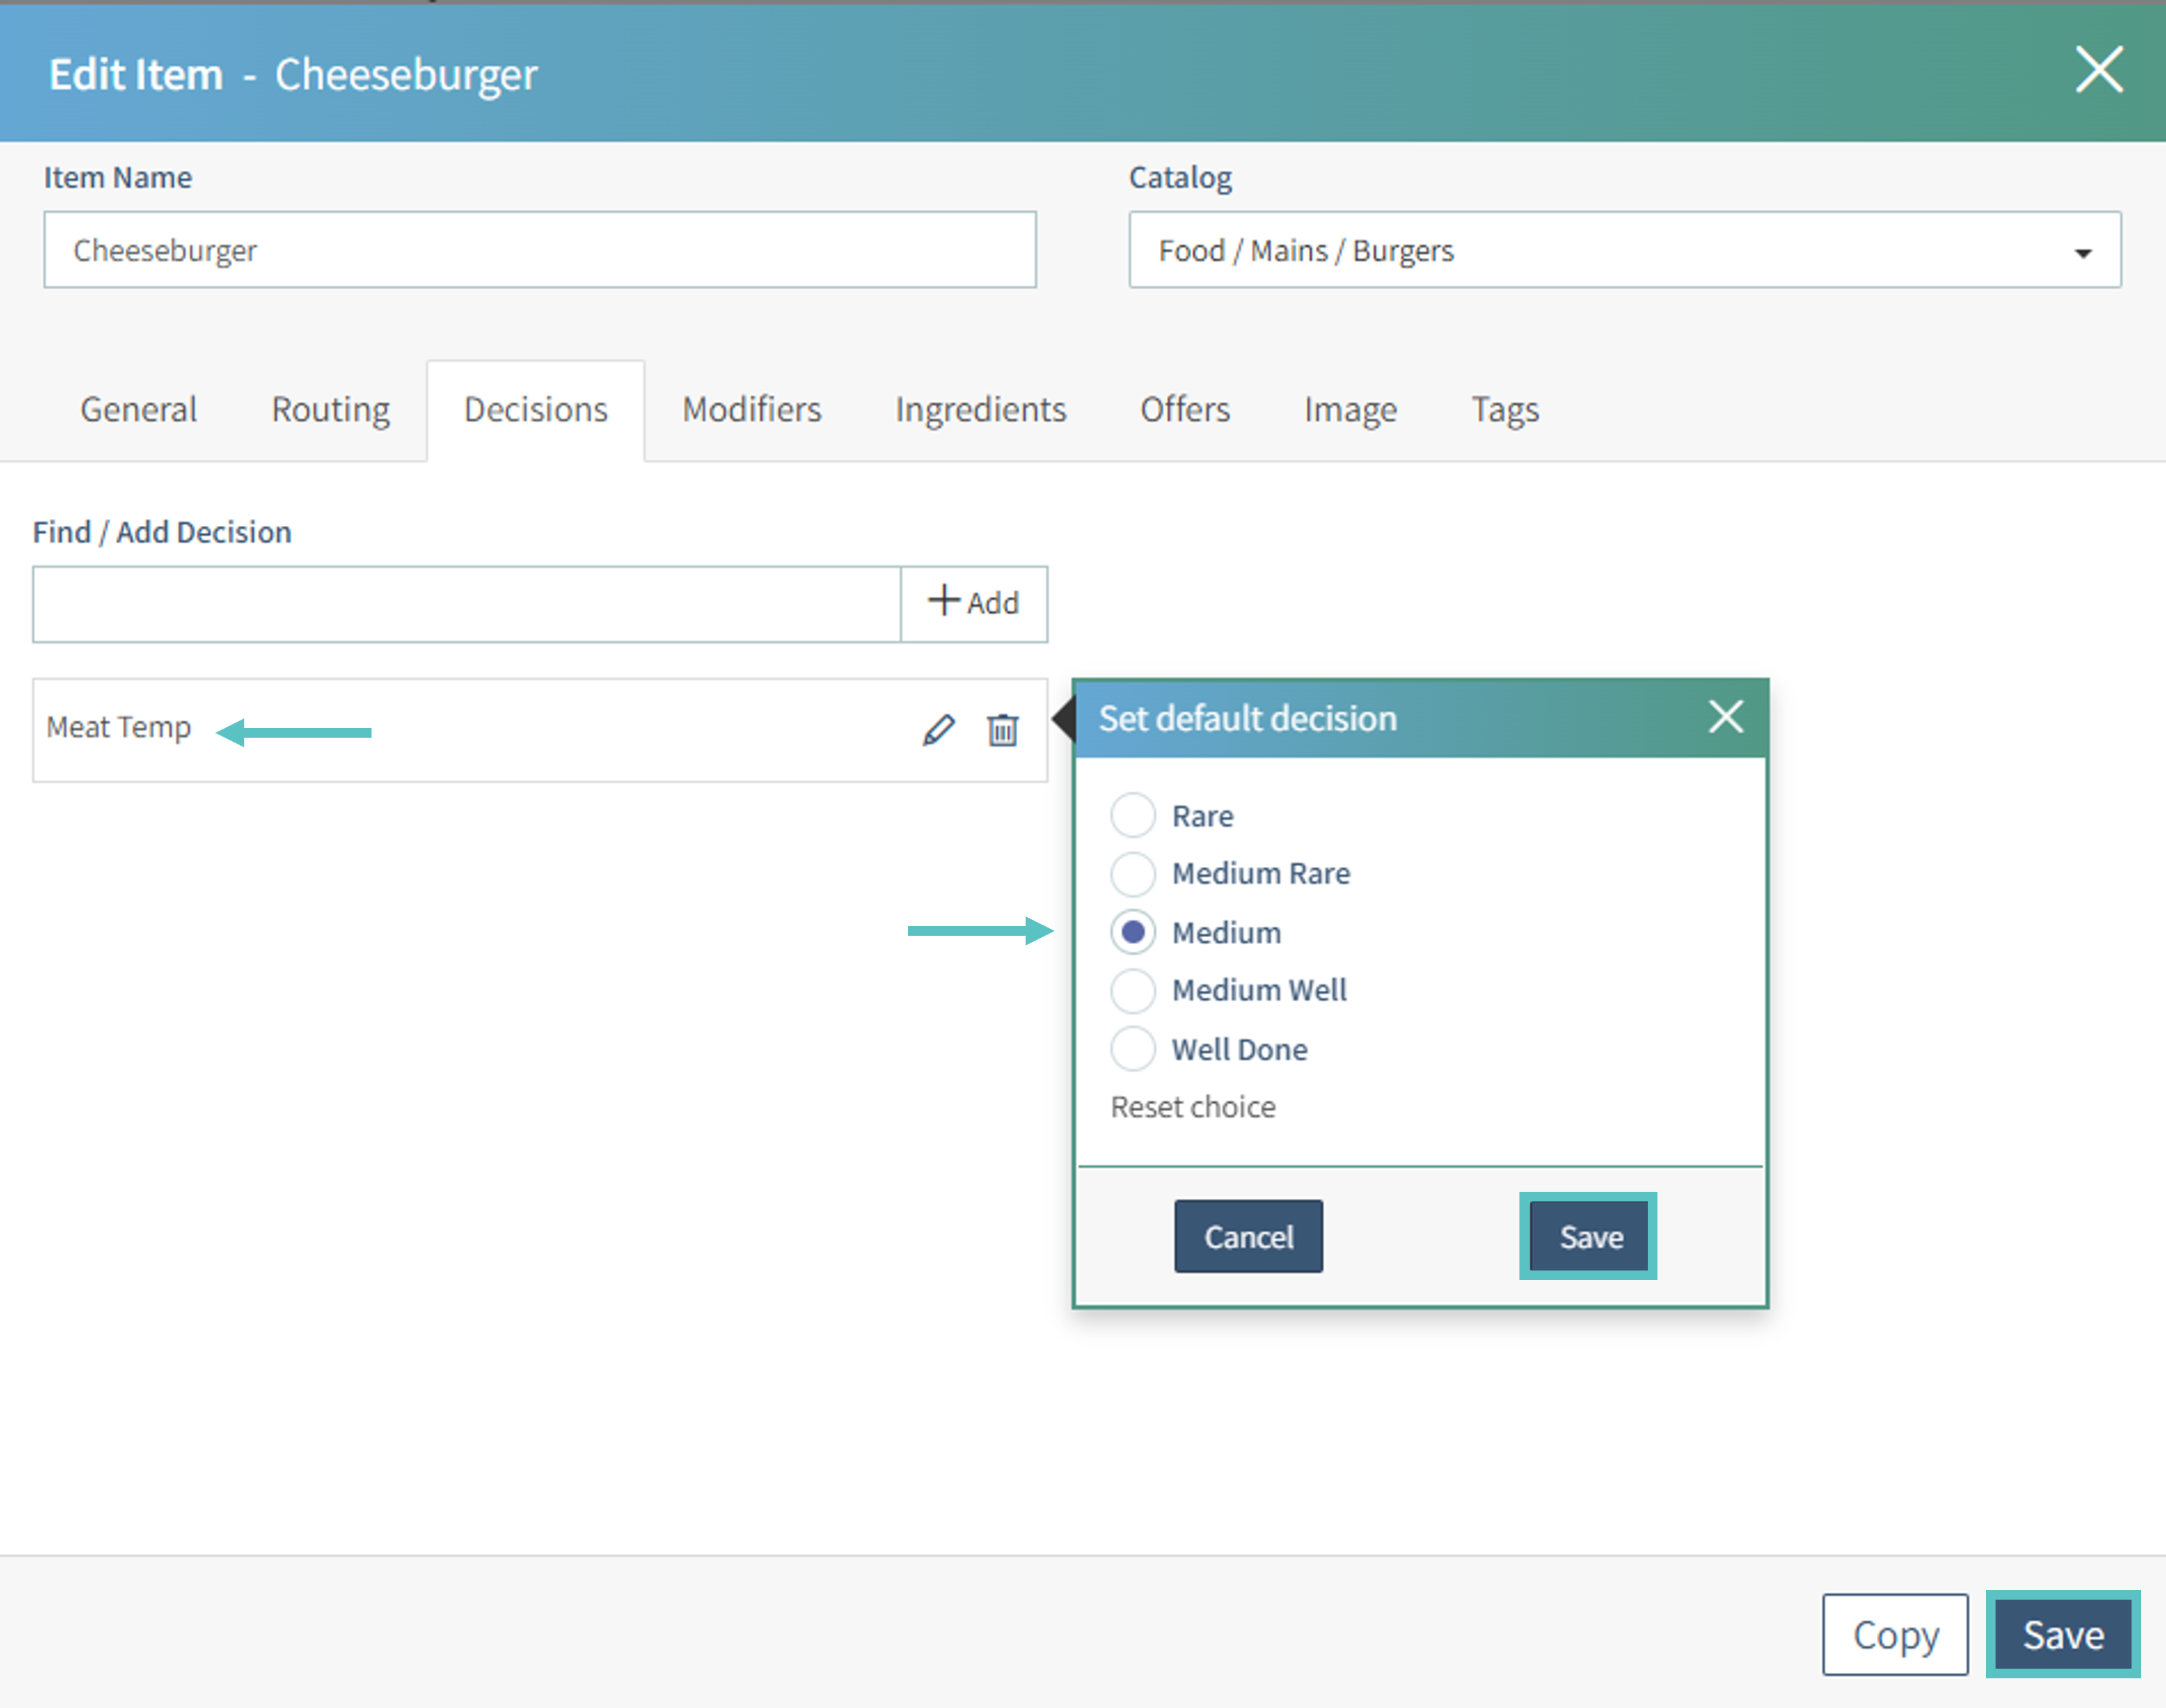
Select the name of the Decision Group to set a default decision if needed. Then select Save and Save again to update the item
If no default option is set, users will be required to make a selection before proceeding
-
Don’t forget to select Publish on the top right to update the changes on Tabit platforms.
Now that you know how to attach a Decision Group, learn how to edit it here