Lesson 2.3: Attaching a Decision Group to an Item Through the Decision Group
Overview
A Decision Group is a list of item(s) or free text related to a lead item. It can have a default choice, and only one value can be selected. Typically, a decision group is used for simple, essential decisions or common modifications.
Two Ways to Add a Decision to an item:
Through the Lead Item - usually used for attaching a group to one item
Through the Decision group (this article) is usually used for attaching a group to multiple items
Follow these steps below to add a Decision to an item through the Decision Group:
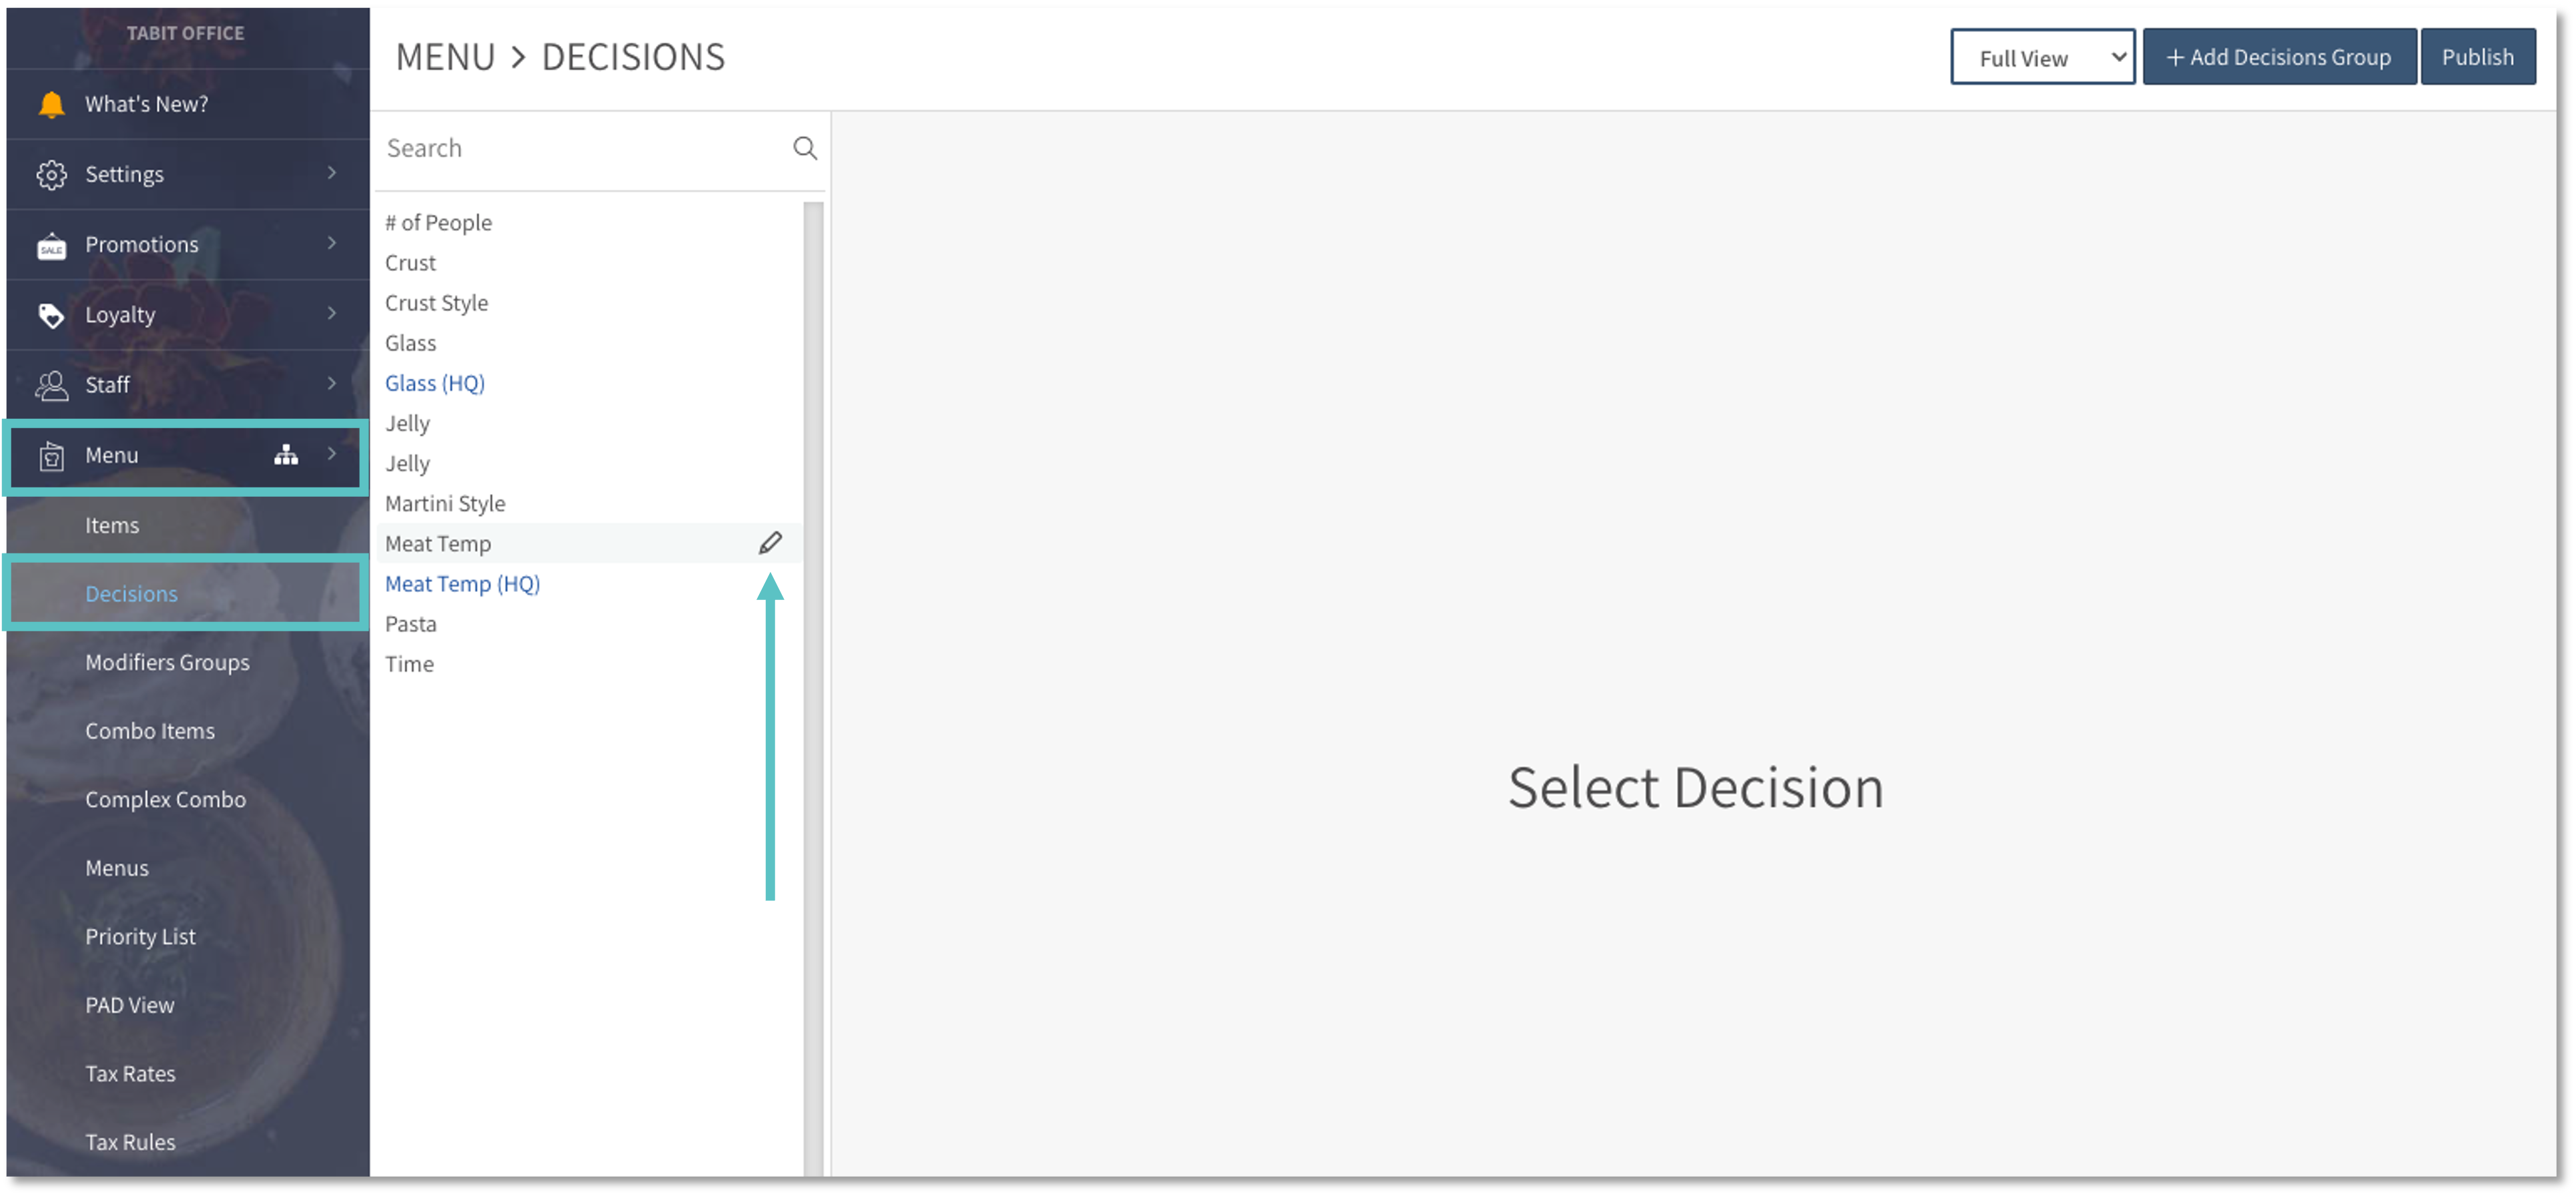
https://www.loom.com/share/baa1ee39167e4a059f20f38fa38b8ed4?sid=099f17c1-ce9f-4d76-ba18-75a6100d963cIn Tabit Office, go to Menu > Decisions. Search and select the relevant Decision and select the Edit icon

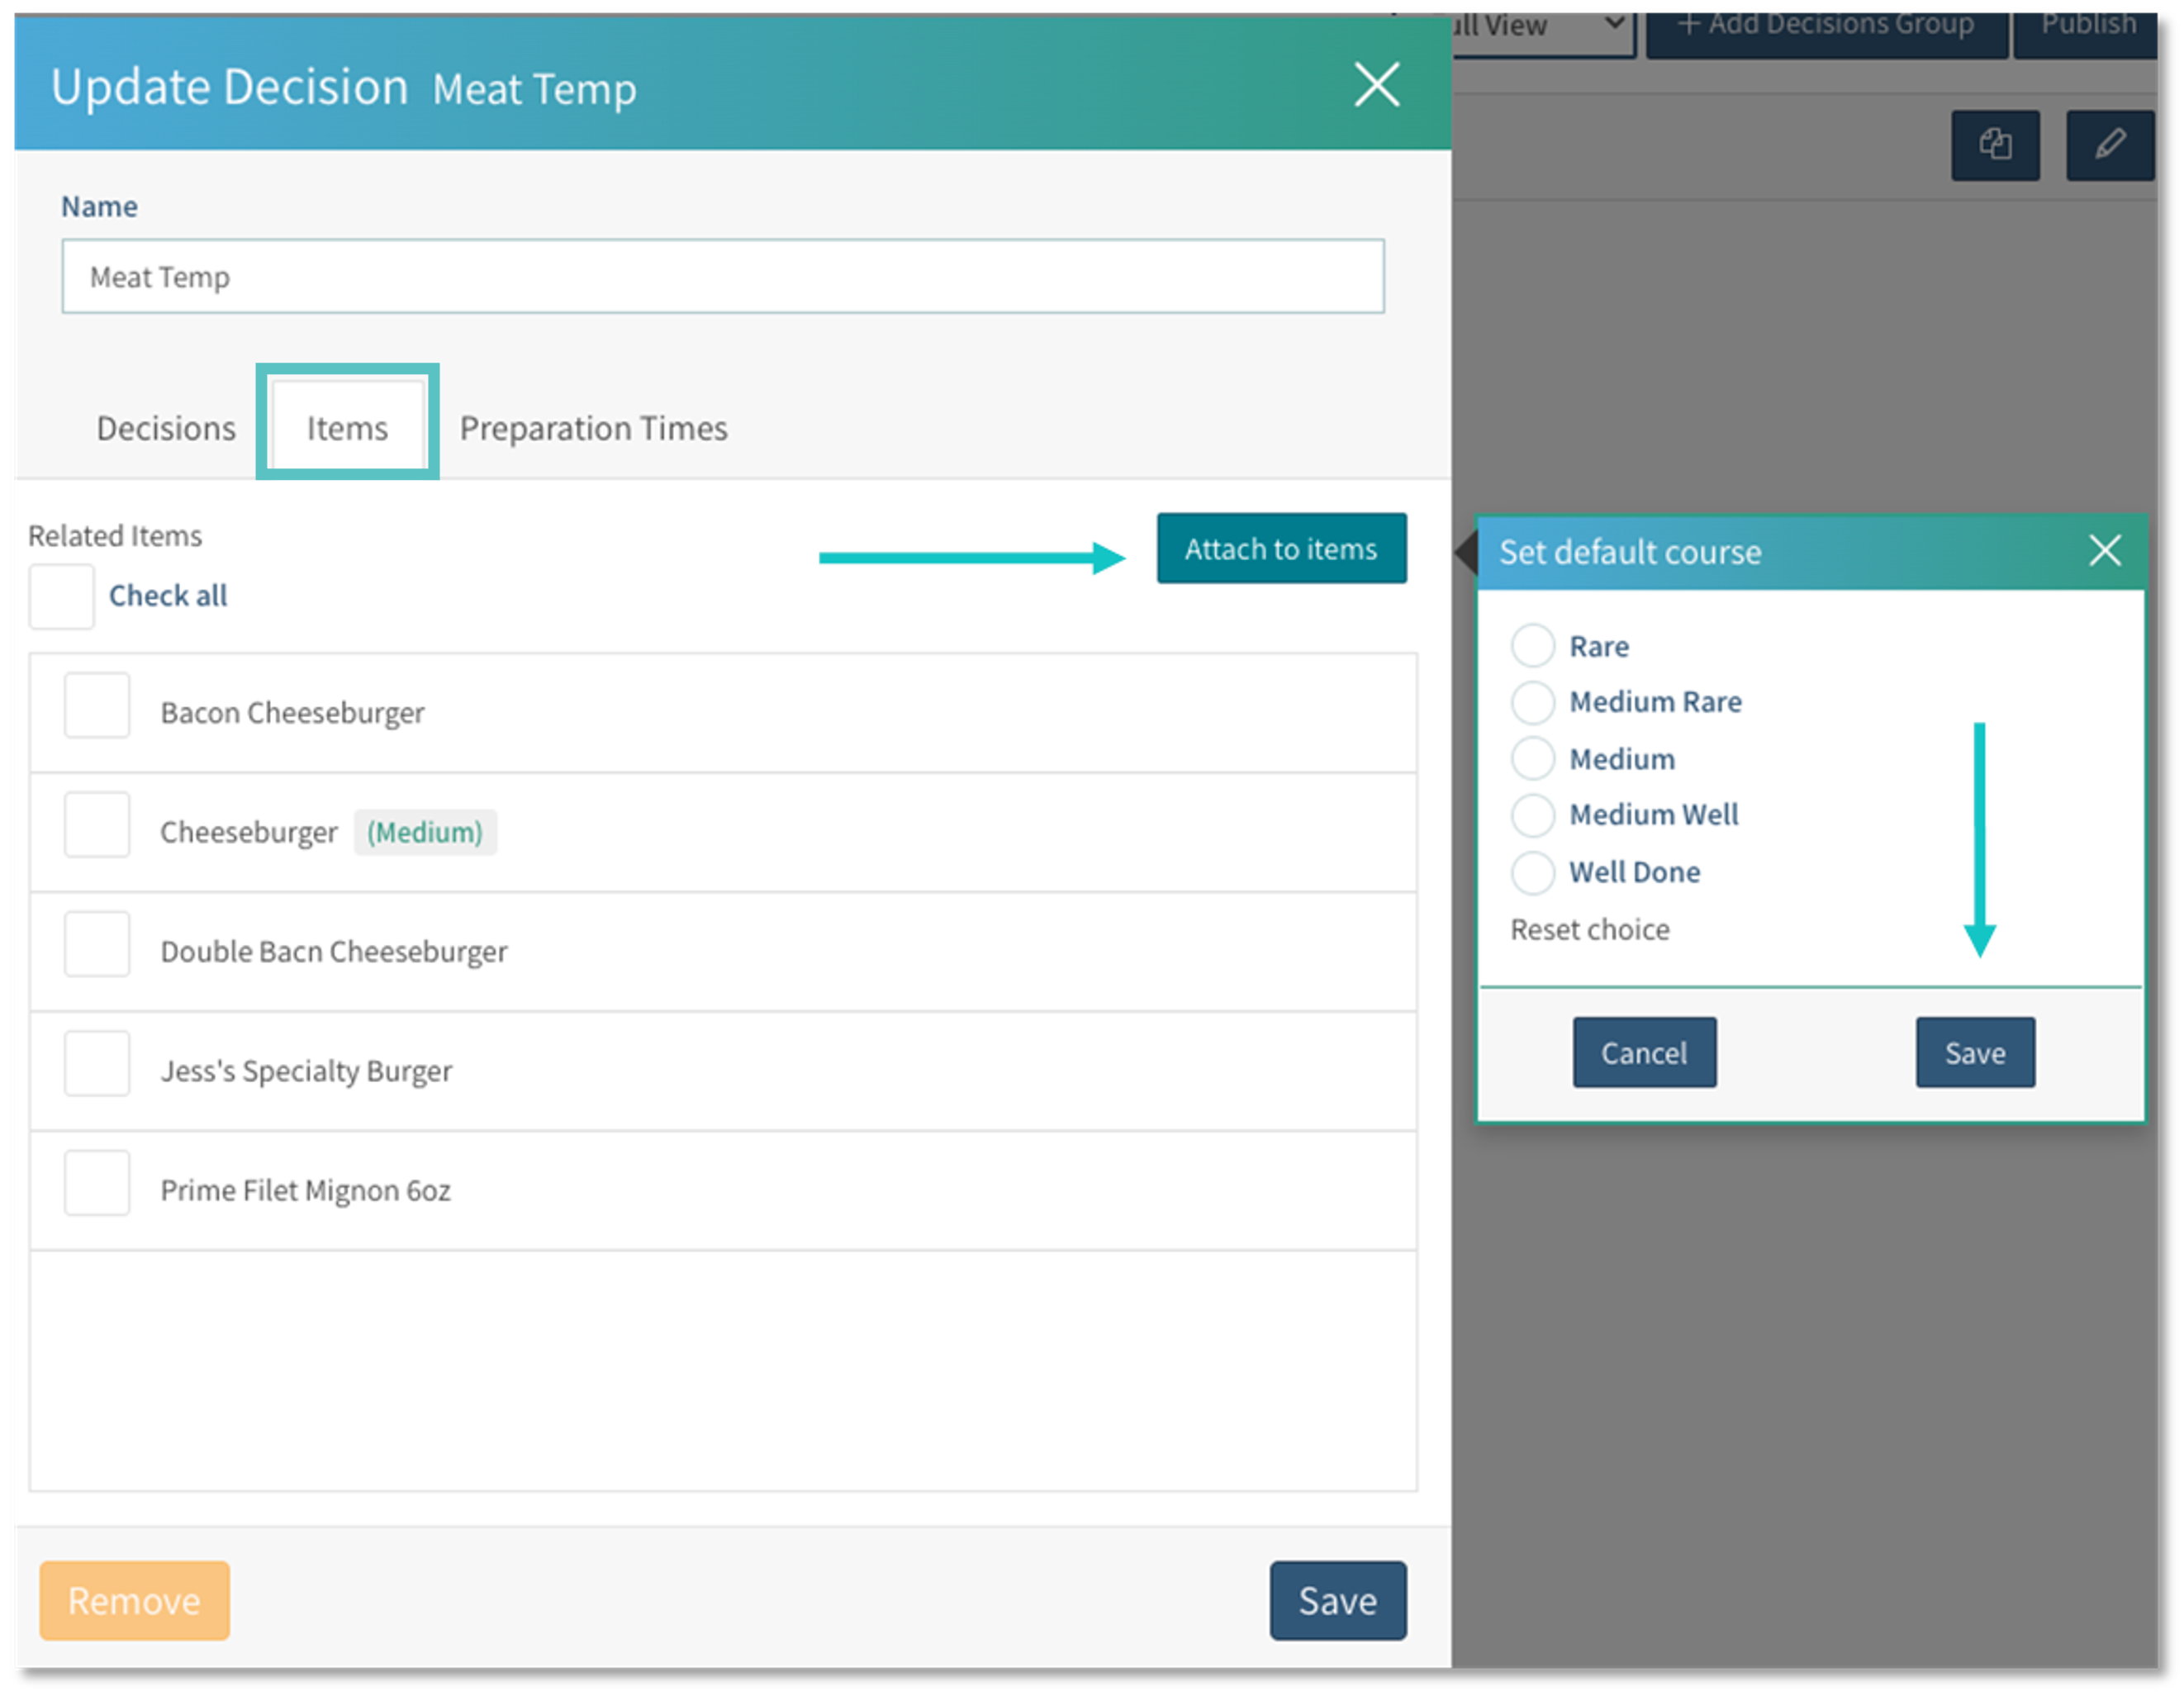
Under the Items tab, select Attach to Items. Set a default decision if needed, then select Save
If no default option is set, users will be required to make a selection before proceeding

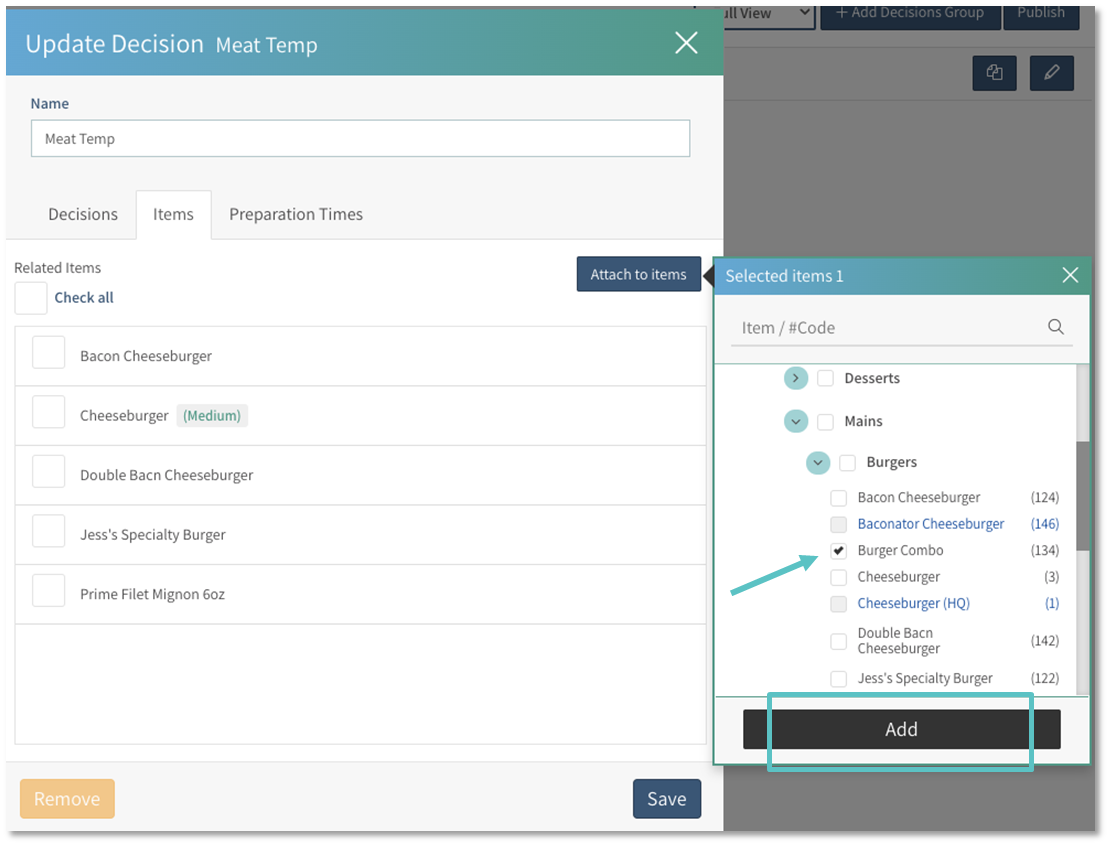
Search and check the boxes next to the item(s) you would like to attach the group to
Then select Add

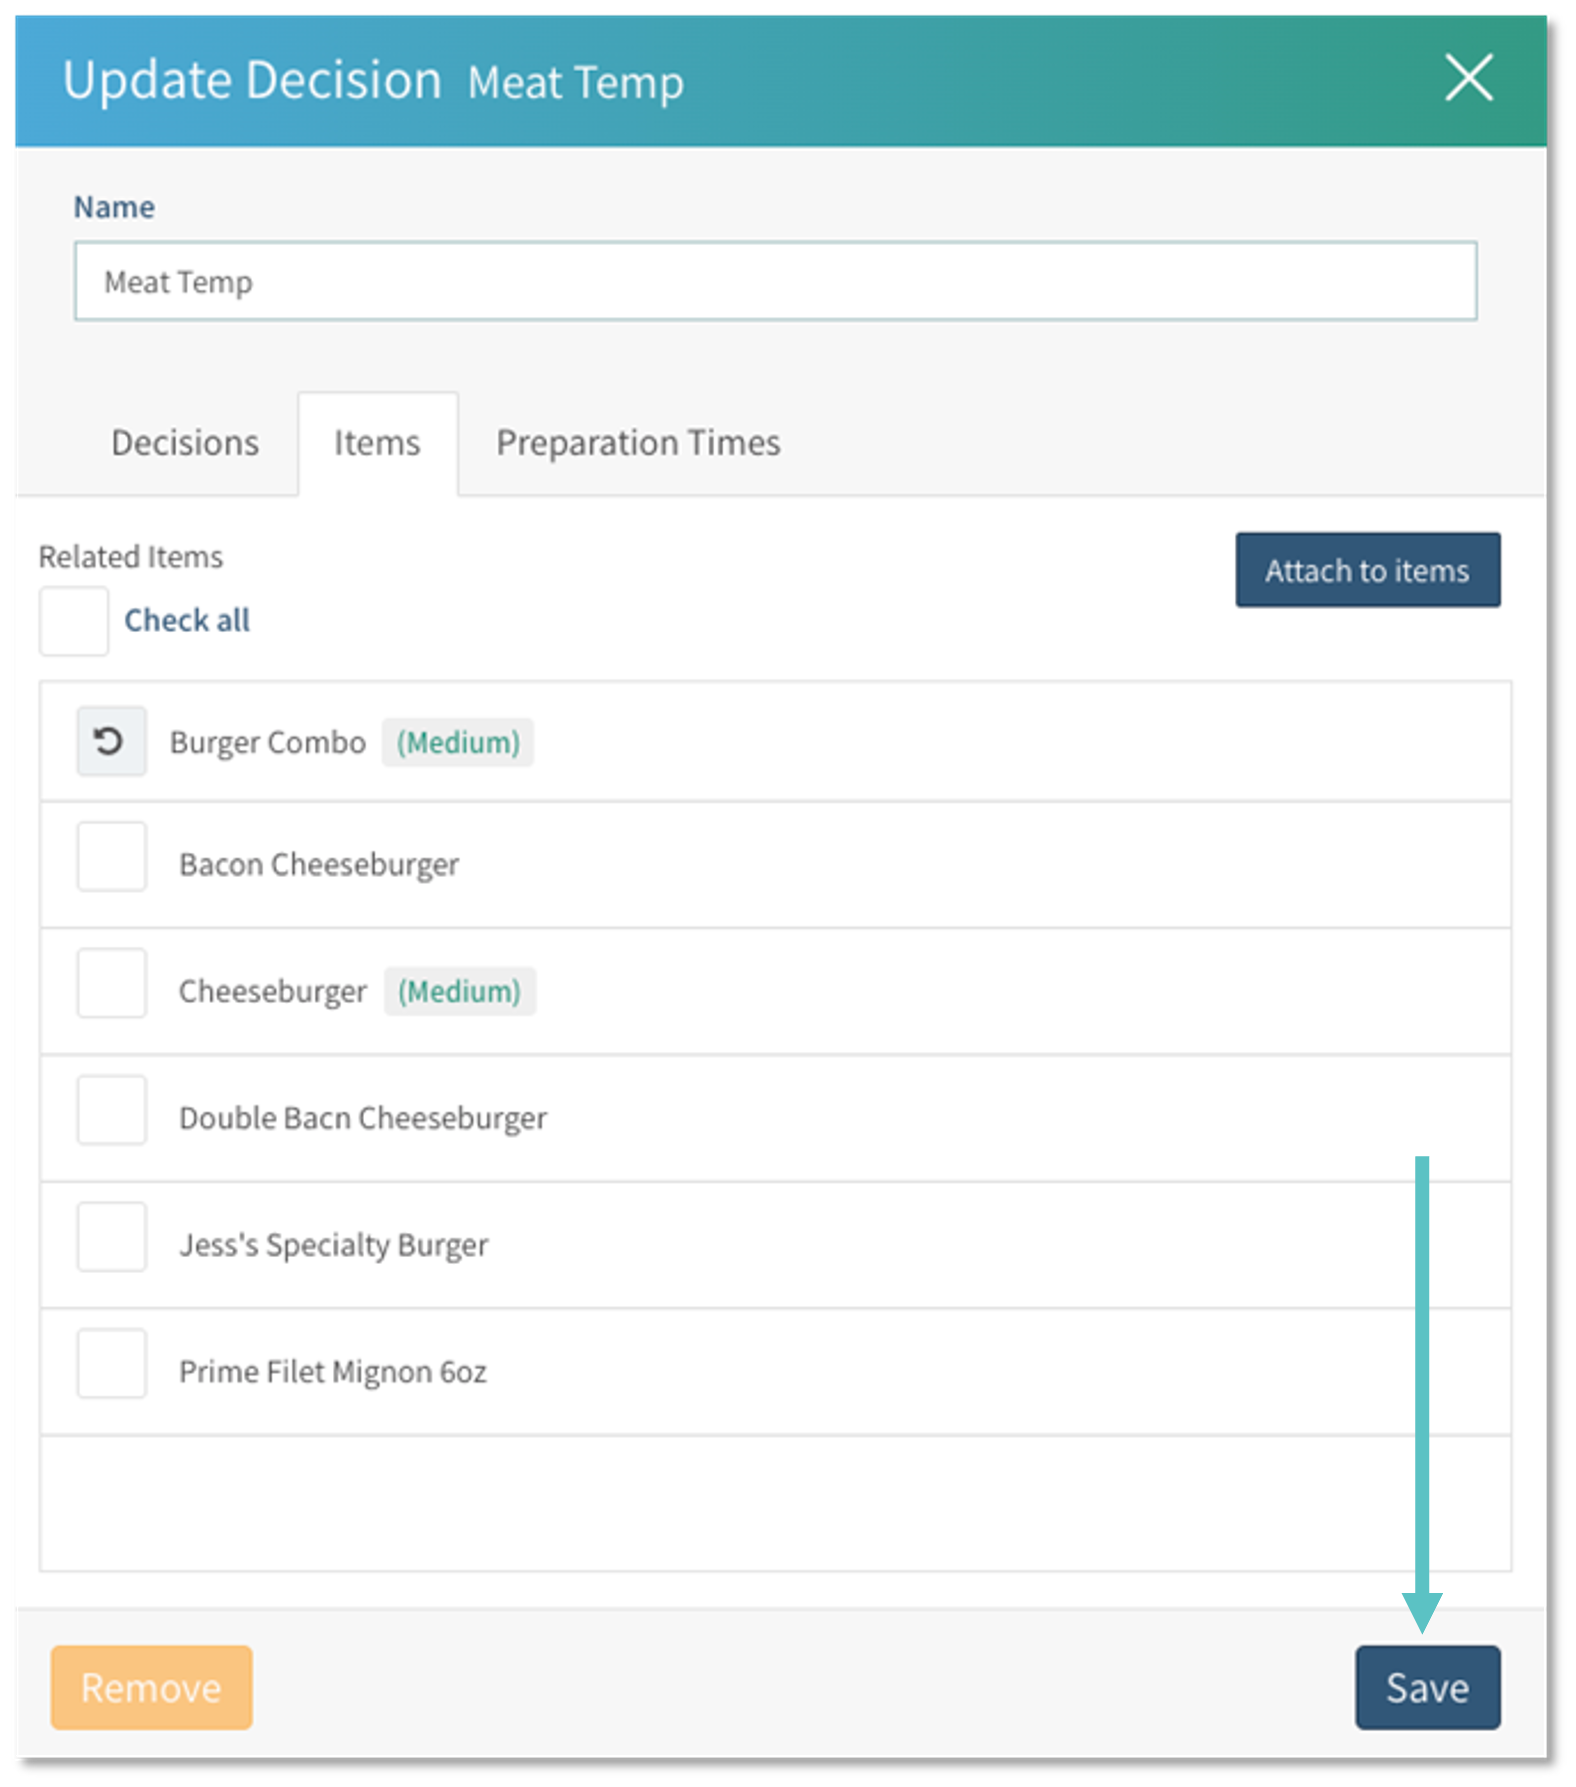
Once added, the item(s) will display with a Refresh icon on the left
Select Save to update the item(s)

Don’t forget to select Publish on the top right to update the changes on Tabit platforms
Now that you know how to attach a Decision Group, learn how to edit it here
