Overview
Any tables that need to be added to Tabit Guest MUST first be added to the Restaurant Map in Back Office.
Click here to learn how to add a table to the Restaurant Map.
Follow these steps to add a table to a Restaurant Map in Tabit Guest.
-
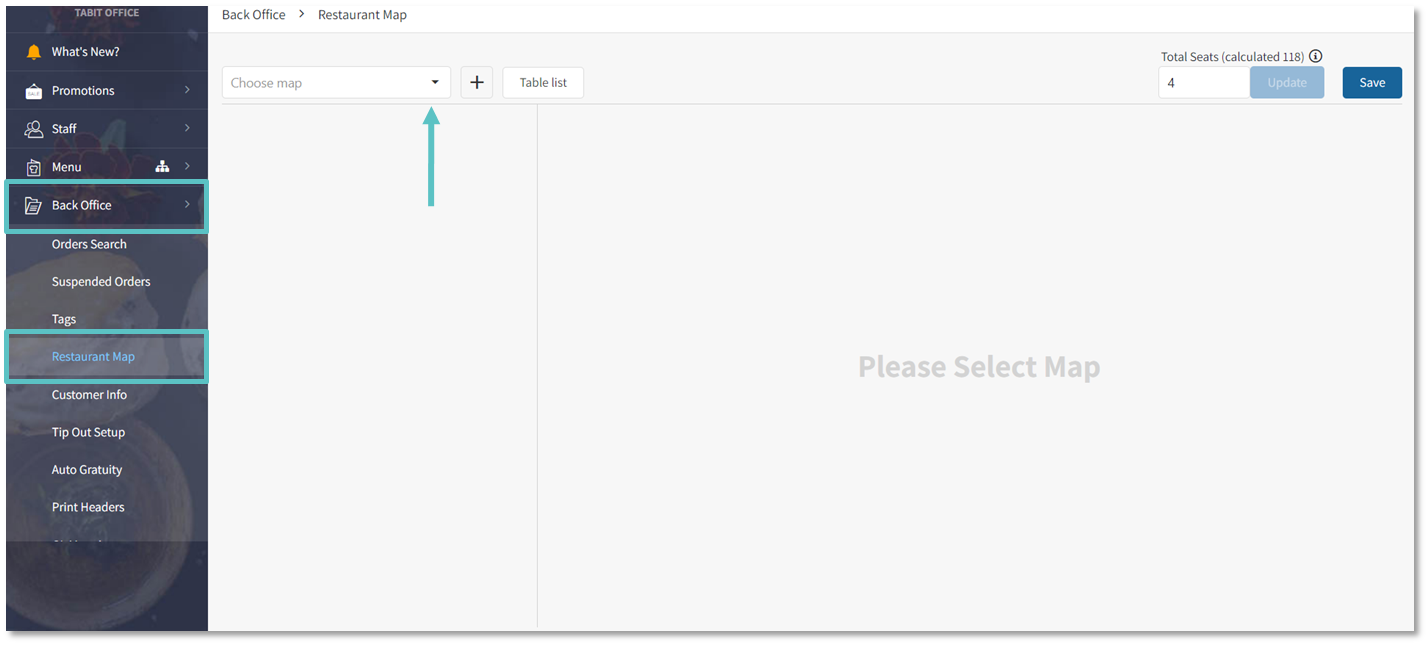
In Office, go to Back Office > Restaurant Map and then select the Tabit Guest Map from the Choose Map dropdown
-
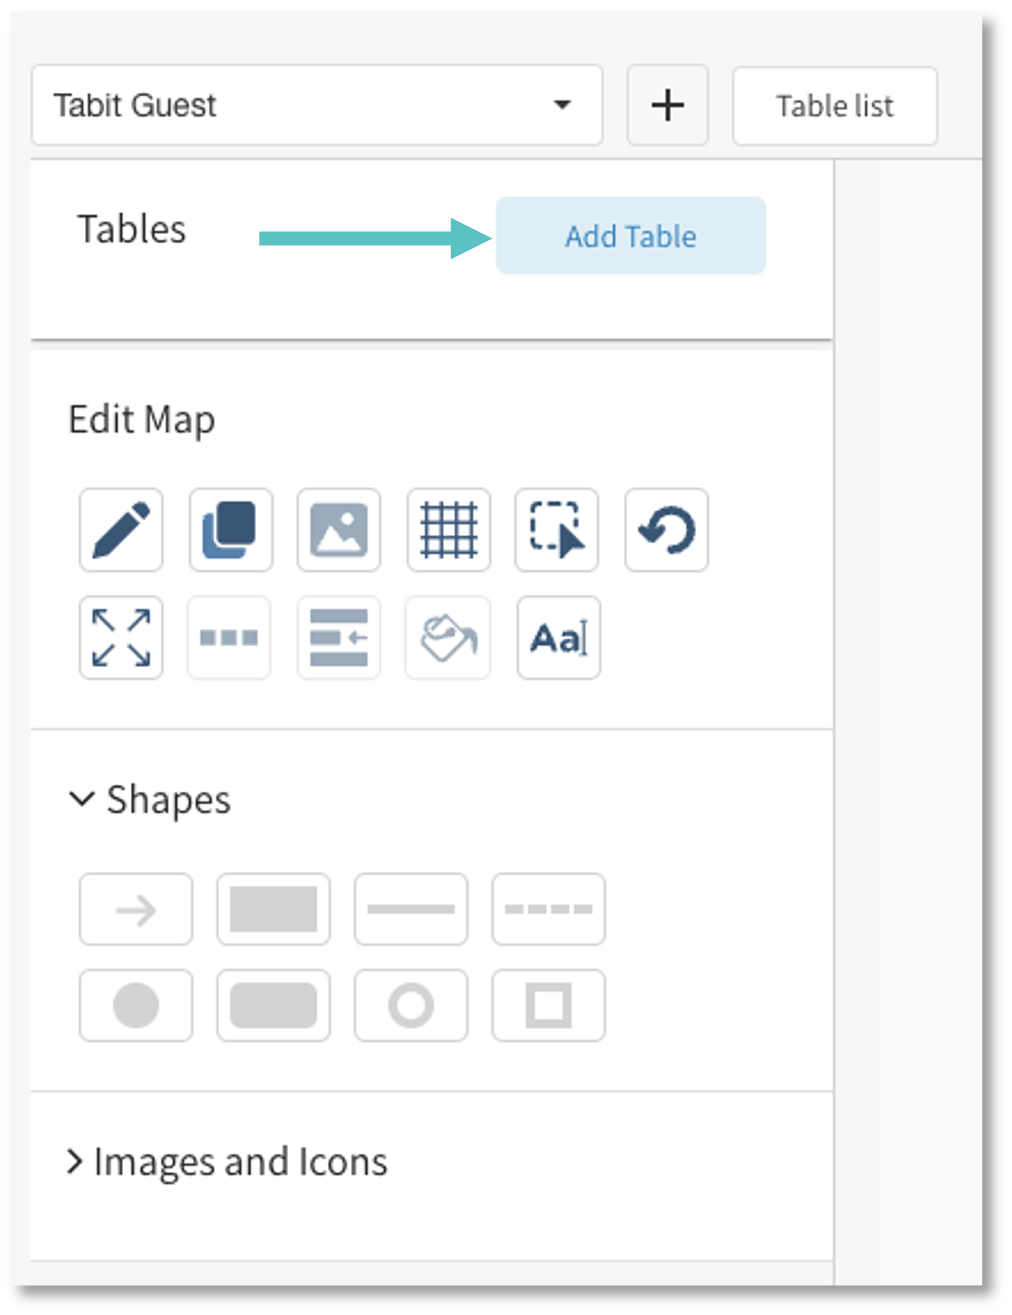
Select Add Table
-
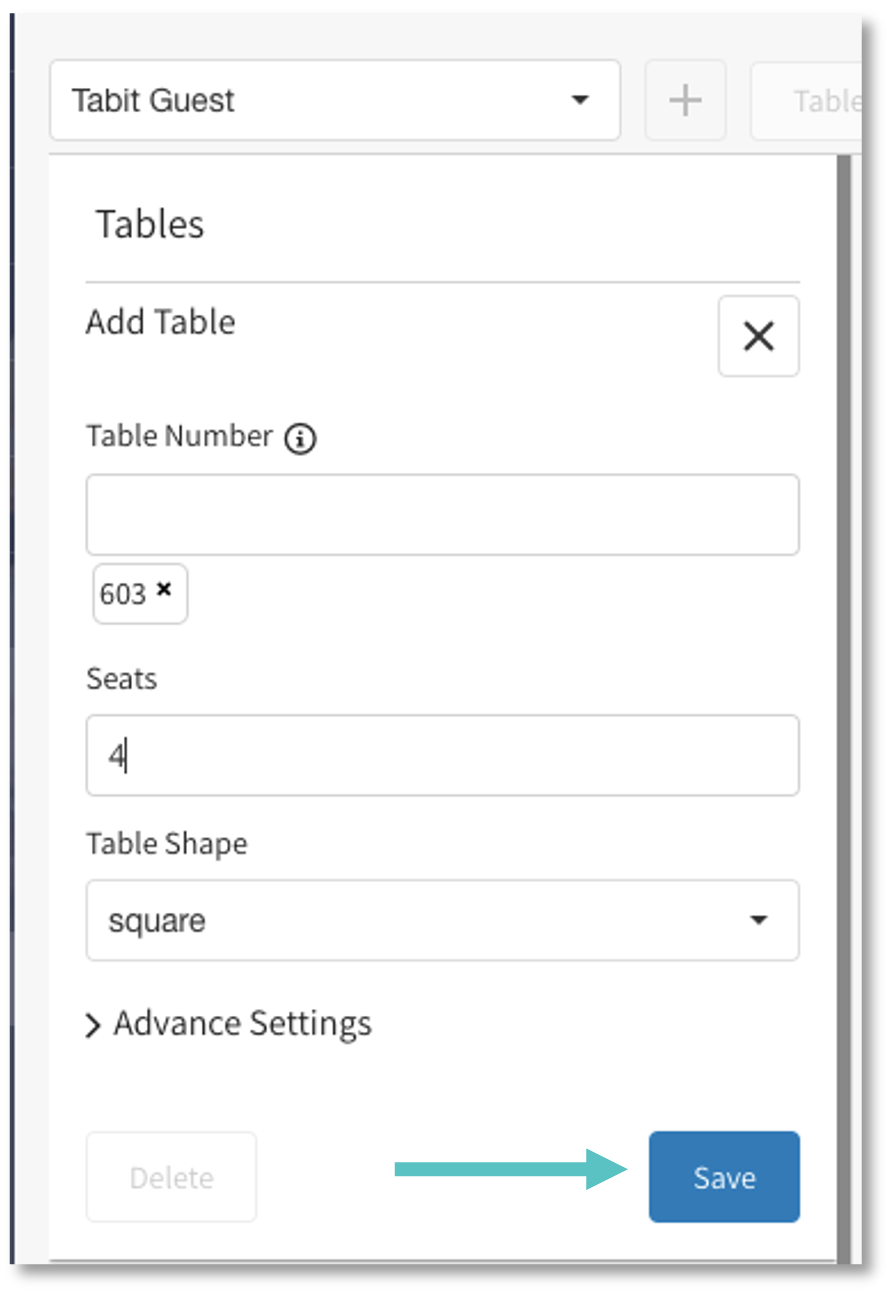
Enter the Table Number and then press the Enter key. If the table already exists on a map, settings will carry over, including the number of Seats and Table Shape.
-
Select Save on the bottom right of the tables box
-
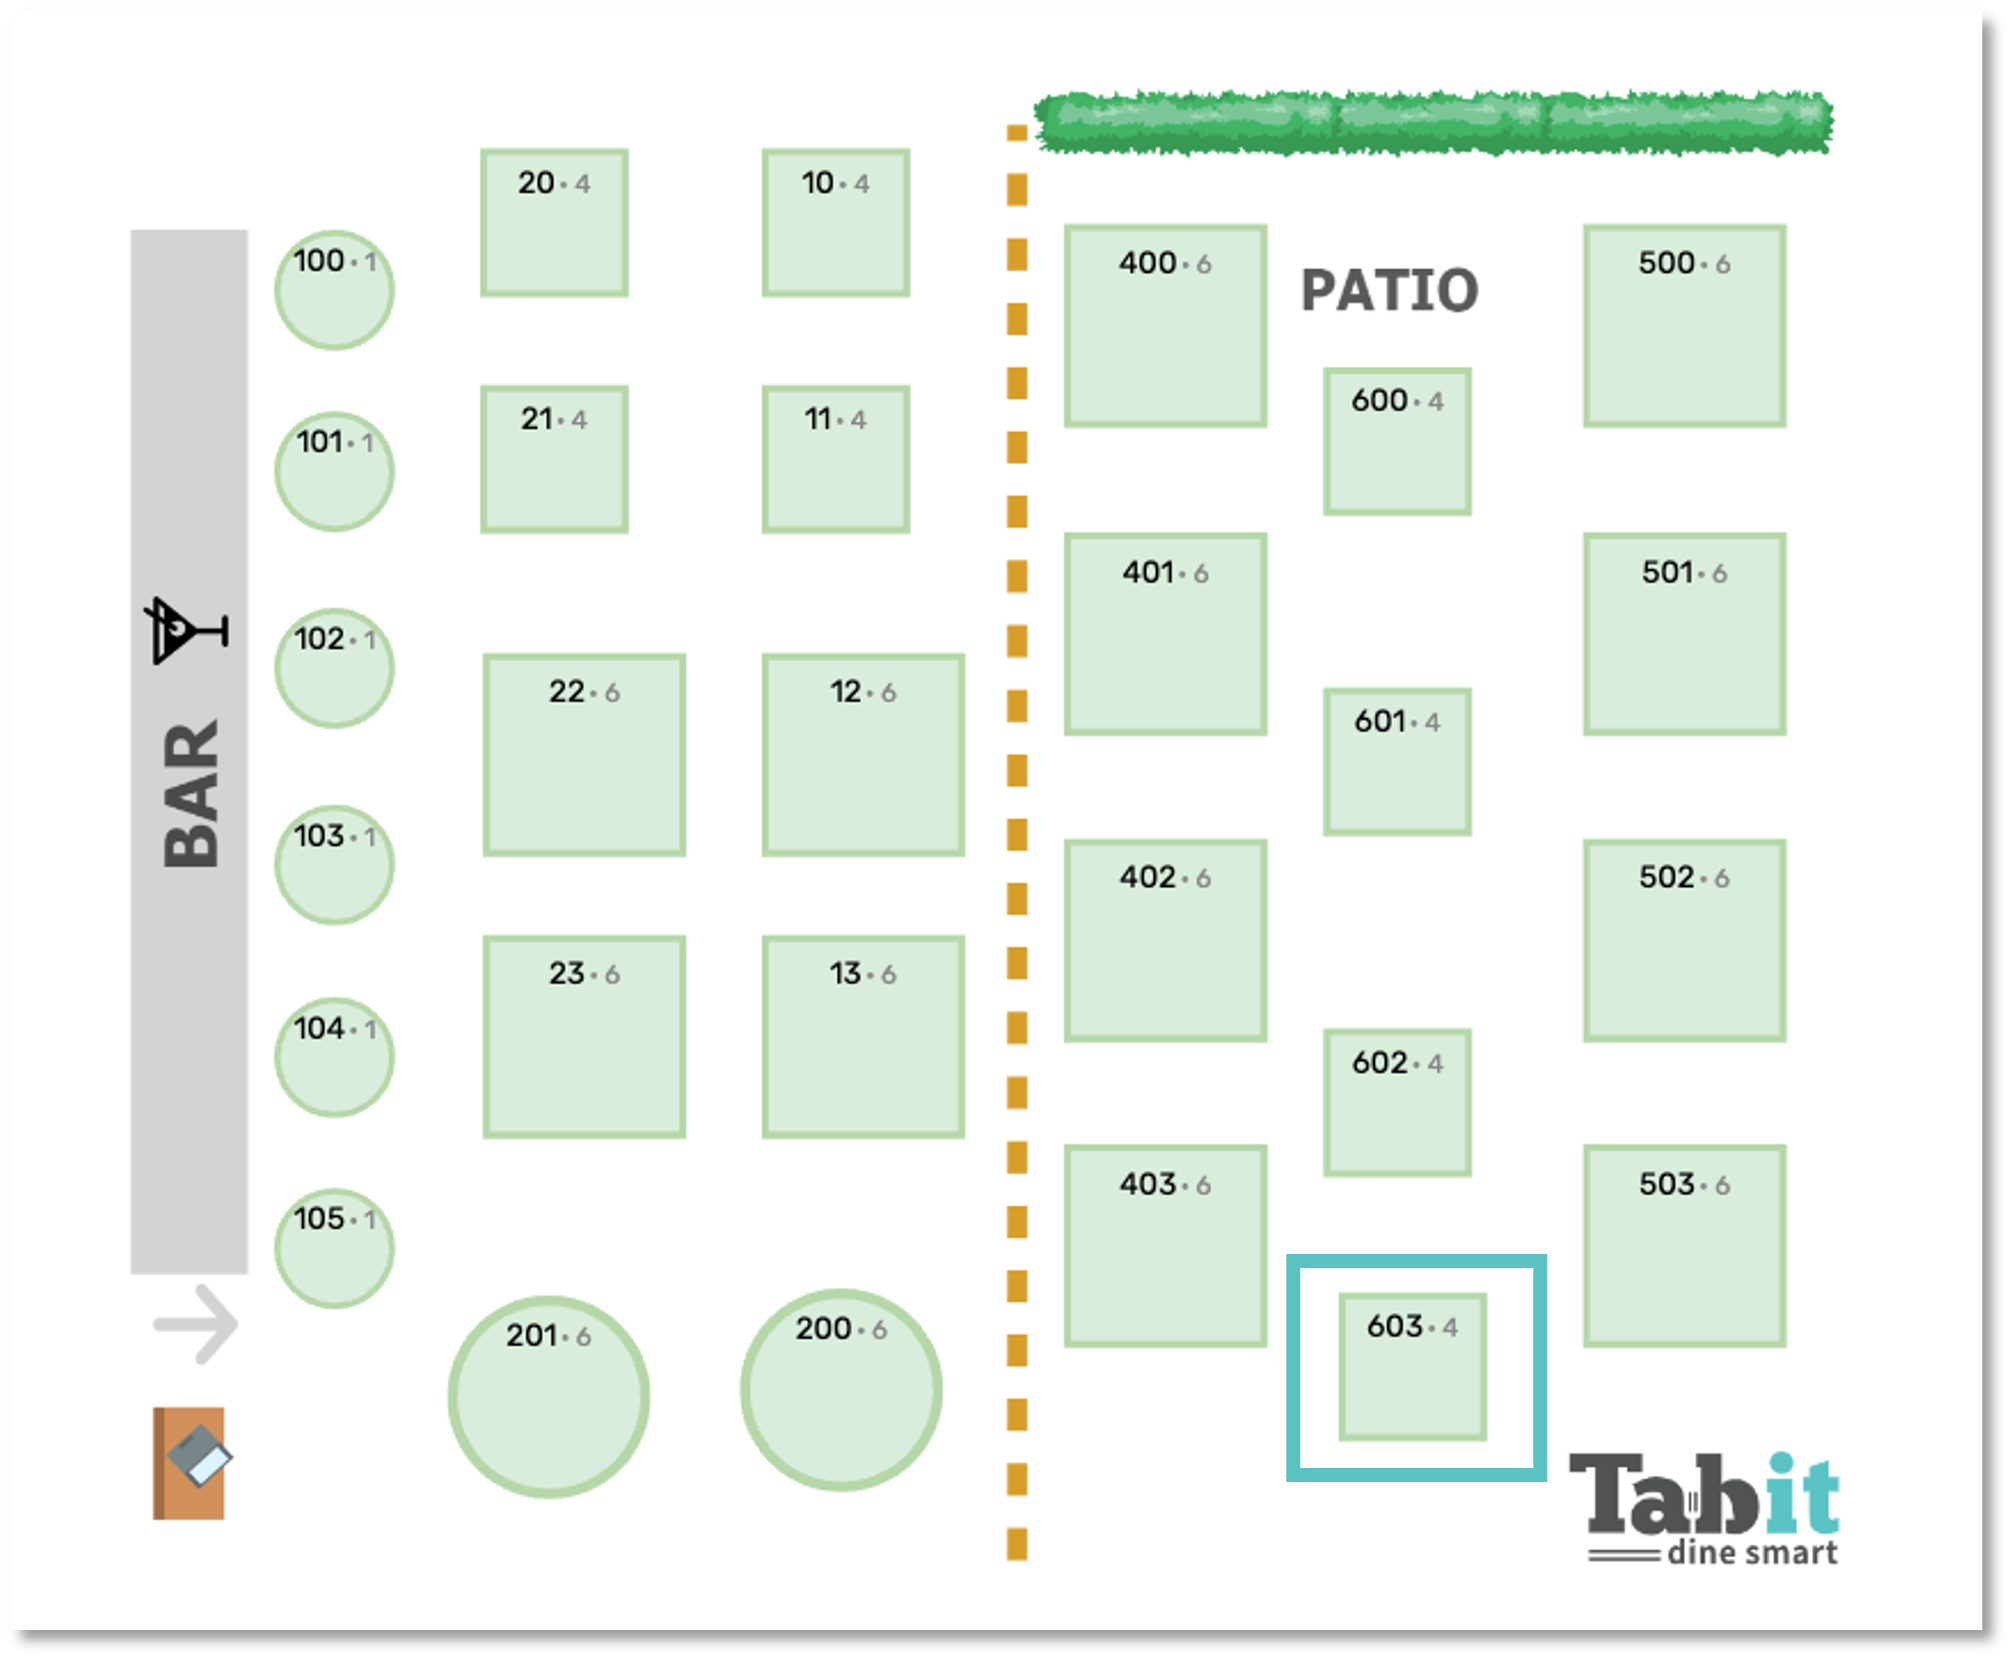
The newly added table will now have its number shown in orange. Select and drag it to the desired location on the map. The arrow keys can be used for precise placement. Then select Save on the top right of the screen

-
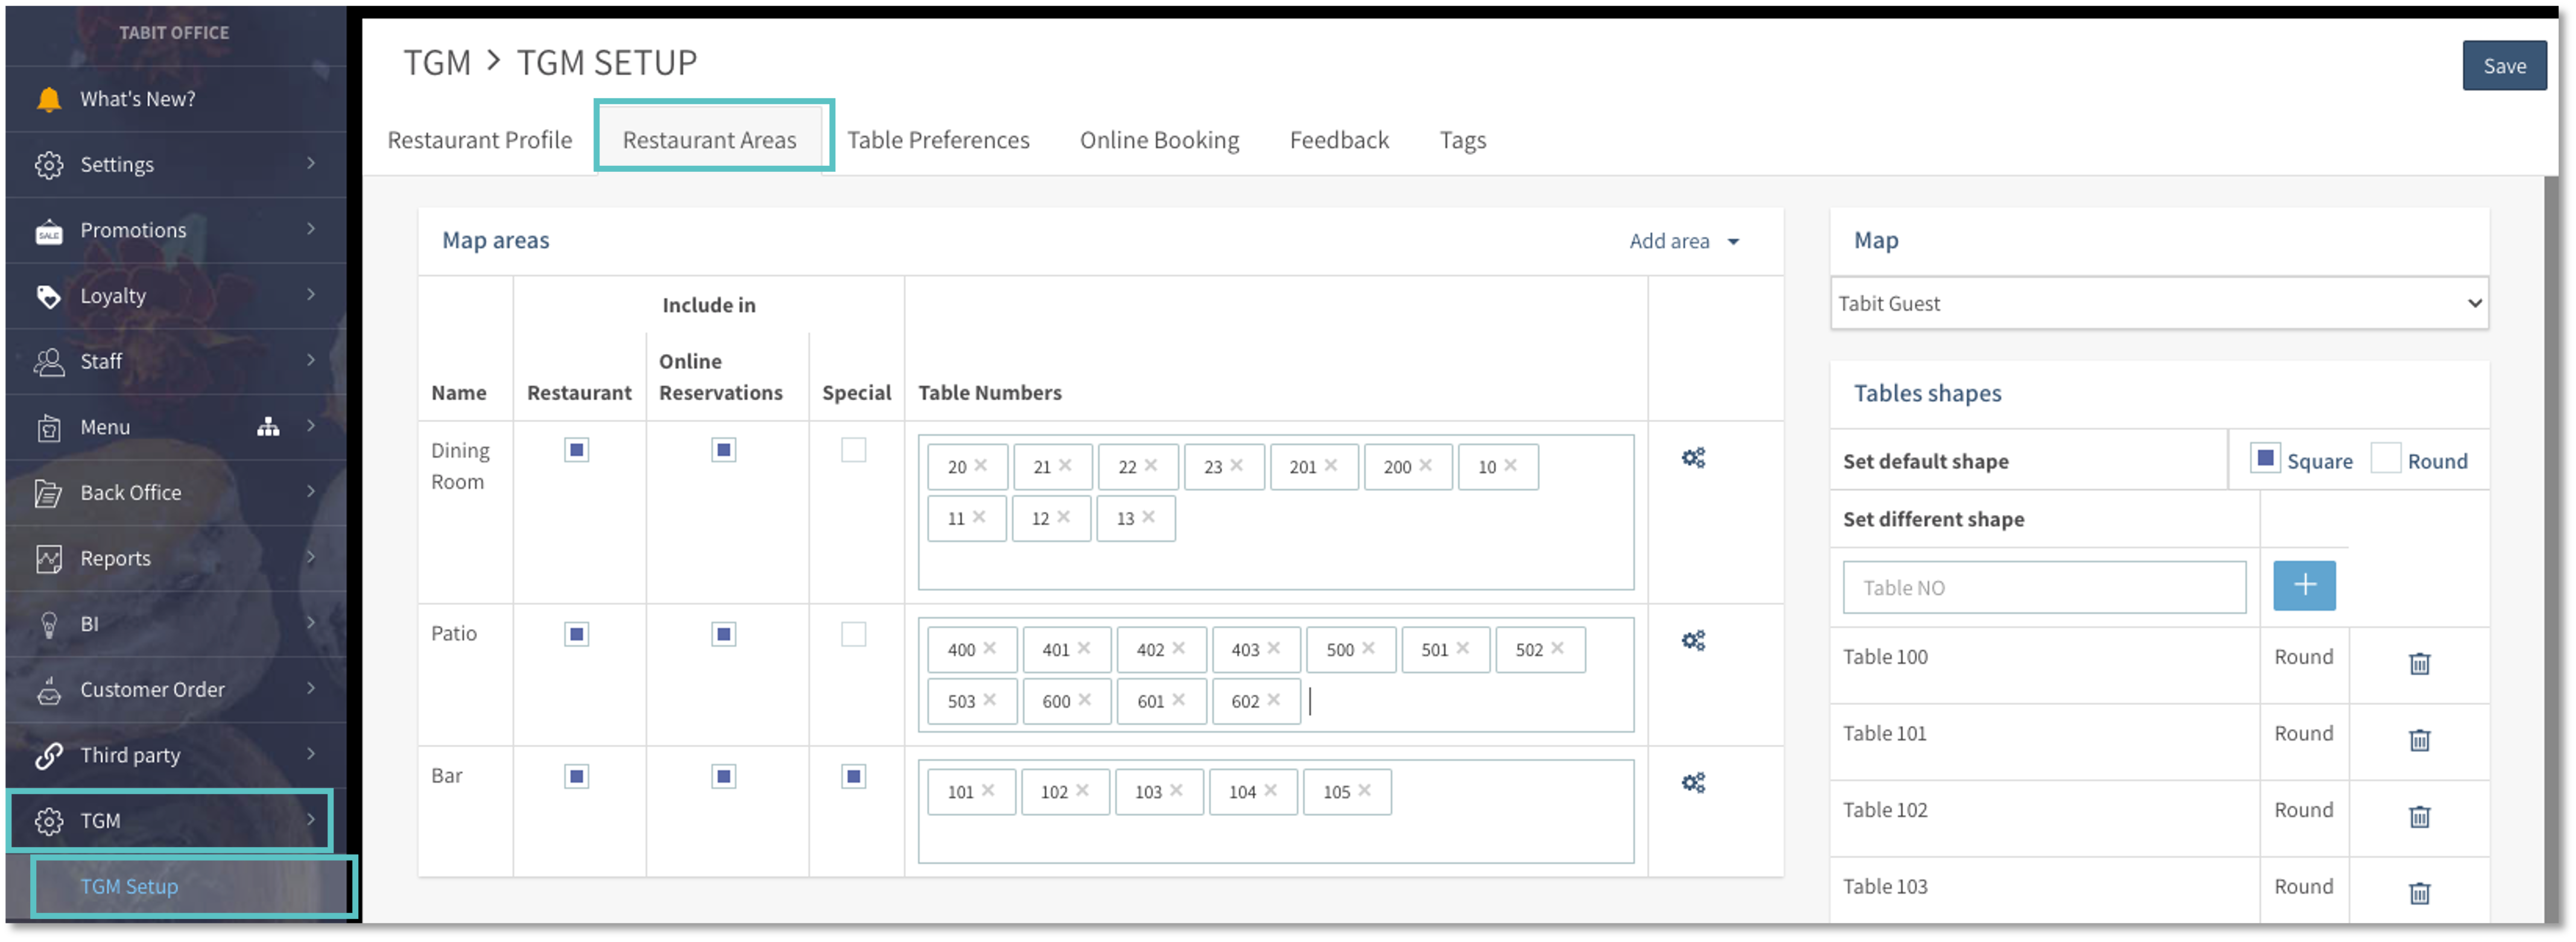
In Office, go to TGM > TGM Setup and select the Restaurant Areas tab
-
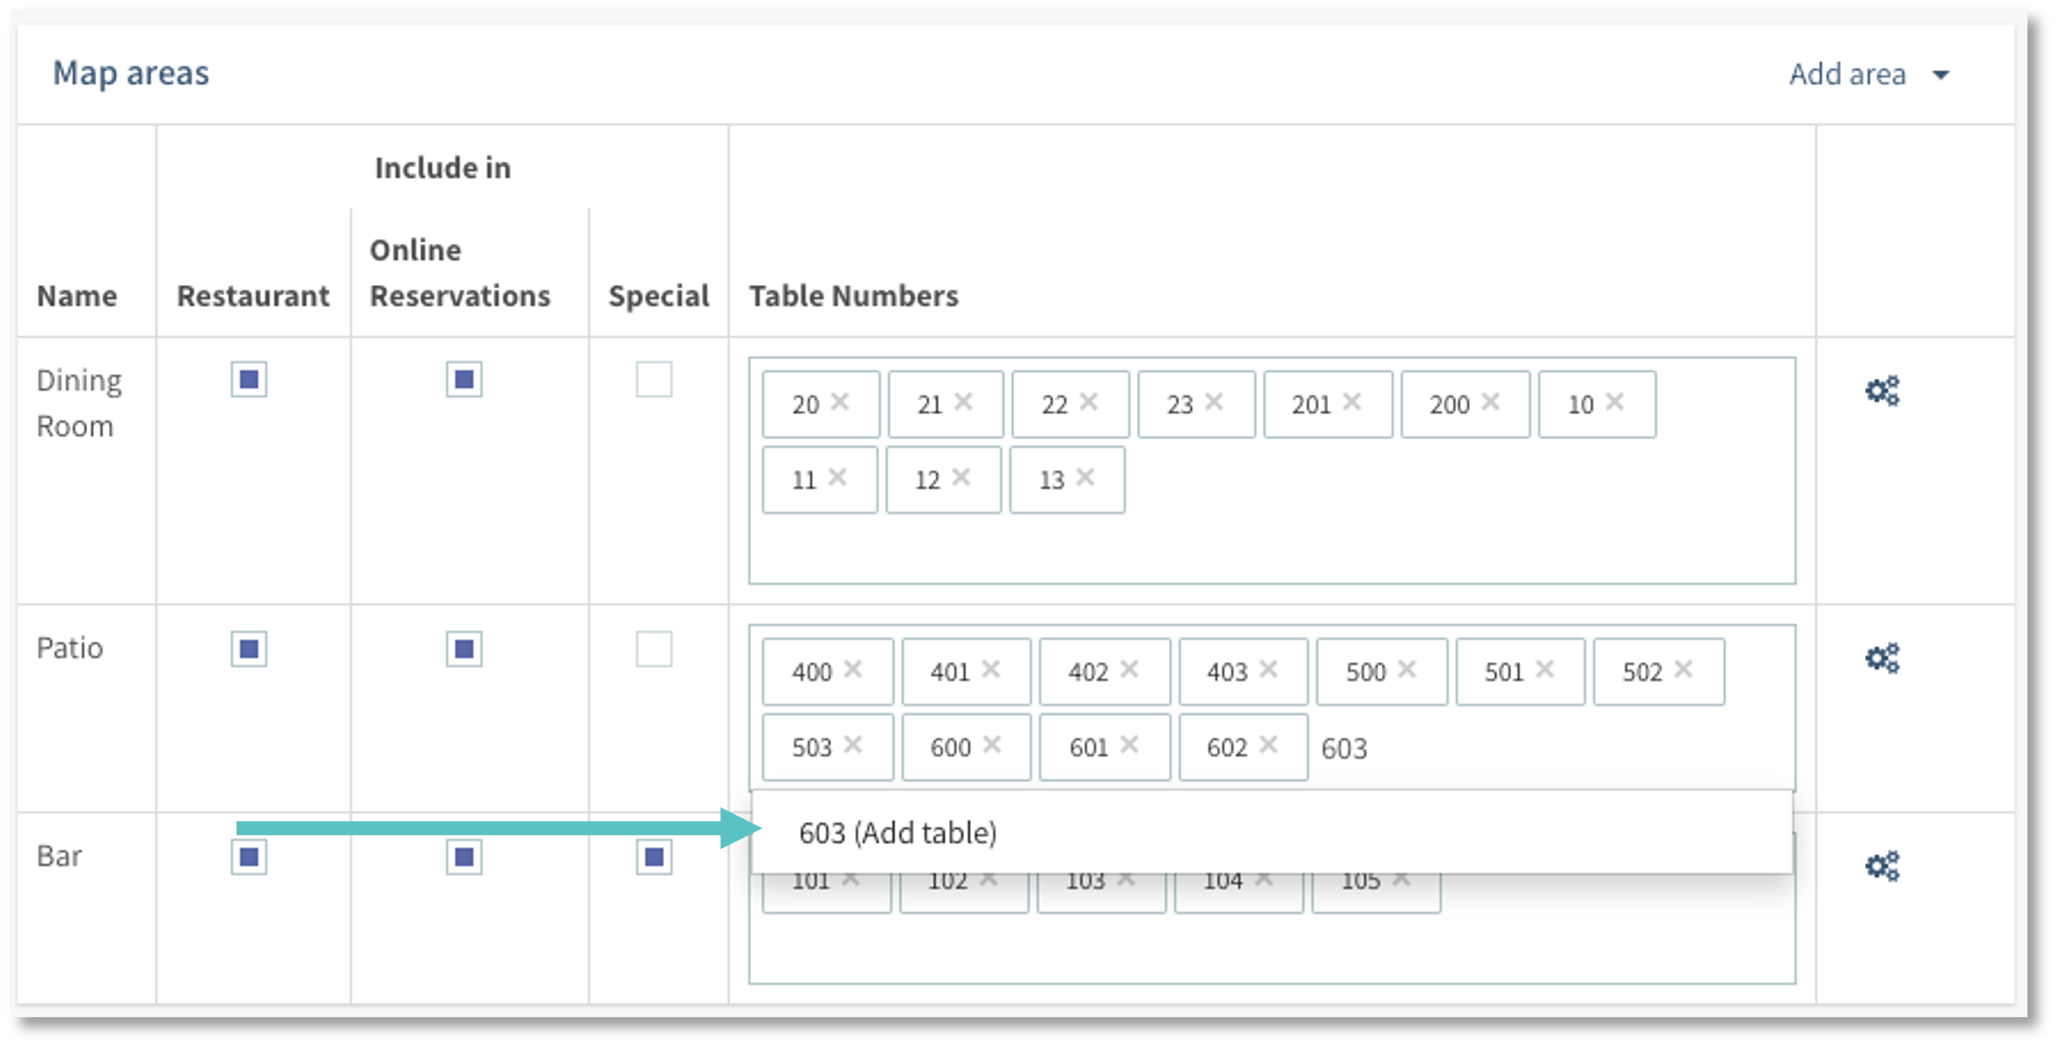
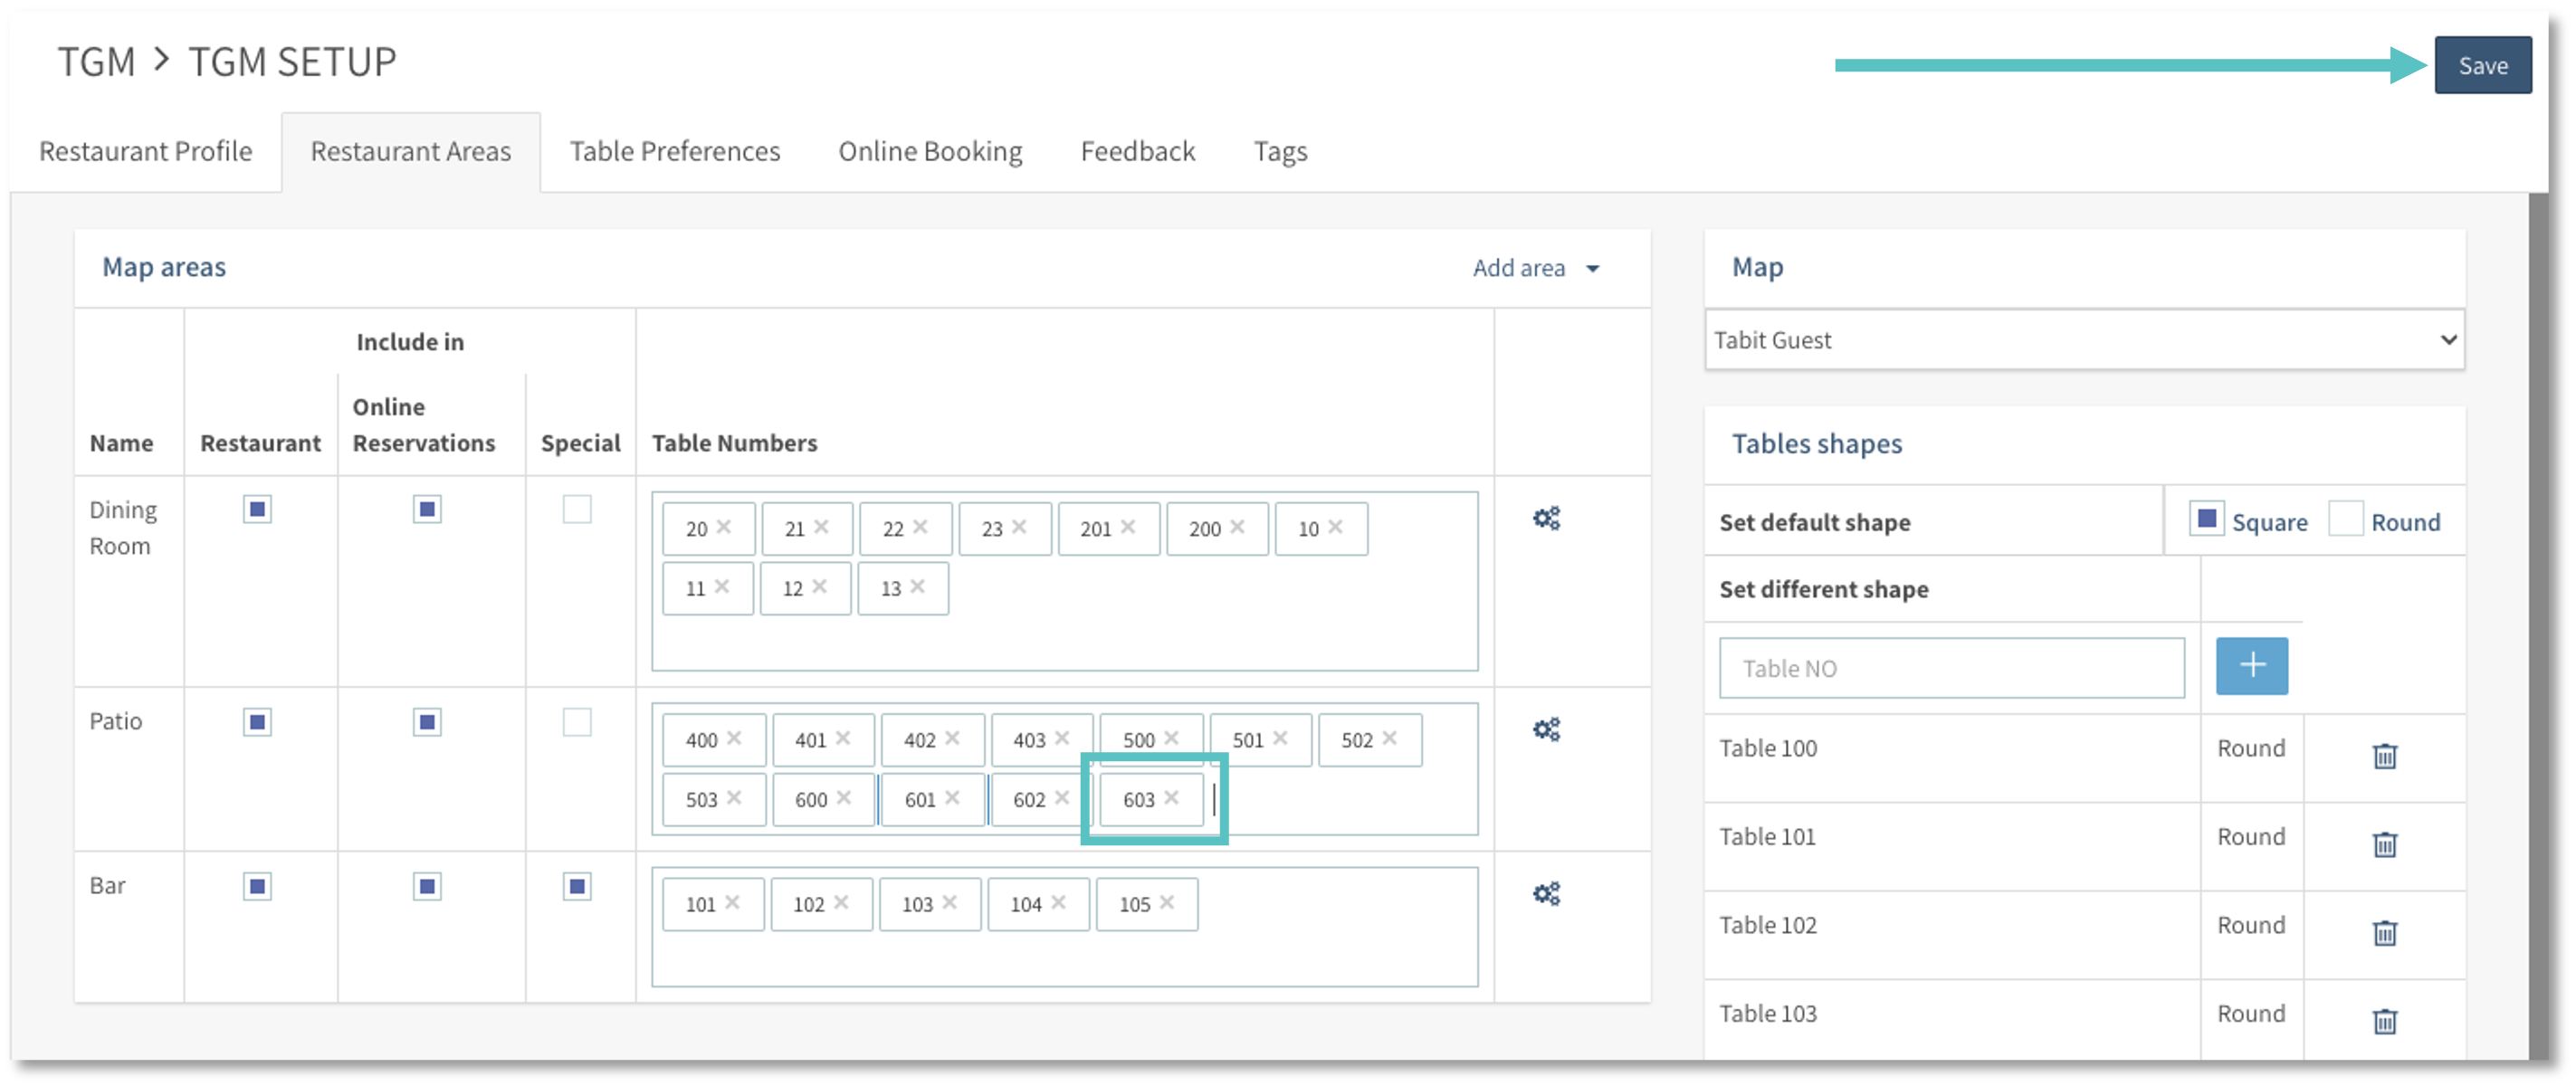
Enter the new table number in the relevant area and then hit enter
-
Select Save in the top right corner of the screen
-
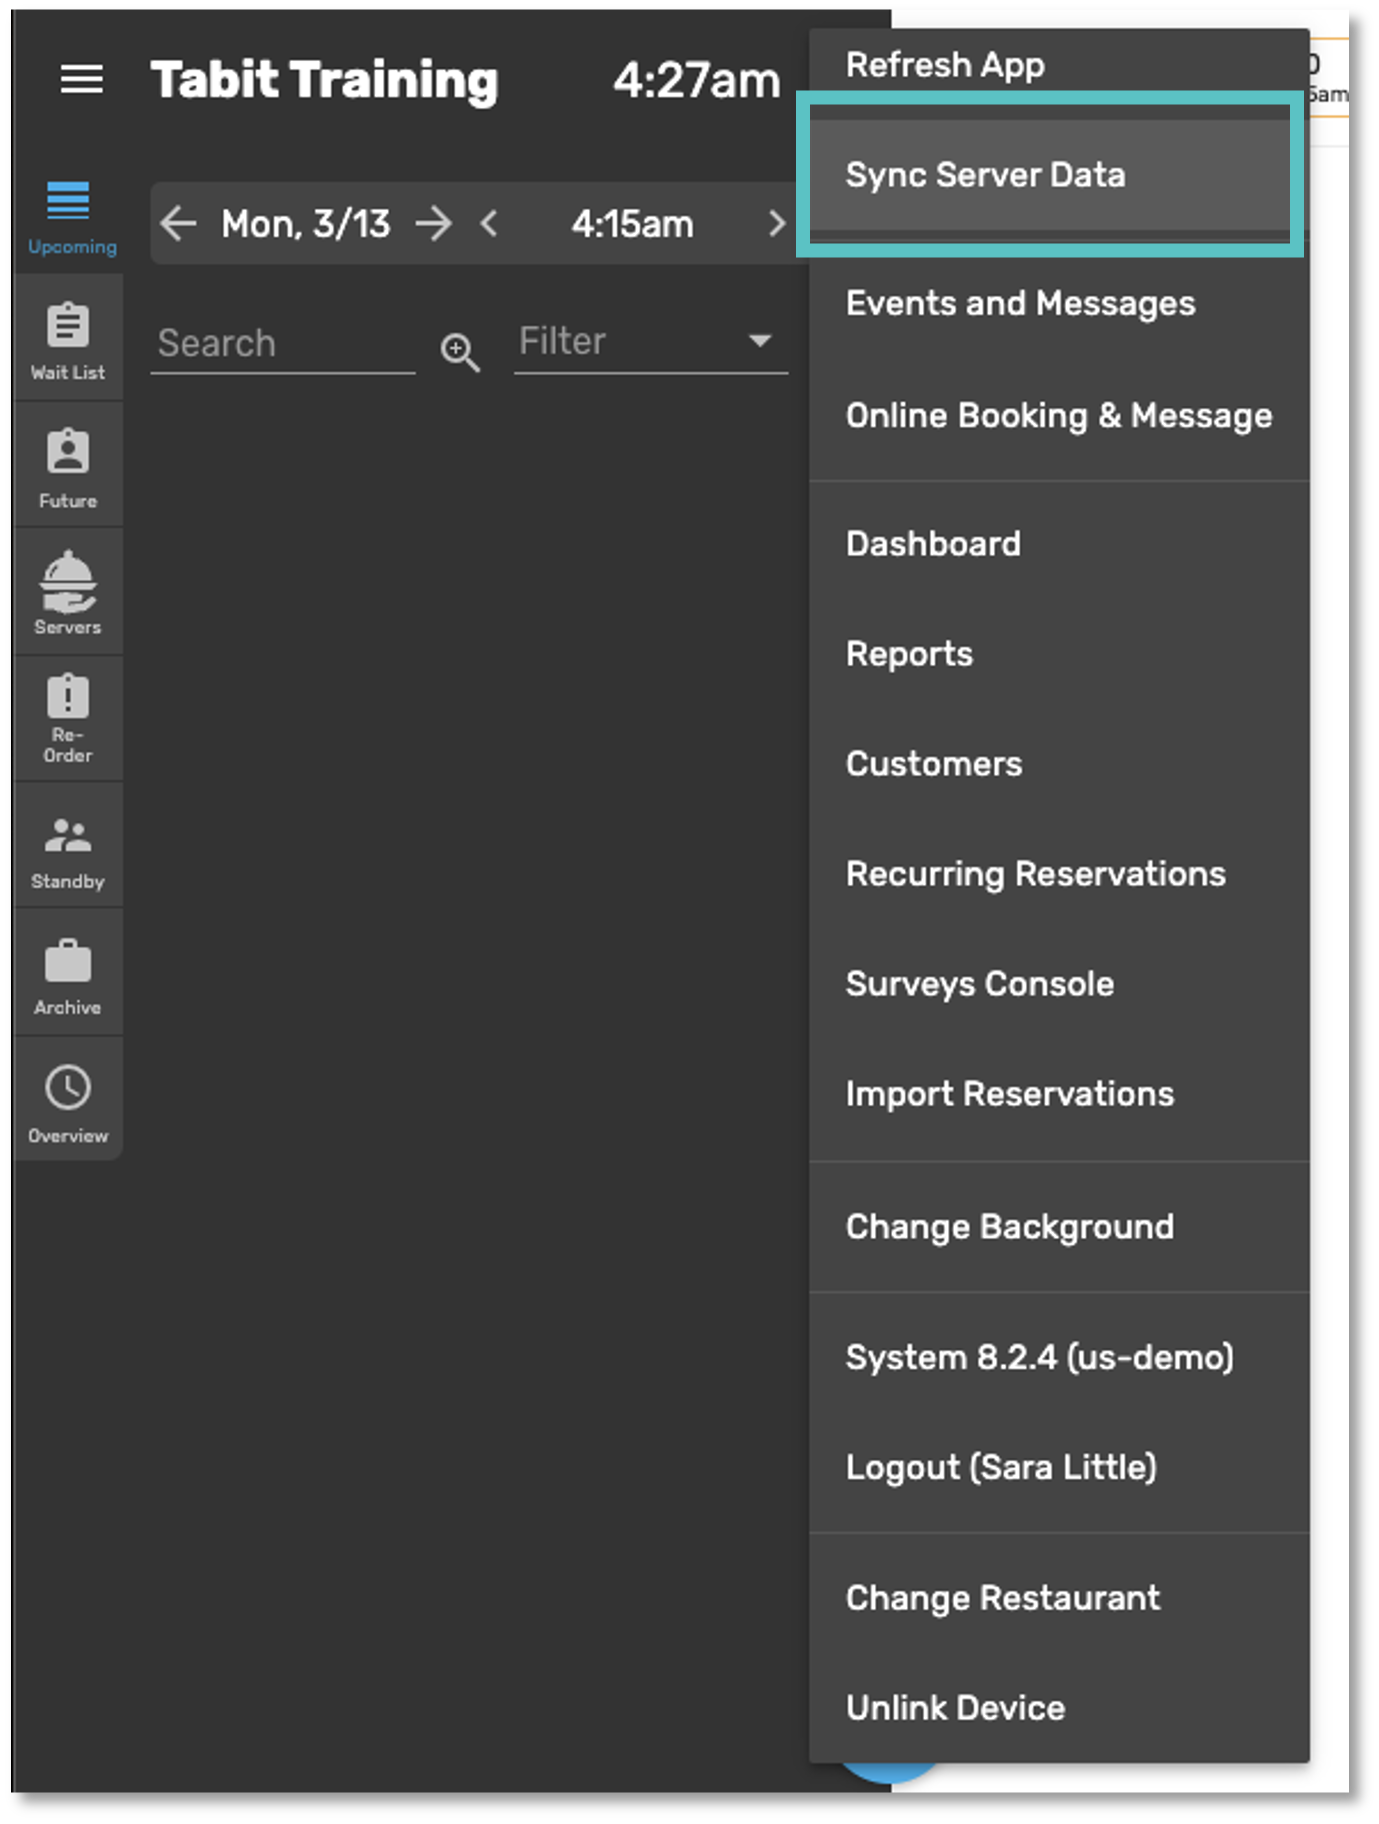
In the Tabit Guest App, select the ⚙️Settings Icon at the top of the screen, select Sync Server Data. This only needs to be done on one device operating the Tabit Guest App
-
Select the ⚙️Settings Icon again and then select Refresh App. This must be done on all devices operating the Tabit Guest App
The newly added table is now visible on the Tabit Guest Map