Overview
Adding images and descriptions to Menu Items is done through Tabit Office.
With this tool, customers can see what a dish looks like and what it contains (ingredients, allergens, cooking methods, etc.) before they decide to order it.
Images and descriptions will also be visible for online ordering through Tabit Order
Follow the steps below to add an image to an Item:
-
Login to Tabit Office with your Manager credentials
-
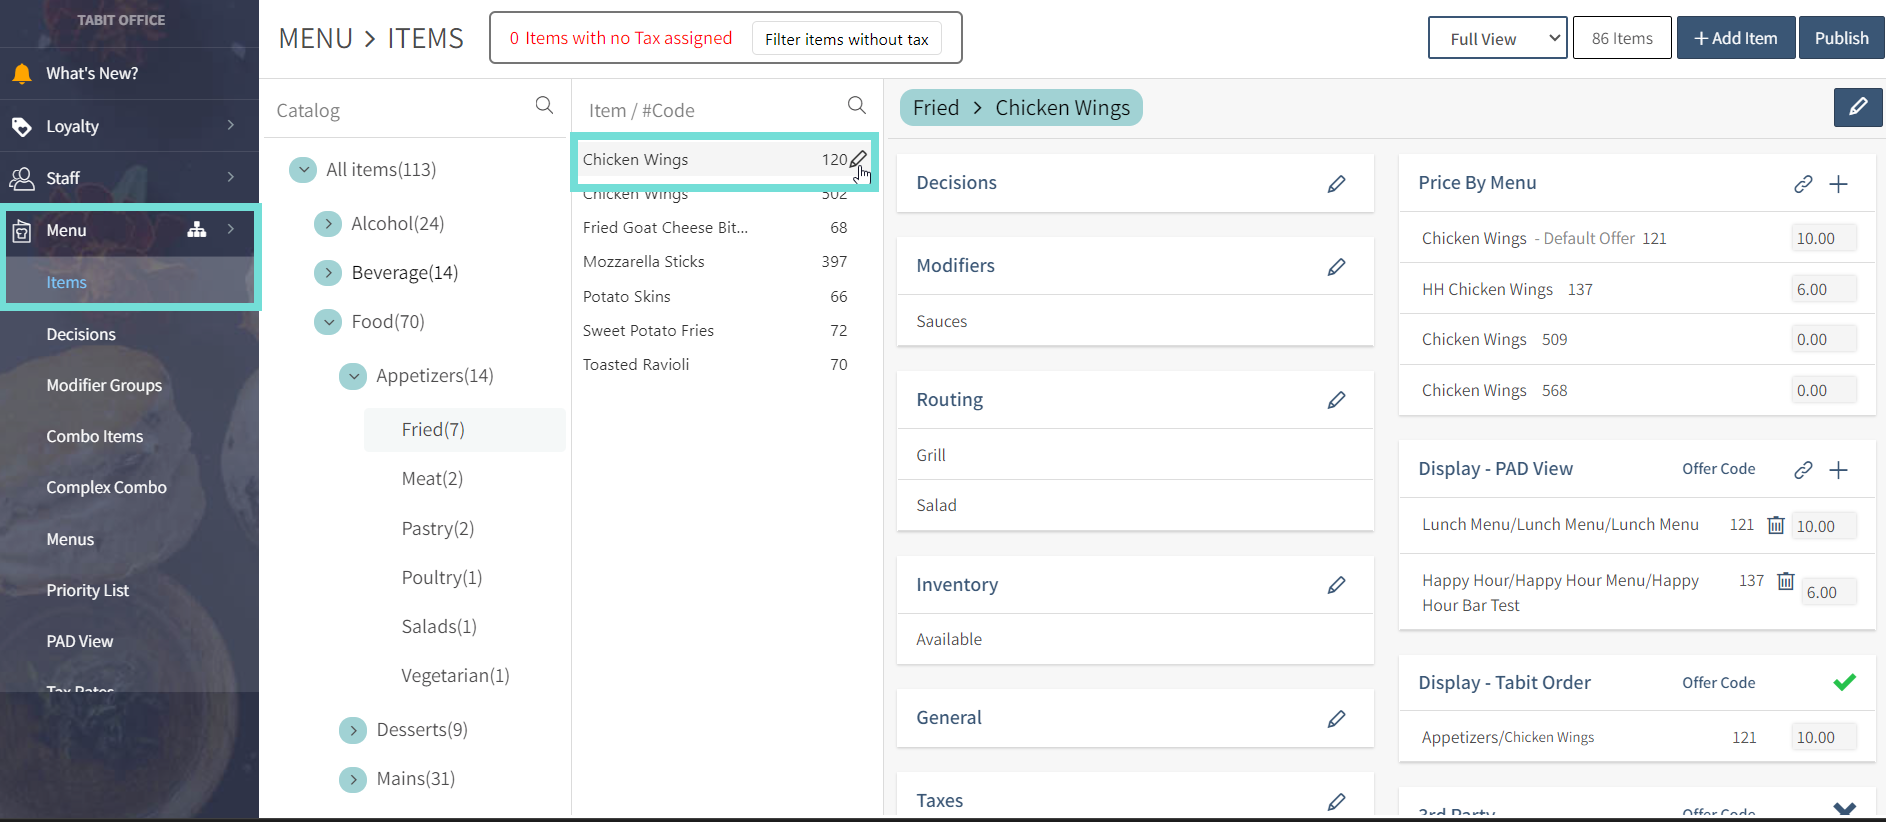
Go to Menu > Items
-
Select or search for the item you want to edit an image and/or description for
-
Hover over the Item and select the Pencil icon that will appear next to the Item
-
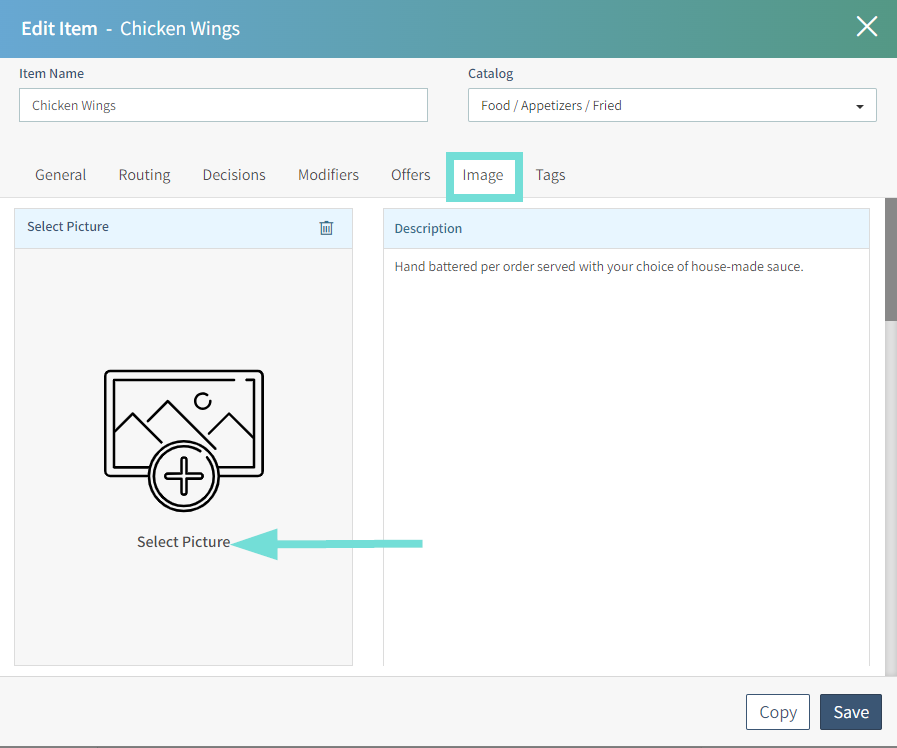
Under the Image tab, go to Select Picture
-
Upload an image from your computer - Files up to 135kb in JPG or PNG format are recommended for optimal appearance
-
Add the descriptions in the Description field
-
Select Save
-
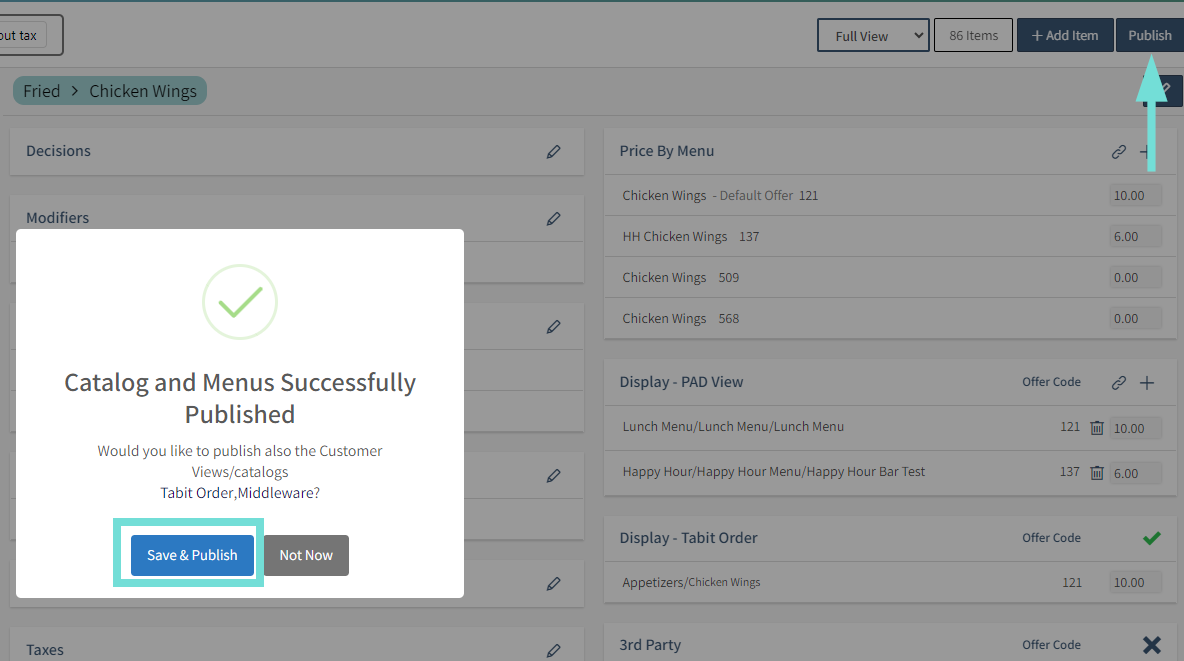
Select Publish and then Save & Publish
This is how the image and description will appear on the PAD: