Overview
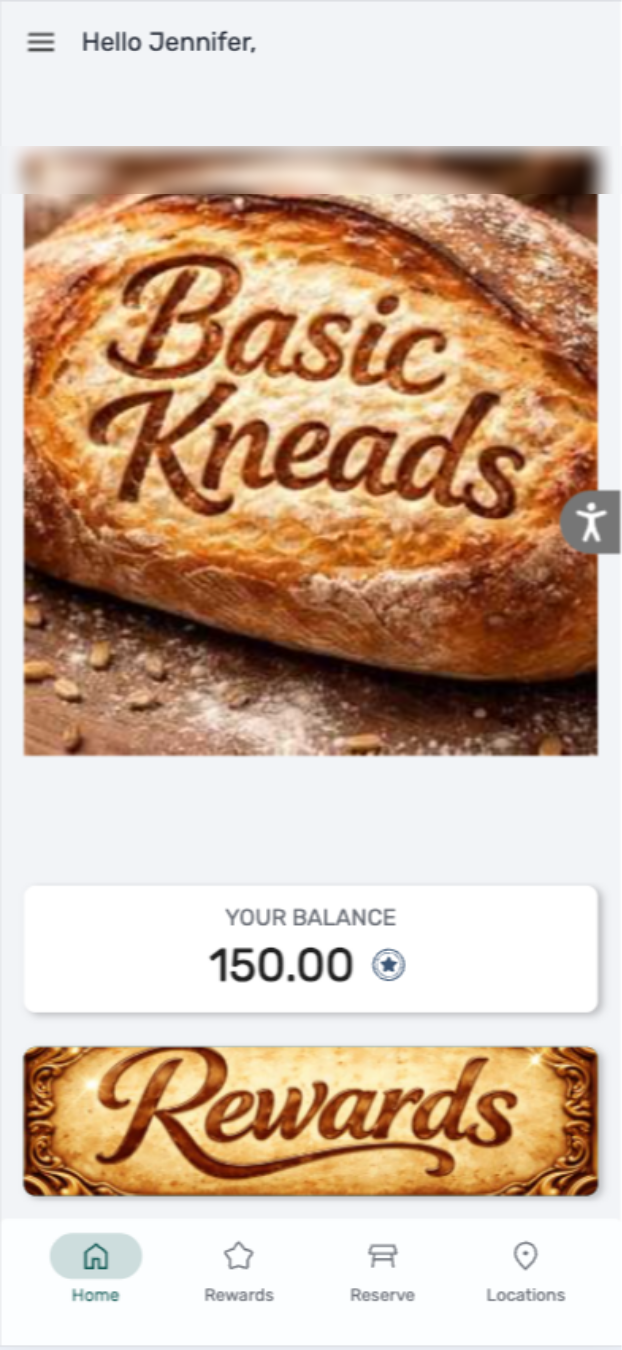
Customizing buttons with images in the Customer Profile allows you to strengthen your branding across Tabit’s loyalty experience. Instead of displaying text buttons, you can upload custom visuals to match your restaurant’s look and feel.
Steps on How to Replace Buttons with Images in the Customer Profile
-
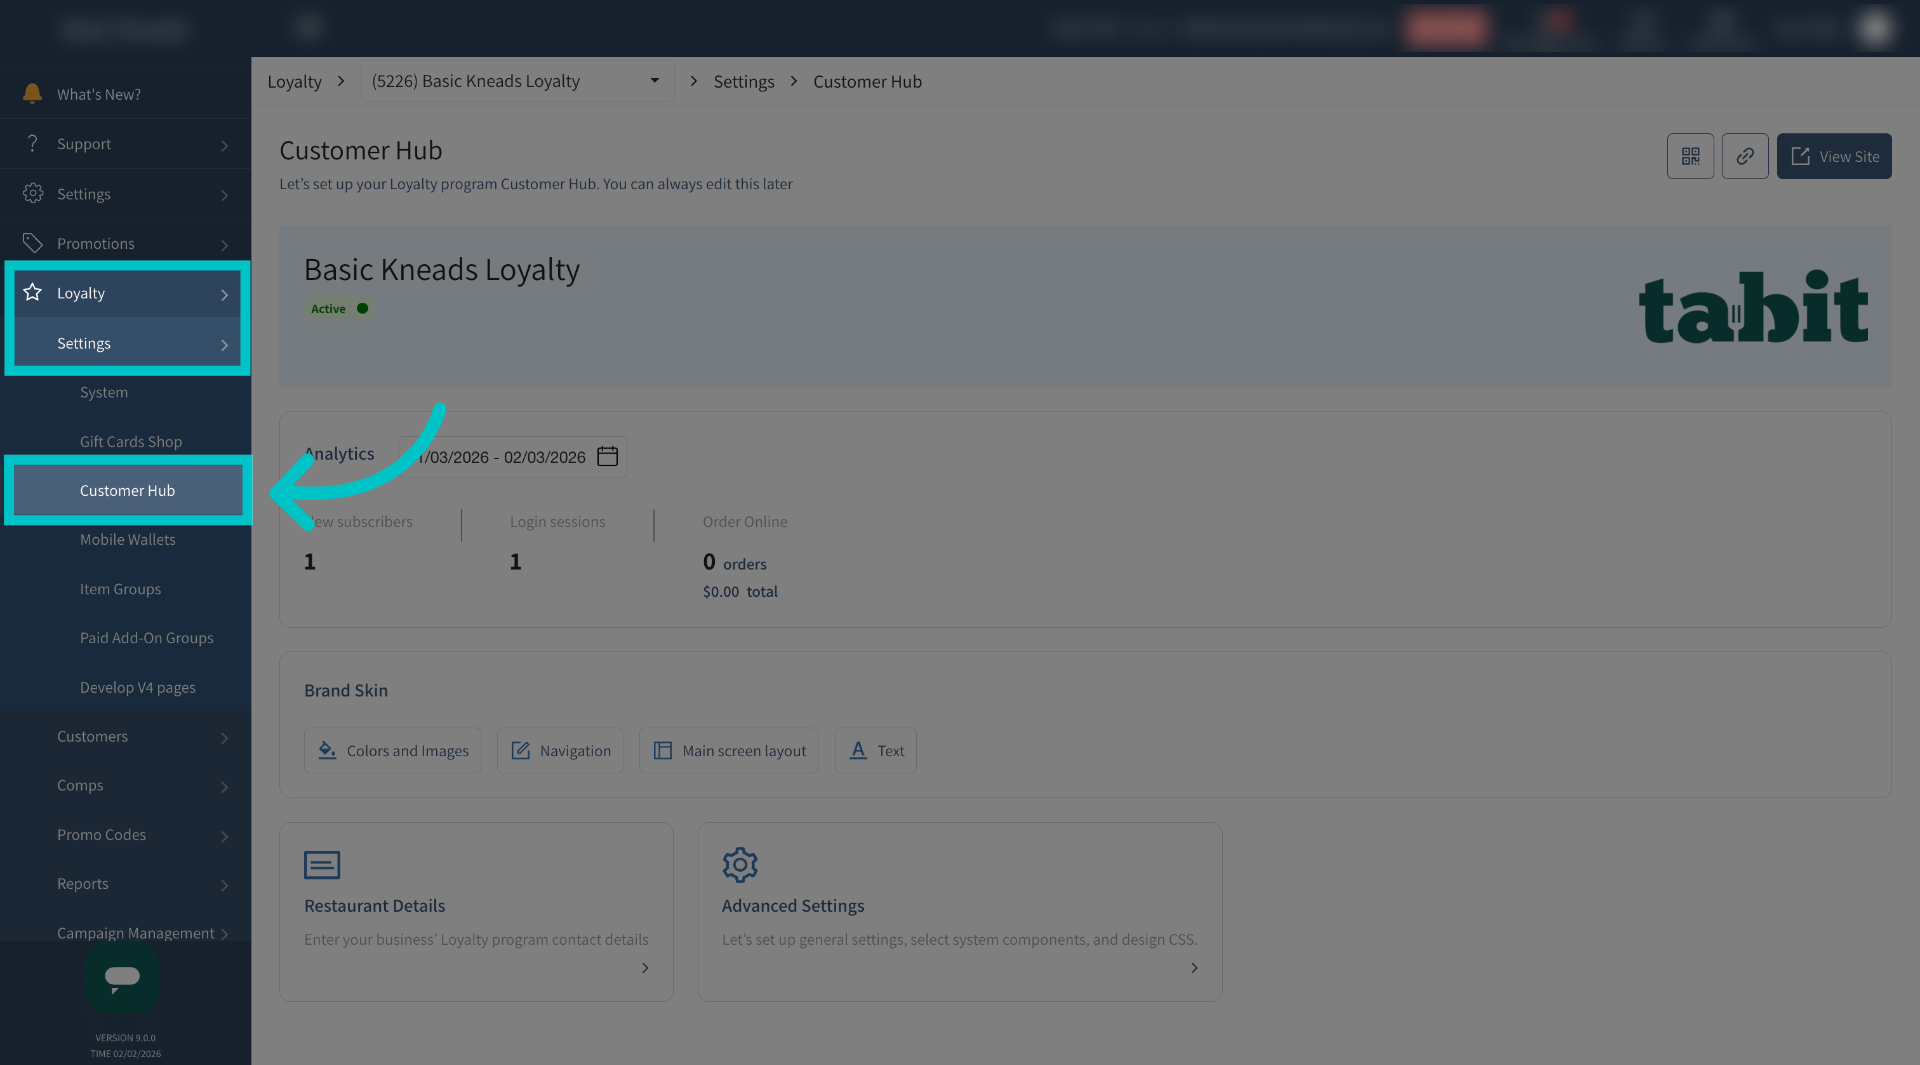
In Tabit Office, go to Loyalty > Settings > Customer Hub
-
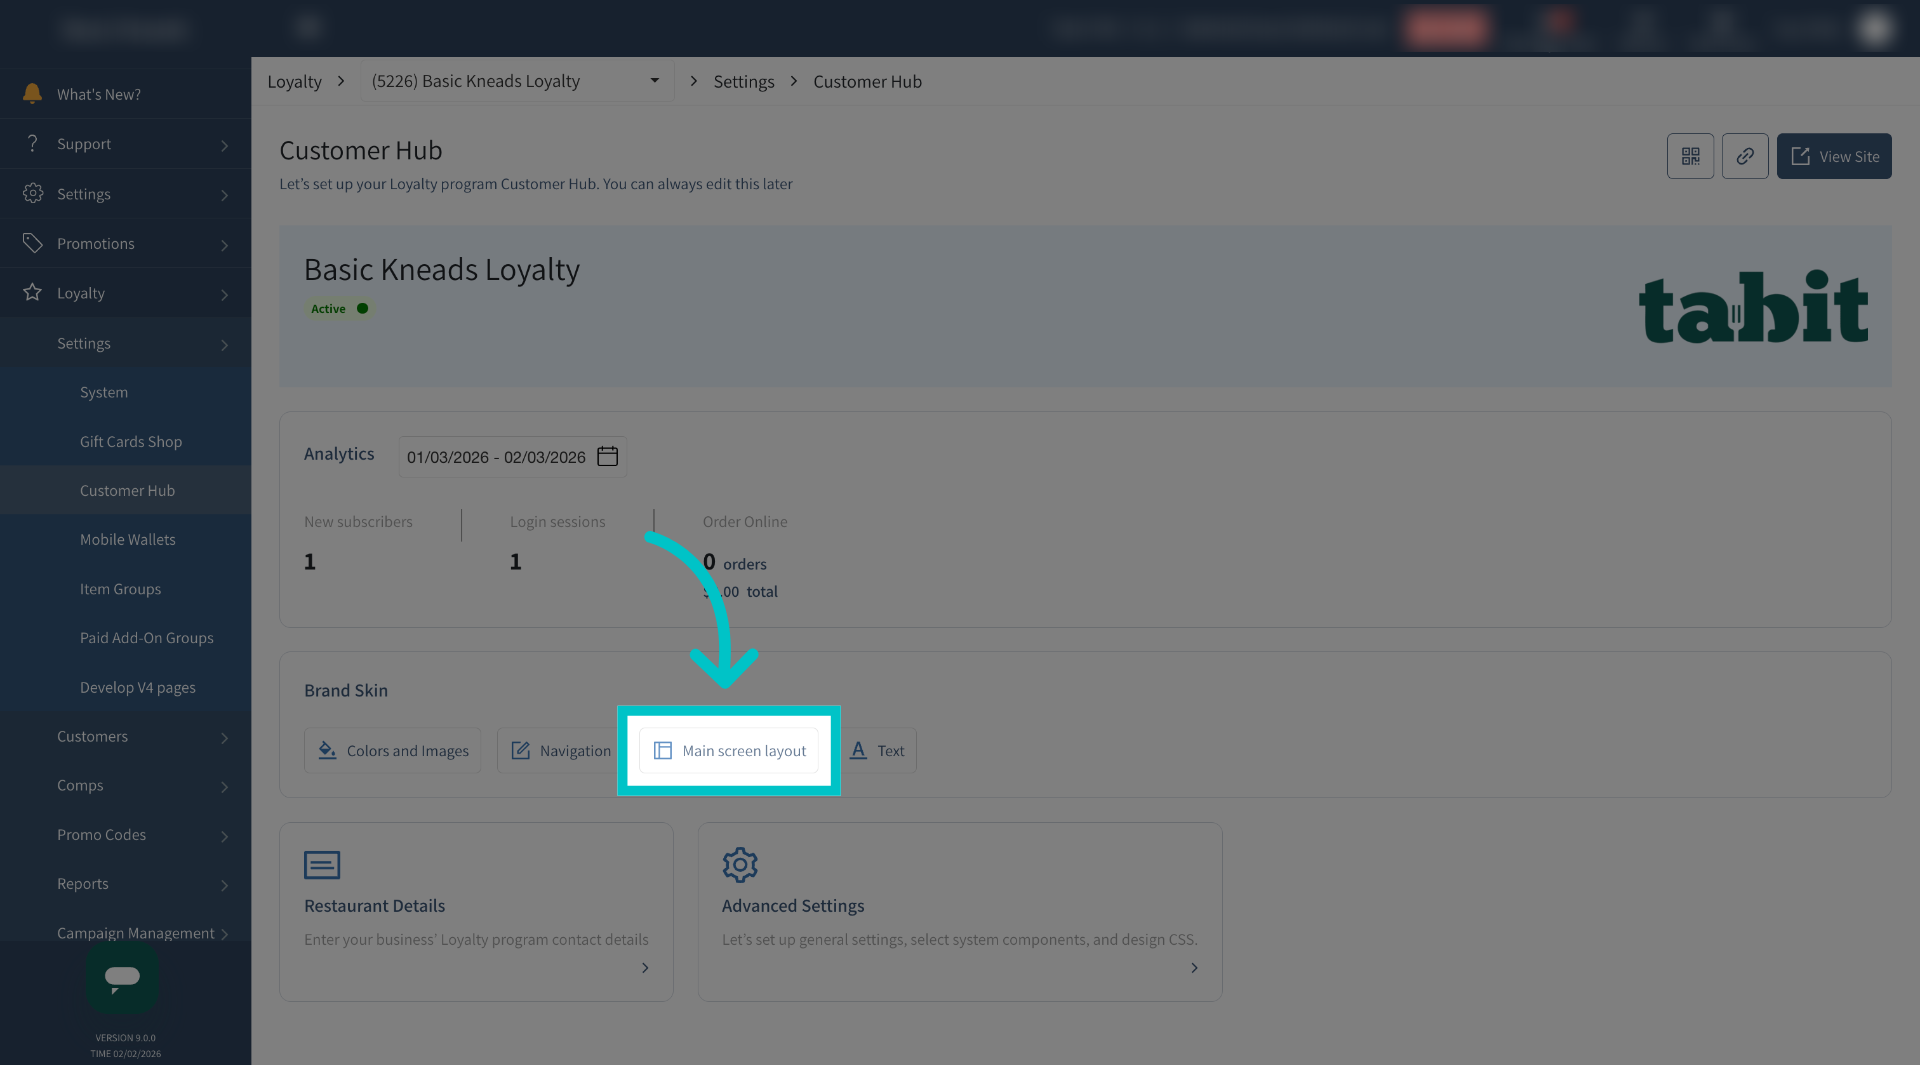
Select Main screen layout
-
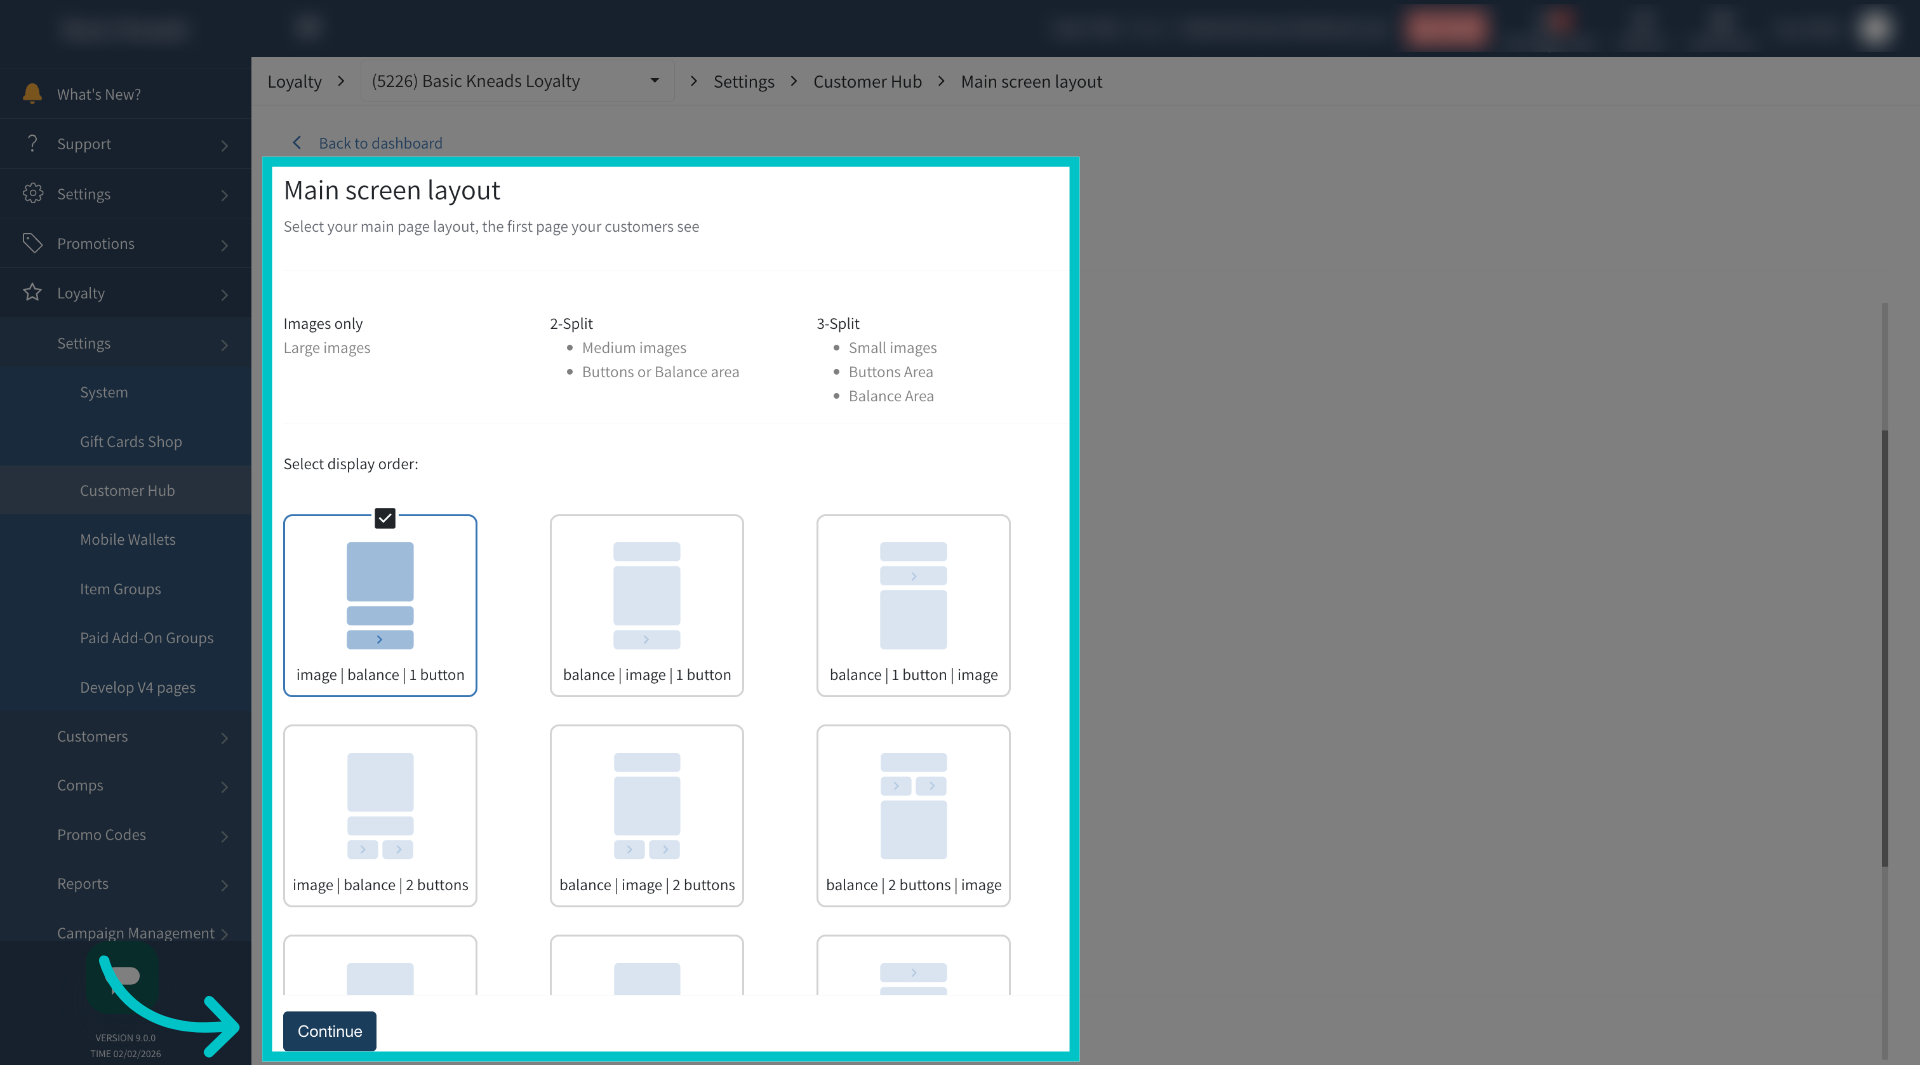
Determine how you would like the main screen to appear, how many buttons, and in what order, and then select Continue
-
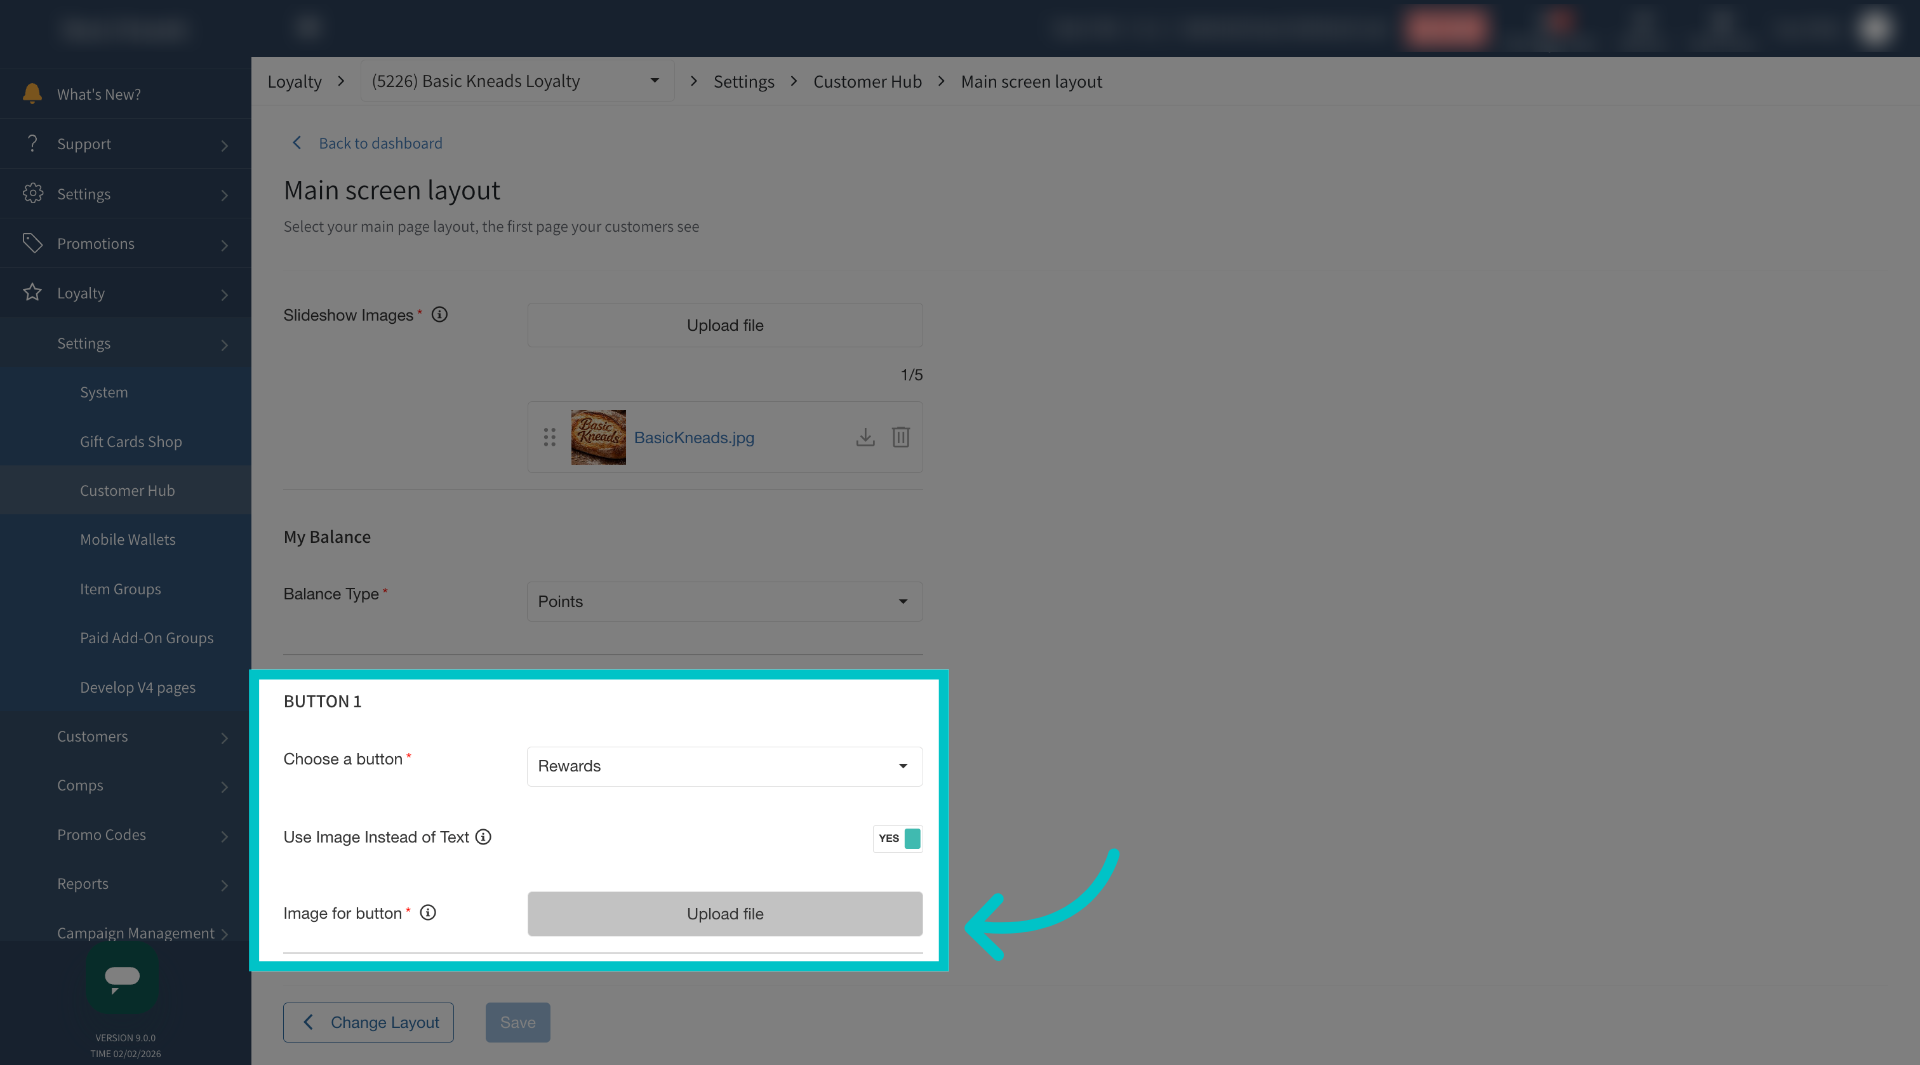
Any buttons you have in your layout will have the option to use an image instead of text. Toggle the flag to YES
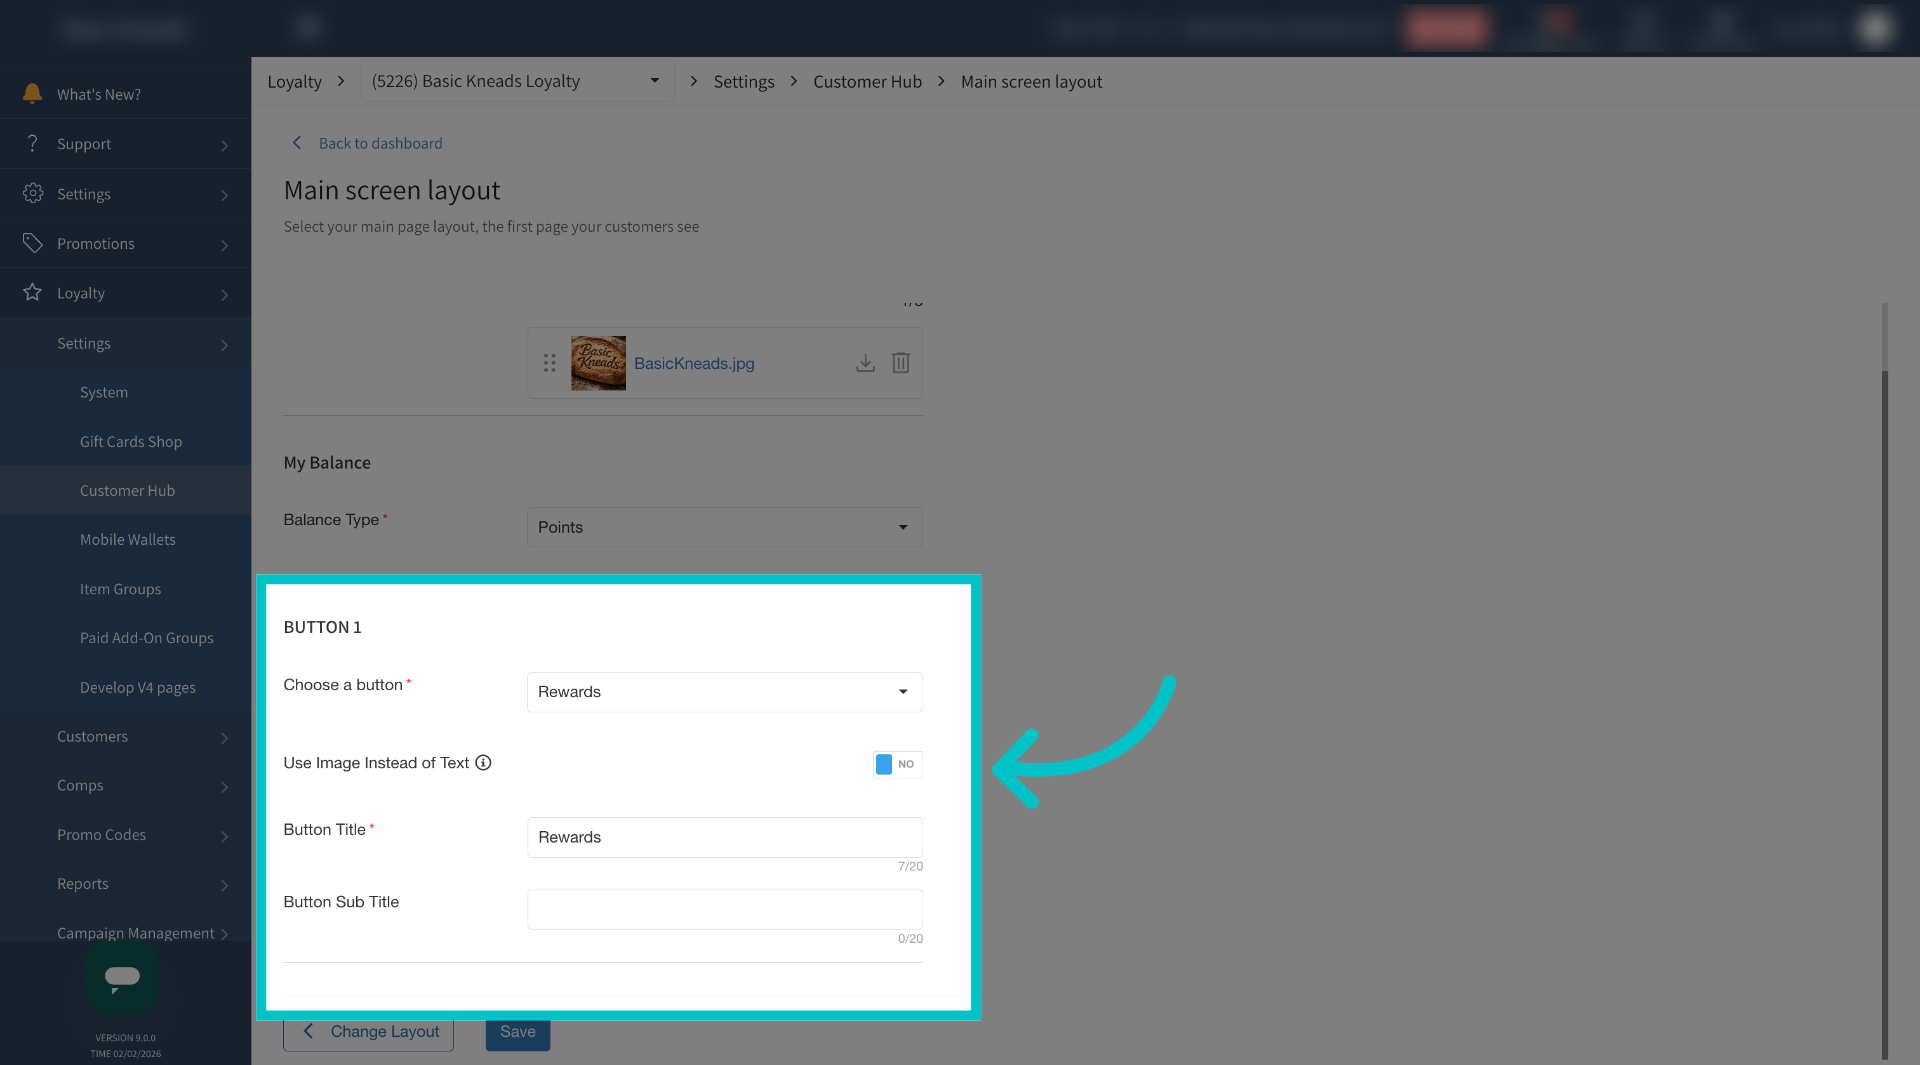
-
Upload an image file for the button. Hover over the tooltip to see what is required for the specific buttons, different buttons have different size limits
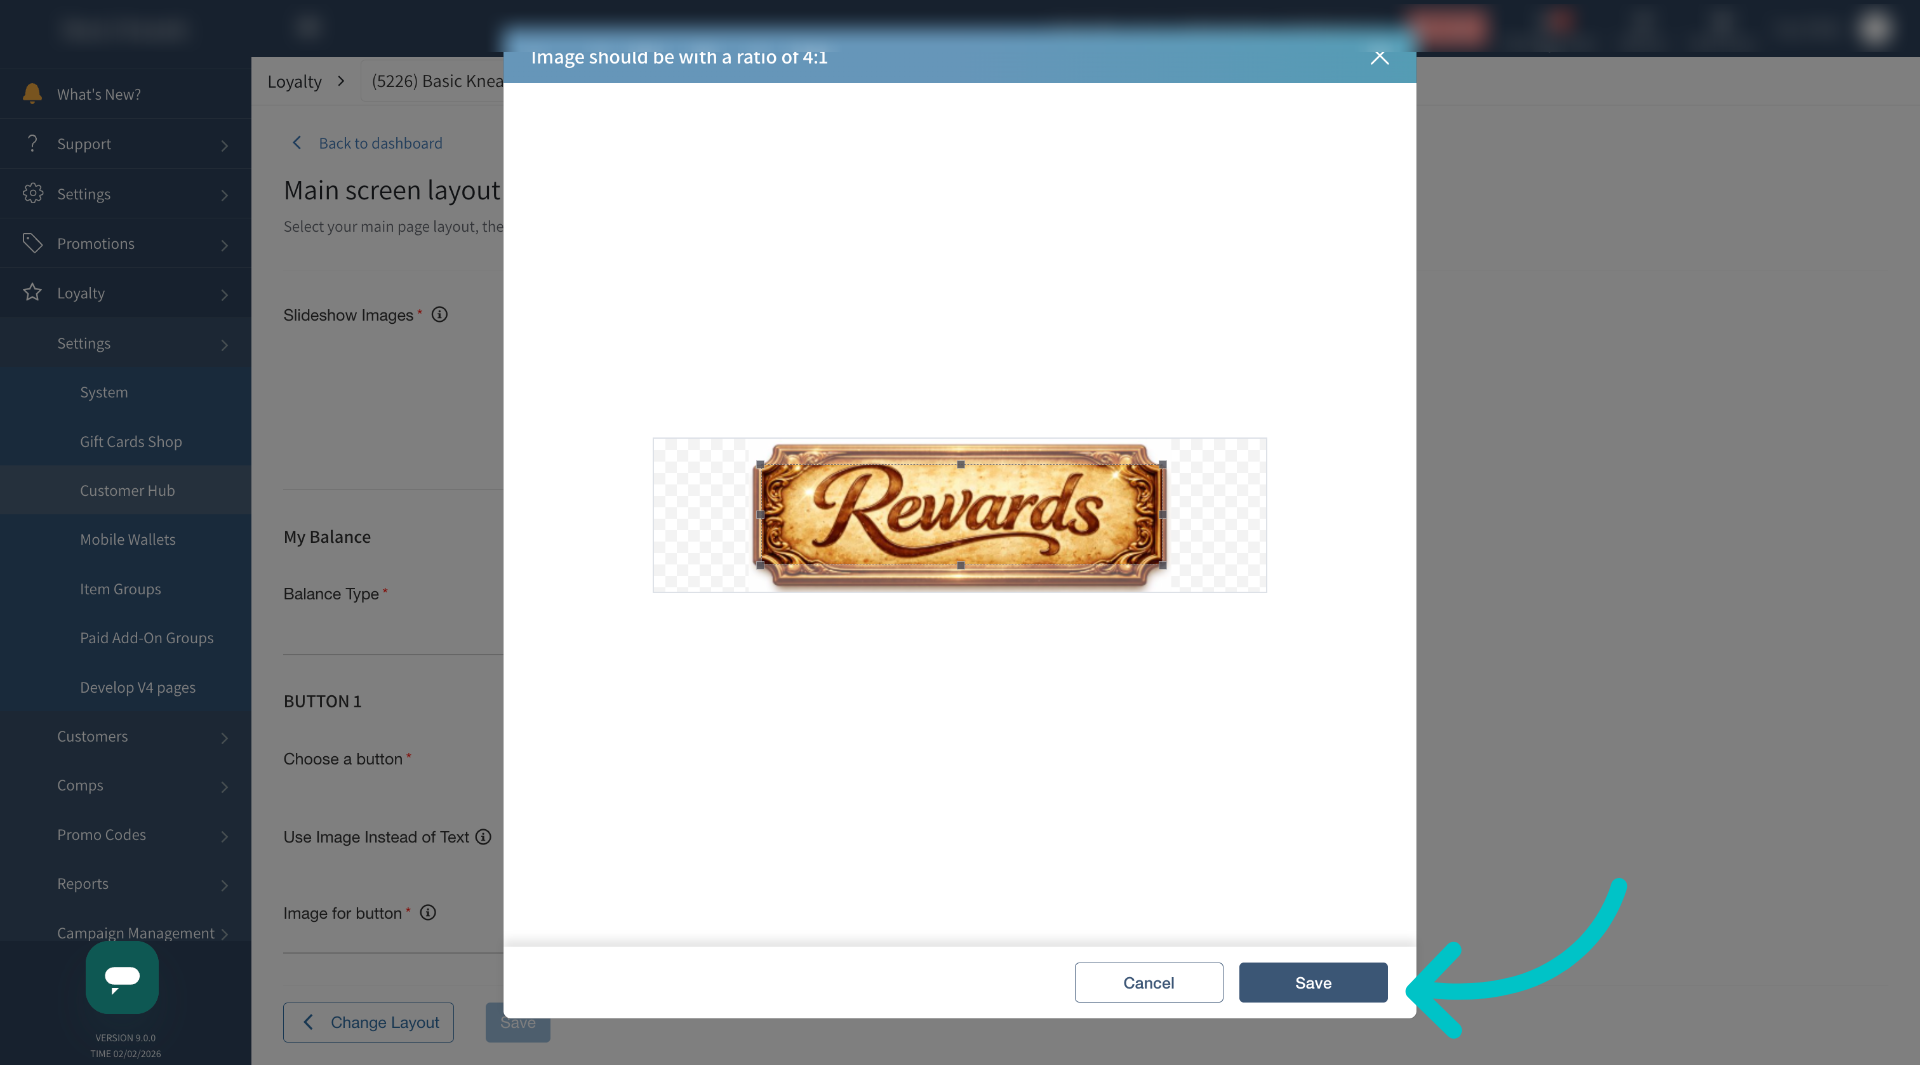
-
Use the outline to crop your image as needed and then select Save
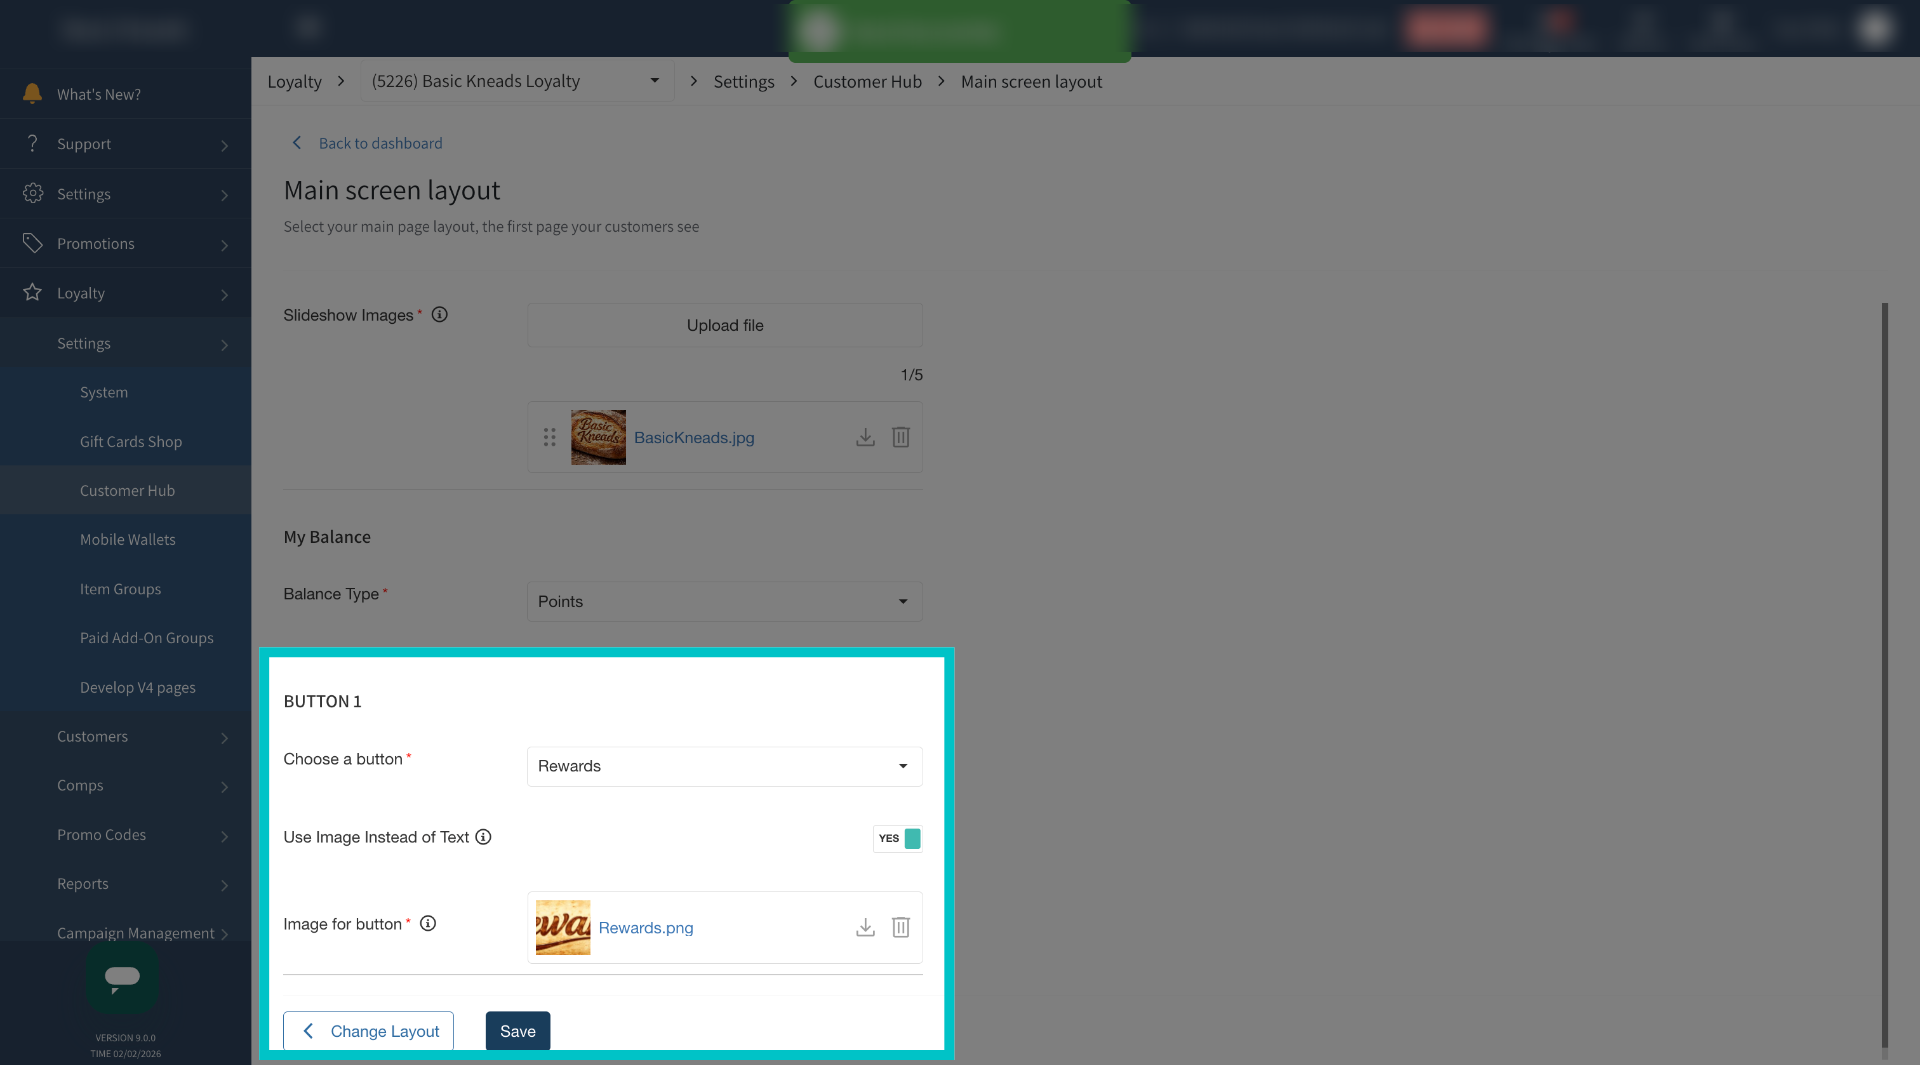
-
Select Save again to finalize and confirm all layout updates
-
Now the text button in the Customer Profile has been replaced with the uploaded image